在前面几个章节,我们见识了Spring Boot为我们做的自动配置,为了让大家快速领略Spring Boot的魅力,我们将在本节先通过分析Spring Boot 的运行原理后,根据已掌握的知识自定义一个starter pom。
在3.5章中我们了解到Spring 4.x 提供了基于条件来配置Bean的能力,其实Spring Boot的神奇的实现也是基于这一原理的。
本节虽然没有摆在显著位置,但是本节的内容是理解Spring Boot运作原理的关键,我们可以借助这一特性来理解Spring Boot运行自动配置的原理,并实现自己的自动配置。
Spring Boot关于自动配置的源码在spring-boot-autoconfigure-2.1.2.x.jar内,若想知道Spring Boot为我们做了哪些自动配置,可以查看这里的源码。
可以通过下面三种方式查看当前项目中已启用和未启用的自动配置的报告。
(1)运行jar时增加–debug参数:
java -jar xx.jar --debug
(2)在application.properties中设置属性:
debug=true
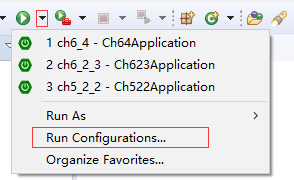
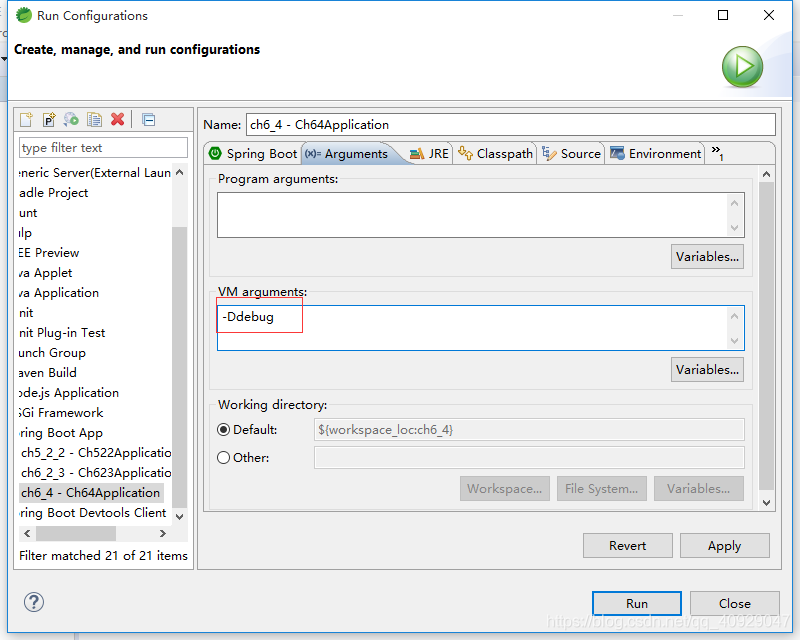
(3)在STS中设置,如图
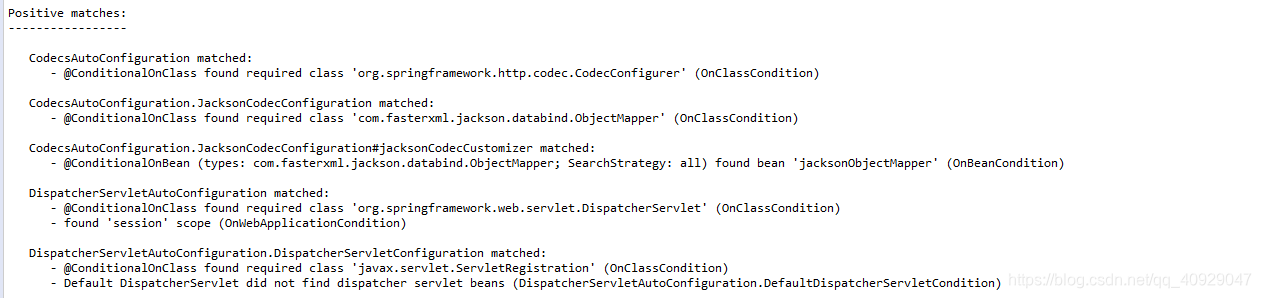
此时启动,可在控制台输出。已启用的配置为:
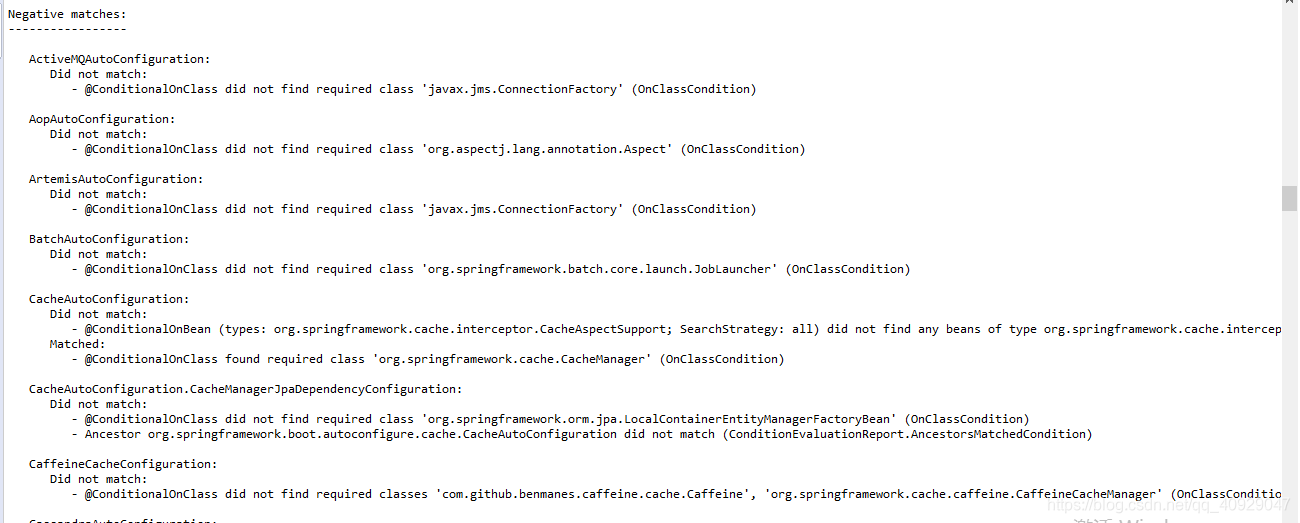
未启用的配置为:
6.5.1 运作原理
关于Spring Boot 的运作原理,我们还是回归到@SpringBootApplication注解上来,这个注解是一个组合注解,它的核心功能是由@EnableAutoConfiguration注解提供的。
下面我们来看下@EnableAutoConfiguration注解的源码:
@Target(ElementType.TYPE)
@Retention(RetentionPolicy.RUNTIME)
@Documented
@Inherited
@AutoConfigurationPackage
@Import(AutoConfigurationImportSelector.class)
public @interface EnableAutoConfiguration {

	String ENABLED_OVERRIDE_PROPERTY = "spring.boot.enableautoconfiguration";

	Class<?>[] exclude() default {};
	String[] excludeName() default {};

}
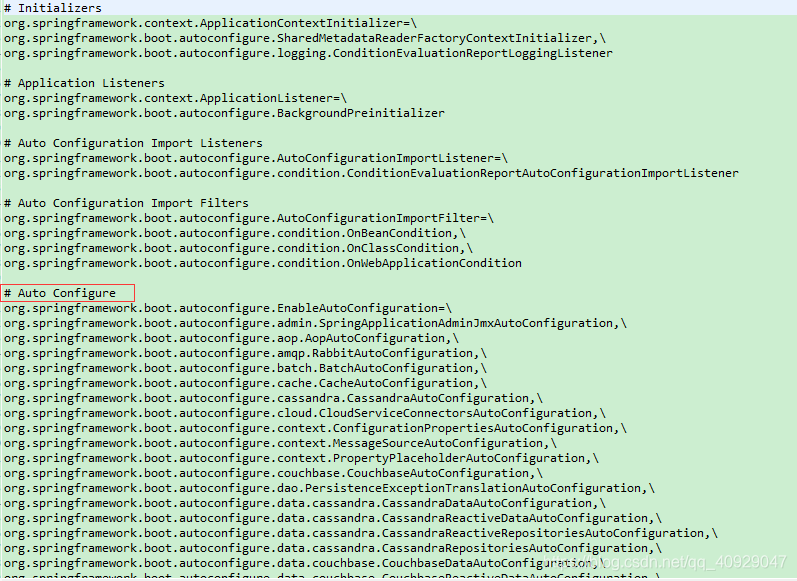
这里最关键的还是@Import注解导入的配置功能,EnableAutoConfigurationImportSelector使用SpringFactoriesLoader.loadFactoryNames方法来扫描具有META-INF/spring.factories文件的jar包,而我们的spring-boot-autoconfigure-2.1.2.x.jar里就有一个spring.factories文件,此文件中声明了有哪些自动配置,如图
6.5.2 核心注解
打开上面任意一个AutoConfiguration文件,一般下面的条件注解,在spring-boot-autoconfigure-2.1.2.x.jar的org.springframwork.boot.autoconfigure.condition包下,条件注解如下。
@ConditionalOnBean:当容器里有指定的Bean的条件下。
@ConditionalOnClass:当类路径下有指定的类的条件下。
@ConditionalOnExpression:基于SpEL表达式作为判断条件。
@ConditionalOnJava:基于JVM版本作为判断条件。
@ConditionalOnJndi:在JNDI存在的条件下查找指定的位置。
@ConditionalOnMissingBean:当容器里没有指定的Bean的情况下。
@ConditionalOnMissingClass:当类路径下没有指定的类的条件下。
@ConditionalOnNotWebApplication:当前项目不是Web项目的条件下。
@ConditionalOnProperty:指定的属性是否有指定的指。
@ConditionalOnResource:类路径是否有指定的值。
@ConditionalOnSingleCandidate:当指定Bean在容器中只有一个,或者虽然有多个但是指定首选的Bean。
@ConditionalOnWebApplication:当前项目的Web项目的条件下。
这些注解都组合了@Conditional元注解,只是使用了不同的条件(Condition),我们在3.5节已做过阐述定义一个根据条件创建不同Bean的演示。
下面我们用在3.5节学过的知识简单分析一下@ConditionalOnWebApplication注解。
@Target({ ElementType.TYPE, ElementType.METHOD })
@Retention(RetentionPolicy.RUNTIME)
@Documented
@Conditional(OnWebApplicationCondition.class)
public @interface ConditionalOnWebApplication {

	Type type() default Type.ANY;

	enum Type {

		ANY,

		REACTIVE

	}

}
从源码可以看出,此注解使用的条件是OnWebApplicationCondition,下面我们看看这个条件是如何构造的:
/*
 * Copyright 2012-2018 the original author or authors.
 *
 * Licensed under the Apache License, Version 2.0 (the "License");
 * you may not use this file except in compliance with the License.
 * You may obtain a copy of the License at
 *
 *      http://www.apache.org/licenses/LICENSE-2.0
 *
 * Unless required by applicable law or agreed to in writing, software
 * distributed under the License is distributed on an "AS IS" BASIS,
 * WITHOUT WARRANTIES OR CONDITIONS OF ANY KIND, either express or implied.
 * See the License for the specific language governing permissions and
 * limitations under the License.
 */

package org.springframework.boot.autoconfigure.condition;

import java.util.Map;

import org.springframework.boot.autoconfigure.AutoConfigurationMetadata;
import org.springframework.boot.autoconfigure.condition.ConditionalOnWebApplication.Type;
import org.springframework.boot.web.reactive.context.ConfigurableReactiveWebEnvironment;
import org.springframework.boot.web.reactive.context.ReactiveWebApplicationContext;
import org.springframework.context.annotation.Condition;
import org.springframework.context.annotation.ConditionContext;
import org.springframework.core.Ordered;
import org.springframework.core.annotation.Order;
import org.springframework.core.type.AnnotatedTypeMetadata;
import org.springframework.util.ClassUtils;
import org.springframework.util.ObjectUtils;
import org.springframework.web.context.ConfigurableWebEnvironment;
import org.springframework.web.context.WebApplicationContext;

/**
 * {@link Condition} that checks for the presence or absence of
 * {@link WebApplicationContext}.
 *
 * @author Dave Syer
 * @author Phillip Webb
 * @see ConditionalOnWebApplication
 * @see ConditionalOnNotWebApplication
 */
@Order(Ordered.HIGHEST_PRECEDENCE + 20)
class OnWebApplicationCondition extends FilteringSpringBootCondition {

	private static final String SERVLET_WEB_APPLICATION_CLASS = "org.springframework.web.context.support.GenericWebApplicationContext";

	private static final String REACTIVE_WEB_APPLICATION_CLASS = "org.springframework.web.reactive.HandlerResult";

	@Override
	protected ConditionOutcome[] getOutcomes(String[] autoConfigurationClasses,
			AutoConfigurationMetadata autoConfigurationMetadata) {
		ConditionOutcome[] outcomes = new ConditionOutcome[autoConfigurationClasses.length];
		for (int i = 0; i < outcomes.length; i++) {
			String autoConfigurationClass = autoConfigurationClasses[i];
			if (autoConfigurationClass != null) {
				outcomes[i] = getOutcome(autoConfigurationMetadata
						.get(autoConfigurationClass, "ConditionalOnWebApplication"));
			}
		}
		return outcomes;
	}

	private ConditionOutcome getOutcome(String type) {
		if (type == null) {
			return null;
		}
		ConditionMessage.Builder message = ConditionMessage
				.forCondition(ConditionalOnWebApplication.class);
		if (ConditionalOnWebApplication.Type.SERVLET.name().equals(type)) {
			if (!ClassNameFilter.isPresent(SERVLET_WEB_APPLICATION_CLASS,
					getBeanClassLoader())) {
				return ConditionOutcome.noMatch(
						message.didNotFind("servlet web application classes").atAll());
			}
		}
		if (ConditionalOnWebApplication.Type.REACTIVE.name().equals(type)) {
			if (!ClassNameFilter.isPresent(REACTIVE_WEB_APPLICATION_CLASS,
					getBeanClassLoader())) {
				return ConditionOutcome.noMatch(
						message.didNotFind("reactive web application classes").atAll());
			}
		}
		if (!ClassNameFilter.isPresent(SERVLET_WEB_APPLICATION_CLASS,
				getBeanClassLoader())
				&& !ClassUtils.isPresent(REACTIVE_WEB_APPLICATION_CLASS,
						getBeanClassLoader())) {
			return ConditionOutcome.noMatch(message
					.didNotFind("reactive or servlet web application classes").atAll());
		}
		return null;
	}

	@Override
	public ConditionOutcome getMatchOutcome(ConditionContext context,
			AnnotatedTypeMetadata metadata) {
		boolean required = metadata
				.isAnnotated(ConditionalOnWebApplication.class.getName());
		ConditionOutcome outcome = isWebApplication(context, metadata, required);
		if (required && !outcome.isMatch()) {
			return ConditionOutcome.noMatch(outcome.getConditionMessage());
		}
		if (!required && outcome.isMatch()) {
			return ConditionOutcome.noMatch(outcome.getConditionMessage());
		}
		return ConditionOutcome.match(outcome.getConditionMessage());
	}

	private ConditionOutcome isWebApplication(ConditionContext context,
			AnnotatedTypeMetadata metadata, boolean required) {
		switch (deduceType(metadata)) {
		case SERVLET:
			return isServletWebApplication(context);
		case REACTIVE:
			return isReactiveWebApplication(context);
		default:
			return isAnyWebApplication(context, required);
		}
	}

	private ConditionOutcome isAnyWebApplication(ConditionContext context,
			boolean required) {
		ConditionMessage.Builder message = ConditionMessage.forCondition(
				ConditionalOnWebApplication.class, required ? "(required)" : "");
		ConditionOutcome servletOutcome = isServletWebApplication(context);
		if (servletOutcome.isMatch() && required) {
			return new ConditionOutcome(servletOutcome.isMatch(),
					message.because(servletOutcome.getMessage()));
		}
		ConditionOutcome reactiveOutcome = isReactiveWebApplication(context);
		if (reactiveOutcome.isMatch() && required) {
			return new ConditionOutcome(reactiveOutcome.isMatch(),
					message.because(reactiveOutcome.getMessage()));
		}
		return new ConditionOutcome(servletOutcome.isMatch() || reactiveOutcome.isMatch(),
				message.because(servletOutcome.getMessage()).append("and")
						.append(reactiveOutcome.getMessage()));
	}

	private ConditionOutcome isServletWebApplication(ConditionContext context) {
		ConditionMessage.Builder message = ConditionMessage.forCondition("");
		if (!ClassNameFilter.isPresent(SERVLET_WEB_APPLICATION_CLASS,
				context.getClassLoader())) {
			return ConditionOutcome.noMatch(
					message.didNotFind("servlet web application classes").atAll());
		}
		if (context.getBeanFactory() != null) {
			String[] scopes = context.getBeanFactory().getRegisteredScopeNames();
			if (ObjectUtils.containsElement(scopes, "session")) {
				return ConditionOutcome.match(message.foundExactly("'session' scope"));
			}
		}
		if (context.getEnvironment() instanceof ConfigurableWebEnvironment) {
			return ConditionOutcome
					.match(message.foundExactly("ConfigurableWebEnvironment"));
		}
		if (context.getResourceLoader() instanceof WebApplicationContext) {
			return ConditionOutcome.match(message.foundExactly("WebApplicationContext"));
		}
		return ConditionOutcome.noMatch(message.because("not a servlet web application"));
	}

	private ConditionOutcome isReactiveWebApplication(ConditionContext context) {
		ConditionMessage.Builder message = ConditionMessage.forCondition("");
		if (!ClassNameFilter.isPresent(REACTIVE_WEB_APPLICATION_CLASS,
				context.getClassLoader())) {
			return ConditionOutcome.noMatch(
					message.didNotFind("reactive web application classes").atAll());
		}
		if (context.getEnvironment() instanceof ConfigurableReactiveWebEnvironment) {
			return ConditionOutcome
					.match(message.foundExactly("ConfigurableReactiveWebEnvironment"));
		}
		if (context.getResourceLoader() instanceof ReactiveWebApplicationContext) {
			return ConditionOutcome
					.match(message.foundExactly("ReactiveWebApplicationContext"));
		}
		return ConditionOutcome
				.noMatch(message.because("not a reactive web application"));
	}

	private Type deduceType(AnnotatedTypeMetadata metadata) {
		Map<String, Object> attributes = metadata
				.getAnnotationAttributes(ConditionalOnWebApplication.class.getName());
		if (attributes != null) {
			return (Type) attributes.get("type");
		}
		return Type.ANY;
	}

}
从isServletWebApplication 方法可以看出,判断条件是:
(1)GenericWebApplicationContext是否在类路径中;
(2)容器里是否有名为session的scope;
(3)当前容器的Environment是否为ConfigurableWebEnvironment;
(4)当前的ResourceLoader是否为WebApplicationContext(ResourceLoader 是ApplicationContext的顶级接口之一);
(5)我们需要构造ConditionOutcome类的对象来帮助我们,最终通过ConditionOutcome.isMatch方法返回布尔值来确定条件。
6.5.3在了解了Spring Boot的运作原理和主要的条件注解后,现在来分析一个简单的Spring Boot内置的自动配置功能:http的编码配置。
我们在常规项目中配置http编码的时候是在web.xml里配置一个Filter如
<filter>
        <filter-name>CharacterEncodingFilter</filter-name>
        <filter-class>org.springframework.web.filter.CharacterEncodingFilter</filter-class>
        <init-param>
            <param-name>encoding</param-name>
            <param-value>UTF-8</param-value>
        </init-param>
    </filter>
    <filter-mapping>
        <filter-name>CharacterEncodingFilter</filter-name>
        <url-pattern>/*</url-pattern>
    </filter-mapping>
自动配置要满足两个条件:
(1)能配置CharacterEncodingFilter这个Bean;
(2)能配置encoding和forceEncoding这两个参数;
1.配置参数
在6.2.3节我们讲述了类型安全的配置,Spring Boot的自动配置也是基于这一点实现的,这里的配置类可以在application.properties中直接设置,源码如下:
/*
 * Copyright 2012-2018 the original author or authors.
 *
 * Licensed under the Apache License, Version 2.0 (the "License");
 * you may not use this file except in compliance with the License.
 * You may obtain a copy of the License at
 *
 *      http://www.apache.org/licenses/LICENSE-2.0
 *
 * Unless required by applicable law or agreed to in writing, software
 * distributed under the License is distributed on an "AS IS" BASIS,
 * WITHOUT WARRANTIES OR CONDITIONS OF ANY KIND, either express or implied.
 * See the License for the specific language governing permissions and
 * limitations under the License.
 */

package org.springframework.boot.autoconfigure.http;

import java.nio.charset.Charset;
import java.nio.charset.StandardCharsets;
import java.util.Locale;
import java.util.Map;

import org.springframework.boot.context.properties.ConfigurationProperties;

/**
 * HTTP properties.
 *
 * @author Phillip Webb
 * @author Stephane Nicoll
 * @author Brian Clozel
 * @since 2.1.0
 */
@ConfigurationProperties(prefix = "spring.http")
public class HttpProperties {

	/**
	 * Whether logging of (potentially sensitive) request details at DEBUG and TRACE level
	 * is allowed.
	 */
	private boolean logRequestDetails;

	/**
	 * HTTP encoding properties.
	 */
	private final Encoding encoding = new Encoding();

	public boolean isLogRequestDetails() {
		return this.logRequestDetails;
	}

	public void setLogRequestDetails(boolean logRequestDetails) {
		this.logRequestDetails = logRequestDetails;
	}

	public Encoding getEncoding() {
		return this.encoding;
	}

	/**
	 * Configuration properties for http encoding.
	 */
	public static class Encoding {

		public static final Charset DEFAULT_CHARSET = StandardCharsets.UTF_8;

		/**
		 * Charset of HTTP requests and responses. Added to the "Content-Type" header if
		 * not set explicitly.
		 */
		private Charset charset = DEFAULT_CHARSET;

		/**
		 * Whether to force the encoding to the configured charset on HTTP requests and
		 * responses.
		 */
		private Boolean force;

		/**
		 * Whether to force the encoding to the configured charset on HTTP requests.
		 * Defaults to true when "force" has not been specified.
		 */
		private Boolean forceRequest;

		/**
		 * Whether to force the encoding to the configured charset on HTTP responses.
		 */
		private Boolean forceResponse;

		/**
		 * Locale in which to encode mapping.
		 */
		private Map<Locale, Charset> mapping;

		public Charset getCharset() {
			return this.charset;
		}

		public void setCharset(Charset charset) {
			this.charset = charset;
		}

		public boolean isForce() {
			return Boolean.TRUE.equals(this.force);
		}

		public void setForce(boolean force) {
			this.force = force;
		}

		public boolean isForceRequest() {
			return Boolean.TRUE.equals(this.forceRequest);
		}

		public void setForceRequest(boolean forceRequest) {
			this.forceRequest = forceRequest;
		}

		public boolean isForceResponse() {
			return Boolean.TRUE.equals(this.forceResponse);
		}

		public void setForceResponse(boolean forceResponse) {
			this.forceResponse = forceResponse;
		}

		public Map<Locale, Charset> getMapping() {
			return this.mapping;
		}

		public void setMapping(Map<Locale, Charset> mapping) {
			this.mapping = mapping;
		}

		public boolean shouldForce(Type type) {
			Boolean force = (type != Type.REQUEST) ? this.forceResponse
					: this.forceRequest;
			if (force == null) {
				force = this.force;
			}
			if (force == null) {
				force = (type == Type.REQUEST);
			}
			return force;
		}

		public enum Type {

			REQUEST, RESPONSE

		}

	}

}
2.配置Bean
通过调用上述配置,并根据条件配置CharacterEncodingFilter的Bean,我们来看看源码:
@Configuration
@EnableConfigurationProperties(HttpProperties.class)  //开启属性注入,通过@EnableConfigurationProperties声明使用@Autowird注入。
@ConditionalOnWebApplication(type = ConditionalOnWebApplication.Type.SERVLET)
@ConditionalOnClass(CharacterEncodingFilter.class) //当CharacterEncodingFilter在类路径条件下
@ConditionalOnProperty(prefix = "spring.http.encoding", value = "enabled", matchIfMissing = true) //当设置spring.http.encoding=enabled的情况下,如果没有设置则默认为true,即条件符合。
public class HttpEncodingAutoConfiguration {

	private final HttpProperties.Encoding properties;

	public HttpEncodingAutoConfiguration(HttpProperties properties) {
		this.properties = properties.getEncoding();
	}

	@Bean
	@ConditionalOnMissingBean //当容器中没有Bean的时候新建Bean
	public CharacterEncodingFilter characterEncodingFilter() {
		CharacterEncodingFilter filter = new OrderedCharacterEncodingFilter();
		filter.setEncoding(this.properties.getCharset().name());
		filter.setForceRequestEncoding(this.properties.shouldForce(Type.REQUEST));
		filter.setForceResponseEncoding(this.properties.shouldForce(Type.RESPONSE));
		return filter;
	}

	@Bean
	public LocaleCharsetMappingsCustomizer localeCharsetMappingsCustomizer() {
		return new LocaleCharsetMappingsCustomizer(this.properties);
	}

	private static class LocaleCharsetMappingsCustomizer implements
			WebServerFactoryCustomizer<ConfigurableServletWebServerFactory>, Ordered {

		private final HttpProperties.Encoding properties;

		LocaleCharsetMappingsCustomizer(HttpProperties.Encoding properties) {
			this.properties = properties;
		}

		@Override
		public void customize(ConfigurableServletWebServerFactory factory) {
			if (this.properties.getMapping() != null) {
				factory.setLocaleCharsetMappings(this.properties.getMapping());
			}
		}

		@Override
		public int getOrder() {
			return 0;
		}

	}

}
6.5.4 实战
看完前面几节的讲述,是不是觉得Spring Boot的自动配置其实很简单,是不是跃跃欲试地想让自己的项目也具备这样的功能。其实我们完全可以依照上面的 http编码配置的例子自己写一个自动配置,不过这里再做的彻底点,我们自己写一个starter pom,这意味着我们不仅有自动配置的功能,而且具有更通用的耦合度更低的配置。
为了方便理解,在这里举一个简单的实战例子,包含当某个类存在的时候,自动配置Bean,并可将Bean的属性在application.properties中配置。
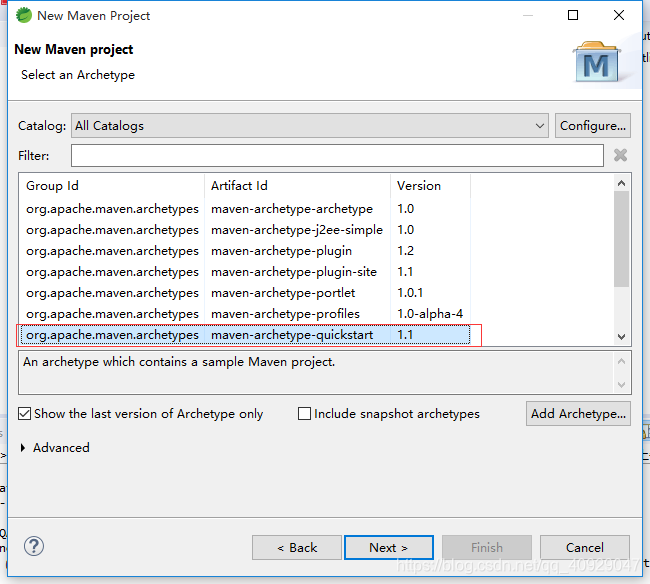
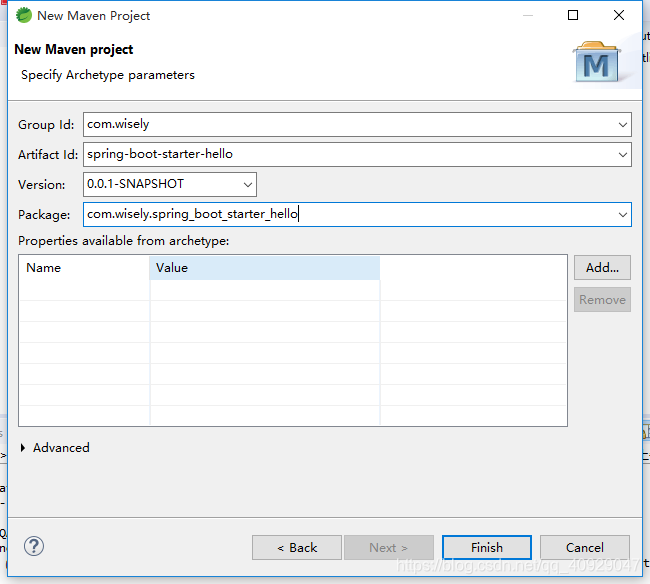
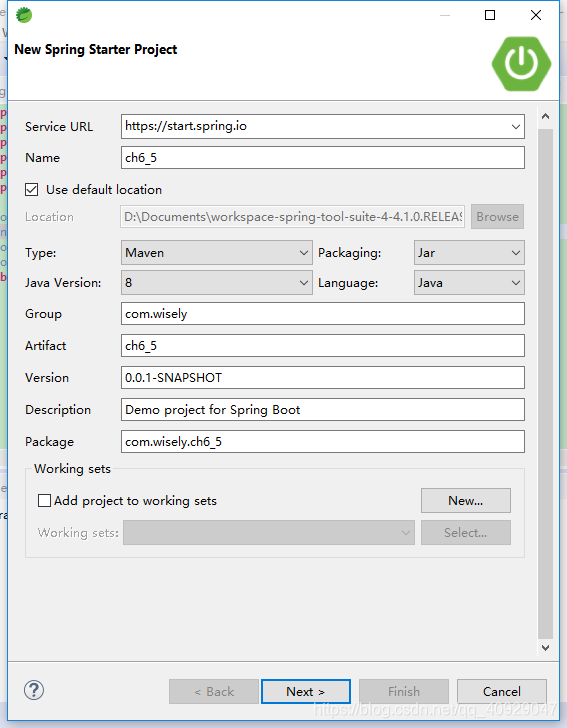
(1)新建starter的Maven项目,如图

在pom.xml中修改代码如下:
<project xmlns="http://maven.apache.org/POM/4.0.0" xmlns:xsi="http://www.w3.org/2001/XMLSchema-instance"
  xsi:schemaLocation="http://maven.apache.org/POM/4.0.0 http://maven.apache.org/xsd/maven-4.0.0.xsd">
  <modelVersion>4.0.0</modelVersion>

  <groupId>com.wisely</groupId>
  <artifactId>spring-boot-starter-hello</artifactId>
  <version>0.0.1-SNAPSHOT</version>
  <packaging>jar</packaging>

  <name>spring-boot-starter-hello</name>
  <url>http://maven.apache.org</url>

  <properties>
    <project.build.sourceEncoding>UTF-8</project.build.sourceEncoding>
  </properties>

  <dependencies>
  <!-- 增加Spring Boot自身的自动配置作为依赖 -->
    <dependency>
      <groupId>org.springframework.boot</groupId>
      <artifactId>spring-boot-autoconfigure</artifactId>
      <version>2.1.2.RELEASE</version>
    </dependency>
    <dependency>
    	<groupId>junit</groupId>
    	<artifactId>junit</artifactId>
    	<version>3.8.1</version>
    	<scope>test</scope>
    </dependency>
  </dependencies>
</project>
(2)属性配置,代码如下:

package com.wisely.spring_boot_starter_hello;

import org.springframework.boot.context.properties.ConfigurationProperties;

@ConfigurationProperties(prefix="hello")
public class HelloServiceProperties {

	private static final String MSG = "world";

	private String msg = MSG;

	public String getMsg() {
		return msg;
	}

	public void setMsg(String msg) {
		this.msg = msg;
	}


}
(3)判断依据类,代码如下:
package com.wisely.spring_boot_starter_hello;

public class HelloService {

	private String msg;

	public String sayHello() {
		return "Hello" + msg;
	}

	public String getMsg() {
		return msg;
	}

	public void setMsg(String msg) {
		this.msg = msg;
	}


}
(4)自动配置类,代码如下:
package com.wisely.spring_boot_starter_hello;

import org.springframework.beans.factory.annotation.Autowired;
import org.springframework.boot.autoconfigure.condition.ConditionalOnClass;
import org.springframework.boot.autoconfigure.condition.ConditionalOnMissingBean;
import org.springframework.boot.autoconfigure.condition.ConditionalOnProperty;
import org.springframework.boot.context.properties.EnableConfigurationProperties;
import org.springframework.context.annotation.Bean;
import org.springframework.context.annotation.Configuration;

@Configuration
@EnableConfigurationProperties(HelloServiceProperties.class)
@ConditionalOnClass(HelloService.class)
@ConditionalOnProperty(prefix="hello",value="enabled",matchIfMissing=true)
public class HelloServiceAutoConfiguration {

	@Autowired
	private HelloServiceProperties helloServiceProperties;

	@Bean
	@ConditionalOnMissingBean(HelloService.class)
	public HelloService helloService() {
		HelloService helloService = new HelloService();
		helloService.setMsg(helloServiceProperties.getMsg());
		return helloService;
	}

}
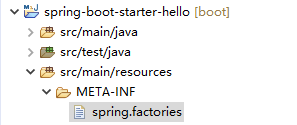
(5)注册配置。在6.5.1中我们知道,若想自动配置生效,需要注册自动配置类。在 src/main/resources 下新建 META-INF/spring.factories,结构如图。
在spring.factories中填写如下内容注册:
org.springframework.boot.autoconfigure.EnableAutoConfiguration=\
com.wisely.spring_boot_starter_hello.HelloServiceAutoConfiguration
若有多个自动配置,则用“,”隔开,此处“\”是为了换行后仍然能读到属性。
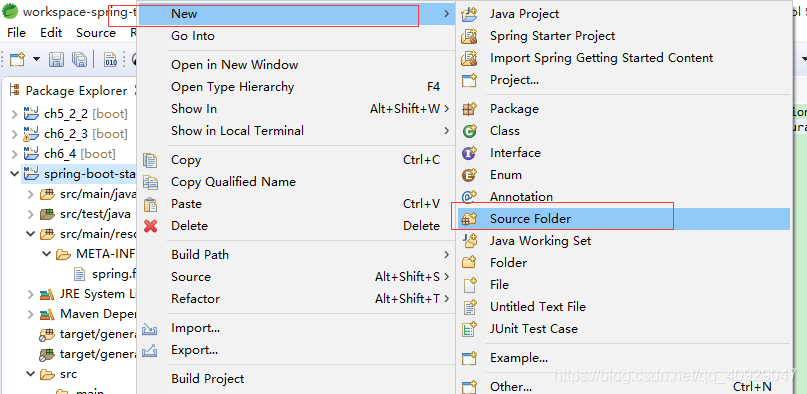
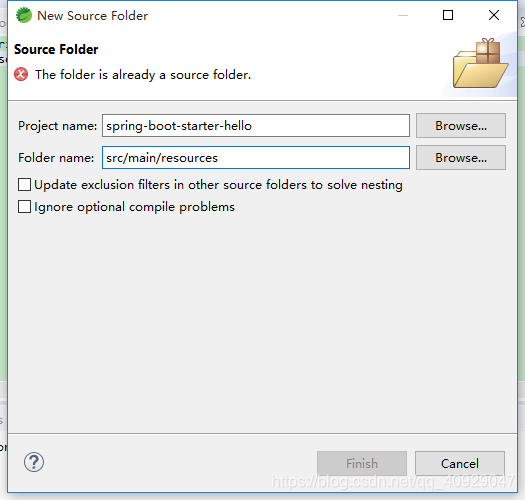
另外,若在此例新建的项目中无 src/main/resources文件夹,需执行如图所示操作
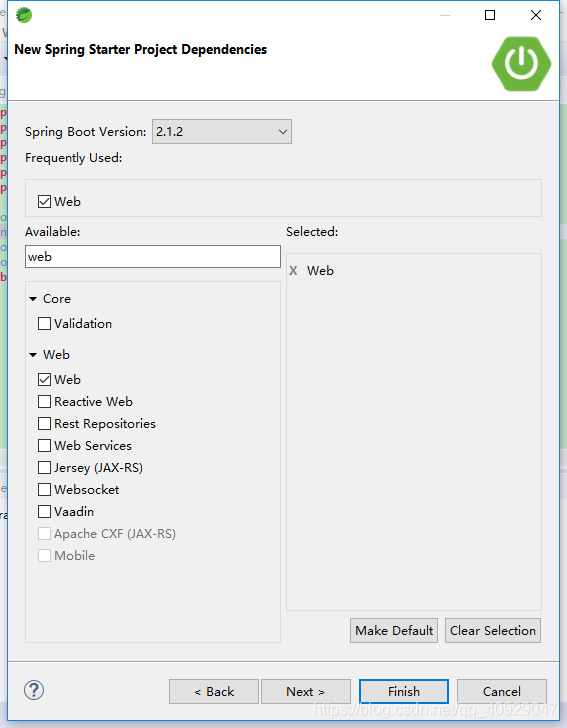
(5)使用starter。新建Spring Boot项目,并将我们的starter作为依赖,如图
在pom.xml中添加spring-boot-starter-hello的依赖,代码如下:
		<dependency>
			<groupId>com.wisely</groupId>
			<artifactId>spring-boot-starter-hello</artifactId>
			<version>0.0.1-SNAPSHOT</version>
		</dependency>
我们可以在Maven的依赖里查看spring-boot-starter-hello,如图
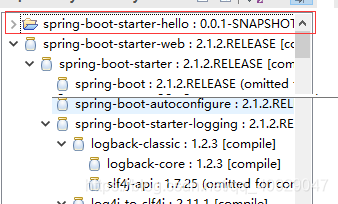
在开发阶段,我们引入的依赖是spring-boot-starter-hello这个项目。在starter稳定之后我们可以将spring-boot-starter-hello通过“mvc install”安装到本地库,或者将这个jar包发布到Maven私服上。
简单的运行类代码如下:
package com.wisely.ch6_5;

import org.springframework.beans.factory.annotation.Autowired;
import org.springframework.boot.SpringApplication;
import org.springframework.boot.autoconfigure.SpringBootApplication;
import org.springframework.web.bind.annotation.RequestMapping;
import org.springframework.web.bind.annotation.RestController;

import com.wisely.spring_boot_starter_hello.HelloService;

@RestController
@SpringBootApplication
public class Ch65Application {

	@Autowired
	HelloService helloService;

	@RequestMapping("/")
	public String index() {
		return helloService.sayHello();
	}

	public static void main(String[] args) {
		SpringApplication.run(Ch65Application.class, args);
	}

}
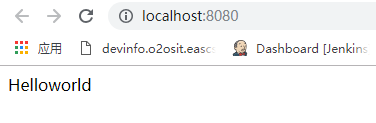
在代码中可以直接注入HelloService的Bean,但在项目中我们并没有配置这个Bean,这是通过自动配置完成的。
访问http://localhost:8080
效果如图
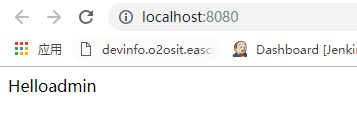
这时在application.properties中配置 msg的内容:
hello.msg=admin
此时 再次访问 ,效果如图
在application.properties中添加debug属性,查看自动配置报告:
debug=true
我们新增的自动配置显示在控制台的报告中,如图
