版权声明:作者:星云 交流即分享,分享才能进步!喜欢我的文章,可在博客左侧扫码赞赏~ https://blog.csdn.net/hadues/article/details/89422513
除了REST Web Service 之外,还可以使用Spring MVC来服务动态HTML内容。Spring MVC支持多种模板技术,包括Thymeleaf,FreeMarker,和JSPs。此外,许多其他模板引擎包括它们自己的Spring MVC集成。
这篇来讲解下Spring Boot 2.x 和Thymeleaf 页面模板引擎的集成。
1.添加依赖
        <dependency>
            <groupId>org.springframework.boot</groupId>
            <artifactId>spring-boot-starter-thymeleaf</artifactId>
        </dependency>
        <dependency>
            <groupId>org.springframework.boot</groupId>
            <artifactId>spring-boot-starter-web</artifactId>
        </dependency>
2.配置模板前缀和后缀
# 内嵌容器配置
server.port=8080
server.servlet.context-path=/

## Thymeleaf 配置
# Thymeleaf 模板配置前缀
spring.thymeleaf.prefix=classpath:/templates/
# Thymeleaf 模板配置后缀
spring.thymeleaf.suffix=.html
spring.thymeleaf.mode=HTML
spring.thymeleaf.encoding=UTF-8
spring.thymeleaf.servlet.content-type=text/html
# 关闭缓存,即时刷新,上线生产环境需改成true
spring.thymeleaf.cache=false
3.定义一个实体类
User.java
package com.xingyun.springbootwiththymeleafsample.model;

import java.io.Serializable;

public class User implements Serializable {

    private String username;
    private String password;

    public User(){}

    public User(String username, String password) {
        this.username = username;
        this.password = password;
    }

    public String getUsername() {
        return username;
    }

    public void setUsername(String username) {
        this.username = username;
    }

    public String getPassword() {
        return password;
    }

    public void setPassword(String password) {
        this.password = password;
    }

    @Override
    public String toString() {
        return super.toString();
    }
}
4.定义我们的Controller
HomeController.java
package com.xingyun.springbootwiththymeleafsample.controller;

import com.xingyun.springbootwiththymeleafsample.model.User;
import org.slf4j.Logger;
import org.slf4j.LoggerFactory;
import org.springframework.stereotype.Controller;
import org.springframework.ui.Model;
import org.springframework.web.bind.annotation.GetMapping;
import org.springframework.web.bind.annotation.ModelAttribute;
import org.springframework.web.bind.annotation.PostMapping;

@Controller
public class HomeController {

    //日志系统
    private Logger logger= LoggerFactory.getLogger(HomeController.class);

    @GetMapping(value = "/")
    public String homePage(Model model){
        model.addAttribute("user", new User());
        return "index";
    }

    @PostMapping(value = "/submit.do")
    public String jumpAction(@ModelAttribute User user){
        logger.info("login user:{}",user.getUsername());
        logger.info("login password:{}",user.getPassword());
        return "result";
    }
}
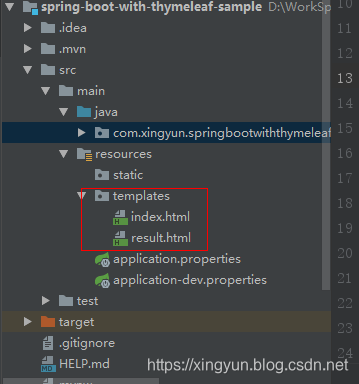
5.定义html页面
创建index.html 和result.html页面
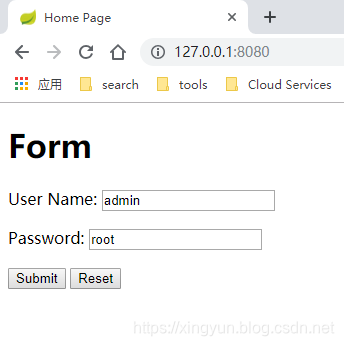
index.html
<!DOCTYPE html>
<html lang="en" xmlns:th="http://www.thymeleaf.org">
<head>
    <meta charset="UTF-8">
    <meta http-equiv="Content-Type" content="text/html; charset=UTF-8" />
    <title>Home Page</title>
</head>
<body>

<!--在Controller 中通过 model.addAttribute("user", new User());
因此可以th:object="${user}" 获取user对象 -->

<h1>Form</h1>
<form action="#" th:action="@{/submit.do}" th:object="${user}" method="post">
    <p>User Name: <input type="text" th:field="*{username}" /></p>
    <p>Password: <input type="text" th:field="*{password}" /></p>
    <p><input type="submit" value="Submit" /> <input type="reset" value="Reset" /></p>
</form>

</body>
</html>
result.html
<!DOCTYPE html>
<html lang="en" xmlns:th="http://www.thymeleaf.org">
<head>
    <meta charset="UTF-8">
    <title>Hello Page</title>
</head>
<body>

<h1>Result</h1>
<p th:text="'username: ' + ${user.username}" />
<p th:text="'password: ' + ${user.password}" />
<a href="/">Submit another message</a>

</body>
</html>
6.访问我们的接口
http://127.0.0.1:8080/
http://127.0.0.1:8080/submit.do

好了,本篇教程到此结束~
更多关注我的这个系列的专栏:Spring Boot 2.x 最佳实践手册