SpringMVC注解配置
1.测试环境:
| 名称 | 版本 | 备注 |
| 操作系统 | Windows10 专业版1809X64 | |
| WEB服务器 | Tomcat 8.5 X64 | |
| 浏览器 | Google Chrome71.0.3578.98X64 | |
| IDE | Eclipse Java EE IDE for Web Developers Photon Release (4.8.0)x64 |
|
2.概述
基于注解的SpringMVC入门示例
2.1 为什么学习SpringMVC注解配置
通过上一篇博文,已经了解了SpringMVC的运行原理,学会了基本的SpringMVC配置,但是,XML配置实在太繁琐,需要写的东西也多,而且不太友善,所以官方团队发行了基于注解的版本,也是企业中应用的版本。
所以废话不多说开始一波操作
3.入门示例
3.1 配置流程说明
第一步:导入包
第二步:构建一个请求,编写请求页面
第三步:配置核心控制器
第四步:构建一个业务控制器
第五步:编写Spring配置文件
第六步:编写一个返回页面
从流程说明上看,总体并没有什么太大的差别,但是在 xml配置 和 控制器的实际代码 差距还是挺大的,请看下方细节。
3.2 配置流程
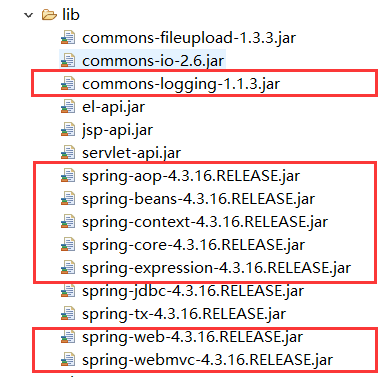
3.2.1 导入包
红色方框中的包就是所依赖的包
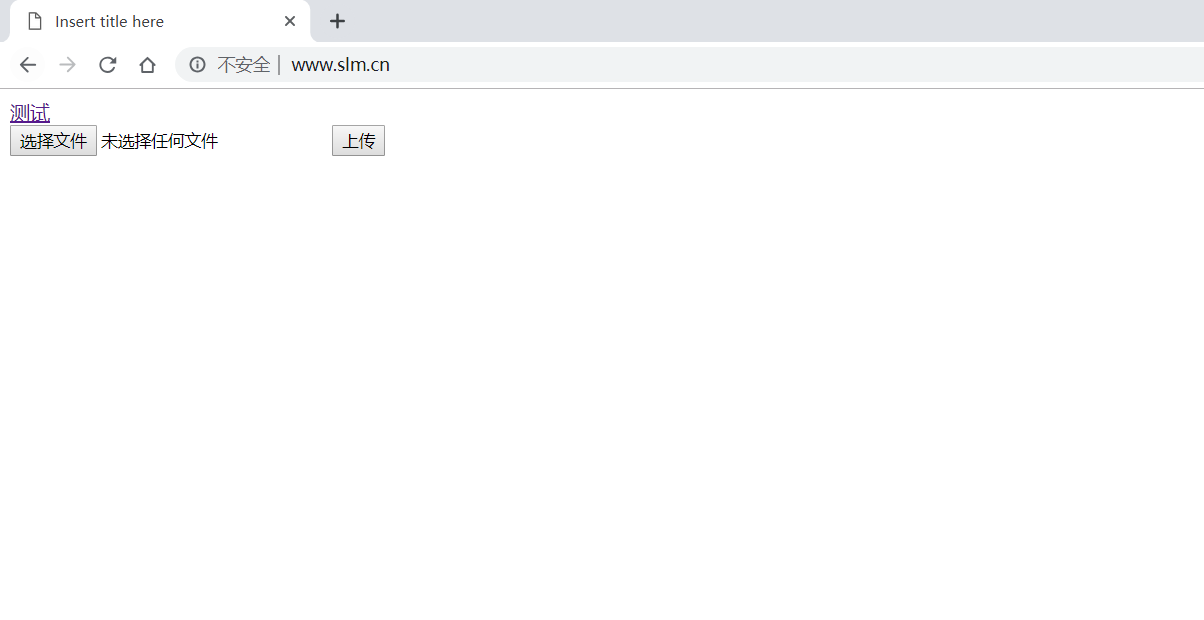
3.2.2 创建一个请求的发送页面 index.jsp
<%@ page language="java" contentType="text/html; charset=UTF-8"
    pageEncoding="UTF-8"%>
<!DOCTYPE html>
<html>
<head>
<meta charset="UTF-8">
<title>Insert title here</title>
<script type="text/javascript" ></script>
</head>
<body>
	<a href="${pageContext.request.contextPath}/test.do">测试</a>
	<form action="${pageContext.request.contextPath}/up.do">
		<input type="file"  name="filename"/>
		<input type="submit" value="上传"/>
	</form>
</body>
</html>
3.2.3 在web.xml配置核心控制器
<?xml version="1.0" encoding="UTF-8"?>
<web-app xmlns:xsi="http://www.w3.org/2001/XMLSchema-instance" xmlns="http://java.sun.com/xml/ns/javaee" xsi:schemaLocation="http://java.sun.com/xml/ns/javaee http://java.sun.com/xml/ns/javaee/web-app_3_0.xsd" id="WebApp_ID" version="3.0">
  <display-name>SpringMVCDemo</display-name>

<!-- The front controller of this Spring Web application, responsible for handling all application requests -->
	<!-- SpringMVC核心处理器 加载-->
	<servlet>
		<servlet-name>springDispatcherServlet</servlet-name>
		<servlet-class>org.springframework.web.servlet.DispatcherServlet</servlet-class>
		<!-- SpringMVC配置文件配置路径 -->
		<init-param>
			<param-name>contextConfigLocation</param-name>
			<param-value>classpath:spring-mvc.xml</param-value>
		</init-param>
		<!--Spring-mvc.xml的注解式配置-->
		<!--
		<init-param>
			<param-name>contextConfigLocation</param-name>
			<param-value>cn.slm.config</param-value>
		</init-param>
		 <init-param>
			<param-name>contextClass</param-name>
			<param-value>org.springframework.web.context.support.AnnotationConfigWebApplicationContext</param-value>
		</init-param>
		-->
		<!-- 随WEB容器启动加载 -->
		<load-on-startup>1</load-on-startup>
	</servlet>

	<!-- Map all requests to the DispatcherServlet for handling -->
	<!-- SpringMVC核心处理器响应(拦截)路径 -->
	<servlet-mapping>
		<servlet-name>springDispatcherServlet</servlet-name>
		<url-pattern>/</url-pattern>
	</servlet-mapping>

  <welcome-file-list>
    <welcome-file>index.html</welcome-file>
    <welcome-file>index.htm</welcome-file>
    <welcome-file>index.jsp</welcome-file>
    <welcome-file>default.html</welcome-file>
    <welcome-file>default.htm</welcome-file>
    <welcome-file>default.jsp</welcome-file>
  </welcome-file-list>
</web-app>
3.2.4 创建一个业务控制器 TuserAction
package cn.slm.action;

import org.springframework.stereotype.Controller;
import org.springframework.web.bind.annotation.RequestMapping;
import org.springframework.web.bind.annotation.RequestMethod;
import org.springframework.web.bind.annotation.RequestParam;
import org.springframework.web.context.annotation.SessionScope;

@Controller//声明当前类为控制器类
@SessionScope//声明同一个Session只创建一次对象
public class TuserAction {
	@RequestMapping(value="/test")//声明 函数print() 响应访问路径 /test
	public String print() {
		//处理逻辑
		System.out.println("this is method: print()....");
		System.out.println("this ");

		return "userinfo";//声明响应视图
	}

	/*@RequestMapping(value="/up",method=RequestMethod.POST)
	public void fileUp(@RequestParam String filename) {

		System.out.println("开始上传!"+filename);

	}*/
}
3.2.5 创建一个Spring的配置文件 spring-mvc.xml
<?xml version="1.0" encoding="UTF-8"?>
<beans xmlns="http://www.springframework.org/schema/beans"
	xmlns:xsi="http://www.w3.org/2001/XMLSchema-instance"
	xmlns:context="http://www.springframework.org/schema/context"
	xmlns:mvc="http://www.springframework.org/schema/mvc"
	xsi:schemaLocation="http://www.springframework.org/schema/mvc http://www.springframework.org/schema/mvc/spring-mvc-4.3.xsd
		http://www.springframework.org/schema/beans http://www.springframework.org/schema/beans/spring-beans.xsd
		http://www.springframework.org/schema/context http://www.springframework.org/schema/context/spring-context-4.3.xsd">
	<!-- springMVC annotation注解补充配置 -->
	<mvc:annotation-driven></mvc:annotation-driven>
	<!-- 将所有的静态资源  交给默认的servlet容器畜处理,即跳过静态资源的拦截-->
	<mvc:default-servlet-handler/>
	<!-- Spring包扫描 -->
	<context:component-scan base-package="cn.slm"></context:component-scan>

	<!-- <bean id="/Tuser.do" class="cn.slm.action.TuserAction"></bean> -->

	<!-- 资源过滤 自动为响应视图添加前后缀-->
	<bean name="viewResolver" class="org.springframework.web.servlet.view.InternalResourceViewResolver">
		<!-- 后缀 -->
		<property name="suffix" value=".jsp"></property>
		<!-- 前缀 -->
		<property name="prefix" value="/WEB-INF/view/"></property>
	</bean>
</beans>
3.2.6 创建一个返回的视图页面 /SpringMVCDemo/WebApp/WEB-INF/view/userinfo.jsp
<%@ page language="java" contentType="text/html; charset=UTF-8"
    pageEncoding="UTF-8"%>
<!DOCTYPE html>
<html>
<head>
<meta charset="UTF-8">
<title>Insert title here</title>
</head>
<body>
	${msg},响应页面!
</body>
</html>
4. 测试
4.1 请求
点击测试连接发送请求
4.1 测试结果

5. 总结
从上面的代码来看,相比于XML的配置方式,注解式的方式确实减少了很多代码。主要侧重在Spring-mvc.xml文件与Action处理类的代码与功能的扩展。
5.1 不需要在每次新增模块时,再在Spring-mvc.xml中配置一个bean标签,减少了频繁修改XML文件的麻烦,也让Spring-mvc.xml简洁的多。
5.2 将映射直接用注解写在类和方法上,新增一个模块就增加了功能,卸载模块时直接删掉或注释掉相关类就可完成,不影响其他模块,实现更直观的可插拔,都不用修改XML。
5.3 业务控制器的代码大量减少简化,不再需要继承或实现任何类或接口,并且可以直接接受页面对象数据,降低了数据获取和处理的难度。
5.4 业务控制器 的返回视图类型由对象更改为字符串大大的方便了编写,也减少了冗余代码。