文章目录
1、简介
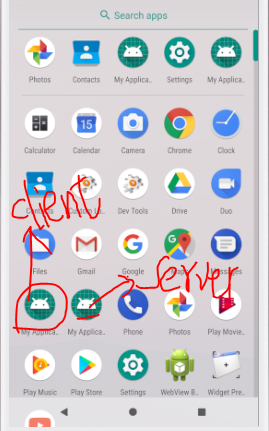
AIDL 是可以让不同进程间通信的一种机制。比如两个 APP之间。
下面我们用一个计算 a+b 的数值来尝试:
客户端app 传入 两个数值 a、 b
服务端app 计算传入的数值
2、创建流程
1)创建 aidl 文件
2)数据运算的服务端
3)数据获取的客户端
3、服务端 创建aidl 文件
1)首先我们在 服务端 创建aidl 文件
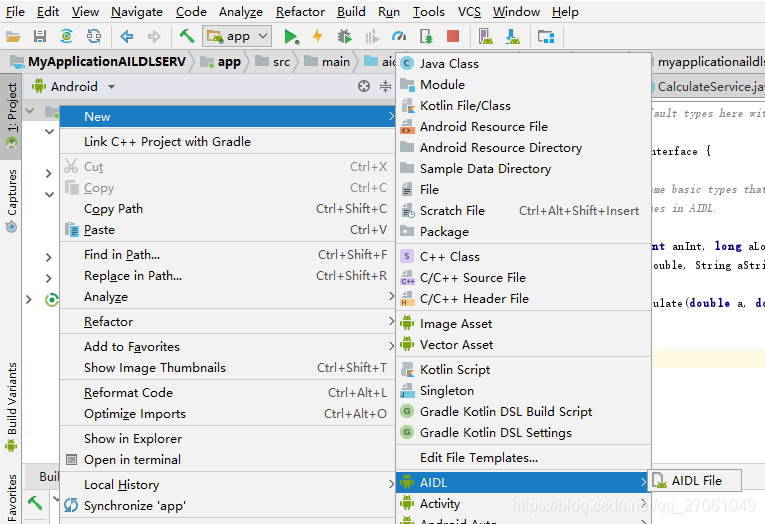
在项目上右击新建 AIDL 文件。
比如:CalculateInterface.aidl
// CalculateInterface.aidl
package myapplication.lum.com.myapplicationaildlserv;

// Declare any non-default types here with import statements

interface CalculateInterface {
    /**
     * Demonstrates some basic types that you can use as parameters
     * and return values in AIDL.
     */
    void basicTypes(int anInt, long aLong, boolean aBoolean, float aFloat,
            double aDouble, String aString);

        double doCalculate(double a, double b);  //自己添加的用来计算的接口
}
4、服务端 创建 数据计算的 服务
新建一个服务 CalculateService.java 用来进行数据计算,同时用来可以被 客户端绑定
package myapplication.lum.com.myapplicationaildlserv;

import android.app.Service;
import android.content.Intent;
import android.os.IBinder;
import android.os.RemoteException;
import android.util.Log;

public class CalculateService extends Service {

    private static final String TAG   =    "CalculateService";

    @Override
    public IBinder onBind(Intent arg0) {
        // TODO Auto-generated method stub
        logE("onBind()");
        return mBinder;
    }

    @Override
    public void onCreate() {
        // TODO Auto-generated method stub
        logE("onCreate()");
        super.onCreate();
    }

    @Override
    public void onStart(Intent intent, int startId) {
        // TODO Auto-generated method stub
        logE("onStart()");
        super.onStart(intent, startId);
    }

    @Override
    public boolean onUnbind(Intent intent) {
        // TODO Auto-generated method stub
        logE("onUnbind()");
        return super.onUnbind(intent);
    }

    @Override
    public void onDestroy() {
        // TODO Auto-generated method stub
        logE("onDestroy()");
        super.onDestroy();
    }

    private static void logE(String str) {
        Log.e(TAG, "--------" + str + "--------");
    }

    private final CalculateInterface.Stub mBinder = new CalculateInterface.Stub() {

        @Override
        public void basicTypes(int anInt, long aLong, boolean aBoolean, float aFloat,
                               double aDouble, String aString) throws RemoteException {

        }

        public double doCalculate(double a, double b) throws RemoteException {
            // TODO Auto-generated method stub
            Log.i("Calculate", "远程计算中");
            Calculate calculate = new Calculate();
            double answer = calculate.calculateSum(a, b);
            return answer;
        }
    };
}
5、服务端 真正计算的 处理类 Calculate.java
package myapplication.lum.com.myapplicationaildlserv;

import android.util.Log;

public class Calculate {

    private String  TAG = "Calculate: ";
    public double  calculateSum(double a, double b) {
        Log.i(TAG,"计算的值: " + (a+b));
        return a + b;
    }
}
6、服务端 server 的配置
在 AndroidManifest.xml 文件中 添加 必要配置
        <service android:name=".CalculateService"
            android:enabled="true"
            android:exported="true"
            android:process=":remote_service">
            <intent-filter>
                <action android:name="com.example.calculate.CalculateService" />
            </intent-filter>
        </service>
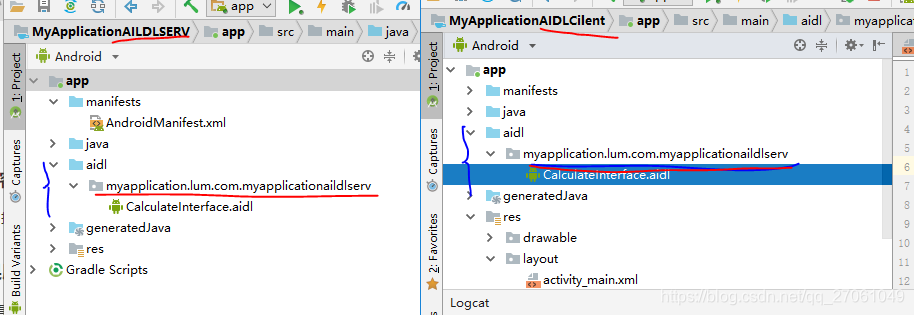
7、客户端 AIDl 的创建
客户端 就是 把服务端的 AIDl 文件 给复制到对应的文件下,然后 build 一下整个项目。
8、客户端 绑定服务 传值 获取数据
package myapplication.lum.com.myapplicationaidlcilent;

import android.content.ComponentName;
import android.content.Context;
import android.content.Intent;
import android.content.ServiceConnection;
import android.content.pm.PackageManager;
import android.content.pm.ResolveInfo;
import android.os.IBinder;
import android.os.RemoteException;
import android.support.v7.app.AppCompatActivity;
import android.os.Bundle;
import android.util.Log;
import android.view.View;
import android.widget.Button;

import java.util.List;

import myapplication.lum.com.myapplicationaildlserv.CalculateInterface;

public class MainActivity extends AppCompatActivity implements View.OnClickListener {

    private String TAG = "MainActivity; ";
    private Button button;
    private CalculateInterface mService;
    private double num1 = 100;
    private  double num2 = 200;
    private  ServiceConnection        mServiceConnection = new ServiceConnection() {

        @Override
        public void onServiceDisconnected(ComponentName name) {
            // TODO Auto-generated method stub

            mService = null;
        }

        @Override
        public void onServiceConnected(ComponentName name, IBinder service) {
            // TODO Auto-generated method stub

            mService = CalculateInterface.Stub.asInterface(service);
        }
    };


@Override
    protected void onCreate(Bundle savedInstanceState) {
        super.onCreate(savedInstanceState);
        setContentView(R.layout.activity_main);


    final Intent intent = new Intent();
    intent.setAction("com.example.calculate.CalculateService");
    final Intent eintent = new Intent(createExplicitFromImplicitIntent(this,intent));

    bindService(eintent, mServiceConnection, Context.BIND_AUTO_CREATE);


    button = (Button) findViewById(R.id.cla_id);
        button.setOnClickListener(this);
    }

    public static Intent createExplicitFromImplicitIntent(Context context, Intent implicitIntent) {
        // Retrieve all services that can match the given intent
        PackageManager pm = context.getPackageManager();
        List<ResolveInfo> resolveInfo = pm.queryIntentServices(implicitIntent, 0);

        // Make sure only one match was found
        if (resolveInfo == null || resolveInfo.size() != 1) {
            return null;
        }

        // Get component info and create ComponentName
        ResolveInfo serviceInfo = resolveInfo.get(0);
        String packageName = serviceInfo.serviceInfo.packageName;
        String className = serviceInfo.serviceInfo.name;
        ComponentName component = new ComponentName(packageName, className);

        // Create a new intent. Use the old one for extras and such reuse
        Intent explicitIntent = new Intent(implicitIntent);

        // Set the component to be explicit
        explicitIntent.setComponent(component);

        return explicitIntent;
    }


    @Override
    public void onClick(View v) {
        switch (v.getId()) {
            case R.id.cla_id:
                Log.i(TAG,"开始传输计算数值 " + num1 + " + " + num2 );
                try {
                    String answer = "计算结果:" + mService.doCalculate(num1, num2);
                    Log.i(TAG,"得到返回的计算: " + answer);
                } catch (RemoteException e) {
                }

                break;
        }
    }
}
效果展示:
我们可以就看到他们是再不同进程中:

文件参考:
Android AIDL使用步骤
https://blog.csdn.net/w296365959/article/details/79817203
一个android中AIDL的简单例子
https://blog.csdn.net/jingwen3699/article/details/53400288