文章目录
前言:
开始前我们先回答几个问题
1.Jetpack是什么/怎么用?
2.android-sunflower-0.1.6是什么?
问题一:
- Jetpack是什么?
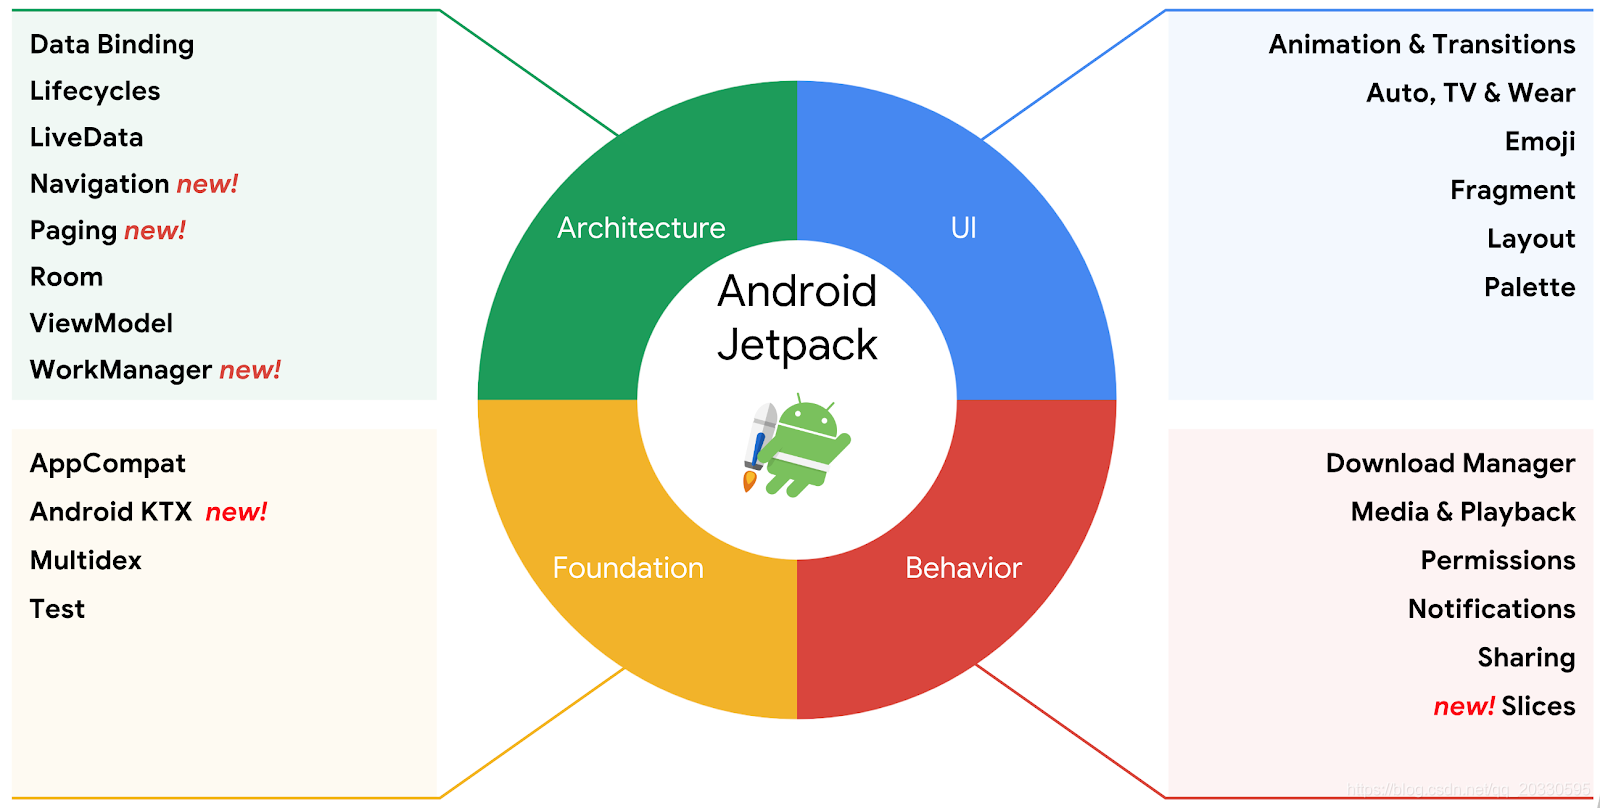
给出下图:简单的概括为四大组件库,可以看到他提供的功能还是蛮实用的,没有多余的部分。

- Jetpack怎么用?
这个问题比较大一下说不清楚,我们从接下来的源码分析中,一步一步理解和掌握,有人会说既然做这么多年开发直接看文档不就能行了吗,你说的有道理,但是阅读外文文档学习确实不符合中国国情,这里就涉及到个人以及政治方面的原因了。也可以看到上面的模块之多,不是一日而语的,纸上读来终觉浅,绝知此事要躬行,我们需要慢慢来,我也是第一次在技术迁移上感受到这种焦虑感,Kotlin在Android开发当中的比重越来越大,还在使用JAVA的伙伴赶紧跟上脚步。
问题二:
长征第一步
地址:https://github.com/googlesamples/android-sunflower
--------------------------------------进入正题---------------------------------------
衔接上篇
JetPack控件ROOM(基于android-sunflower-0.1.6)
WorkManager
简单使用
坐标:AppDatabase
官方解释:OneTimeWorkRequests can be put in simple or complex graphs of work by using methods
//内联函数
//注意:只是使用SeedDatabaseWorker的ClassName而已,没有初始化
val request = OneTimeWorkRequestBuilder<SeedDatabaseWorker>().build()
WorkManager.getInstance().enqueue(request)

//SeedDatabaseWorker
//教科书般的JSON案例
//assets -> JsonReader->database
class SeedDatabaseWorker(context: Context, workerParams: WorkerParameters) : Worker(context, workerParams) {
    private val TAG by lazy { SeedDatabaseWorker::class.java.simpleName }

    override fun doWork(): Worker.Result {
  		//规定任何想解析的类型
        val plantType = object : TypeToken<List<Plant>>() {}.type
        var jsonReader: JsonReader? = null

        return try {
            val inputStream = applicationContext.assets.open(PLANT_DATA_FILENAME)
            jsonReader = JsonReader(inputStream.reader())
            val plantList: List<Plant> = Gson().fromJson(jsonReader, plantType)
            val database = AppDatabase.getInstance(applicationContext)
            database.plantDao().insertAll(plantList)
            Worker.Result.SUCCESS
        } catch (ex: Exception) {
            Log.e(TAG, "Error seeding database", ex)
            Worker.Result.FAILURE
        } finally {
            jsonReader?.close()
        }
    }
}
MiXin(迷信)Dapp
MiXin(迷信)Dapp 这个APP绝对值得大家去学习,他的价值不仅仅只是Jetpack这么简单
注意:
- 缺少google-services.json的去firebase申请一个即可。
- 建议先去看前面的章节,因为这个项目相较之前的还是复杂多了。
坐标:WorkerExtension
Kotlin的扩展函数类,对Kotlin不熟悉的,请尽快学习koltin的中文开发网站
// 调用顺序 1
inline fun <reified W : ListenableWorker> WorkManager.enqueueOneTimeNetworkWorkRequest(inputData: Data? = null) {
   //清除已执行任务
   pruneWork()
   //执行
   enqueue(buildNetworkRequest<W>(inputData).build())
}
// 调用顺序 3
inline fun <reified W : ListenableWorker> buildRequest(inputData: Data? = null) =
		//创建WorkReque实例 而非W实例
        OneTimeWorkRequestBuilder<W>()
        //设置补偿计划,即失败重连,(线性,10*1000,单位毫秒)
                .setBackoffCriteria(BackoffPolicy.LINEAR, MIN_BACKOFF_MILLIS, TimeUnit.MILLISECONDS)
                .apply {
                    if (inputData != null) {
                        setInputData(inputData)
                    }
                }
// 调用顺序 2
inline fun <reified W : ListenableWorker> buildNetworkRequest(inputData: Data? = null) =
        buildRequest<W>(inputData)
        		//设置约束,网络连接时
                .setConstraints(Constraints.Builder()
                        .setRequiredNetworkType(NetworkType.CONNECTED)
                        .build())
// 调用顺序 1
// 参考https://developer.android.com/topic/libraries/architecture/workmanager/advanced.html
fun WorkManager.enqueueAvatarWorkRequest(inputData: Data? = null) {
	//清除已执行任务
    pruneWork()
    //beginWith 第一个任务
    beginWith(buildNetworkRequest<DownloadAvatarWorker>(inputData).build())
   			//接下来的任务
            .then(buildRequest<GenerateAvatarWorker>(inputData).build())
            //执行
            .enqueue()
}
这还只是通用工具类,看看具体实现
坐标:RefreshConversationWorker
if (userIdList.isNotEmpty()) {
 	 WorkManager.getInstance().enqueueOneTimeNetworkWorkRequest<RefreshUserWorker>(
 	 //这里的 to 扩展函数,生成Pair<,>()
 	 //注意这个toTypedArray 转成的ArrayList
 	 //workDataOf获取一个Data(androidx.work.Data)
     workDataOf(RefreshUserWorker.USER_IDS to userIdList.toTypedArray(),
         RefreshUserWorker.CONVERSATION_ID to conversationId))
} else {
 	 WorkManager.getInstance().enqueueAvatarWorkRequest(
     workDataOf(GROUP_ID to conversationId))
}

inline fun workDataOf(vararg pairs: Pair<String, Any?>): Data {
	//注意是这样用的
    val dataBuilder = Data.Builder()
    for (pair in pairs) {
        dataBuilder.put(pair.first, pair.second)
    }
    return dataBuilder.build()
}
androidx.work.Data 官方解释
- 一组可持久的键/值对,用作输入和输出
- 键是字符串,值可以使任意类型
- 有大小限制 MAX_DATA_BYTES = 10 * 1024; // 10KB
- 不允许序列化反序列化
注意:简写后你会发现build中的泛型W和Builder的泛型W是不同的,build返回一个Worker,而Builder仅仅是提供一个ClassName而已
    enqueue(OneTimeWorkRequest.Builder(W::class.java).build())    //简写
    enqueue(buildNetworkRequest<W>(inputData).build())
坐标:RefreshUserWorker
疑问:既然OneTimeWorkRequest没有初始化RefreshUserWorker,那么初始化如何完成的呢?
关于Worker
官方解释: *The basic object that performs work. Worker classes are instantiated at runtime by {@link WorkManager} and the {@link #doWork()} method is called on a background thread. In case the work is preempted for any reason, the same instance of Worker is not reused. This means that {@link #doWork()} is called exactly once per Worker instance.
也就是说实际上Worker是在WorkManager中初始化之后立即执行的
那我去看下 WorkManager官方文档
坐标:EnqueueRunnable
WorkSpec 是WorkRequest 的成员之一,而WorkSpec又是Worker的载体,insertWorkSpec即插入到到数据库中,这样Worker的保存就完成了
  for (WorkRequest work : workList) {
            WorkSpec workSpec = work.getWorkSpec();

            if (hasPrerequisite && !hasCompletedAllPrerequisites) {
                if (hasFailedPrerequisites) {
                    workSpec.state = FAILED;
                } else if (hasCancelledPrerequisites) {
                    workSpec.state = CANCELLED;
                } else {
                    workSpec.state = BLOCKED;
                }
            } else {
                // Set scheduled times only for work without prerequisites. Dependent work
                // will set their scheduled times when they are unblocked.
                workSpec.periodStartTime = currentTimeMillis;
            }

            if (Build.VERSION.SDK_INT >= 23 && Build.VERSION.SDK_INT <= 25) {
                tryDelegateConstrainedWorkSpec(workSpec);
            }

            // If we have one WorkSpec with an enqueued state, then we need to schedule.
            if (workSpec.state == ENQUEUED) {
                needsScheduling = true;
            }

            workDatabase.workSpecDao().insertWorkSpec(workSpec);

            if (hasPrerequisite) {
                for (String prerequisiteId : prerequisiteIds) {
                    Dependency dep = new Dependency(work.getStringId(), prerequisiteId);
                    workDatabase.dependencyDao().insertDependency(dep);
                }
            }

            for (String tag : work.getTags()) {
                workDatabase.workTagDao().insert(new WorkTag(tag, work.getStringId()));
            }

            if (isNamed) {
                workDatabase.workNameDao().insert(new WorkName(name, work.getStringId()));
            }
        }
坐标:WorkSpecDao
获取getWorkSpec
 /**
     * @param id The identifier
     * @return The WorkSpec associated with that id
     */
    @Query("SELECT * FROM workspec WHERE id=:id")
    WorkSpec getWorkSpec(String id);
Worker调用流程
坐标:WorkManager
WorkManagerImpl.getInstance()
  public static @NonNull WorkManager getInstance() {
        WorkManager workManager = WorkManagerImpl.getInstance();
        if (workManager == null) {
            throw new IllegalStateException("WorkManager is not initialized properly.  The most "
                    + "likely cause is that you disabled WorkManagerInitializer in your manifest "
                    + "but forgot to call WorkManager#initialize in your Application#onCreate or a "
                    + "ContentProvider.");
        } else {
            return workManager;
        }
    }
坐标:WorkManagerImpl
初始化函数
注释:Used to do a one-time initialization of the {@link WorkManager} singleton with a custom @link Configuration}. By default, this method should not be called because WorkManager is automatically initialized.
也就是会自动执行
启动方式:
To initialize WorkManager yourself, please follow these steps:
- Disable {@code androidx.work.impl.WorkManagerInitializer} in your manifest.
- Invoke this method in {@code Application#onCreate} or a {@code ContentProvider}. Note that this method must be invoked in one of these two places or you risk getting a {@code NullPointerException} in {@link #getInstance()}.
- 在manifest中取消 WorkManagerInitializer
- 在Application中申明 WorkManager.initialize()
  public static void initialize(@NonNull Context context, @NonNull Configuration configuration) {
       WorkManagerImpl.initialize(context, configuration);
   }

  @RestrictTo(RestrictTo.Scope.LIBRARY_GROUP)
    public static void initialize(@NonNull Context context, @NonNull Configuration configuration) {
        synchronized (sLock) {
            if (sDelegatedInstance != null && sDefaultInstance != null) {
                throw new IllegalStateException("WorkManager is already initialized.  Did you "
                        + "try to initialize it manually without disabling "
                        + "WorkManagerInitializer? See "
                        + "WorkManager#initialize(Context, Configuration) or the class level"
                        + "Javadoc for more information.");
            }

            if (sDelegatedInstance == null) {
                context = context.getApplicationContext();
                if (sDefaultInstance == null) {
                    sDefaultInstance = new WorkManagerImpl(
                            context,
                            configuration,
                            new WorkManagerTaskExecutor());
                }
                sDelegatedInstance = sDefaultInstance;
            }
        }
    }
createSchedulers
    /**
     * @hide
     */
    @RestrictTo(RestrictTo.Scope.LIBRARY_GROUP)
    public @NonNull List<Scheduler> createSchedulers(Context context) {
        return Arrays.asList(
                Schedulers.createBestAvailableBackgroundScheduler(context, this),
                new GreedyScheduler(context, this));
    }
坐标:GreedyScheduler
schedule函数
mWorkManagerImpl.startWork(workSpec.id);
坐标:WorkManagerImpl
startWork
    @RestrictTo(RestrictTo.Scope.LIBRARY_GROUP)
    public ListenableFuture<Boolean> startWork(String workSpecId) {
        return startWork(workSpecId, null);
    }
new StartWorkRunnable
 @RestrictTo(RestrictTo.Scope.LIBRARY_GROUP)
    public ListenableFuture<Boolean> startWork(
            String workSpecId,
            WorkerParameters.RuntimeExtras runtimeExtras) {
        StartWorkRunnable startWorkRunnable =
                new StartWorkRunnable(this, workSpecId, runtimeExtras);
        mWorkTaskExecutor.executeOnBackgroundThread(startWorkRunnable);
        return startWorkRunnable.getEnqueuedFuture();
    }
坐标:StartWorkRunnable
//被启动
   @Override
    public void run() {
        mEnqueuedFuture.set(mWorkManagerImpl.getProcessor().startWork(mWorkSpecId, mRuntimeExtras));
    }
坐标:Processor
    public boolean startWork(String id, WorkerParameters.RuntimeExtras runtimeExtras){
    	//初始化WorkerWrapper
    }

  	public boolean startWork(String id) {
        return startWork(id, null);
    }
坐标:WorkerWrapper
runWorker();
// Call mWorker.startWork() on the main thread.
            mWorkTaskExecutor.getMainThreadExecutor()
                    .execute(new Runnable() {
                        @Override
                        public void run() {
                            try {
                                mInnerFuture = mWorker.startWork();
                                future.setFuture(mInnerFuture);
                            } catch (Throwable e) {
                                future.setException(e);
                            }

                        }
                    });
坐标:Worker
Worker的所有实现类都会接到doWork通知
@WorkerThread
public abstract @NonNull Result doWork();

@Override
    public final @NonNull ListenableFuture<Result> startWork() {
        mFuture = SettableFuture.create();
        getBackgroundExecutor().execute(new Runnable() {
            @Override
            public void run() {
            	//对应上面英文说明:在后台被调用
                Result result = doWork();
                mFuture.set(result);
            }
        });
        return mFuture;
    }
以上为全部Worker被调用过程,谢谢浏览
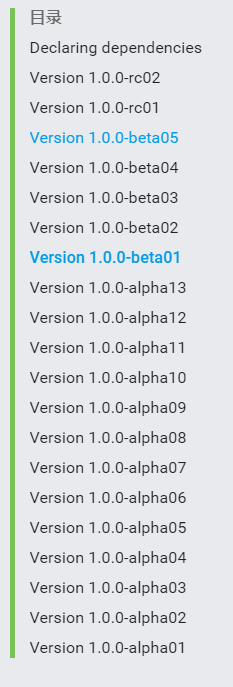
题外话: beta版本才有getWorkInfoByIdLiveData API

https://developer.android.com/jetpack/androidx/releases/work
implementation "android.arch.work:work-runtime-ktx:1.0.0-beta02"