版权声明:本文为博主原创文章,未经博主允许不得转载。 https://blog.csdn.net/lx_nhs/article/details/83146206
一. 使用QQ邮箱作为smtp邮件服务器发送邮件
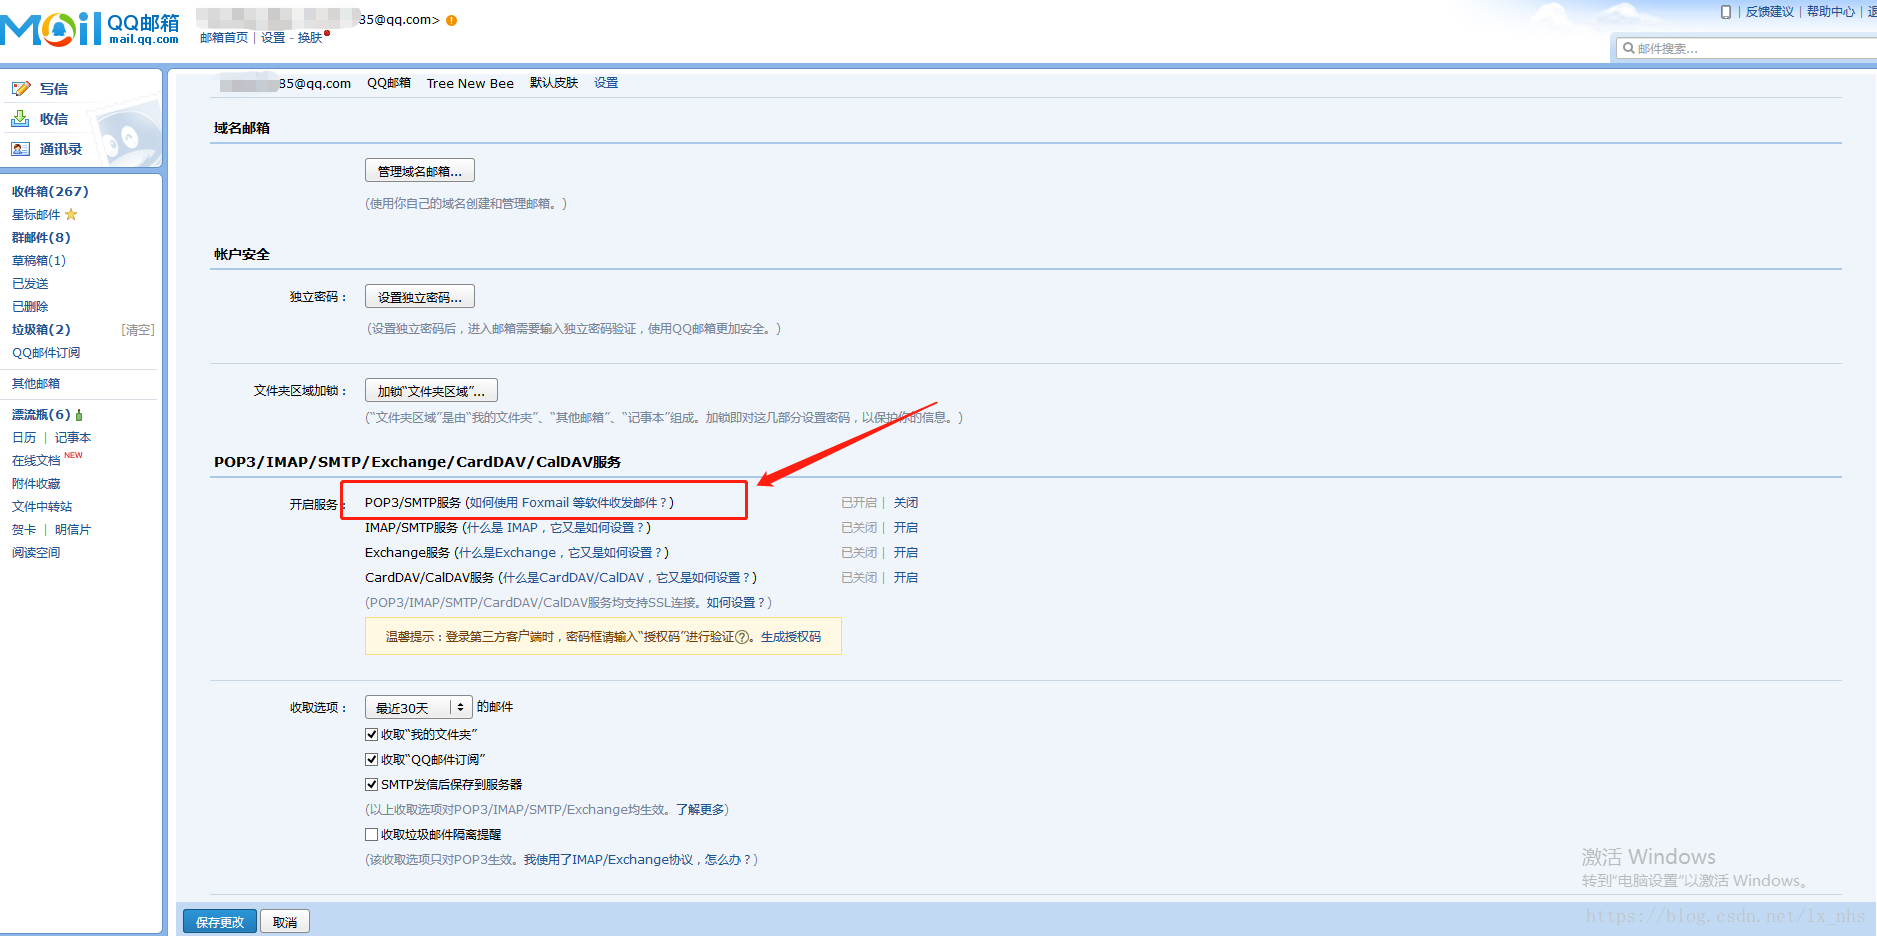
步骤1.开启QQ邮箱的POP3/SMTP服务:
开启后会得到一个16位授权码, 作为第三方使用邮件服务器的登录凭证.
注意: 修改邮箱密码后, 授权码会失效, 需要重新获取.
步骤2: 编写配置文件applicationContext-email.xml(此处使用xml配置方式):
<?xml version="1.0" encoding="UTF-8"?>
<beans xmlns="http://www.springframework.org/schema/beans"
	xmlns:xsi="http://www.w3.org/2001/XMLSchema-instance" xmlns:tx="http://www.springframework.org/schema/tx"
	xmlns:context="http://www.springframework.org/schema/context"
	xmlns:aop="http://www.springframework.org/schema/aop"
	xsi:schemaLocation="
		http://www.springframework.org/schema/beans
		http://www.springframework.org/schema/beans/spring-beans.xsd
		http://www.springframework.org/schema/tx
		http://www.springframework.org/schema/tx/spring-tx.xsd
		http://www.springframework.org/schema/context
		http://www.springframework.org/schema/context/spring-context.xsd
		http://www.springframework.org/schema/aop
		http://www.springframework.org/schema/aop/spring-aop.xsd"
	default-lazy-init="false">
	<bean id="javaMailSender" class="org.springframework.mail.javamail.JavaMailSenderImpl">
		<property name="host">
			<!-- qq的SMTP邮箱服务器地址, 若使用163网易则改为:smtp.163.com -->
			<value>smtp.qq.com</value>
		</property>
<!-- 	<property name="port">
			SMTP邮箱服务器端口(465或587), 建议不要配置, 使用默认就行
			<value>建议不要配置!!博主配置反而发布出去!!</value>
		</property> -->
		<property name="javaMailProperties">
			<props>
				<prop key="mail.smtp.auth">true</prop>
				<!-- 连接超时时间 -->
				<prop key="mail.smtp.timeout">25000</prop>
			</props>
		</property>
		<!-- 你的邮箱账号 -->
		<property name="username">
			<value>[email protected]</value>
		</property>
		<!-- 16位授权码, 注意不是登录密码! -->
		<property name="password">
			<value>qazcrslpoghcbahh</value>
		</property>
		<property name="defaultEncoding">
			<value>UTF-8</value>
		</property>
	</bean>

	<bean id="simpleMailMessage" class="org.springframework.mail.SimpleMailMessage">
		<!-- 发件人信息, 需要和上面username值一样 -->
		<property name="from" value="[email protected]" />
	</bean>

</beans>
步骤3: 编写测试类:
package emailtest;

import java.util.Date;

import javax.annotation.Resource;
import javax.mail.MessagingException;
import javax.mail.internet.MimeMessage;

import org.junit.Test;
import org.junit.runner.RunWith;
import org.springframework.mail.SimpleMailMessage;
import org.springframework.mail.javamail.JavaMailSender;
import org.springframework.mail.javamail.MimeMessageHelper;
import org.springframework.test.context.ContextConfiguration;
import org.springframework.test.context.junit4.SpringJUnit4ClassRunner;
import org.springframework.util.StringUtils;

@RunWith(SpringJUnit4ClassRunner.class)
@ContextConfiguration("classpath:applicationContext-email.xml")
public class EmailTest {

	@Resource
	private JavaMailSender javaMailSender;

	@Resource
	private SimpleMailMessage simpleMailMessage;

	@Test
	public void sendMail() throws MessagingException{
		sendMail("[email protected]","验证码:6666","密码找回");
	}

	public void sendMail(String email, String content, String subject) throws MessagingException {
		MimeMessage message = javaMailSender.createMimeMessage();
		MimeMessageHelper messageHelper;
		messageHelper = new MimeMessageHelper(message, true, "UTF-8");
		messageHelper.setFrom(StringUtils.trimAllWhitespace(simpleMailMessage.getFrom()));
		messageHelper.setTo(email);
		messageHelper.setSubject(subject);
		messageHelper.setText(content, true);
		messageHelper.setSentDate(new Date());
		// 发送邮件
		javaMailSender.send(messageHelper.getMimeMessage());

	}
}
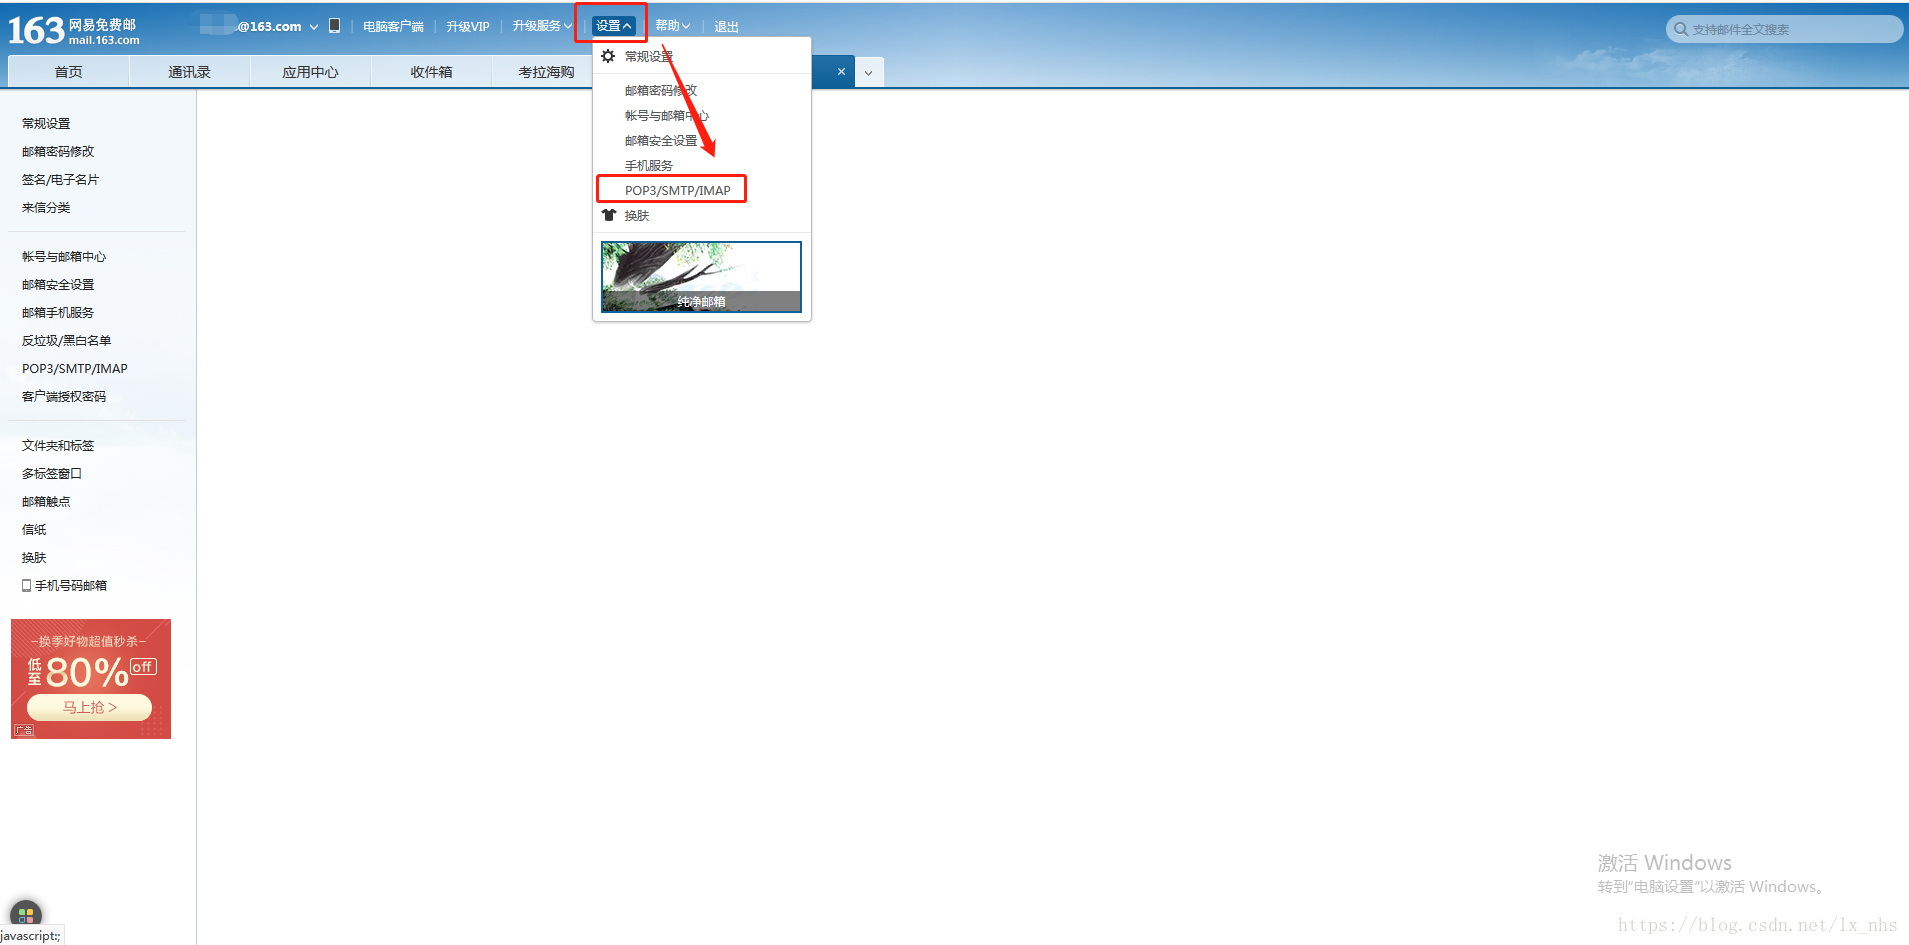
二. 使用网易邮箱作为smtp邮件服务器发送邮件
1.相似的, 先打开网易邮箱的POP3/SMTP服务, 设置授权码.
2.修改上述applicationContext.xml中配置信息:
	服务器地址改为smtp.163.com
	username更改为你的网易邮箱账号
	password则是你在开启POP3/SMTP服务时设置的授权码
	from的值和username值一样.