版权声明:本文为博主原创文章,未经博主允许不得转载。 https://blog.csdn.net/qq_20042935/article/details/89250599
引出问题?
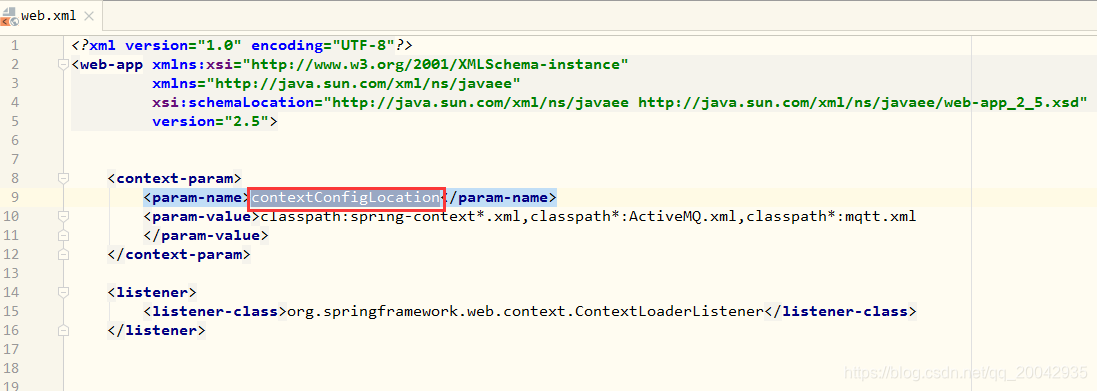
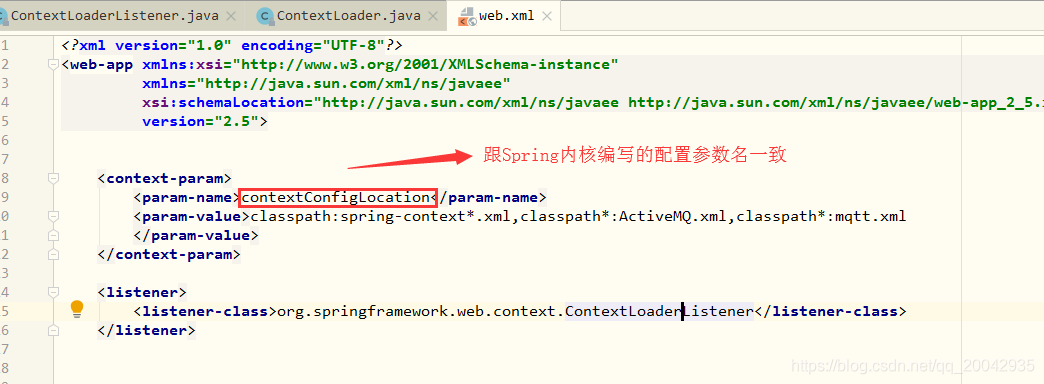
为什么在web.xml里面配置Spring,里面的context参数一定是contextConfigLocation,如下图:
分析流程
tomcat启动时,里面有配置监听程序的声明周期的监听器,如上图(ContextLoaderListner类)。
点击进入ContextLoaderListener类,如下图:
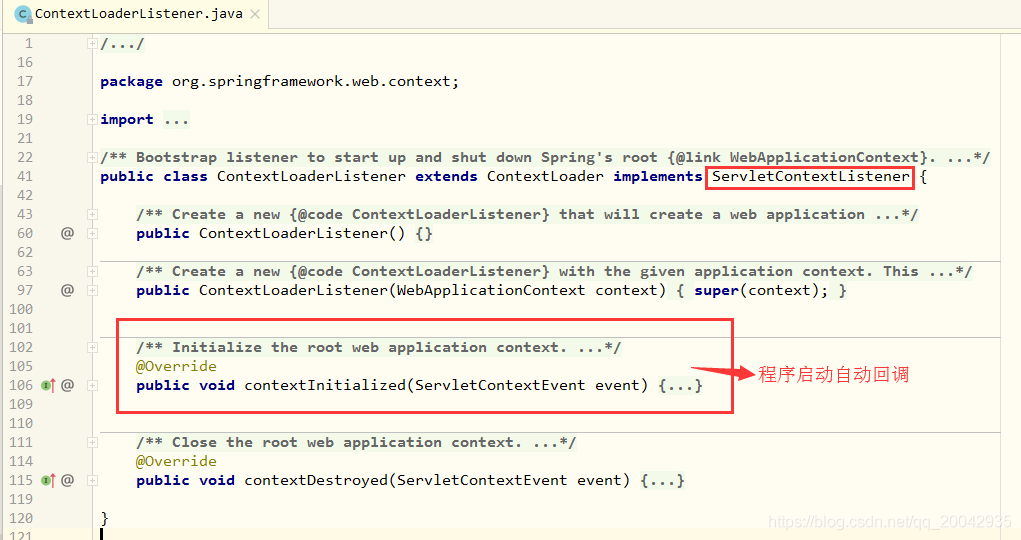
可以看出,ContextLoaderListner实现了ServletContextListener,实现了两个方法,分别是:
- contextInitialized:web程序初始化的时候回调(web服务器开启)
- contextDestroyed:web程序关闭的时候回调(web服务器关闭)
我们打开 contextInitialized方法
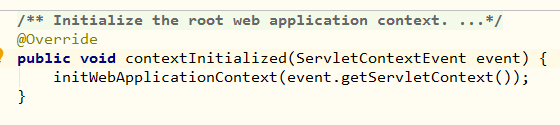
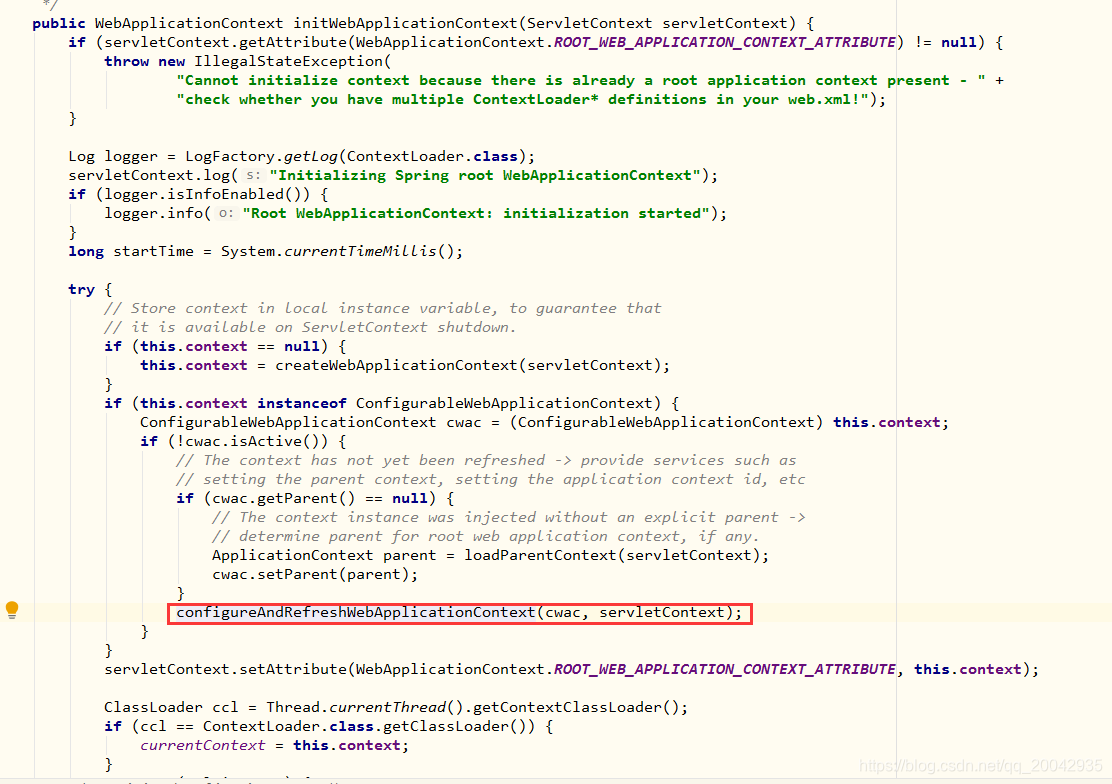
再进入initWebApplicationContext方法查看,如下图:

复制下整个方法的代码,代码如下:
/**
	 * Initialize Spring's web application context for the given servlet context,
	 * using the application context provided at construction time, or creating a new one
	 * according to the "{@link #CONTEXT_CLASS_PARAM contextClass}" and
	 * "{@link #CONFIG_LOCATION_PARAM contextConfigLocation}" context-params.
	 * @param servletContext current servlet context
	 * @return the new WebApplicationContext
	 * @see #ContextLoader(WebApplicationContext)
	 * @see #CONTEXT_CLASS_PARAM
	 * @see #CONFIG_LOCATION_PARAM
	 */
	public WebApplicationContext initWebApplicationContext(ServletContext servletContext) {
		if (servletContext.getAttribute(WebApplicationContext.ROOT_WEB_APPLICATION_CONTEXT_ATTRIBUTE) != null) {
			throw new IllegalStateException(
					"Cannot initialize context because there is already a root application context present - " +
					"check whether you have multiple ContextLoader* definitions in your web.xml!");
		}

		Log logger = LogFactory.getLog(ContextLoader.class);
		servletContext.log("Initializing Spring root WebApplicationContext");
		if (logger.isInfoEnabled()) {
			logger.info("Root WebApplicationContext: initialization started");
		}
		long startTime = System.currentTimeMillis();

		try {
			// Store context in local instance variable, to guarantee that
			// it is available on ServletContext shutdown.
			if (this.context == null) {
				this.context = createWebApplicationContext(servletContext);
			}
			if (this.context instanceof ConfigurableWebApplicationContext) {
				ConfigurableWebApplicationContext cwac = (ConfigurableWebApplicationContext) this.context;
				if (!cwac.isActive()) {
					// The context has not yet been refreshed -> provide services such as
					// setting the parent context, setting the application context id, etc
					if (cwac.getParent() == null) {
						// The context instance was injected without an explicit parent ->
						// determine parent for root web application context, if any.
						ApplicationContext parent = loadParentContext(servletContext);
						cwac.setParent(parent);
					}
					configureAndRefreshWebApplicationContext(cwac, servletContext);
				}
			}
			servletContext.setAttribute(WebApplicationContext.ROOT_WEB_APPLICATION_CONTEXT_ATTRIBUTE, this.context);

			ClassLoader ccl = Thread.currentThread().getContextClassLoader();
			if (ccl == ContextLoader.class.getClassLoader()) {
				currentContext = this.context;
			}
			else if (ccl != null) {
				currentContextPerThread.put(ccl, this.context);
			}

			if (logger.isDebugEnabled()) {
				logger.debug("Published root WebApplicationContext as ServletContext attribute with name [" +
						WebApplicationContext.ROOT_WEB_APPLICATION_CONTEXT_ATTRIBUTE + "]");
			}
			if (logger.isInfoEnabled()) {
				long elapsedTime = System.currentTimeMillis() - startTime;
				logger.info("Root WebApplicationContext: initialization completed in " + elapsedTime + " ms");
			}

			return this.context;
		}
		catch (RuntimeException ex) {
			logger.error("Context initialization failed", ex);
			servletContext.setAttribute(WebApplicationContext.ROOT_WEB_APPLICATION_CONTEXT_ATTRIBUTE, ex);
			throw ex;
		}
		catch (Error err) {
			logger.error("Context initialization failed", err);
			servletContext.setAttribute(WebApplicationContext.ROOT_WEB_APPLICATION_CONTEXT_ATTRIBUTE, err);
			throw err;
		}
	}
上面的流程只是一些加载操作,会发现里面调用了一个方法,大致是初始化相关的配置参数的,如下图:
点击进入此方法,会发现方法里面需要调用一个全局的变量,通过KEY值获取:
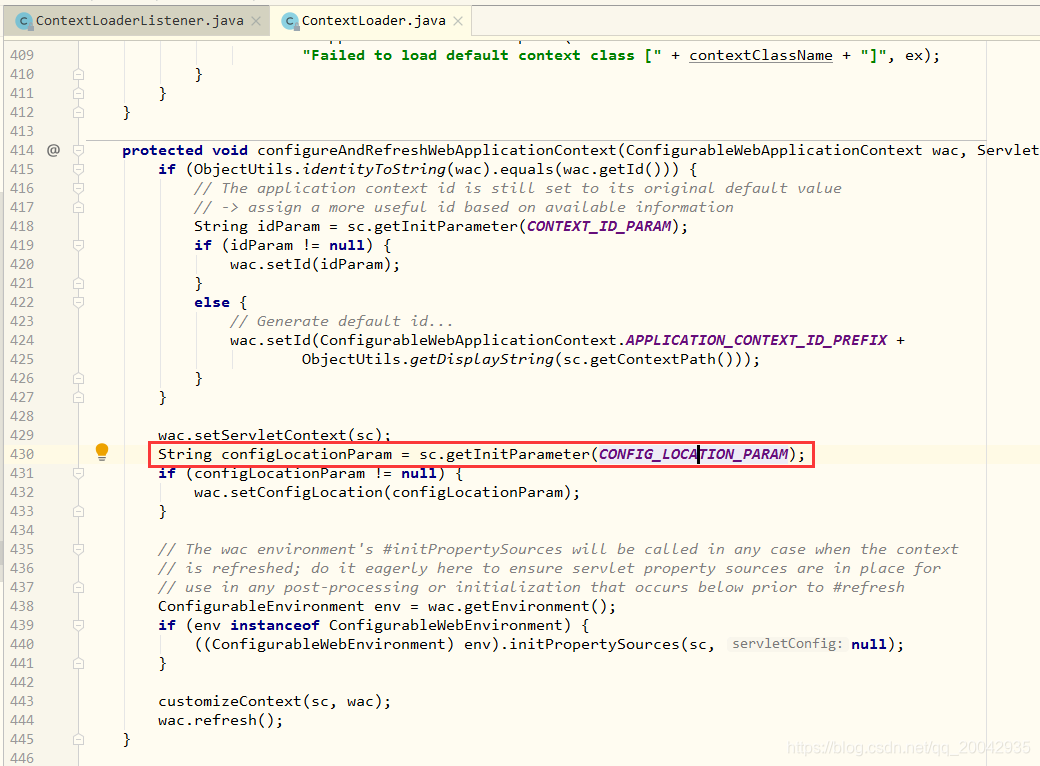
这个KEY是什么呢?没错,猜对了,正是我们web.xml里面配的KEY值,如下:

再看下第一张图:
整个流程就这样了!!!