1. ElasticSearch与Springboot的整合
1.1 安装elasticsearch 6.5.4
(1)安装环境win7、java 8
elasticsearch 下载地址https://www.elastic.co/cn/downloads/elasticsearch

(2)解压该文件到适当的位置,解压了3份

修改配置文件

(3)用sublime打开修改或新增以下配置
# ======================== Elasticsearch Configuration =========================
#
# NOTE: Elasticsearch comes with reasonable defaults for most settings.
#       Before you set out to tweak and tune the configuration, make sure you
#       understand what are you trying to accomplish and the consequences.
#
# The primary way of configuring a node is via this file. This template lists
# the most important settings you may want to configure for a production cluster.
#
# Please consult the documentation for further information on configuration options:
# https://www.elastic.co/guide/en/elasticsearch/reference/index.html
#
# ---------------------------------- Cluster -----------------------------------
#
# Use a descriptive name for your cluster:
#
cluster.name: elasticsearch
#
# ------------------------------------ Node ------------------------------------
#
# Use a descriptive name for the node:
#
node.name: master
node.master: true
#
# Add custom attributes to the node:
#
#node.attr.rack: r1
#
# ----------------------------------- Paths ------------------------------------
#
# Path to directory where to store the data (separate multiple locations by comma):
#
#path.data: /path/to/data
#
# Path to log files:
#
#path.logs: /path/to/logs
#
# ----------------------------------- Memory -----------------------------------
#
# Lock the memory on startup:
#
#bootstrap.memory_lock: true
#
# Make sure that the heap size is set to about half the memory available
# on the system and that the owner of the process is allowed to use this
# limit.
#
# Elasticsearch performs poorly when the system is swapping the memory.
#
# ---------------------------------- Network -----------------------------------
#
# Set the bind address to a specific IP (IPv4 or IPv6):
#
#network.host: 192.168.0.1
#
# Set a custom port for HTTP:
#
http.port: 9200
network.host: 127.0.0.1
(4)保存后启动elasticsearch.bat


(5)同理,其他两个节点只需要改下配置即可
cluster.name: elasticsearch
node.name: node-1
http.port: 9201
network.host: 127.0.0.1 #服务连接发布地址
cluster.name: elasticsearch
node.name: node-2
http.port: 9202
network.host: 127.0.0.1 #服务连接发布地址
1.2 安装elasticsearch-head-master插件
(1)下载地址https://github.com/mobz/elasticsearch-head

(2)解压放到合适的地址

(3)安装node运行环境
https://nodejs.org/en/download/,查看node版本输入: node --version

(4)安装完node之后编译elasticsearch-head
执行npm install -g grunt-cli 编译源码
执行npm install 安装服务
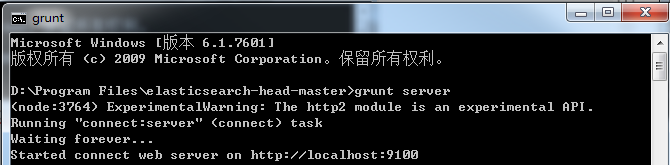
执行grunt server启动服务
(5)启动head插件后情况
(6)打开http://localhost:9100/

1.3 整合springboot
1.3.1 新建springboot项目


添加依赖
 <!--es依赖-->
 <dependency>
     <groupId>org.springframework.boot</groupId>
     <artifactId>spring-boot-starter-data-elasticsearch</artifactId>
 </dependency>
 <!--log4j-->
 <dependency>
     <groupId>org.apache.logging.log4j</groupId>
     <artifactId>log4j-core</artifactId>
     <version>2.7</version>
 </dependency>


1.3.2 新建包目录结构

1.3.3 配置文件application.properties
server.port=8888

#节点的地址 注意api模式下端口号是9300,千万不要写成9200
spring.data.elasticsearch.cluster-nodes=192.168.1.8:9300
#elasticsearch集群名称,默认的是elasticsearc,具体在配置文件中查看
spring.data.elasticsearch.cluster-name=my-application
#是否开启本地存储
spring.data.elasticsearch.repositories.enabled=true
1.3.4 以商品的增删改查为例:
(1)实体类Goods.java
package com.xxx.entity;

import org.springframework.data.elasticsearch.annotations.Document;

import java.io.Serializable;

/**
 * @ClassName Goods
 * @Description TODO
 * @Author Administrator
 * @Date 2019/1/12 13:20
 * @Version 1.0
 */

/**
 * indexName必须为小写,可理解为数据库名
 */
@Document(indexName = "goodsinfo", type = "goods")
public class Goods implements Serializable {
    private Long id;
    private String name;
    private String description;
    /**
     * 必须添加无参构造器,但是jackson的反序列化需要使用无参构造函数
     */
    public Goods() {
    }
    public Goods(Long id, String name, String description) {
        this.id = id;
        this.name = name;
        this.description = description;
    }
    public Long getId() {
        return id;
    }
    public void setId(Long id) {
        this.id = id;
    }
    public String getName() {
        return name;
    }
    public void setName(String name) {
        this.name = name;
    }
    public String getDescription() {
        return description;
    }
    public void setDescription(String description) {
        this.description = description;
    }
}
(2)数据操作类GoodsRepository.java
package com.xxx.repository;

import com.xxx.entity.Goods;
import org.springframework.data.elasticsearch.repository.ElasticsearchRepository;
import org.springframework.stereotype.Component;

/**
 * @ClassName GoodsRepository
 * @Description TODO
 * @Author Administrator
 * @Date 2019/1/12 13:24
 * @Version 1.0
 */
@Component
public interface GoodsRepository extends ElasticsearchRepository<Goods, Long> {
}
(3)访问api类GoodsController.java
package com.xxx.controller;

import com.xxx.entity.Goods;
import com.xxx.repository.GoodsRepository;
import org.elasticsearch.index.query.QueryBuilder;
import org.elasticsearch.index.query.QueryBuilders;
import org.elasticsearch.index.query.QueryStringQueryBuilder;
import org.elasticsearch.index.query.functionscore.FunctionScoreQueryBuilder;
import org.springframework.beans.factory.annotation.Autowired;
import org.springframework.data.domain.Page;
import org.springframework.data.domain.PageRequest;
import org.springframework.data.domain.Pageable;
import org.springframework.data.elasticsearch.core.query.NativeSearchQuery;
import org.springframework.data.elasticsearch.core.query.SearchQuery;
import org.springframework.data.web.PageableDefault;
import org.springframework.web.bind.annotation.RequestMapping;
import org.springframework.web.bind.annotation.RestController;

import java.util.ArrayList;
import java.util.Iterator;
import java.util.List;
import java.util.Optional;

/**
 * @ClassName GoodsController
 * @Description TODO
 * @Author Administrator
 * @Date 2019/1/12 13:26
 * @Version 1.0
 */
@RestController
@RequestMapping("/goods")
public class GoodsController {

    @Autowired
    private GoodsRepository goodsRepository;

    /**
     * 保存
     * @param name
     * @param description
     * @return
     */
    @RequestMapping("/save")
    public String save(String name, String description){
        Goods goods = new Goods(System.currentTimeMillis(), name, description);
        goodsRepository.save(goods);
        return "success";
    }

    /**
     * 更新
     * @param id
     * @param name
     * @param description
     * @return
     */
    @RequestMapping("/update")
    public String update(Long id, String name, String description){
        Goods goods = new Goods(id, name, description);
        goodsRepository.save(goods);
        return "success";
    }

    /**
     * 根据id查找
     * @param id
     * @return
     */
    @RequestMapping("/selectOne")
    public Optional<Goods> selectOne(Long id){
        return goodsRepository.findById(id);
    }

    /**
     * 删除
     * @param id
     * @return
     */
    @RequestMapping("/delete")
    public String delete(Long id){
        goodsRepository.deleteById(id);
        return "success";
    }

    /**
     * 限定关键词的搜索
     * @param name
     * @param pageable
     * @return
     */
    @RequestMapping("/getGoodsListByItem")
    public List<Goods> getGoodsListByItem(String name, @PageableDefault(page=0, value = 10) Pageable pageable){
        //设置分页
        QueryBuilder queryBuilder = QueryBuilders.matchQuery("name", name);
        Page<Goods> goodsPage = goodsRepository.search(queryBuilder, pageable);
        return goodsPage.getContent();
    }

    /**
     * 模糊搜索
     * @param condition
     * @return
     */
    @RequestMapping("/getGoodsList")
    public List<Goods> getGoodsList(String condition){
        QueryStringQueryBuilder builder = new QueryStringQueryBuilder(condition);
        Iterable<Goods> searchResult = goodsRepository.search(builder);
        List<Goods> goodsList = new ArrayList<>();
        Iterator<Goods> iterator = searchResult.iterator();
        while (iterator.hasNext()){
            goodsList.add(iterator.next());
        }
        return goodsList;
    }
}
1.4 将项目上传到github托管
打开https://github.com/,注册账号,创建或登录


复制远程地址
在本地选择一个文件夹管理项目,打开git bash,输入git clone 您的github地址

之后将项目通过tortoise(小乌龟工具)add,然commit & push到远程即可。