官网地址:https://router.vuejs.org/zh/
先来个自我介绍吧,我就是你们口中的路由,我的作用就是告诉你们怎么到达某地,比如你想去一个地方(前提是这个地方是已经存在的)我会查询我的路线图(路由配置)告诉你怎么过去。明白了吧,我的作用就是给你们导航的,有了我的存在,你们不用在详细的记住每一条路线图,只需要记住要去的目的地名字就行了,至于怎么过去,那是我的事,你就不用操心了,完全按照我的指示就能又快有准的到达目的地。
对了,我还有三个助手,他们分别是:
1.router :这位是我的指令官,他管理着所有的 route,当你需要指路时,他会召集所有的route,到routes集合,然后一个一个询问谁知道路线,直到找到那个route。如果找到了那个知道路线的route,router就派出他去为你导航,直至把你送到目的地。
2.routes:所有的路线route都在这里存放。
3.route:看名字也知道我是单数了,能力有限,我只能存放一条路线图。
认识了我的三位助手,对我也有个简单的认识了,下面进入实操环节。
--------分割线-----------
一:vue-router 初级应用
最终期望:在首页中点击对应的连接进入对应的组件。
在 components中新建三个组件 分别是:A、B、C
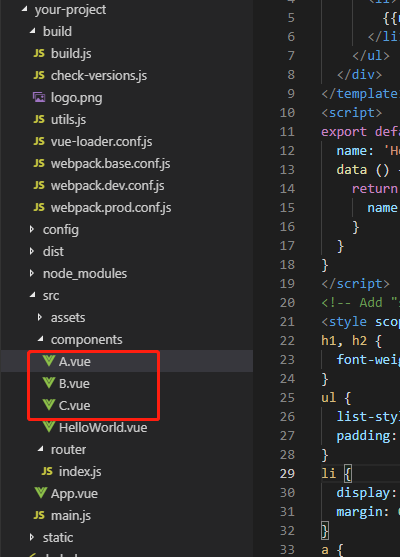
A:
<template>
<div class="hello">
<ul>
<li>
{{name}}
</li>
</ul>
</div>
</template>
<script>
export default {
name: 'HelloWorld',
data () {
return {
name: 'my name is A'
}
}
}
</script>
<!-- Add "scoped" attribute to limit CSS to this component only -->
<style scoped>
</style>
B:
<template>
<div class="hello">
<ul>
<li>
{{name}}
</li>
</ul>
</div>
</template>
<script>
export default {
name: 'HelloWorld',
data () {
return {
name: 'my name is B!'
}
}
}
</script>
<!-- Add "scoped" attribute to limit CSS to this component only -->
<style scoped>
h1, h2 {
font-weight: normal;
}
ul {
list-style-type: none;
padding: 0;
}
li {
display: inline-block;
margin: 0 10px;
}
a {
color: #42b983;
}
</style>
C:
<template>
<div class="hello">
<ul>
<li>
{{name}}
</li>
</ul>
</div>
</template>
<script>
export default {
name: 'HelloWorld',
data () {
return {
name: 'my name is C!'
}
}
}
</script>
<!-- Add "scoped" attribute to limit CSS to this component only -->
<style scoped>
h1, h2 {
font-weight: normal;
}
ul {
list-style-type: none;
padding: 0;
}
li {
display: inline-block;
margin: 0 10px;
}
a {
color: #42b983;
}
</style>
配置路由:
/router/index.js
import Vue from 'vue'

import Router from 'vue-router'

import HelloWorld from '@/components/HelloWorld'
import A from '@/components/A'
import B from '@/components/B'
import C from '@/components/C'
Vue.use(Router)
export default new Router({
routes: [
{
path: '/',
name: 'HelloWorld',
component: HelloWorld
},
{
path: '/A',
name: 'A',
component: A
},
{
path: '/B',
name: 'B',
component: B
},
{
path: '/C',
name: 'C',
component: C
}
]
})
在 HelloWord.vue中引入A、B、C三个组件的连接
<template>
<div class="hello">
<ul>
<li>
<a href="/#/A">A</a>
</li>
<li>
<a href="/#/B">B</a>
</li>
<li>
<a href="/#/C">C</a>
</li>
</ul>
</div>
</template>
<script>
export default {
name: 'HelloWorld',
data () {
return {
msg: 'Welcome to Your Vue.js App'
}
}
}
</script>
<!-- Add "scoped" attribute to limit CSS to this component only -->
<style scoped>
h1, h2 {
font-weight: normal;
}
ul {
list-style-type: none;
padding: 0;
}
li {
display: inline-block;
margin: 0 10px;
}
a {
color: #42b983;
}
</style>
运行命令:npm run dev
打开网站运行一下:

到这里vue-router的初级应用就介绍完了,总结下,有三个部分的知识点
1.定义三个组件 A、B、C
2.在router/index.js文件中引入三个组件,并做相应的路由配置
3.在页面中添加3个a标签,分别跳转到对应的组件
这部分内容比较初级,只是对路由做了简单的演示,通过定义好的路由进入对应的组件,在我们平时开发中,涉及到的需求要比这复杂的多,后面的内容会慢慢加深难度,接下来开始讲解vue-router的进阶版:vue-router 中级应用,这部分内容分三个小节:
1.怎么动态定义路由
2.路由中怎么传递参数
3.路由命名有什么用