1.导入模块 并定义一个验证状态
 1 from PIL import Image, ImageDraw, ImageFont
 2 from django.utils.six import BytesIO
 3
 4 def verify_code(request):
 5     #引入随机函数模块
 6     import random
 7     #定义变量,用于画面的背景色、宽、高
 8     bgcolor = (random.randrange(20, 100), random.randrange(
 9         20, 100), 255)
10     width = 100
11     height = 25
12     #创建画面对象
13     im = Image.new('RGB', (width, height), bgcolor)
14     #创建画笔对象
15     draw = ImageDraw.Draw(im)
16     #调用画笔的point()函数绘制噪点
17     for i in range(0, 100):
18         xy = (random.randrange(0, width), random.randrange(0, height))
19         fill = (random.randrange(0, 255), 255, random.randrange(0, 255))
20         draw.point(xy, fill=fill)
21     #定义验证码的备选值
22     str1 = 'ABCD123EFGHIJK456LMNOPQRS789TUVWXYZ0'
23     #随机选取4个值作为验证码
24     rand_str = ''
25     for i in range(0, 4):
26         rand_str += str1[random.randrange(0, len(str1))]
27     #构造字体对象,ubuntu的字体路径为“/usr/share/fonts/truetype/freefont”
28     font = ImageFont.truetype('FreeMono.ttf', 23)
29     #构造字体颜色
30     fontcolor = (255, random.randrange(0, 255), random.randrange(0, 255))
31     #绘制4个字
32     draw.text((5, 2), rand_str[0], font=font, fill=fontcolor)
33     draw.text((25, 2), rand_str[1], font=font, fill=fontcolor)
34     draw.text((50, 2), rand_str[2], font=font, fill=fontcolor)
35     draw.text((75, 2), rand_str[3], font=font, fill=fontcolor)
36     #释放画笔
37     del draw
38     #存入session,用于做进一步验证
39     request.session['verifycode'] = rand_str
40     #内存文件操作
41     buf = BytesIO()
42     #将图片保存在内存中,文件类型为png
43     im.save(buf, 'png')
44     #将内存中的图片数据返回给客户端,MIME类型为图片png
45     return HttpResponse(buf.getvalue(), 'image/png')
2.在views 中进行映射
re_path(r'^verify_code/$', views.verify_code),

3.在网页中直接放入img中
<img src="/verify_code/" alt="验证码">

4.使用ajax 获取验证密码和账号
 1 <!DOCTYPE html>
 2 <html lang="en">
 3 <head>
 4     <meta charset="UTF-8">
 5     <title>login</title>
 6 </head>
 7 <body>
 8 <h1 class="show"></h1>
 9
10 <input type="text" id = username value="{{username}}"> <br>
11 <input type="text" id = password> <br>
12 <input type="text" id = yum> <a>请输入验证码</a> <br>
13 <img src="/verify_code/" alt="验证码">
14 <input type="button" id="Ajax" value="ajax登陆"> <br>
15 <input type="checkbox" id = "ow" name="ow"> 记住密码<br>
16 <a href="/get_cookies">点击到获取cookies</a>
17 </body>
18
19 <script src="/static/index/js/jquery-3.3.1.min.js"></script>
20
21 </html>
22
23 <script>
24     $(function () {
25         $('#Ajax').click(function () {
26                 username = $('#username').val();
27                 password = $('#password').val();
28                 ow = $("#ow").val();
29                 yum = $('#yum').val();
30                 $.ajax({
31                     'url': '/loginajax',
32                     'type': 'post',
33                     'data': {'username': username, 'password': password,
34                                 "yum":yum,},
35                     'success':function(data){
36                     //登陆成功返回1
37                     //登陆失败返回0
38                         //验证失败返回3
39                     if (data.res == 1) {
40                         $('.show').show().html('登陆成功')
41                     } else if (data.res == 0) {
42                         $('.show').show().html('登陆失败')
43                     } else if (data.res == 3){
44                         $('.show').show().html('验证码输入失败')
45                     }
46                 }
47                 });
48             });
49     });
50
51
52 </script>
在上面 ajax 中 向服务器发送了 账号密码 和 验证码
在验证函数中
1     yzm = request.POST.get('yum')      # 获取传入的 验证码
2     vaue = request.session['verifycode']  # 生成图片的时候 把验证码存到了session 中
3     if yzm !=vaue:                #如果不相等的话会返回 3   HTML ajax 会显示验证错误
4         return JsonResponse({'res':3})
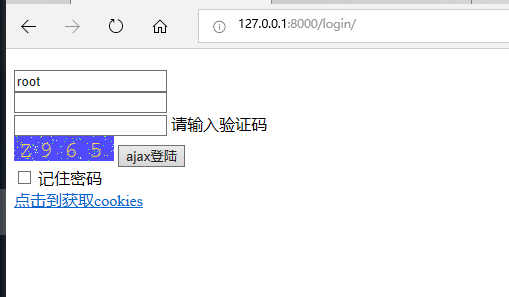
成果图