前言:
说句实话,web api成型的项目我还没有做,但是还是想介绍一下web api ,本博客适合初识的朋友,大佬就可以让开了!
1、WEB API是个啥
WEB API是一种开发系统间接口、设备接口的技术,他是基于http协议的,请求和返回格式结果默认是json格式!
以上是一个简单的定义,听着是不是费劲,我就举一个简单的例子:https://blog.csdn.net/jerry11112 这个是我的csdn博客链接首页,他就是一个接口,通过这个接口我们可以访问我的博客页面!我们要想访问这个页面,是需要有网络的,所以我们访问的页面就是基于http请求的 ! 那么关键之处来了:我们用webapi就可以开发基于http协议的博客链接https://blog.csdn.net/jerry11112 ! 就是说这个博客链接就是地址,就可以试用webapi来开发!
以上因为有一些个人理解,可能有一些漏语,如有问题,欢迎指出
2、Web API实现前后端分离
首先引入一个问题,就是什么是前后端分离,前后端分离就是说我的相同的一个后端可以对应各种前端!后端可以自己独立的运行,根本不受前端的任何影响!前后端开发可以并行进行,如果是在服务器端,就应该被称之为后端,代表着你看不见,摸不着。而如果运行在用户端,就应该被称之为前端,代表你是可以看得到的。
3、webAPI前后端分离详细demo
(1)后端:
1、先建立一个空的web api (右击解决方案----添加-----新建项目----web–asp.net.Web应用程序-----选择空----底下勾选web api)

2、在Model下建立一个Person类
public class Product
    {
        public int Id { get; set; }
        public string Name { get; set; }
        public string Sex { get; set; }
        public decimal Age { get; set; }

    }
3、在Controllers下建立一个WebApiController
using System.Collections.Generic;
using System.Linq;
using System.Net;
using System.Web.Http;
using web_api_demo.Models;

namespace web_api_demo.Controllers
{
    public class WebApiController : ApiController
    {
        Person[] person = new Person[]
        {
            new Person { Id = 1, Name = "李光", Sex = "男", Age = 18 },
             new Person { Id = 1, Name = "东月", Sex = "女", Age = 18 },
              new Person { Id = 1, Name = "小胖", Sex = "男", Age = 22 },
               new Person { Id = 1, Name = "大兵兵", Sex = "男", Age = 23 },

        };
        public IEnumerable<Person> GetAllProducts()
        {
            return person;
        }
        public Person GetProductById(int id)
        {
            var product = person.FirstOrDefault((p) => p.Id == id);
            if (product == null)
            {
                throw new HttpResponseException(HttpStatusCode.NotFound);
            }
            return product;
        }
    }
}
4、配置路由
在给出代码之前我们需要在我们的后端安装一个东西,这个东西是解决跨域的,点击管理Nuget程序包,如图
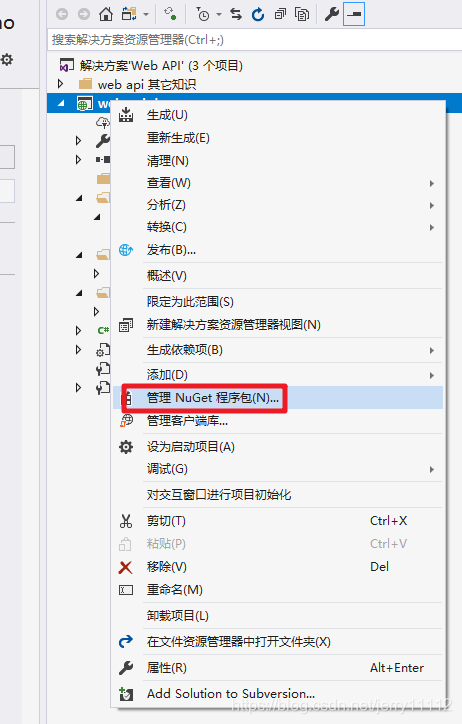
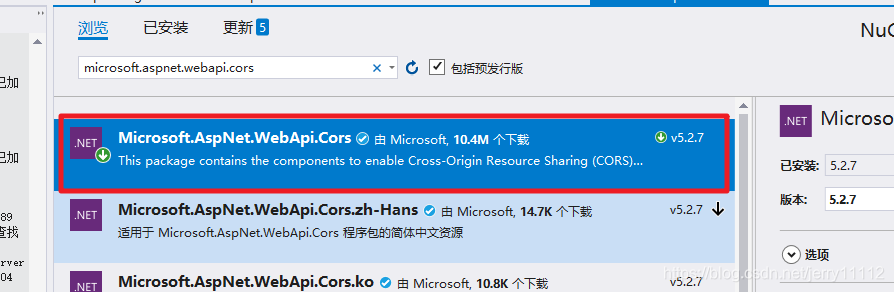
搜索microsoft.aspnet.webapi.cors 然后进行安装
在app_Start文件夹下,打开WebApiConfig,我们在了里边进行配置!
这里我们分别解决两个问题分别是跨域问题与将xml转换成json串格式
using Newtonsoft.Json.Serialization;
using System.Web.Http;
using System.Web.Http.Cors;

namespace web_api_demo
{
    public static class WebApiConfig
    {
        public static void Register(HttpConfiguration config)
        {


            //跨域配置
            config.EnableCors(new EnableCorsAttribute("*", "*", "*"));

            // Web API 路由
            config.MapHttpAttributeRoutes();

            config.Routes.MapHttpRoute(
                name: "DefaultApi",
                routeTemplate: "api/{controller}/{id}",   //如果想要和MVC一样,我们可以在controller加上action
                defaults: new { id = RouteParameter.Optional }
            );

    //将xml转换成json
            config.Formatters.Remove(config.Formatters.XmlFormatter);
            var jsonFormatter = config.Formatters.JsonFormatter;
            jsonFormatter.SerializerSettings.Formatting = Newtonsoft.Json.Formatting.Indented;
            jsonFormatter.SerializerSettings.ContractResolver = new CamelCasePropertyNamesContractResolver();
            //说明:第一行是去掉默认的XML格式,这样输出数据就会以json格式显示,第三行是将输出结果缩进显示,第四行则是将字段名称改成camelCase格式,即postalCode这样的json统一格式。然后我们再次运行,发现结果就是我们想要的了。
        }
    }
}
后端代码完成,我们先进行一个简单的测试:
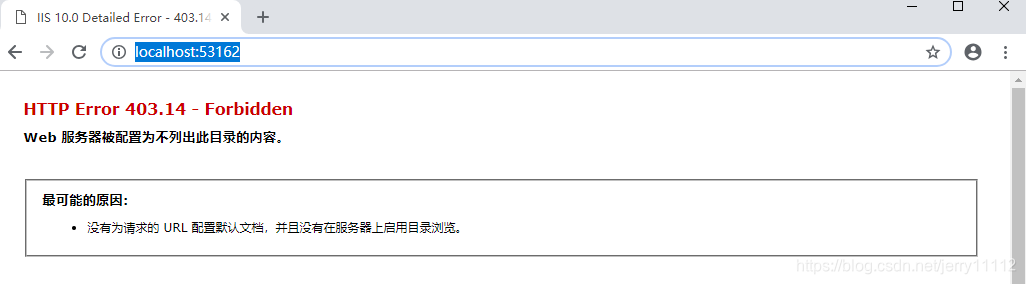
5、运行:
出现下面的界面,
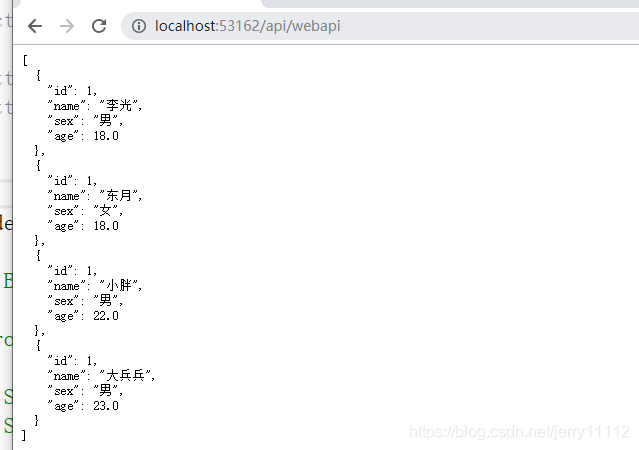
 然后在后边输入/api/webapi ,出现下图,证明咱们的后台没有问题了
(2)前端
新建立一个空网站,建立一个简单的html页面,页面代码如下

<!DOCTYPE html>
<html>
<head>
    <meta charset="utf-8" />
    <title></title>
</head>
<body>

    <script src="jquery.js"></script>
    <script>
        function getCategory() {
            //获取所有商品类别
            $.ajax({
                type: "GET",
                url: "http://localhost:53162/api/webapi",         // controller里面的方法地址
                dataType: "json",
                success: function (result) {
                    console.log(result)
                }
            });
        };

    </script>

    <div>
        <input id="Button1" type="button" value="button" onclick="getCategory()" />
    </div>
</body>
</html>
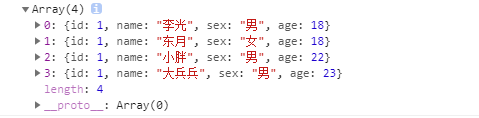
运行,点击button 按 F12 打开页面的控制台: 出现如下数据,证明我们成功的获取了后台的数据
现在前台想要获取一个数据。此时将ajax中的内容换成如下代码
            //获取所有商品类别
            $.ajax({
                type: "GET",
                url: "http://localhost:53162/api/webapi/1",         // controller里面的方法地址
                dataType: "json",
                contentType: 'application/json;',
                success: function (data) {
                    alert(data.sex)
                }
            });
运行:从后端获得数据完毕
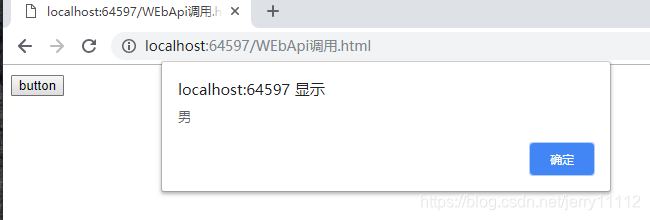
看到上边的例子,我们不难发现后端给了前端一个URL,前端就可以获得相应的数据!