摘要:本文要用Maven来构建一个多模块的web项目
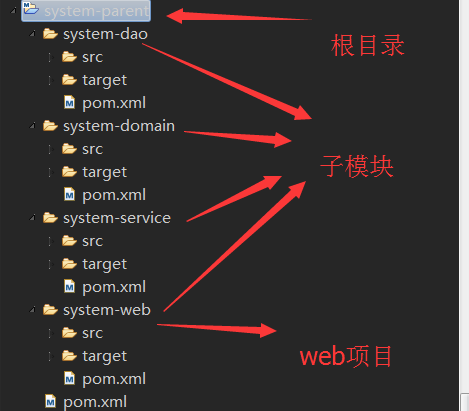
项目结构如下:
system-parent
|----pom.xml
|----system-domain
|----pom.xml
|----system-dao
|----pom.xml
|----system-service
|----pom.xml
|----system-web
|----pom.xml
一、创建system-parent项目
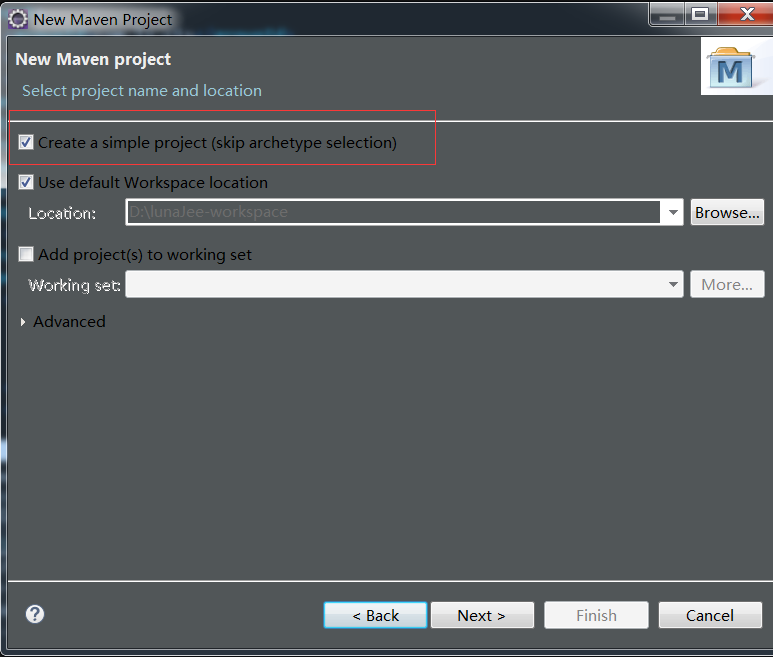
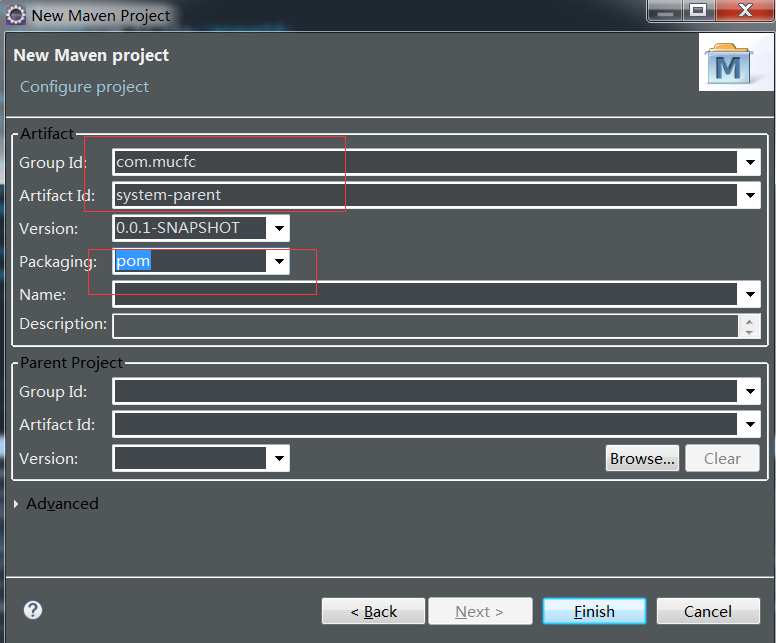
创建system-parent,用来给各个子模块继承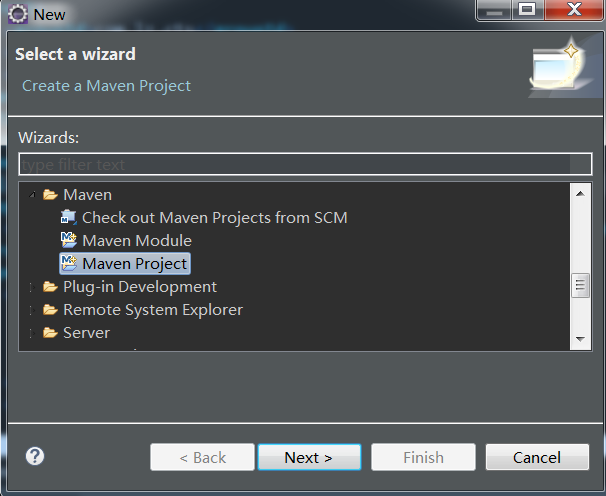
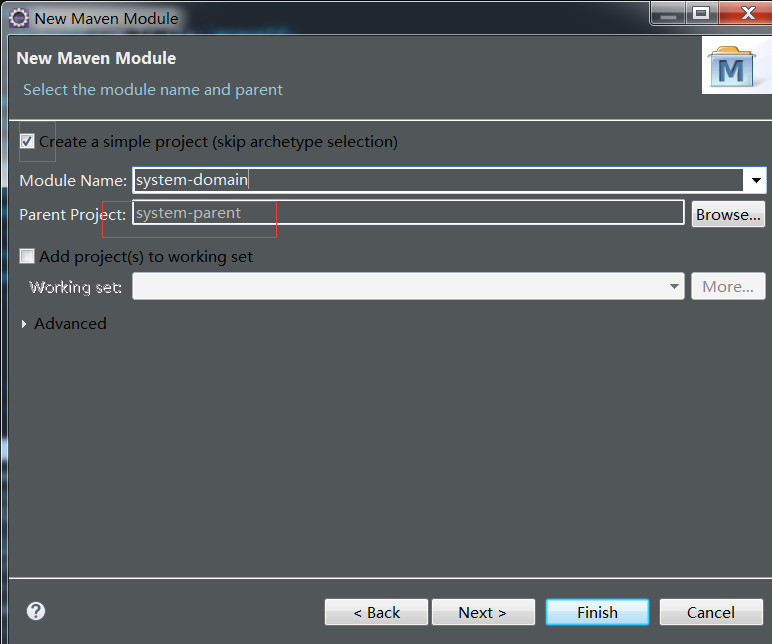
勾选create a simple...
注意要选pom
创建好的结构如下,把src文件删除掉

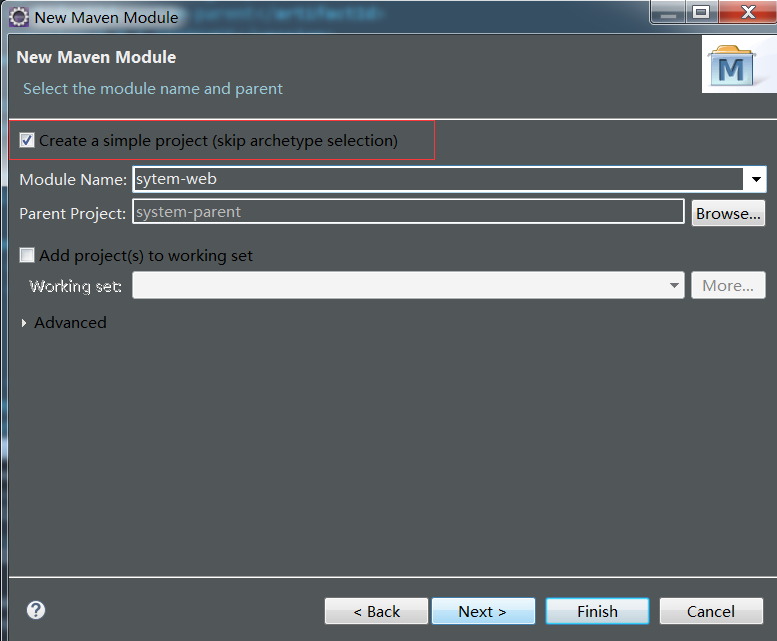
二、创建sytem-domain模块
项目右键-》new->other
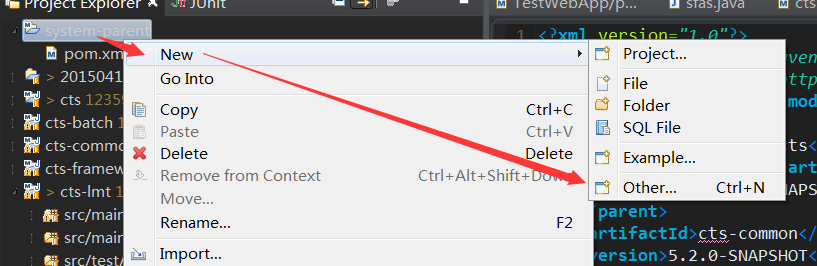
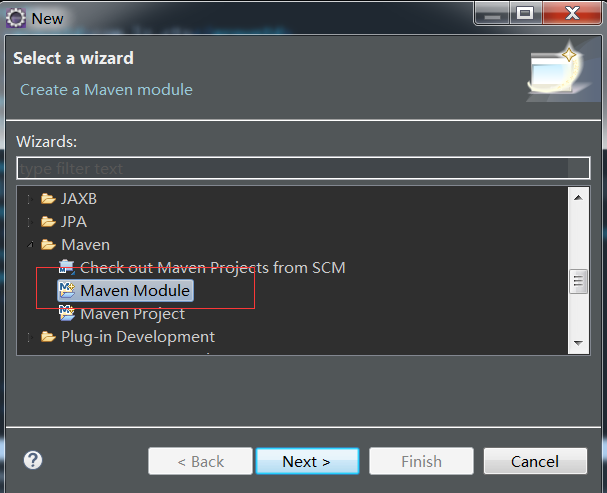
注意选择maven module
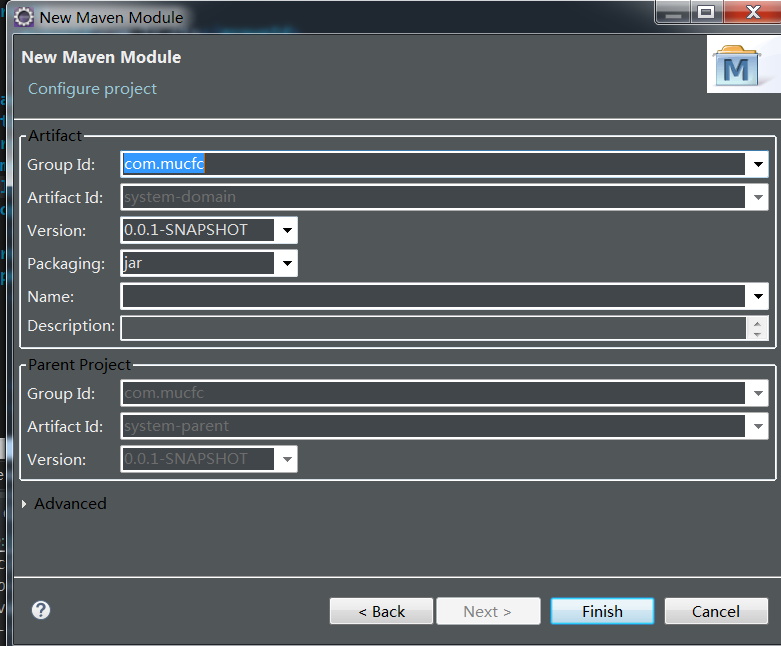
packageing,选择jar,因为这是要打包成jar给别的模块用的
子模块添加好后如下
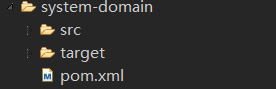
打开system-domain项目pom.xml文件,改成如下
-
<project xmlns="http://maven.apache.org/POM/4.0.0" xmlns:xsi="http://www.w3.org/2001/XMLSchema-instance" xsi:schemaLocation="http://maven.apache.org/POM/4.0.0 http://maven.apache.org/xsd/maven-4.0.0.xsd">
-
<modelVersion>4.0.0
</modelVersion>
-
<parent>
-
<groupId>com.mucfc
</groupId>
-
<artifactId>system-parent
</artifactId>
-
<version>0.0.1-SNAPSHOT
</version>
-
</parent>
-
-
<artifactId>system-domain
</artifactId>
-
<packaging>jar
</packaging>
-
-
<name>system-domain
</name>
-
<url>http://maven.apache.org
</url>
-
</project>
-
<modules>
-
<module>system-domain
</module>
-
</modules>
表明子模块添加成功
三、创建system-dao模块
步骤和2一样,命名不同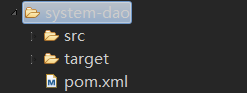
然后把再打开system-dao的项目下的pom文件,修改成如下:
-
<project xmlns="http://maven.apache.org/POM/4.0.0" xmlns:xsi="http://www.w3.org/2001/XMLSchema-instance" xsi:schemaLocation="http://maven.apache.org/POM/4.0.0 http://maven.apache.org/xsd/maven-4.0.0.xsd">
-
<modelVersion>4.0.0
</modelVersion>
-
<parent>
-
<groupId>com.mucfc
</groupId>
-
<artifactId>system-parent
</artifactId>
-
<version>0.0.1-SNAPSHOT
</version>
-
</parent>
-
<artifactId>system-dao
</artifactId>
-
<packaging>jar
</packaging>
-
-
<name>system-dao
</name>
-
<url>http://maven.apache.org
</url>
-
<dependencies>
-
<!--system-dao需要使用到system-domain中的类,所以需要添加对system-domain模块的依赖-->
-
<dependency>
-
<groupId>com.mucfc
</groupId>
-
<artifactId>system-domain
</artifactId>
-
<version>${project.version}
</version>
-
</dependency>
-
</dependencies>
-
</project>
四、创建system-service模块
步骤和2一样,命名不同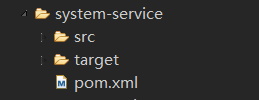
然后把再打开system-service的项目下的pom文件,修改成如下:
-
<project xmlns="http://maven.apache.org/POM/4.0.0" xmlns:xsi="http://www.w3.org/2001/XMLSchema-instance" xsi:schemaLocation="http://maven.apache.org/POM/4.0.0 http://maven.apache.org/xsd/maven-4.0.0.xsd">
-
<modelVersion>4.0.0
</modelVersion>
-
<parent>
-
<groupId>com.mucfc
</groupId>
-
<artifactId>system-parent
</artifactId>
-
<version>0.0.1-SNAPSHOT
</version>
-
</parent>
-
-
<artifactId>system-service
</artifactId>
-
<packaging>jar
</packaging>
-
-
<name>system-service
</name>
-
<url>http://maven.apache.org
</url>
-
-
<dependencies>
-
<!--system-service依赖system-dao和system-domain但是我们只需添加system-dao的依赖即可,因为system-dao已经依赖了system-domain -->
-
<dependency>
-
<groupId>com.mucfc
</groupId>
-
<artifactId>system-dao
</artifactId>
-
<version>${project.version}
</version>
-
</dependency>
-
</dependencies>
-
</project>
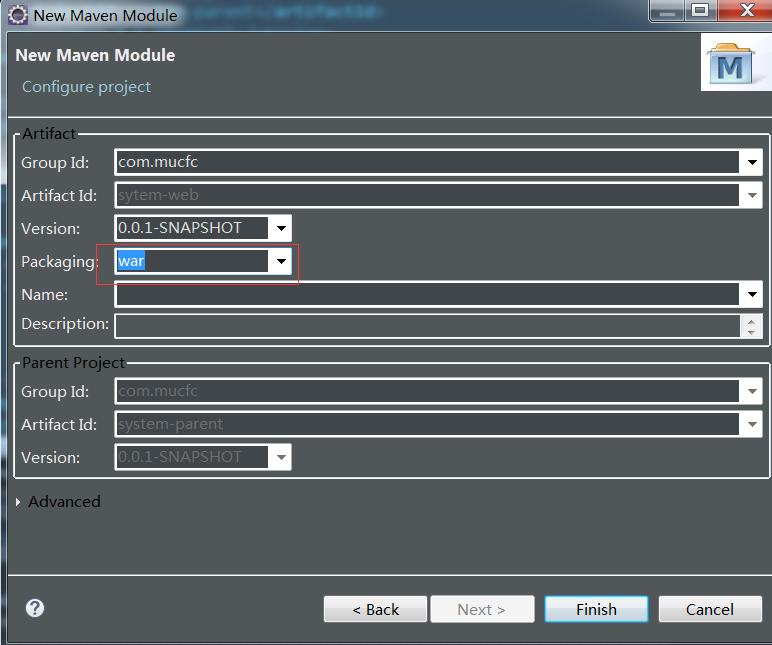
五、创建system-web模块
web项目要打包成war文件,所以有个地方要改下
这里记得要选war文件
把pom文件改成如下:
-
<project xmlns="http://maven.apache.org/POM/4.0.0" xmlns:xsi="http://www.w3.org/2001/XMLSchema-instance" xsi:schemaLocation="http://maven.apache.org/POM/4.0.0 http://maven.apache.org/xsd/maven-4.0.0.xsd">
-
<modelVersion>4.0.0
</modelVersion>
-
<parent>
-
<groupId>com.mucfc
</groupId>
-
<artifactId>system-parent
</artifactId>
-
<version>0.0.1-SNAPSHOT
</version>
-
</parent>
-
-
<artifactId>system-web
</artifactId>
-
<packaging>war
</packaging>
-
-
<name>system-web
</name>
-
<url>http://maven.apache.org
</url>
-
-
<dependencies>
-
<dependency>
-
<groupId>com.mucfc
</groupId>
-
<artifactId>system-service
</artifactId>
-
<version>${project.version}
</version>
-
</dependency>
-
</dependencies>
-
</project>
六、整体目录如下
六、编译运行项目
经过上面的五个步骤,相关的模块全部创建完成,怎么运行起来呢。由于最终运行的是system-web模块,具体请看这里我的另一个博文Maven Tomcat7自动部署
摘要:本文要用Maven来构建一个多模块的web项目
项目结构如下:
system-parent
|----pom.xml
|----system-domain
|----pom.xml
|----system-dao
|----pom.xml
|----system-service
|----pom.xml
|----system-web
|----pom.xml
一、创建system-parent项目
创建system-parent,用来给各个子模块继承勾选create a simple...
注意要选pom
创建好的结构如下,把src文件删除掉
二、创建sytem-domain模块
项目右键-》new->other
注意选择maven module
packageing,选择jar,因为这是要打包成jar给别的模块用的
子模块添加好后如下
打开system-domain项目pom.xml文件,改成如下
-
<project xmlns="http://maven.apache.org/POM/4.0.0" xmlns:xsi="http://www.w3.org/2001/XMLSchema-instance" xsi:schemaLocation="http://maven.apache.org/POM/4.0.0 http://maven.apache.org/xsd/maven-4.0.0.xsd">
-
<modelVersion>4.0.0
</modelVersion>
-
<parent>
-
<groupId>com.mucfc
</groupId>
-
<artifactId>system-parent
</artifactId>
-
<version>0.0.1-SNAPSHOT
</version>
-
</parent>
-
-
<artifactId>system-domain
</artifactId>
-
<packaging>jar
</packaging>
-
-
<name>system-domain
</name>
-
<url>http://maven.apache.org
</url>
-
</project>
-
<modules>
-
<module>system-domain
</module>
-
</modules>
表明子模块添加成功
三、创建system-dao模块
步骤和2一样,命名不同然后把再打开system-dao的项目下的pom文件,修改成如下:
-
<project xmlns="http://maven.apache.org/POM/4.0.0" xmlns:xsi="http://www.w3.org/2001/XMLSchema-instance" xsi:schemaLocation="http://maven.apache.org/POM/4.0.0 http://maven.apache.org/xsd/maven-4.0.0.xsd">
-
<modelVersion>4.0.0
</modelVersion>
-
<parent>
-
<groupId>com.mucfc
</groupId>
-
<artifactId>system-parent
</artifactId>
-
<version>0.0.1-SNAPSHOT
</version>
-
</parent>
-
<artifactId>system-dao
</artifactId>
-
<packaging>jar
</packaging>
-
-
<name>system-dao
</name>
-
<url>http://maven.apache.org
</url>
-
<dependencies>
-
<!--system-dao需要使用到system-domain中的类,所以需要添加对system-domain模块的依赖-->
-
<dependency>
-
<groupId>com.mucfc
</groupId>
-
<artifactId>system-domain
</artifactId>
-
<version>${project.version}
</version>
-
</dependency>
-
</dependencies>
-
</project>
四、创建system-service模块
步骤和2一样,命名不同然后把再打开system-service的项目下的pom文件,修改成如下:
-
<project xmlns="http://maven.apache.org/POM/4.0.0" xmlns:xsi="http://www.w3.org/2001/XMLSchema-instance" xsi:schemaLocation="http://maven.apache.org/POM/4.0.0 http://maven.apache.org/xsd/maven-4.0.0.xsd">
-
<modelVersion>4.0.0
</modelVersion>
-
<parent>
-
<groupId>com.mucfc
</groupId>
-
<artifactId>system-parent
</artifactId>
-
<version>0.0.1-SNAPSHOT
</version>
-
</parent>
-
-
<artifactId>system-service
</artifactId>
-
<packaging>jar
</packaging>
-
-
<name>system-service
</name>
-
<url>http://maven.apache.org
</url>
-
-
<dependencies>
-
<!--system-service依赖system-dao和system-domain但是我们只需添加system-dao的依赖即可,因为system-dao已经依赖了system-domain -->
-
<dependency>
-
<groupId>com.mucfc
</groupId>
-
<artifactId>system-dao
</artifactId>
-
<version>${project.version}
</version>
-
</dependency>
-
</dependencies>
-
</project>
五、创建system-web模块
web项目要打包成war文件,所以有个地方要改下
这里记得要选war文件
把pom文件改成如下:
-
<project xmlns="http://maven.apache.org/POM/4.0.0" xmlns:xsi="http://www.w3.org/2001/XMLSchema-instance" xsi:schemaLocation="http://maven.apache.org/POM/4.0.0 http://maven.apache.org/xsd/maven-4.0.0.xsd">
-
<modelVersion>4.0.0
</modelVersion>
-
<parent>
-
<groupId>com.mucfc
</groupId>
-
<artifactId>system-parent
</artifactId>
-
<version>0.0.1-SNAPSHOT
</version>
-
</parent>
-
-
<artifactId>system-web
</artifactId>
-
<packaging>war
</packaging>
-
-
<name>system-web
</name>
-
<url>http://maven.apache.org
</url>
-
-
<dependencies>
-
<dependency>
-
<groupId>com.mucfc
</groupId>
-
<artifactId>system-service
</artifactId>
-
<version>${project.version}
</version>
-
</dependency>
-
</dependencies>
-
</project>
六、整体目录如下
六、编译运行项目
经过上面的五个步骤,相关的模块全部创建完成,怎么运行起来呢。由于最终运行的是system-web模块,具体请看这里我的另一个博文Maven Tomcat7自动部署