一、百度地图
1.1、申请key
要想使用百度地图SDK,就必须申请一个百度地图的api key。申请流程很简单。
首先注册成为百度的开发者,然后打开http://lbsyun.baidu.com/apiconsole/key 这个网址,添加应用:
创建应用最重要的一步是【安全码】。安全码所由【数字签名】和【;】以及【包名】组成。包名就是创建的项目的包结构,
是指AndroidManifest.xml中的mainfest标签下的package的值。
数字签名指android的签名证书的SHA1值。打开eclipse的preferences菜单,在Android的【Build】中可以看到SHA1的值,如下图:

1.2、下载SDK开发包
打开http://developer.baidu.com/map/index.php?title=androidsdk/sdkandev-download 网址下载sdk,可以全部下载或自定义下载。从V2.3.0之后的版本,
SDK的开发包以可定制的形式提供下载,用户可以根据自己的项目需要勾选相应的功能下载对应的SDK开发包。
1.3、在android项目中引用百度SDK
a) 将开放包中的jar包和so文件添加到libs文件下。

b) 在AndroidManifest.xml中添加开放秘钥和所需权限。
<application
        android:allowBackup="true"
        android:icon="@drawable/ic_launcher"
        android:label="@string/app_name"
        android:theme="@style/AppTheme" >
        <meta-data
            android:name="com.baidu.lbsapi.API_KEY"
            android:value="填写你申请的AK" />
权限
<!-- 百度API所需权限 -->
<uses-permission android:name="android.permission.GET_ACCOUNTS" />
<uses-permission android:name="android.permission.USE_CREDENTIALS" />
<uses-permission android:name="android.permission.MANAGE_ACCOUNTS" />
<uses-permission android:name="android.permission.AUTHENTICATE_ACCOUNTS" />
<uses-permission android:name="android.permission.ACCESS_NETWORK_STATE" />
<uses-permission android:name="android.permission.INTERNET" />
<uses-permission android:name="com.android.launcher.permission.READ_SETTINGS" />
<uses-permission android:name="android.permission.CHANGE_WIFI_STATE" />
<uses-permission android:name="android.permission.ACCESS_WIFI_STATE" />
<uses-permission android:name="android.permission.READ_PHONE_STATE" />
<uses-permission android:name="android.permission.WRITE_EXTERNAL_STORAGE" />
<uses-permission android:name="android.permission.BROADCAST_STICKY" />
<uses-permission android:name="android.permission.WRITE_SETTINGS" />
<uses-permission android:name="android.permission.READ_PHONE_STATE" />
c) 在布局文件中添加地图控件:
<com.baidu.mapapi.map.MapView
        android:id="@+id/bmapview"
        android:layout_width="match_parent"
        android:layout_height="match_parent"
        android:clickable="true" />
d) 在应用程序创建时初始化SDK引用的Context全局变量。
@Override
protected void onCreate(Bundle savedInstanceState) {
    super.onCreate(savedInstanceState);
    requestWindowFeature(Window.FEATURE_NO_TITLE);
    //
    SDKInitializer.initialize(getApplicationContext());
    setContentView(R.layout.activity_main);
    init();
}
这里需要注意一下:initialize方法中必须传入的是ApplicationContext,传入this或MAinActivity.this会报运行时异常,所以百度建议把该方法放到Application的初始化方法中。

然后重写activity的生命周期的几个方法来管理地图的生命周期。在activity的onResume、onPause、onDestory方法中
分别执行mapview的onReusme、onPause、onDestory方法。
public class MainActivity extends Activity {
    // 百度地图控件
    private MapView mMapView = null;
    // 百度地图对象
    private BaiduMap bdMap;
    @Override
    protected void onCreate(Bundle savedInstanceState) {
        super.onCreate(savedInstanceState);
        requestWindowFeature(Window.FEATURE_NO_TITLE);
        //
        SDKInitializer.initialize(getApplicationContext());
        setContentView(R.layout.activity_main);
        init();
    }
    /**
     * 初始化方法
     */
    private void init() {
        mMapView = (MapView) findViewById(R.id.bmapview);
    }
    @Override
    protected void onResume() {
        super.onResume();
        mMapView.onResume();
    }
    @Override
    protected void onPause() {
        super.onPause();
        mMapView.onPause();
    }
    @Override
    protected void onDestroy() {
        mMapView.onDestroy();
        mMapView = null;
        super.onDestroy();
    }
}
完成以上步骤,此时就可以完成一个简单的”Hello Map“程序了。
1.4、普通地图和卫星地图切换
百度地图将地图的类型分为两种:普通矢量地图和卫星图
mMapView = (MapView) findViewById(R.id.bmapView);
mBaiduMap = mMapView.getMap();
//普通地图
mBaiduMap.setMapType(BaiduMap.MAP_TYPE_NORMAL);
//卫星地图
mBaiduMap.setMapType(BaiduMap.MAP_TYPE_SATELLITE);
1.5、显示实时交通图(路况图)
//开启交通图
mBaiduMap.setTrafficEnabled(true);
1.6、显示热力图
热力图就是以特殊高亮的形式显示访客热衷的页面区域和访客所在的地理区域的图示。通俗来说就是显示地图上某一块区域的人的密集程度。

//开启热力图
mBaiduMap.setBaiduHeatMapEnabled(true);
二、高德地图
1.1、环境配置
1、SDK下载
从网站相关下载下载开发包并解压。
- 3D地图包解压后得到:3D地图显示包“AMap_3DMap_VX.X.X_时间.jar”和库文件夹(包含armeabi、arm64-v8a等库文件)。
- 2D地图包解压后得到:2D地图显示包“AMap_2DMap_VX.X.X_时间.jar ”
- 搜索包解压后得到:“AMap_Search__VX.X.X_时间.jar ”
为保证服务可以正常使用,您需要注册成为开发者并申请Key。每个帐户,最多可以申请 30 个 Key。申请流程请参照获取密钥。
2、配置工程
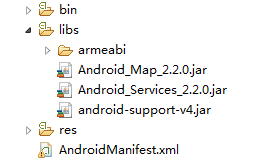
步骤1:开发工程中新建“ libs ”文件夹,将地图包(2D或3D)、搜索包拷贝到 libs 的根目录下。若选择3D地图包,还需要将各库文件夹一起拷贝。拷贝完成后的工程目录(以3D V2.2.0为例)如图所示:
注意:若您在 Eclipse 上使用 adt22 版本插件,则需要在 Eclipse 上进行如下配置:
选中 Eclipse 的工程,右键选择 “Properties > Java Build Path > Order and Export”,勾选 “Android Private Libraries”。
3、代码混淆
在生成apk进行代码混淆时进行如下配置(如果爆出warning,在报出warning的包加入类似的语句:-dontwarn 包名)
3D 地图
    -keep   class com.amap.api.mapcore.**{*;}
    -keep   class com.amap.api.maps.**{*;}
    -keep   class com.autonavi.amap.mapcore.*{*;}

定位
   -keep class com.amap.api.location.**{*;}
   -keep class com.amap.api.fence.**{*;}
   -keep class com.autonavi.aps.amapapi.model.**{*;}

搜索
    -keep   class com.amap.api.services.**{*;}

2D地图
    -keep class com.amap.api.maps2d.**{*;}
    -keep class com.amap.api.mapcore2d.**{*;}

导航
    -keep class com.amap.api.navi.**{*;}
    -keep class com.autonavi.**{*;}
1.2、显示地图
Hello AMap完成地图显示功能,是地图应用的开始。通过以下几步操作,即可在您的应用中使用高德地图SDK:
第一步:添加用户key 在工程的“ AndroidManifest.xml ”文件如下代码中添加您的用户 Key。
<application android:icon="@drawable/icon" android:label="@string/app_name">
         <meta-data android:name="com.amap.api.v2.apikey" android:value="请输入您的用户Key"></meta-data>

         <activity android:name="com.amap.map3d.demo.MainActivity">
             <intent-filter>
                <action android:name="android.intent.action.MAIN">
                <category android:name="android.intent.category.LAUNCHER">
             </category></action></intent-filter>
         </activity>
</application>
第二步:添加所需权限 在工程的“ AndroidManifest.xml ”文件中进行添加,请直接拷贝。
//地图包、搜索包需要的基础权限

    <uses-permission android:name="android.permission.INTERNET" />
    <uses-permission android:name="android.permission.WRITE_EXTERNAL_STORAGE" />
    <uses-permission android:name="android.permission.ACCESS_NETWORK_STATE" />
    <uses-permission android:name="android.permission.ACCESS_WIFI_STATE" />
    <uses-permission android:name="android.permission.READ_PHONE_STATE" />
    <uses-permission android:name="android.permission.ACCESS_COARSE_LOCATION" />

    //定位包、导航包需要的额外权限(注:基础权限也需要)
    <uses-permission android:name="android.permission.ACCESS_FINE_LOCATION" />
    <uses-permission android:name="android.permission.ACCESS_LOCATION_EXTRA_COMMANDS" />
    <uses-permission android:name="android.permission.ACCESS_MOCK_LOCATION" />
    <uses-permission android:name="android.permission.CHANGE_WIFI_STATE" />
第三步:在布局xml文件中添加地图控件
<com.amap.api.maps.MapView
        android:id="@+id/map"
        android:layout_width="match_parent"
        android:layout_height="match_parent">
</com.amap.api.maps.MapView>
第四步,创建地图Activity,管理地图生命周期
public class MainActivity extends Activity {
  MapView mMapView = null;
  @Override
  protected void onCreate(Bundle savedInstanceState) {
    super.onCreate(savedInstanceState);
    setContentView(R.layout.activity_main);
    //获取地图控件引用
    mMapView = (MapView) findViewById(R.id.map);
    //在activity执行onCreate时执行mMapView.onCreate(savedInstanceState),实现地图生命周期管理
    mMapView.onCreate(savedInstanceState);
  }
  @Override
  protected void onDestroy() {
    super.onDestroy();
    //在activity执行onDestroy时执行mMapView.onDestroy(),实现地图生命周期管理
    mMapView.onDestroy();
  }
 @Override
 protected void onResume() {
    super.onResume();
    //在activity执行onResume时执行mMapView.onResume (),实现地图生命周期管理
    mMapView.onResume();
    }
 @Override
 protected void onPause() {
    super.onPause();
    //在activity执行onPause时执行mMapView.onPause (),实现地图生命周期管理
    mMapView.onPause();
    }
 @Override
 protected void onSaveInstanceState(Bundle outState) {
    super.onSaveInstanceState(outState);
    //在activity执行onSaveInstanceState时执行mMapView.onSaveInstanceState (outState),实现地图生命周期管理
    mMapView.onSaveInstanceState(outState);
  }

}
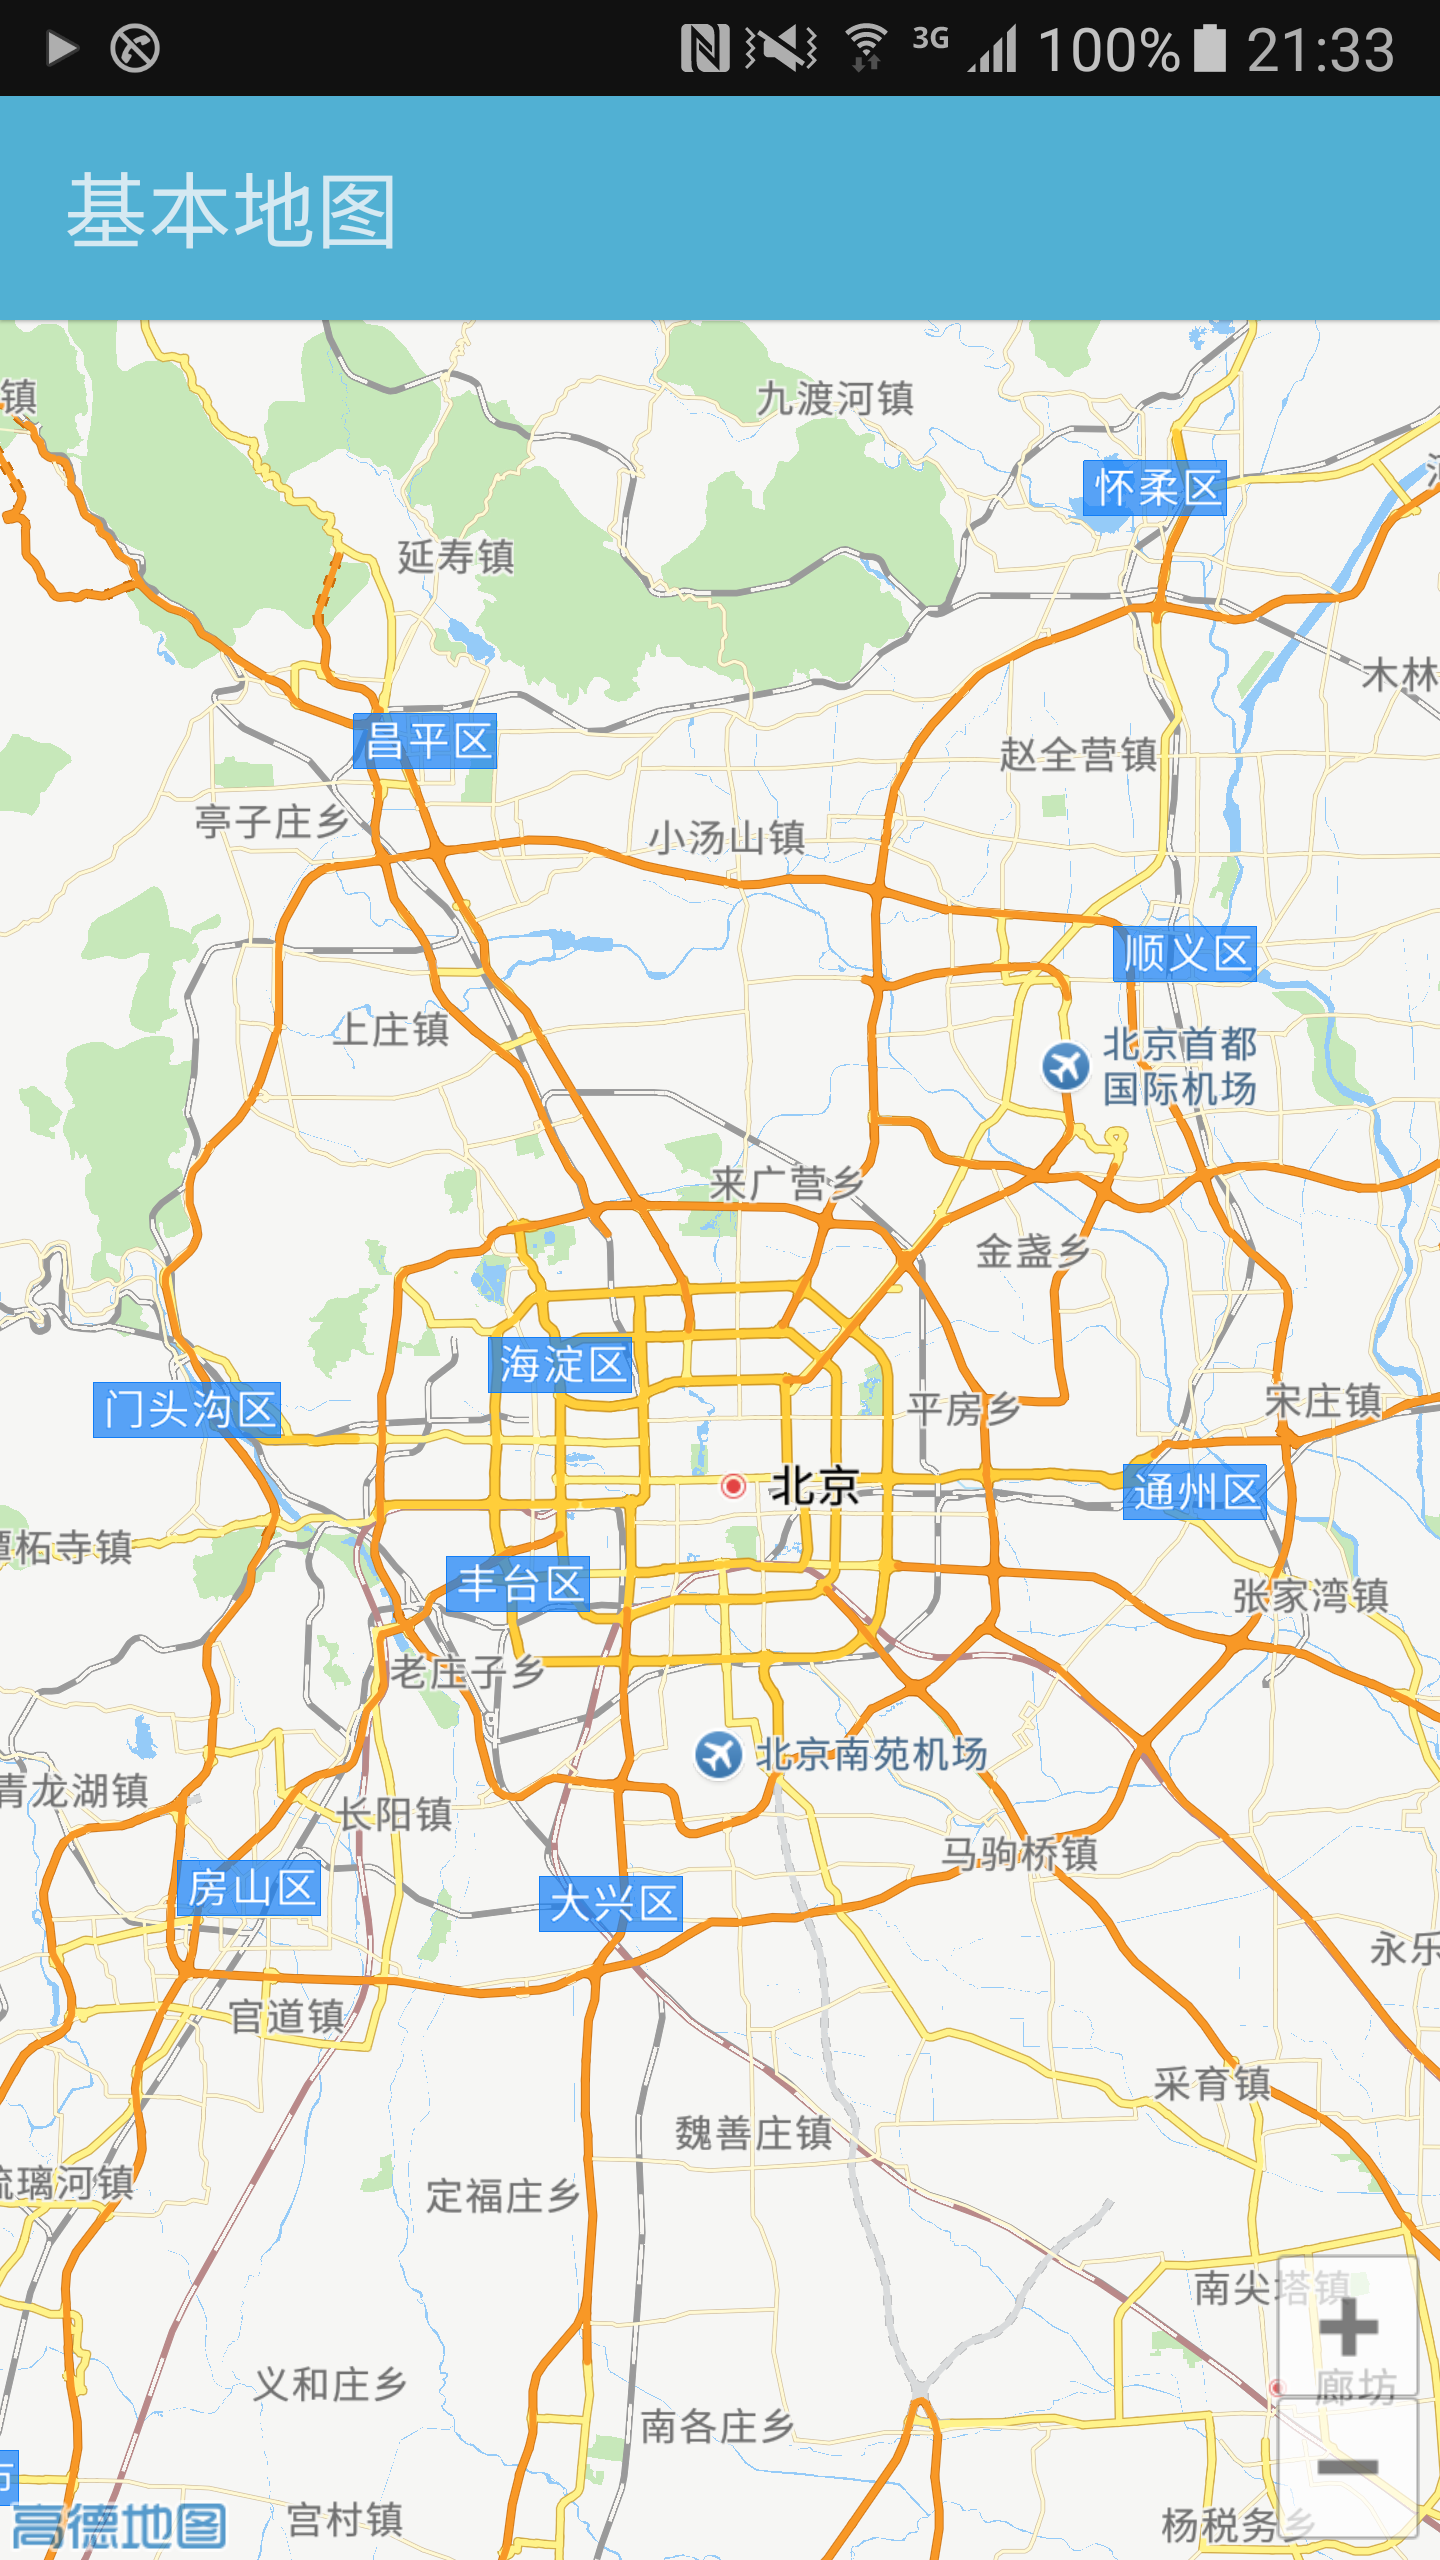
编译运行,效果如下图:
1.2、地图定位
1、定位效果
地图支持定位效果如下,可以根据应用实际场景进行选择。
-
定位模式,即只第一次定位到地图中心点显示
-
跟随模式,即每次定位结果地图居中显示
-
旋转模式,即每次定位结果地图居中显示,并且定位图标跟随手机方向旋转
2、代码示例:
public class NavigationActivity extends Activity implements LocationSource, AMapLocationListener {
    MapView mMapView;
    AMap mAmap;
    private AMapLocationClient mlocationClient;
    private AMapLocationClientOption mLocationOption;

    @Override
    protected void onCreate(Bundle savedInstanceState) {
        super.onCreate(savedInstanceState);
        setContentView(R.layout.activity_home_navigation);
        mMapView = (MapView) findViewById(R.id.mapview_home_navigatiom_map);
        mMapView.onCreate(savedInstanceState);
        initMapOpitions();
    }

    private void initMapOpitions() {
        mAmap = mMapView.getMap();
        mAmap.setLocationSource(this);// 设置定位监听
        UiSettings uiSettings = mAmap.getUiSettings();
        // 设置默认定位按钮是否显示
        uiSettings.setMyLocationButtonEnabled(true);
        // 设置为true表示显示定位层并可触发定位
        mAmap.setMyLocationEnabled(true);
        //uiSettings.setScrollGesturesEnabled(true);// 平移(滑动)手势
        //aMap.moveCamera(CameraUpdateFactory.zoomTo(15)); // 设置缩放级别
        // 设置定位的类型为定位模式 ,可以由定位、跟随或地图根据面向方向旋转几种
        mAmap.setMyLocationType(AMap.LOCATION_TYPE_LOCATE);
        // 覆盖物点击事件
        mAmap.setOnPOIClickListener(new OnPOIClickListener() {
            @Override
            public void onPOIClick(Poi poi) {
                // 得到坐标,跳转
                LatLng latLng = poi.getCoordinate();
                changeCamera(CameraUpdateFactory.newCameraPosition(new CameraPosition(
                        latLng, 17, 0, 30)), null);

                // 画标记
                drawMarkers(latLng);
            }
        });
    }

    /**
     * 激活定位
     */
    @Override
    public void activate(OnLocationChangedListener listener) {
        if (mlocationClient == null) {
            mlocationClient = new AMapLocationClient(this);
            mLocationOption = new AMapLocationClientOption();
            //设置为高精度定位模式
            mLocationOption.setLocationMode(AMapLocationMode.Hight_Accuracy);
            //设置是否强制刷新WIFI,默认为强制刷新
            mLocationOption.setWifiActiveScan(true);
            //是否允许模拟位置
            mLocationOption.setMockEnable(false);
            //定位时间间隔
            mLocationOption.setInterval(2000);
            //设置定位参数
            mlocationClient.setLocationOption(mLocationOption);
            //设置定位监听
            mlocationClient.setLocationListener(this);
            // 设置定位一次
            //mLocationOption.setOnceLocation(true);
            // 此方法为每隔固定时间会发起一次定位请求,为了减少电量消耗或网络流量消耗,
            // 注意设置合适的定位时间的间隔(最小间隔支持为2000ms),并且在合适时间调用stopLocation()方法来取消定位请求
            // 在定位结束后,在合适的生命周期调用onDestroy()方法
            // 在单次定位情况下,定位无论成功与否,都无需调用stopLocation()方法移除请求,定位sdk内部会移除
            mlocationClient.startLocation();
        }
    }

    /**
     * 定位监听回调
     */
    @Override
    public void onLocationChanged(AMapLocation amapLocation) {
        if (amapLocation != null && amapLocation.getErrorCode() == 0) {
            // 跳转到该坐标
            LatLng latLng = new LatLng(amapLocation.getLatitude(), amapLocation.getLongitude());
            changeCamera(CameraUpdateFactory.newCameraPosition(new CameraPosition(
                            latLng, 17, 0, 30)), null);
            LatLonPoint latLonPoint = new LatLonPoint(amapLocation.getLatitude(), amapLocation.getLongitude());
            //mCity = amapLocation.getCity();
            mlocationClient.stopLocation();
        } else {
            String errText = "定位失败," + amapLocation.getErrorCode() + ": " + amapLocation.getErrorInfo();
            Log.e("AmapErr",errText);
        }
    }

    /**
     * 调用函数animateCamera或moveCamera来改变可视区域(动画)
     */
    private void changeCamera(CameraUpdate update, CancelableCallback callback) {
        mAmap.animateCamera(update, 1000, callback);
    }

    /**
     * 画标记
     * @param latlng
     */
    public void drawMarkers(LatLng latlng) {
        // 清空地图的mark
        mAmap.clear();
        // 添加标记     .title(address) 暂时去掉
        Marker marker = mAmap.addMarker(new MarkerOptions()
        .position(latlng)
        .icon(BitmapDescriptorFactory
        .defaultMarker(BitmapDescriptorFactory.HUE_AZURE))
        .draggable(true));
        // 设置默认显示一个infowinfow
        marker.showInfoWindow();
    }

    /**
     * 停止定位
     */
    @Override
    public void deactivate() {
        if (mlocationClient != null) {
            mlocationClient.stopLocation();
            mlocationClient.onDestroy();
        }
        mlocationClient = null;
    }

    @Override
    protected void onResume() {
        super.onResume();
        mMapView.onResume();
    }

    @Override
    protected void onPause() {
        super.onPause();
        mMapView.onPause();
    }

    @Override
    protected void onDestroy() {
        super.onDestroy();
        mMapView.onDestroy();
    }
}
1.3、周边搜索
1.4、路径规划
高德地图路径规划需要设定起始坐标和结束坐标,然后设置路径搜索的回调接口setRouteSearchListener(this),通过BusRouteQuery、DriveRouteQuery、WalkRouteQuery类来搜索线路,
当搜索到结果后,会回调onBusRouteSearched()、onDriveRouteSearched()、onWalkRouteSearched()等三个方法,表示公交、自驾、步行三种方案。
反馈的结果busRouteResult、DriveRouteResult、WalkRouteResult,调用它们的getPaths()方法可以获得线路方案的List集合。
/**
 * 导航类
 * @author Legend-pc
 */
public class NavigationActivity extends Activity implements
        RouteSearch.OnRouteSearchListener {
    MapView mapView;
    AMap aMap;
    RouteSearch.FromAndTo fromAndTo;// 起始点和终点的经纬度
    RouteSearch routeSearch;

    @Override
    protected void onCreate(Bundle savedInstanceState) {
        super.onCreate(savedInstanceState);
        setContentView(R.layout.activity_home_navigation);
        mapView = (MapView) findViewById(R.id.mapview_home_navigatiom_map);
        mapView.onCreate(savedInstanceState);
        if (aMap == null) {
            aMap = mapView.getMap();
        }
        // 起点坐标
        LatLonPoint start = new LatLonPoint(39.923271, 116.396034);
        // 终点坐标
        LatLonPoint end = new LatLonPoint(39.984947, 116.494689);
        // 实例化FromAndTo,从哪里到达哪里
        fromAndTo = new RouteSearch.FromAndTo(start, end);
        // 实例化routeSearch(路径搜索)
        routeSearch = new RouteSearch(this);
        routeSearch.setRouteSearchListener(this);

        // 初始化标记起始点
        setfromandtoMarker(start, end);

    }

    private void setfromandtoMarker(LatLonPoint startLatLonPoint, LatLonPoint endLatLonPoint) {
        LatLng startLatLng = new LatLng(startLatLonPoint.getLatitude(), startLatLonPoint.getLongitude());
        LatLng endLatLng = new LatLng(endLatLonPoint.getLatitude(), endLatLonPoint.getLongitude());
        aMap.addMarker(new MarkerOptions()
        .position(startLatLng)
        .icon(BitmapDescriptorFactory.fromResource(R.drawable.start)));
        aMap.addMarker(new MarkerOptions()
        .position(endLatLng)
        .icon(BitmapDescriptorFactory.fromResource(R.drawable.end)));
    }

    public void click(View view) {
        switch (view.getId()) {
        case R.id.btn_home_navigatiom_bus:    // 公交
            // 第一个参数表示路径规划的起点和终点,
            // 第二个参数表示公交查询模式,
            // 第三个参数表示公交查询城市区号,
            // 第四个参数表示是否计算夜班车,0表示不计算
            RouteSearch.BusRouteQuery busRouteQuery = new RouteSearch.BusRouteQuery(
                    fromAndTo, RouteSearch.BusDefault, "北京", 0);
            routeSearch.calculateBusRouteAsyn(busRouteQuery);
            break;

        case R.id.btn_home_navigatiom_car:    // 驾车
            RouteSearch.DriveRouteQuery driveRouteQuery = new RouteSearch.DriveRouteQuery(
                    fromAndTo, RouteSearch.DrivingDefault, null, null, "");
            routeSearch.calculateDriveRouteAsyn(driveRouteQuery);
            break;

        case R.id.btn_home_navigatiom_walk:    // 步行
            RouteSearch.WalkRouteQuery walkRouteQuery = new RouteSearch.WalkRouteQuery(
                    fromAndTo, RouteSearch.WalkDefault);
            routeSearch.calculateWalkRouteAsyn(walkRouteQuery);
            break;
        }
    }

    /**
     * 公交搜索方案
     */
    @Override
    public void onBusRouteSearched(BusRouteResult busRouteResult, int i) {
        BusPath busPath = busRouteResult.getPaths().get(0);// 取其中一个路线
        aMap.clear();
        BusRouteOverlay routeOverlay = new BusRouteOverlay(this, aMap, busPath,
                busRouteResult.getStartPos(), busRouteResult.getTargetPos());
        routeOverlay.removeFromMap();
        routeOverlay.addToMap();
        routeOverlay.zoomToSpan();
    }

    /**
     * 驾车搜索方案
     */
    @Override
    public void onDriveRouteSearched(DriveRouteResult driveRouteResult, int i) {
        DrivePath drivePath = driveRouteResult.getPaths().get(0);// 取其中一个路线
        aMap.clear();
        DrivingRouteOverlay routeOverlay = new DrivingRouteOverlay(this, aMap,
                drivePath, driveRouteResult.getStartPos(),
                driveRouteResult.getTargetPos());
        routeOverlay.removeFromMap();
        routeOverlay.addToMap();
        routeOverlay.zoomToSpan();
    }

    /**
     * 步行搜索方案
     */
    @Override
    public void onWalkRouteSearched(WalkRouteResult walkRouteResult, int i) {
        WalkPath walkPath = walkRouteResult.getPaths().get(0);// 取其中一个路线
        aMap.clear();// 清除地图上的标注之类
        WalkRouteOverlay routeOverlay = new WalkRouteOverlay(this, aMap,
                walkPath, walkRouteResult.getStartPos(),
                walkRouteResult.getTargetPos());
        routeOverlay.removeFromMap();
        routeOverlay.addToMap();
        routeOverlay.zoomToSpan();
    }

    @Override
    protected void onResume() {
        super.onResume();
        mapView.onResume();
    }

    @Override
    protected void onPause() {
        super.onPause();
        mapView.onPause();
    }

    @Override
    protected void onDestroy() {
        super.onDestroy();
        mapView.onDestroy();
    }
}
a) 布局文件
<LinearLayout
    android:layout_width="match_parent"
    android:layout_height="match_parent"
    android:orientation="vertical">
    <LinearLayout
        android:layout_width="match_parent"
        android:layout_height="wrap_content" >
        <Button
            android:id="@+id/btn_home_navigatiom_bus"
            android:layout_width="0dp"
            android:layout_height="wrap_content"
            android:layout_weight="1"
            android:onClick="click"
            android:text="bus" />
        <Button
            android:id="@+id/btn_home_navigatiom_car"
            android:layout_width="0dp"
            android:layout_height="wrap_content"
            android:layout_weight="1"
            android:onClick="click"
            android:text="car" />
        <Button
            android:id="@+id/btn_home_navigatiom_walk"
            android:layout_width="0dp"
            android:layout_height="wrap_content"
            android:layout_weight="1"
            android:onClick="click"
            android:text="walk" />
    </LinearLayout>
    <com.amap.api.maps.MapView
        android:id="@+id/mapview_home_navigatiom_map"
        android:layout_width="match_parent"
        android:layout_height="match_parent" >
    </com.amap.api.maps.MapView>
</LinearLayout>