使用tensorflow库文件编写c++程序
前言:在上一篇博客中记录了用vs2015编译生成release x64下的tensorflow c++版本dll和lib,未经过测试。这篇文章对生成的链接库进行调用。
1.利用visual studio 2015创建win32控制台空项目
不必考虑项目的位置,任意位置即可,例如生成在我的vs工作空间。

2.对项目进行配置
2.1 修改编译平台为 release x64

2.2 设置要包含的tensorflow头文件的路径
项目右键属性 → VC++目录 → 包含目录:
D:\dataspace7_softwaredata\data5_myTensorflow\tensorflow-1.3.0\tensorflow\contrib\cmake\build\external\eigen_archive
D:\dataspace7_softwaredata\data5_myTensorflow\tensorflow-1.3.0\tensorflow\contrib\cmake\build
D:\dataspace7_softwaredata\data5_myTensorflow\tensorflow-1.3.0
D:\dataspace7_softwaredata\data5_myTensorflow\tensorflow-1.3.0\third_party\eigen3
D:\dataspace7_softwaredata\data5_myTensorflow\tensorflow-1.3.0\tensorflow\contrib\cmake\build\protobuf\src
D:\dataspace7_softwaredata\data5_myTensorflow\tensorflow-1.3.0\tensorflow\contrib\cmake\build\protobuf\src\protobuf\src
D:\dataspace7_softwaredata\data5_myTensorflow\tensorflow-1.3.0\tensorflow\contrib\cmake\build\Debug

2.3 引入tensorflow.lib文件
右键项目——添加——现有项
D:\dataspace7_softwaredata\data5_myTensorflow\tensorflow-1.3.0\tensorflow\contrib\cmake\build\Release目录下的tensorflow.lib

2.4 设置预编译选项
右键属性——C/C++——预处理器,预处理器定义中加入PLATFORM_WINDOWS

3.编写测试代码
3.1 stdafx.h
// stdafx.h
#pragma once
#include "targetver.h"
#include <stdio.h>
#include <tchar.h>
#define COMPILER_MSVC
#define NOMINMAX
3.2 tfTest1.cpp
//tfTest1.cpp
#include "stdafx.h"
#include <iostream>

#include <Eigen\\Dense>
#include "tensorflow/core/public/session.h"
#include "tensorflow/cc/ops/standard_ops.h"

using namespace tensorflow;

GraphDef CreateGraphDef()
{
	Scope root = Scope::NewRootScope();

	auto X = ops::Placeholder(root.WithOpName("x"), DT_FLOAT,
		ops::Placeholder::Shape({ -1, 2 }));
	auto A = ops::Const(root, { { 3.f, 2.f },{ -1.f, 0.f } });

	auto Y = ops::MatMul(root.WithOpName("y"), A, X,
		ops::MatMul::TransposeB(true));

	GraphDef def;
	TF_CHECK_OK(root.ToGraphDef(&def));

	return def;
}

int main()
{
	std::cout << "me" << std::endl;
	GraphDef graph_def = CreateGraphDef();

	// Start up the session
	SessionOptions options;
	std::unique_ptr<Session> session(NewSession(options));
	TF_CHECK_OK(session->Create(graph_def));

	// Define some data.  This needs to be converted to an Eigen Tensor to be
	// fed into the placeholder.  Note that this will be broken up into two
	// separate vectors of length 2: [1, 2] and [3, 4], which will separately
	// be multiplied by the matrix.
	std::vector<float> data = { 1, 2, 3, 4 };
	auto mapped_X_ = Eigen::TensorMap<Eigen::Tensor<float, 2, Eigen::RowMajor>>
		(&data[0], 2, 2);
	auto eigen_X_ = Eigen::Tensor<float, 2, Eigen::RowMajor>(mapped_X_);

	Tensor X_(DT_FLOAT, TensorShape({ 2, 2 }));
	X_.tensor<float, 2>() = eigen_X_;

	std::vector<Tensor> outputs;
	TF_CHECK_OK(session->Run({ { "x", X_ } }, { "y" }, {}, &outputs));

	// Get the result and print it out
	Tensor Y_ = outputs[0];
	std::cout << Y_.tensor<float, 2>() << std::endl;

	session->Close();
	getchar();
	return 0;
}
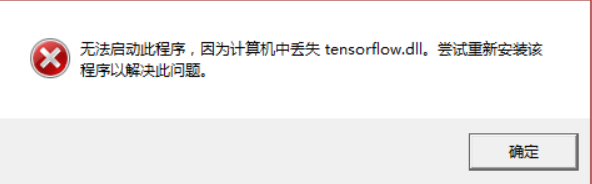
4. 编译成功后将tensorflow.dll拷贝到可执行exe目录下
否则会报错:无法启动此程序,因为计算机中丢失tensorflow.dll,尝试重新安装该程序以解决此问题
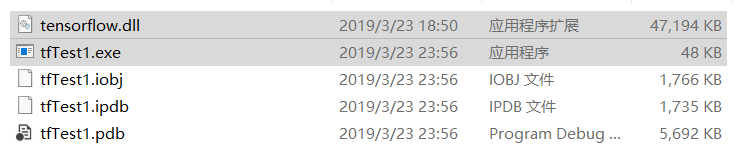
5. 测试成功
