1.概述
JPA Spring Data : 致力于减少数据访问层 (DAO) 的开发量. 开发者唯一要做的,就只是声明持久层的接口,其他都交给 Spring Data JPA 来帮你完成!
2.spring整合jpa
<?xml version="1.0" encoding="UTF-8"?>
<beans xmlns="http://www.springframework.org/schema/beans"
	xmlns:xsi="http://www.w3.org/2001/XMLSchema-instance"
	xmlns:context="http://www.springframework.org/schema/context"
	xmlns:tx="http://www.springframework.org/schema/tx"
	xmlns:jpa="http://www.springframework.org/schema/data/jpa"
	xsi:schemaLocation="http://www.springframework.org/schema/beans http://www.springframework.org/schema/beans/spring-beans.xsd
		http://www.springframework.org/schema/data/jpa http://www.springframework.org/schema/data/jpa/spring-jpa-1.3.xsd
		http://www.springframework.org/schema/tx http://www.springframework.org/schema/tx/spring-tx-4.0.xsd
		http://www.springframework.org/schema/context http://www.springframework.org/schema/context/spring-context-4.0.xsd">

	<!-- 配置自动扫描的包 -->
	<context:component-scan base-package="com.atguigu.springdata"></context:component-scan>

	<!-- 1. 配置数据源 -->
	<context:property-placeholder location="classpath:db.properties"/>

	<bean id="dataSource"
		class="com.mchange.v2.c3p0.ComboPooledDataSource">
		<property name="user" value="${jdbc.user}"></property>
		<property name="password" value="${jdbc.password}"></property>
		<property name="driverClass" value="${jdbc.driverClass}"></property>
		<property name="jdbcUrl" value="${jdbc.jdbcUrl}"></property>

		<!-- 配置其他属性 -->
	</bean>

	<!-- 2. 配置 JPA 的 EntityManagerFactory -->
	<bean id="entityManagerFactory"
		class="org.springframework.orm.jpa.LocalContainerEntityManagerFactoryBean">
		<property name="dataSource" ref="dataSource"></property>
		<property name="jpaVendorAdapter">
			<bean class="org.springframework.orm.jpa.vendor.HibernateJpaVendorAdapter"></bean>
		</property>
		<property name="packagesToScan" value="com.atguigu.springdata"></property>
		<property name="jpaProperties">
			<props>
				<!-- 二级缓存相关 -->
				<!--
				<prop key="hibernate.cache.region.factory_class">org.hibernate.cache.ehcache.EhCacheRegionFactory</prop>
				<prop key="net.sf.ehcache.configurationResourceName">ehcache-hibernate.xml</prop>
				-->
				<!-- 生成的数据表的列的映射策略 -->
				<prop key="hibernate.ejb.naming_strategy">org.hibernate.cfg.ImprovedNamingStrategy</prop>
				<!-- hibernate 基本属性 -->
				<prop key="hibernate.dialect">org.hibernate.dialect.MySQL5InnoDBDialect</prop>
				<prop key="hibernate.show_sql">true</prop>
				<prop key="hibernate.format_sql">true</prop>
				<prop key="hibernate.hbm2ddl.auto">update</prop>
			</props>
		</property>
	</bean>

	<!-- 3. 配置事务管理器 -->
	<bean id="transactionManager"
		class="org.springframework.orm.jpa.JpaTransactionManager">
		<property name="entityManagerFactory" ref="entityManagerFactory"></property>
	</bean>

	<!-- 4. 配置支持注解的事务 -->
	<tx:annotation-driven transaction-manager="transactionManager"/>

	<!-- 5. 配置 SpringData -->
	<!-- 加入  jpa 的命名空间 -->
	<!-- base-package: 扫描 Repository Bean 所在的 package -->
	<jpa:repositories base-package="com.atguigu.springdata"
		entity-manager-factory-ref="entityManagerFactory"></jpa:repositories>

</beans>
3.介绍几个接口

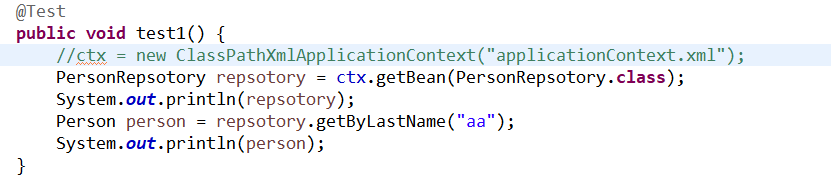
4.介绍Repository的接口使用
1.声明一个接口,继承改接口
2.调用
3.如果方法名不按要求,会报的异常

4.介绍方法起名的时候需要的注意点


5.查询流程分析

5.使用@query查询
1.使用@Query好处

2.案例:传入多个参数

3.模糊查询

4.使用原生本地sql

5.@Modifying:完成更新操作

6.CrudRepository 接口

7.PagingAndSortingRepository接口

@Test
	public void testSortAndPAge() {

		PersonRepsotory repsotory = ctx.getBean(PersonRepsotory.class);
		int pageNo = 1;//起始页,从零开始,即第二页
		int pageSize = 5;
		//传递需要排序的字段和方式
		Order orders1 = new Order(Direction.DESC,"id");
		Order order2 = new Order(Direction.ASC, "email");
		//设置排序,可以是一个可变参
		Sort sort = new Sort(orders1,order2);
		PageRequest pageRequest = new PageRequest(pageNo, pageSize,sort);
		Page<Person> page = repsotory.findAll(pageRequest);
		System.out.println("总记录数: " + page.getTotalElements());
		System.out.println("当前第几页: " + (page.getNumber() + 1));
		System.out.println("总页数: " + page.getTotalPages());
		System.out.println("当前页面的 List: " + page.getContent());
		System.out.println("当前页面的记录数: " + page.getNumberOfElements());
	}


}
8.JpaRepository接口
 、
、
9.JpaSpecificationExecutor接口

z
