新建项目
我是用的是IDEA,项目选择如下所示:

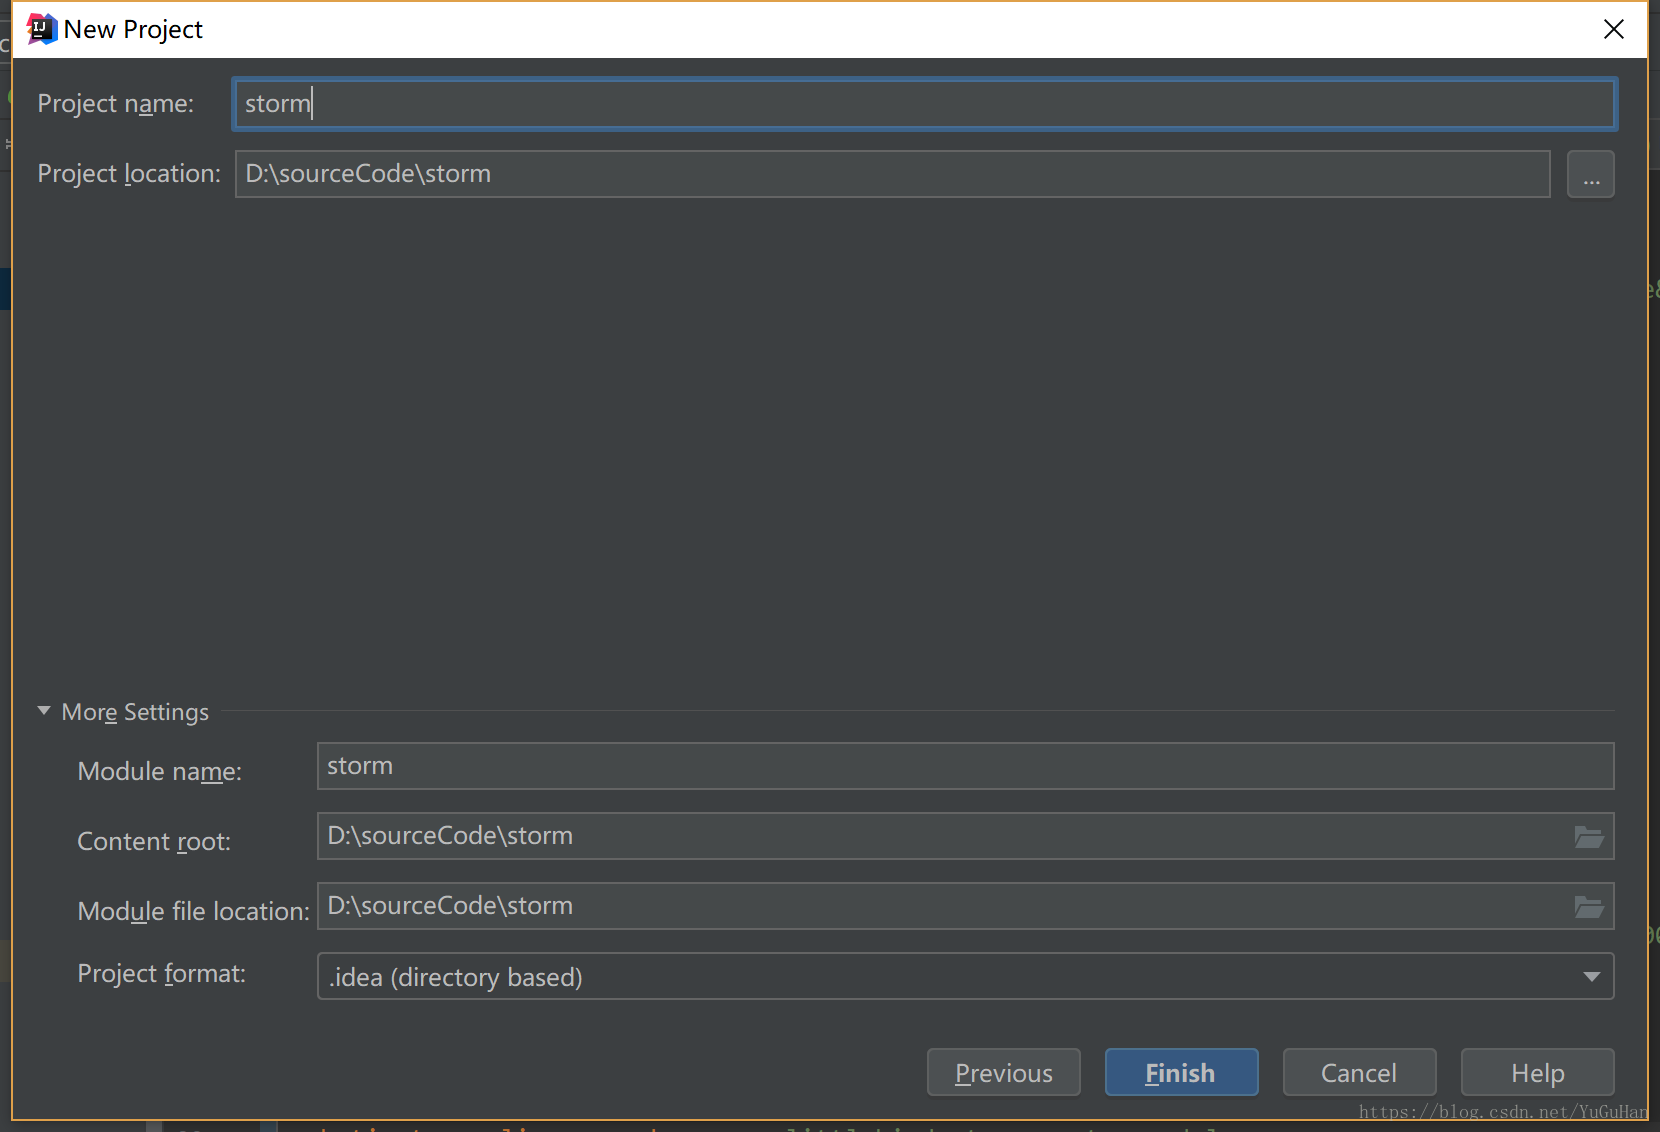
为项目取一个名字,如下图所示,然后点击next

选择需要添加的模块,选择完毕后,会自动将所需的依赖,添加到pom文件中

确认路径无误,点击finish即可
项目基本结构,IDEA会自动生成,为了测试环境是否可以成功运行,建议建包结构如下:

项目生成后的pom文件内容如下:
        <dependency>
            <groupId>org.springframework.boot</groupId>
            <artifactId>spring-boot-starter-jdbc</artifactId>
        </dependency>
        <dependency>
            <groupId>org.springframework.boot</groupId>
            <artifactId>spring-boot-starter-web</artifactId>
        </dependency>
        <dependency>
            <groupId>org.mybatis.spring.boot</groupId>
            <artifactId>mybatis-spring-boot-starter</artifactId>
            <version>1.3.2</version>
        </dependency>

        <dependency>
            <groupId>mysql</groupId>
            <artifactId>mysql-connector-java</artifactId>
            <version>8.0.11</version>
        </dependency>

        <dependency>
            <groupId>org.springframework.boot</groupId>
            <artifactId>spring-boot-starter-test</artifactId>
            <scope>test</scope>
        </dependency>
我们需要自己添加druid的依赖信息,如下:
<dependency>
     <groupId>com.alibaba</groupId>
     <artifactId>druid</artifactId>
     <version>1.1.10</version>
</dependency>
下边,开始对配置文件进行配置,在springboot中,所有的配置信息都可以在application.properties中进行,下边是基本的配置信息:包括druid连接池的一些配置,我使用的是8.x版本的mysql,与之前版本的会有稍微的不同,可去官网查阅。
# 使用druid连接池
spring.datasource.type=com.alibaba.druid.pool.DruidDataSource
# 数据库的URL、帐号、密码、驱动,dbname是自己数据库中表空间的对应的名字,请修改为自己本地一致的
spring.datasource.url = jdbc:mysql://127.0.0.1:3306/dbname?autoReconnect=true&useUnicode=true&characterEncoding=utf8&serverTimezone=UTC&zeroDateTimeBehavior=CONVERT_TO_NULL&useSSL=false
spring.datasource.username = root
spring.datasource.password = root
spring.datasource.driver-class-name=com.mysql.cj.jdbc.Driver

#连接池的配置信息
spring.datasource.initialSize=5
spring.datasource.minIdle=5
spring.datasource.maxActive=20
spring.datasource.maxWait=60000
spring.datasource.timeBetweenEvictionRunsMillis=60000
spring.datasource.minEvictableIdleTimeMillis=300000
spring.datasource.validationQuery=SELECT 1 FROM DUAL
spring.datasource.testWhileIdle=true
spring.datasource.testOnBorrow=false
spring.datasource.testOnReturn=false
spring.datasource.poolPreparedStatements=true
spring.datasource.maxPoolPreparedStatementPerConnectionSize=20
spring.datasource.filters=stat,wall
spring.datasource.connectionProperties=druid.stat.mergeSql=true;druid.stat.slowSqlMillis=5000

# MyBatis 配置
# mybatis的mapper.xml文件的路径
mybatis.mapper-locations=classpath:mapper/*.xml
# mybatis的model所在的包
mybatis.type-aliases-package=com.littlebird.storm.system.model
信息配置完毕后,我们就可以进行mybatis是否可行的测试。
分别创建service,controller,dao,model和mapper.xml等文件,如下所示:
controller
package com.littlebird.storm.system.controller;

import com.littlebird.storm.system.model.User;
import com.littlebird.storm.system.service.UserService;
import org.springframework.beans.factory.annotation.Autowired;
import org.springframework.web.bind.annotation.RequestMapping;
import org.springframework.web.bind.annotation.RestController;

import java.util.List;

@RestController
@RequestMapping("/user")
public class UserController {
    @Autowired
    UserService userService;

    @RequestMapping("/find")
    public User findByName(){
        /*因为没写前端页面,这里写了些伪业务代码*/
        User user =userService.findByName("李四");
        return user;
    }

    @RequestMapping("/findall")
    public List<User> findAll(){
        List<User> users =userService.findAll();
        return users;
    }
}
service
package com.littlebird.storm.system.service;

import com.littlebird.storm.system.dao.UserDao;
import com.littlebird.storm.system.model.User;
import org.springframework.beans.factory.annotation.Autowired;
import org.springframework.stereotype.Service;

import java.util.List;

@Service
public class UserService {

    @Autowired
    private UserDao userDao;

    public User findByName(String name){
        User user =userDao.findByName(name);
        return user;
    }

    public List<User> findAll(){
        List<User> users =userDao.findAll();
        return users;
    }
}
model
package com.littlebird.storm.system.model;

public class User {
    private long userId;
    private String userName;
    private String password;
    private String phone;

    public long getUserId() {
        return userId;
    }

    public void setUserId(long userId) {
        this.userId = userId;
    }

    public String getUserName() {
        return userName;
    }

    public void setUserName(String userName) {
        this.userName = userName;
    }

    public String getPassword() {
        return password;
    }

    public void setPassword(String password) {
        this.password = password;
    }

    public String getPhone() {
        return phone;
    }

    public void setPhone(String phone) {
        this.phone = phone;
    }
}
dao
package com.littlebird.storm.system.dao;

/*@Mapper*/
/*@Repository也可以不用添加,但是不添加之后使用@Autowired注入接口是IDEA会提示红线,但是不影响编译运行*/
/*@Mapper如果配置了自动扫描,这个注解可以不添加,也推荐使用自动扫描*/

import com.littlebird.storm.system.model.User;
import org.apache.ibatis.annotations.Select;
import org.springframework.stereotype.Repository;

import java.util.List;

@Repository
public interface UserDao {

    /*xml方式*/
    User findByName(String userName);
    /*注解方式*/
    @Select("select * from t_user")
    List<User> findAll();
}
mapper
<?xml version="1.0" encoding="UTF-8" ?>
<!DOCTYPE mapper
        PUBLIC "-//mybatis.org//DTD Mapper 3.0//EN"
        "http://mybatis.org/dtd/mybatis-3-mapper.dtd">
<!--命名空间,指定对应的Dao-->
<mapper namespace="com.littlebird.storm.system.dao.UserDao">

    <!--使用resultType指定输出类型-->
    <select id="findByName" resultType="User">
        SELECT * FROM t_user WHERE username = #{userName}
    </select>

</mapper>
数据库表信息如下,可以自行创建,很简单的表格:

测试可以使用IDEA自带的测试工具,很好用,如下图所示:

由于版本不同,可能所在位置不一样,但是都在tool下,打开后是这样的:

测试完毕后,如果能正确返回结果,则表示项目搭建成功!
下边开始配置druid监控服务,如图所示添加DruidConfig.java文件,

在其中配置druid监控服务的servlet和filter,在spring boot中有专门配置servlet和filter的方法,包括注解方式和Bean方式,我们采用bean方式,代码如下:
package com.littlebird.storm.core.database.druid;

import com.alibaba.druid.support.http.StatViewServlet;
import com.alibaba.druid.support.http.WebStatFilter;
import org.springframework.boot.web.servlet.FilterRegistrationBean;
import org.springframework.boot.web.servlet.ServletRegistrationBean;
import org.springframework.context.annotation.Bean;
import org.springframework.context.annotation.Configuration;

@Configuration
public class DruidConfig {

    @Bean
    public ServletRegistrationBean druidServlet() {
        ServletRegistrationBean reg = new ServletRegistrationBean();
        reg.setServlet(new StatViewServlet());
        reg.addUrlMappings("/druid/*");
        //配置用户名
        reg.addInitParameter("loginUsername", "root");
        //配置密码
        reg.addInitParameter("loginPassword", "root");
        //在日志中打印执行慢的sql语句
        reg.addInitParameter("logSlowSql", "true");
        //另外还可配置黑白名单等信息,可参考druid官网介绍
        return reg;
    }

    @Bean
    public FilterRegistrationBean filterRegistrationBean() {
        FilterRegistrationBean filterRegistrationBean = new FilterRegistrationBean();
        filterRegistrationBean.setFilter(new WebStatFilter());
        filterRegistrationBean.addUrlPatterns("/*");
        //过滤文件类型
        filterRegistrationBean.addInitParameter("exclusions", "*.js,*.gif,*.jpg,*.png,*.css,*.ico,/druid/*");
        //监控单个url调用的sql列表
        filterRegistrationBean.addInitParameter("profileEnable", "true");
        return filterRegistrationBean;
    }

}
配置完毕后,我本地地址是http://localhost:8080/druid,就可以进行登入访问了,但是此时,点击数据源一栏,是没有任何数据源的,如下图所示:

下边,我们来进行数据源的配置,在上图中已经给过目录结构,分别创建DruidBean.java和MyBatisConfig.java,内容分别如下:
DruidBean.java
package com.littlebird.storm.core.database.druid;

import com.alibaba.druid.pool.DruidDataSource;
import org.springframework.boot.context.properties.ConfigurationProperties;
import org.springframework.stereotype.Component;

import java.sql.SQLException;

@Component
//可以将application.properties中前缀为spring.datasource的配置项,自动注入到当前bean中
@ConfigurationProperties(prefix = "spring.datasource")
public class DruidBean {

    private String url;

    private String username;

    private String password;

    private String driverClassName ;

    private Integer initialSize = 2;

    private Integer minIdle = 1;

    private Integer maxActive = 20;

    private Integer maxWait = 60000;

    private Integer timeBetweenEvictionRunsMillis = 60000;

    private Integer minEvictableIdleTimeMillis = 300000;

    private String validationQuery = "SELECT 'x'";

    private Boolean testWhileIdle = true;

    private Boolean testOnBorrow = false;

    private Boolean testOnReturn = false;

    private Boolean poolPreparedStatements = true;

    private Integer maxPoolPreparedStatementPerConnectionSize = 20;

    private String filters = "stat";

    public void config(DruidDataSource dataSource) {

        dataSource.setUrl(url);
        dataSource.setUsername(username);
        dataSource.setPassword(password);

        dataSource.setDriverClassName(driverClassName);
        dataSource.setInitialSize(initialSize);     //定义初始连接数
        dataSource.setMinIdle(minIdle);             //最小空闲
        dataSource.setMaxActive(maxActive);         //定义最大连接数
        dataSource.setMaxWait(maxWait);             //最长等待时间

        // 配置间隔多久才进行一次检测,检测需要关闭的空闲连接,单位是毫秒
        dataSource.setTimeBetweenEvictionRunsMillis(timeBetweenEvictionRunsMillis);

        // 配置一个连接在池中最小生存的时间,单位是毫秒
        dataSource.setMinEvictableIdleTimeMillis(minEvictableIdleTimeMillis);
        dataSource.setValidationQuery(validationQuery);
        dataSource.setTestWhileIdle(testWhileIdle);
        dataSource.setTestOnBorrow(testOnBorrow);
        dataSource.setTestOnReturn(testOnReturn);

        // 打开PSCache,并且指定每个连接上PSCache的大小
        dataSource.setPoolPreparedStatements(poolPreparedStatements);
        dataSource.setMaxPoolPreparedStatementPerConnectionSize(maxPoolPreparedStatementPerConnectionSize);

        try {
            dataSource.setFilters(filters);
        } catch (SQLException e) {
            e.printStackTrace();
        }
    }


    public String getUrl() {
        return url;
    }

    public void setUrl(String url) {
        this.url = url;
    }

    public String getUsername() {
        return username;
    }

    public void setUsername(String username) {
        this.username = username;
    }

    public String getPassword() {
        return password;
    }

    public void setPassword(String password) {
        this.password = password;
    }

    public String getDriverClassName() {
        return driverClassName;
    }

    public void setDriverClassName(String driverClassName) {
        this.driverClassName = driverClassName;
    }

    public Integer getInitialSize() {
        return initialSize;
    }

    public void setInitialSize(Integer initialSize) {
        this.initialSize = initialSize;
    }

    public Integer getMinIdle() {
        return minIdle;
    }

    public void setMinIdle(Integer minIdle) {
        this.minIdle = minIdle;
    }

    public Integer getMaxActive() {
        return maxActive;
    }

    public void setMaxActive(Integer maxActive) {
        this.maxActive = maxActive;
    }

    public Integer getMaxWait() {
        return maxWait;
    }

    public void setMaxWait(Integer maxWait) {
        this.maxWait = maxWait;
    }

    public Integer getTimeBetweenEvictionRunsMillis() {
        return timeBetweenEvictionRunsMillis;
    }

    public void setTimeBetweenEvictionRunsMillis(Integer timeBetweenEvictionRunsMillis) {
        this.timeBetweenEvictionRunsMillis = timeBetweenEvictionRunsMillis;
    }

    public Integer getMinEvictableIdleTimeMillis() {
        return minEvictableIdleTimeMillis;
    }

    public void setMinEvictableIdleTimeMillis(Integer minEvictableIdleTimeMillis) {
        this.minEvictableIdleTimeMillis = minEvictableIdleTimeMillis;
    }

    public String getValidationQuery() {
        return validationQuery;
    }

    public void setValidationQuery(String validationQuery) {
        this.validationQuery = validationQuery;
    }

    public Boolean getTestWhileIdle() {
        return testWhileIdle;
    }

    public void setTestWhileIdle(Boolean testWhileIdle) {
        this.testWhileIdle = testWhileIdle;
    }

    public Boolean getTestOnBorrow() {
        return testOnBorrow;
    }

    public void setTestOnBorrow(Boolean testOnBorrow) {
        this.testOnBorrow = testOnBorrow;
    }

    public Boolean getTestOnReturn() {
        return testOnReturn;
    }

    public void setTestOnReturn(Boolean testOnReturn) {
        this.testOnReturn = testOnReturn;
    }

    public Boolean getPoolPreparedStatements() {
        return poolPreparedStatements;
    }

    public void setPoolPreparedStatements(Boolean poolPreparedStatements) {
        this.poolPreparedStatements = poolPreparedStatements;
    }

    public Integer getMaxPoolPreparedStatementPerConnectionSize() {
        return maxPoolPreparedStatementPerConnectionSize;
    }

    public void setMaxPoolPreparedStatementPerConnectionSize(Integer maxPoolPreparedStatementPerConnectionSize) {
        this.maxPoolPreparedStatementPerConnectionSize = maxPoolPreparedStatementPerConnectionSize;
    }

    public String getFilters() {
        return filters;
    }

    public void setFilters(String filters) {
        this.filters = filters;
    }
}
上述类建立完成后,IDEA会有一个提示,是因为没有开启配置文件属性值自动注入的功能,添加一个依赖就可以了,如下:
<dependency>
   <groupId>org.springframework.boot</groupId>
   <artifactId>spring-boot-configuration-processor</artifactId>
   <optional>true</optional>
</dependency>
MybatisConfig.java
package com.littlebird.storm.core.database.mybatis;

import com.alibaba.druid.pool.DruidDataSource;
import com.littlebird.storm.core.database.druid.DruidBean;
import org.springframework.beans.factory.annotation.Autowired;
import org.springframework.context.annotation.Bean;
import org.springframework.context.annotation.Configuration;


@Configuration
public class MybatisConfig {

    @Autowired
    DruidBean druidProperties;

    /**
     * guns的数据源
     */
    private DruidDataSource dataSourceStrom() {
        DruidDataSource dataSource = new DruidDataSource();
        druidProperties.config(dataSource);
        return dataSource;
    }

    /**
     * 单数据源连接池配置
     */
    @Bean(initMethod = "init",destroyMethod = "close")
    public DruidDataSource dataSource() {
        return dataSourceStrom();
    }


}
重新启动环境,就可以看见数据源啦,配置完毕。
