Apache Shiro是一个强大且易用的Java安全框架,执行身份验证、授权、密码和会话管理。使用Shiro的易于理解的API,您可以快速、轻松地获得任何应用程序,从最小的移动应用程序到最大的网络和企业应用程序。
三个核心组件:Subject, SecurityManager 和 Realms.

Subject: 即“当前操作用户”。但是,在Shiro中,Subject这一概念并不仅仅指人,也可以是第三方进程、后台帐户(Daemon Account)或其他类似事物。它仅仅意味着“当前跟软件交互的东西”。但考虑到大多数目的和用途,你可以把它认为是Shiro的“用户”概念。Subject代表了当前用户的安全操作,SecurityManager则管理所有用户的安全操作。
SecurityManager: 它是Shiro框架的核心,典型的Facade模式,Shiro通过SecurityManager来管理内部组件实例,并通过它来提供安全管理的各种服务。
Realm: Realm充当了Shiro与应用安全数据间的“桥梁”或者“连接器”。也就是说,当对用户执行认证(登录)和授权(访问控制)验证时,Shiro会从应用配置的Realm中查找用户及其权限信息。从这个意义上讲,Realm实质上是一个安全相关的DAO:它封装了数据源的连接细节,并在需要时将相关数据提供给Shiro。当配置Shiro时,你必须至少指定一个Realm,用于认证和(或)授权。配置多个Realm是可以的,但是至少需要一个。
Shiro内置了可以连接大量安全数据源(又名目录)的Realm,如LDAP、关系数据库(JDBC)、类似INI的文本配置资源以及属性文件等。如果缺省的Realm不能满足需求,你还可以插入代表自定义数据源的自己的Realm实现。
一.thymeleaf模板的导入
1.引入依赖:
<dependency>
    <groupId>org.springframework.boot</groupId>
    <artifactId>spring-boot-starter-thymeleaf</artifactId>
</dependency>
2.在controller中添加测试方法
@RequestMapping("/testThymeleaf")
 public String testThymeleaf(ModelMap model){
     model.addAttribute("name","李国辉");
     //返回test.html
     return "test";
 }

创建一个简单的test.html,然后获取name的值
<!DOCTYPE html>
 <html lang="en" xmlns:th="http://www.w3.org/1999/xhtml">
 <head>
     <meta charset="UTF-8">
     <title>Title</title>
 </head>
 <body>
     <h3 th:text="${name}"></h3>
 </body>
 </html>
二 .Shiro实践
2.1 分析Shiro的核心API
Subject: 用户主体(把操作交给SecurityManager)
SecurityManager: 安全管理器 (关联Realm)
Realm: Shiro连接数据的桥梁
2.2 导入shiro与spring整合依赖
修改pom.xml,导入依赖
<dependency>
    <groupId>org.apache.shiro</groupId>
    <artifactId>shiro-spring</artifactId>
    <version>1.4.0</version>
</dependency>
2.3 自定义Realm类:
public class UserRealm extends AuthorizingRealm{

    /**
     *  执行授权逻辑
     *
     * @param principals
     * @return
     */
    @Override
    protected AuthorizationInfo doGetAuthorizationInfo(PrincipalCollection principals) {
        System.out.println("执行授权逻辑!");
        return null;
    }

    /**
     *  执行认证逻辑
     *
     * @param token
     * @return
     * @throws AuthenticationException
     */
    @Override
    protected AuthenticationInfo doGetAuthenticationInfo(AuthenticationToken token) throws AuthenticationException {
        System.out.println("执行认证逻辑!");
        return null;
    }
}
2.4 编写Shiro的配置类 (*)
@Configuration
public class ShiroConfig {

    /**
     *  创建ShiroFilterFactoryBean
     */
    public ShiroFilterFactoryBean getShiroFilterFactoryBean(@Qualifier("securityManager") DefaultWebSecurityManager securityManager){

        ShiroFilterFactoryBean shiroFilterFactoryBean = new ShiroFilterFactoryBean();
        //1.设置安全管理器
        shiroFilterFactoryBean.setSecurityManager(securityManager);

        return shiroFilterFactoryBean;
    }

    /**
     *  创建DefaultWebSecurityManager
     *  使用@Qualifier注解从Apring容器中引入UserRealm
     */
    @Bean(name = "securityManager")
    public DefaultWebSecurityManager getDefaultWebSecurityManager(@Qualifier("userRealm") UserRealm userRealm){
        DefaultWebSecurityManager securityManager = new DefaultWebSecurityManager();
        //关联realm
        securityManager.setRealm(userRealm);
        return securityManager;
    }

    /**
     *  创建Realm对象
     *  加载到spring容器中共其他方法调用
     */

    @Bean(name ="userRealm")
    public UserRealm getRealm(){
        return new UserRealm();
    }
}
2.5 编写Controller登录逻辑
    @RequestMapping("login")
    public String login(String name,String password,ModelMap model){
        /**
         *  使用Shiro编写认证操作
         */
        //1. 获取Subject
        Subject subject = SecurityUtils.getSubject();
        //2.封装用户数据
        UsernamePasswordToken token = new UsernamePasswordToken(name, password);
        //执行登录方法
        try{
            subject.login(token);
            //登录成功! 跳转到test.html
            return "redirect:/thymeleaf";

        }catch (UnknownAccountException e){
            //登录失败!直接掉到login.html页面
            model.addAttribute("msg","用户名不存在!");
            return "login";
        }catch (IncorrectCredentialsException e){
            //登录失败,密码错误
            model.addAttribute("msg","密码错误!");
            return "login";
        }
    }
2.6 判断Realm的判断逻辑
@Override
protected AuthenticationInfo doGetAuthenticationInfo(AuthenticationToken token) throws AuthenticationException {
    System.out.println("执行认证逻辑!");
    //模拟数据库中的用户名和密码
    String username = "aaa";
    String password = "123456";
    //编写Shiro的判断逻辑,判断用户名和密码
    UsernamePasswordToken token1 = (UsernamePasswordToken) token;
    //判断用户名
    if(!token1.getUsername().equals(username)){
        //用户名不存在!
        return null; //Shiro底层会抛出UnKnowAccountException
    }
    //判断密码
    return new SimpleAuthenticationInfo("",password,"");
}
三.整合mybatis实现登录
3.1 导入相关依赖:
<dependency>
  <groupId>com.alibaba</groupId>
    <artifactId>druid</artifactId>
    <version>1.0.25</version>
</dependency>
<dependency>
    <groupId>mysql</groupId>
    <artifactId>mysql-connector-java</artifactId>
</dependency>
<dependency>
    <groupId>org.mybatis.spring.boot</groupId>
    <artifactId>mybatis-spring-boot-starter</artifactId>
    <version>1.3.2</version>
</dependency>

    生成相应的实体类,具体的插件都在pom文件找那个进行插入
3.2 编写service通过用户名查询对象接口:
@Override
public User selectUserByName(String name) {
    UserExample example = new UserExample();
    example.createCriteria().andNameEqualTo(name);
    List<User> users = userMapper.selectByExample(example);
    if(users.isEmpty()){
        return null;
    }else {
        return users.get(0);
    }
}
注意:在启动类中加入@MapperScan注解进行mapper扫描,不然启动不起来
3.3 在userRealm中注入userService,并进行代码改造
@Override
protected AuthenticationInfo doGetAuthenticationInfo(AuthenticationToken token) throws AuthenticationException {
    System.out.println("执行认证逻辑!");
    //编写Shiro的判断逻辑,判断用户名和密码
    UsernamePasswordToken token1 = (UsernamePasswordToken) token;
    //通过登录传过来的用户名查询数据库中的用户是否存在!
    User user = userService.selectUserByName(token1.getUsername());
    //判断用户名
    if(user==null){
        //用户名不存在!
        return null; //Shiro底层会抛出UnKnowAccountException Controller中进行捕获
    }
    //判断密码
    return new SimpleAuthenticationInfo("",user.getPassword(),"");
}
四.Springboot与Shiro整合实现用户授权
4.1 使用Shiro内置过滤器拦截资源
1).在shiroConfig中对接口添加需要授权
    /**
     *  为add接口添加授权过滤器
     *  注意: 当授权拦截后,shiro会自动跳转到未授权页面
     */
    map.put("/add","perms[user:add]");
2). 设置未授权提示页面
    //设置未授权提示页面
    shiroFilterFactoryBean.setUnauthorizedUrl("/unAuth"); //跳转到的controller接口
3). 编写跳转接口以及接口中定义跳转的页面
    @RequestMapping("unAuth")
    public String unAuth(){
        return "user/unAuth";
    }
4.2 动态授权逻辑编写:
@Override
protected AuthorizationInfo doGetAuthorizationInfo(PrincipalCollection principals) {
    System.out.println("执行授权逻辑!");
    //给资源进行授权
    SimpleAuthorizationInfo info = new SimpleAuthorizationInfo();
    //添加授权字符串,就是在shiroConfig中授权时定义的字符串
    //到数据库中查询当前登录用户的授权字符串
    //获取当前用户
    Subject subject = SecurityUtils.getSubject();
    //要想获取到当前用户,需要在下面的认证逻辑完成传过来

    User user = (User) subject.getPrincipal();
      User dbUser = userService.selectUserById(user.getId());

      //然后添加授权字符串
      info.addStringPermission(dbUser.getPerms());
  //  info.addStringPermission("user:add");
 //   info.addStringPermissions();  添加一个集合
      return info;
  }
注意: 要在认证逻辑中把user对象传过来,不然不知道是谁登录,然后就是在shiroconfig中给add和update加上授权拦截
五.thymeleaf和shiro标签整合使用
5.1 导入依赖
<!--thymeleaf扩展依赖-->
<dependency>
    <groupId>com.github.theborakompanioni</groupId>
    <artifactId>thymeleaf-extras-shiro</artifactId>
    <version>2.0.0</version>
</dependency>
5.2 配置ShiroDialect
在ShiroConfig中进行配置:
 /**
   *  配置ShiroDialect,用于thymeleaf和shiro标签配合使用
   */
  @Bean
  public ShiroDialect getShiroDialect(){
      return new ShiroDialect();
  }
前端只需要加上判断即可:但是访问必须要先走登录接口toLogin
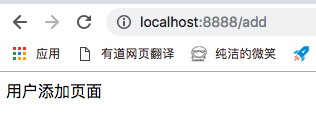
<div shiro:hasPermission="user:add">
用户添加功能: <a href="add">用户添加</a><br/>
</div>
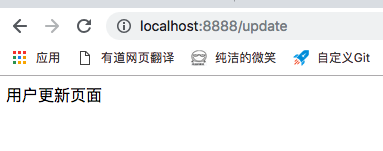
<div shiro:hasPermission="user:update">
用户修改功能: <a href="update">用户修改</a>
</div>
实现效果展示:
用户: ligh 密码: 123456 拥有权限: 添加权限

登录成功之后:

点进去进行添加功能:
另外一个用户: liguohui 密码: 123456 权限: 修改权限

登录成功之后:

因为该用户只有修改权限,所以只会显示修改按钮,并且点进去执行修改操作:
至此,Sprignboot集成Shiro完成了认证授权的过程。