大家好,关于在centos7虚拟机安装Oracle11g,从安装到最终正常使用,我一共整理了7篇笔记,记录了安装过程的步骤以及过程中遇到的问题,这是第一篇笔记,感谢大家阅读!
本文是结合了网上几篇文章的内容整理而成。
网上几篇分别是:
https://jingyan.baidu.com/article/48b37f8dccfd4b1a64648808.html
http://www.itdaan.com/blog/2017/12/15/4376710cfdd1f38998f2c53fcb2218c7.html
https://www.cnblogs.com/muhehe/p/7816808.html
https://wenku.baidu.com/view/c10103af89eb172ded63b791.html(在后期图形化安装过程中帮了大忙)
一、环境准备
安装包:
1.VMware-workstation-full-11.1.0-2496824.exe
2.CentOS-7-x86_64-DVD-1511.iso

3.linux.x64_11gR2_database_1of2.zip
linux.x64_11gR2_database_2of2.zip
二、安装Oracle前准备
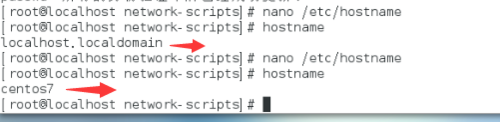
准备工作1:在安装前建议把主机的主机名更改一下,不要使用默认的localhost.localdomain,这里是从案例方面考虑的,建议修改成其它的。
准备工作2:修改hosts文件
vi hosts 加一行:
192.168.1.64 Databright #前面的ip是服务器/电脑的ip,后面的字符串可自定义
保存后执行命令【service network start】
1.创建运行oracle数据库的系统用户和用户组
[sonny@localhost ~]$ su root #切换到root
Password:
[root@localhost sonny]# groupadd oinstall #创建用户组oinstall
[root@localhost sonny]# groupadd dba #创建用户组dba
[root@localhost sonny]# useradd -g oinstall -g dba -m oracle #创建oracle用户,并加入到oinstall和dba用户组
[root@localhost sonny]# passwd oracle #设置用户oracle的登陆密码,不设置密码,在CentOS的图形登陆界面没法登陆
Changing password for user oracle.
New password: # 密码
BAD PASSWORD: The password is shorter than 8 characters
Retype new password: # 确认密码
passwd: all authentication tokens updated successfully.
[root@localhost sonny]# id oracle # 查看新建的oracle用户
uid=1001(oracle) gid=1002(dba) groups=1002(dba)
[root@localhost sonny]#
为啥要创建oinstall用户组及dba组? 参考:http://www.oracle.com/technetwork/cn/articles/hunter-rac11gr2-iscsi-2-092412-zhs.html#13
理论上单例按照需要3种用户组,实际只建两个oinstall和dba,后面再安装oracle数据库的时候把OSOPER组也设置是dba组。
a.oracle 清单组(一般为oinstall):
OINSTALL 组的成员被视为 Oracle 软件的“所有者”,拥有对 Oracle 中央清单 (oraInventory) 的写入权限。在一个 Linux 系统上首次安装 Oracle 软件时,
OUI 会创建 /etc/oraInst.loc 文件。该文件指定 Oracle 清单组的名称(默认为 oinstall)以及 Oracle 中央清单目录的路径。
b.数据库管理员(OSDBA,一般为 dba):
OSDBA 组的成员可通过操作系统身份验证使用 SQL 以 SYSDBA 身份连接到一个 Oracle 实例。该组的成员可执行关键的数据库管理任务,如创建数据库、启动和关
闭实例。该组的默认名称为dba。SYSDBA 系统权限甚至在数据库未打开时也允许访问数据库实例。对此权限的控制完全超出了数据库本身的范围。不要混淆 SYSDBA
系统权限与数据库角色 DBA。DBA 角色不包括 SYSDBA 或 SYSOPER 系统权限。
c.数据库操作员组(OSOPER,一般为 oper):
OSOPER 组的成员可通过操作系统身份验证使用 SQL 以 SYSOPER 身份连接到一个 Oracle 实例。这个可选组的成员拥有一组有限的数据库管理权限,如管理和运行备份。
该组的默认名称为oper。SYSOPER 系统权限甚至在数据库未打开时也允许访问数据库实例。对此权限的控制完全超出了数据库本身的范围。要使用该组,选择 Advanced 安装类型来安装 Oracle 数据库软件。
2.创建oracle数据库安装目录
[sonny@localhost ~]$ su root
Password:
[root@localhost sonny]# mkdir -p /data/oracle #oracle数据库安装目录
[root@localhost sonny]# mkdir -p /data/oraInventory #oracle数据库配置文件目录
[root@localhost sonny]# mkdir -p /data/database #oracle数据库软件包解压目录
[root@localhost sonny]# cd /data
[root@localhost data]# ls #创建完毕检查一下(强迫症)
database oracle oraInventory
[root@localhost data]# chown -R oracle:oinstall /data/oracle #设置目录所有者为oinstall用户组的oracle用户
[root@localhost data]# chown -R oracle:oinstall /data/oraInventory
[root@localhost data]# chown -R oracle:oinstall /data/database
[root@localhost data]#
3.修改OS系统标识
oracle默认不支持CentOS系统安装,Oracle Database 11g Release 2 的 OS要求参考: https://docs.oracle.com/cd/E11882_01/install.112/e47689/pre_install.htm#LADBI1106
我安装是64位数据库,On Linux x86-64:Red Hat Enterprise Linux 7 (RHEL 7)
另外,CentOS7.0.1511 基于 RHEL7.2 参考:http://www.linuxidc.com/Linux/2015-12/126283.htm
修改文件 /etc/RedHat-release
[sonny@localhost data]$ su root
Password:
[root@localhost data]# cat /proc/version
Linux version 3.10.0-327.el7.x86_64 ([email protected]) (gcc version 4.8.3 20140911 (Red Hat 4.8.3-9) (GCC) ) #1 SMP Thu Nov 19 22:10:57 UTC 2015
[root@localhost data]# cat /etc/redhat-release
CentOS Linux release 7.2.1511 (Core)
[root@localhost data]# vi /etc/redhat-release
[root@localhost data]# cat /etc/redhat-release
redhat-7
[root@localhost data]#
4.安装oracle数据库所需要的软件包
[root@localhost data]# yum -y install binutils* compat-libcap1* compat-libstdc++* gcc* gcc-c++* glibc* glibc-devel* ksh* libaio* libaio-devel* libgcc* libstdc++* libstdc++-devel* libXi* libXtst* make* sysstat* elfutils* unixODBC*
centos7需要的安装包,可以在Oracle上查看:https://docs.oracle.com/cd/E11882_01/install.112/e47689/pre_install.htm#LADBI1085
我的版本当然对应的是这个版本:Oracle Linux 7 and Red Hat Enterprise Linux 7
它没有要求说要安装elfutils和unixODBC包,但是等安装Oracle检查安装前准备时,会提示说缺少这两个包,所以一并安装
有时候使用yum安装的时候,会提示another app is currently holding the yum lock,这个时候打开另外一个terminal,在root用户下输入
#rm -f /var/run/yum.pid
强制关掉yum进程
5.关闭防火墙
1 [root@localhost data]# systemctl status firewalld.service #查看防火墙状态(运行中)
2 ● firewalld.service - firewalld - dynamic firewall daemon
3 Loaded: loaded (/usr/lib/systemd/system/firewalld.service; enabled; vendor preset: enabled)
4 Active: active (running) since Wed 2017-09-13 09:23:08 CST; 25min ago
5 Docs: man:firewalld(1)
6 Main PID: 641 (firewalld)
7 CGroup: /system.slice/firewalld.service
8 └─641 /usr/bin/python -Es /usr/sbin/firewalld --nofork --nopid
9
10 Sep 13 09:22:58 localhost.localdomain systemd[1]: Starting firewalld - dynami...
11 Sep 13 09:23:08 localhost.localdomain systemd[1]: Started firewalld - dynamic...
12 Hint: Some lines were ellipsized, use -l to show in full.
13 [root@localhost data]# systemctl stop firewalld.service #关闭防火墙
14 [root@localhost data]# systemctl status firewalld.service #查看防火墙状态(已关闭)
15 ● firewalld.service - firewalld - dynamic firewall daemon
16 Loaded: loaded (/usr/lib/systemd/system/firewalld.service; enabled; vendor preset: enabled)
17 Active: inactive (dead) since Wed 2017-09-13 09:48:55 CST; 10s ago
18 Docs: man:firewalld(1)
19 Process: 641 ExecStart=/usr/sbin/firewalld --nofork --nopid $FIREWALLD_ARGS (code=exited, status=0/SUCCESS)
20 Main PID: 641 (code=exited, status=0/SUCCESS)
21
22 Sep 13 09:22:58 localhost.localdomain systemd[1]: Starting firewalld - dynami...
23 Sep 13 09:23:08 localhost.localdomain systemd[1]: Started firewalld - dynamic...
24 Sep 13 09:48:54 localhost.localdomain systemd[1]: Stopping firewalld - dynami...
25 Sep 13 09:48:55 localhost.localdomain systemd[1]: Stopped firewalld - dynamic...
26 Hint: Some lines were ellipsized, use -l to show in full.
27 [root@localhost data]# systemctl disable firewalld.service #禁止使用防火墙(重启也是禁止的)
28 Removed symlink /etc/systemd/system/dbus-org.fedoraproject.FirewallD1.service.
29 Removed symlink /etc/systemd/system/basic.target.wants/firewalld.service.
6.关闭selinux(需重启生效)
1 [root@localhost data]# vi /etc/selinux/config
2 [root@localhost data]# cat /etc/selinux/config
/etc/selinux/config 最终文档为:
# This file controls the state of SELinux on the system.
# SELINUX= can take one of these three values:
# enforcing - SELinux security policy is enforced.
# permissive - SELinux prints warnings instead of enforcing.
# disabled - No SELinux policy is loaded.
SELINUX=disabled #此处修改为disabled
# SELINUXTYPE= can take one of three two values:
# targeted - Targeted processes are protected,
# minimum - Modification of targeted policy. Only selected processes are protected.
# mls - Multi Level Security protection.
SELINUXTYPE=targeted
7、修改内核参数(加入斜体部分)
1 [root@local++host data]# vi /etc/sysctl.conf
2 [root@localhost data]# cat /etc/sysctl.conf
# sysctl settings are defined through files in
# /usr/lib/sysctl.d/, /run/sysctl.d/, and /etc/sysctl.d/.
#
# Vendors settings live in /usr/lib/sysctl.d/.
# To override a whole file, create a new file with the same in
# /etc/sysctl.d/ and put new settings there. To override
# only specific settings, add a file with a lexically later
# name in /etc/sysctl.d/ and put new settings there.
#
# For more information, see sysctl.conf(5) and sysctl.d(5).
net.ipv4.icmp_echo_ignore_broadcasts = 1
net.ipv4.conf.all.rp_filter = 1
fs.file-max = 6815744 #设置最大打开文件数
fs.aio-max-nr = 1048576
kernel.shmall = 2097152 #共享内存的总量,8G内存设置:2097152*4k/1024/1024
kernel.shmmax = 2147483648 #最大共享内存的段大小
kernel.shmmni = 4096 #整个系统共享内存端的最大数
kernel.sem = 250 32000 100 128
net.ipv4.ip_local_port_range = 9000 65500 #可使用的IPv4端口范围
net.core.rmem_default = 262144
net.core.rmem_max= 4194304
net.core.wmem_default= 262144
net.core.wmem_max= 1048576
8、使配置修改内核的参数生效
1 [root@localhost data]# sysctl -p
net.ipv4.icmp_echo_ignore_broadcasts = 1
net.ipv4.conf.all.rp_filter = 1
sysctl: setting key "fs.file-max": Invalid argument
fs.file-max = 6815744 #设置最大打开文件数
fs.aio-max-nr = 1048576
sysctl: setting key "kernel.shmall": Invalid argument
kernel.shmall = 2097152 #共享内存的总量,8G内存设置:2097152*4k/1024/1024
sysctl: setting key "kernel.shmmax": Invalid argument
kernel.shmmax = 2147483648 #最大共享内存的段大小
sysctl: setting key "kernel.shmmni": Invalid argument
kernel.shmmni = 4096 #整个系统共享内存端的最大数
kernel.sem = 250 32000 100 128
sysctl: setting key "net.ipv4.ip_local_port_range": Invalid argument
net.ipv4.ip_local_port_range = 9000 65500 #可使用的IPv4端口范围
net.core.rmem_default = 262144
net.core.rmem_max = 4194304
net.core.wmem_default = 262144
net.core.wmem_max = 1048576
9、对oracle用户设置限制,提高软件运行性能(斜体为添加部分)
1 [root@localhost data]# vi /etc/security/limits.conf
2 [root@localhost data]# cat /etc/security/limits.conf
在最下面部分添加内容(斜体为添加的内容)
@student - maxlogins 4
oracle soft nproc 2047
oracle hard nproc 16384
oracle soft nofile 1024
oracle hard nofile 65536
End of file
10、配置用户的环境变量(斜体部分为添加代码)
1 [root@localhost data]# vi /home/oracle/.bash_profile
2 [root@localhost data]# cat /home/oracle/.bash_profile
# .bash_profile
# Get the aliases and functions
if [ -f ~/.bashrc ]; then
. ~/.bashrc
fi
# User specific environment and startup programs
PATH=$PATH:$HOME/.local/bin:$HOME/bin
export PATH
export ORACLE_BASE=/data/oracle #oracle数据库安装目录
export ORACLE_HOME=$ORACLE_BASE/product/11.2.0/db_1 #oracle数据库路径
export ORACLE_SID=orcl #oracle启动数据库实例名
export ORACLE_UNQNAME=orcl
export ORACLE_TERM=xterm #xterm窗口模式安装
export PATH=$ORACLE_HOME/bin:/usr/sbin:$PATH #添加系统环境变量
export LD_LIBRARY_PATH=$ORACLE_HOME/lib:/lib:/usr/lib #添加系统环境变量
export LANG=C #防止安装过程出现乱码
export NLS_LANG=AMERICAN_AMERICA.ZHS16GBK #设置Oracle客户端字符集,必须与Oracle安装时设置的字符集保持一致
export ORACLE_UNQNAME=orcl (in 11.2 dbconsole, the $ORACLE_UNQNAME needs to be set rather than $ORACLE_SID)
报错:
ERROR:export '=' not a valid identifier
如果你给添加语句写成这样(等号两边带空格):export LANG = C就会报错
不能给/etc/profile文件里加空格
11、使用户的环境变量配置立即生效
1 [root@localhost data]# source /home/oracle/.bash_profile
12.将安装包移动到/usr/local/src路径下
1 [root@localhost ~]# cd /.
2 [root@localhost /]# cd /home/anzerong/Desktop/
3 [root@localhost Desktop]# ls
4 linux.x64_11gR2_database_1of2.zip linux.x64_11gR2_database_2of2.zip
5 [root@localhost Desktop]# mv linux.x64_11gR2_database_1of2.zip /usr/local/src
6 [root@localhost Desktop]# ls
7 linux.x64_11gR2_database_2of2.zip
8 [root@localhost Desktop]# mv linux.x64_11gR2_database_2of2.zip /usr/local/src
13.重启系统,确保所有设置生效
1 [root@localhost Desktop]# reboot
14.从oracle用户进入/usr/local/src目录
1 [oracle@localhost /]$ cd /usr/local/src
2 [oracle@localhost src]$ ls
3 linux.x64_11gR2_database_1of2.zip linux.x64_11gR2_database_2of2.zip
15.解压两个软件包至/data/database/目录下
1 [oracle@localhost src]$ unzip linux.x64_11gR2_database_1of2.zip -d /data/database/ #解压
2 (省略...)
3 [oracle@localhost src]$ unzip linux.x64_11gR2_database_2of2.zip -d /data/database/ #解压
4 (省略...)
16.进入管理员权限,设置目录所有者为oinstall用户组的oracle用户
1 [oracle@localhost src]$ su root
2 Password:
3 [root@localhost src]# chown -R oracle:oinstall /data/database/database/
17.使用oracle以图形化方式登陆系统,执行安装命令
1[oracle@localhost /]$ cd /data/database/database/
2 [oracle@localhost database]$ ls
3 doc install response rpm runInstaller sshsetup stage welcome.html
4 [oracle@localhost database]$ ./runInstaller
5 Starting Oracle Universal Installer...
6 (省略...)