(标答出处: 鱼C论坛)
《零基础入门学习Python》
测试题:

答:
(1)可以进行偷懒,使用继承之后,对于相同类似的类不需要再重新敲一边方法,继承可以使得子类具有和父类相同的方法和属性,不需要再重新敲一遍
(2)并且在子类继承父类的同时,可以在子类中添加新的方法和属性,来覆盖父类的方法和属性。
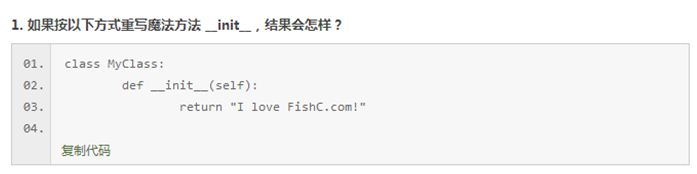
答:会报错,因为__init__方法不能反悔除None意外的值

答:子类中有和父类相同的属性或者方法时,子类的方法和属性会覆盖父类的方法和属性,父类的仍然有,不会删除,只是子类看不到。

答:在继承的企鹅类中,定义和父类飞的方法一样的方法,来覆盖父类中的方法,如:
class Bird :
    def fly(self) :
        print ("I can fly!")

class penguin(Bird) :
    def fly(self) :
        pass

b = Bird()
p = penguin()
b.fly()
p.fly()
运行结果:


答:super函数超级在你不需要写出具体的基类(父类)的名字,他会自动帮你找出所有基类,以及对应的方法。由于不用给出基类的名字,所以如果你要改变子类所继承的父类,只需要修改子类括号中的基类名字即可。


答:使用super函数
class A() :
    def __init__(self) :
        print ("进入A")
        print ("离开A")

class B(A) :
    def __init__(self) :
        print ("进入B")
        super().__init__()
        print ("离开B")

class C(A) :
    def __init__(self) :
        print ("进入C")
        super().__init__()
        print ("离开C")

class D(B,C) :
    def __init__(self) :
        print ("进入D")
        super().__init__()
        print ("离开D")

d = D()
运行结果:

动动手
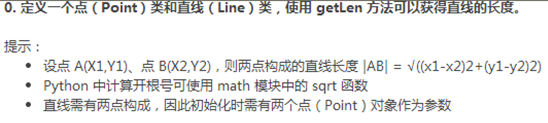
import math as m

class Point () :
    def __init__(self,x=0,y=0) :
        self.x = x
        self.y = y

    def getx (self) :
        return self.x

    def gety (self) :
        return self.y

class Line() :
    def __init__(self , p1 , p2) :
        self.x = p1.getx() - p2.getx()
        self.y = p1.gety() - p2.gety()

    def getlen (self) :
        lenline = m.sqrt(self.x*self.x + self.y + self.y)
        print (lenline)

p1 = Point(2,4)
p2 = Point(4,2)
line = Line(p1,p2)
line.getlen()
运行结果:


使用tkinter模块制作了一个简易计算器
import tkinter #导入tkinter模块

root  = tkinter.Tk()
root.minsize(280,500)
root.title('zx的计算器')

#1.界面布局
#显示面板
result = tkinter.StringVar()
result.set(0)                           #显示面板显示结果1,用于显示默认数字0
result2 = tkinter.StringVar()           #显示面板显示结果2,用于显示计算过程
result2.set('')
#显示版
label = tkinter.Label(root,font = ('微软雅黑',20),bg = '#EEE9E9',bd ='9',fg = '#828282',anchor = 'se',textvariable = result2)
label.place(width = 280,height = 170)
label2 = tkinter.Label(root,font = ('微软雅黑',30),bg = '#EEE9E9',bd ='9',fg = 'black',anchor = 'se',textvariable = result)
label2.place(y = 170,width = 280,height = 60)

#数字键按钮

btn7 = tkinter.Button(root,text = '7',font = ('微软雅黑',20),fg = ('#4F4F4F'),bd = 0.5,command = lambda : pressNum('7'))
btn7.place(x = 0,y = 285,width = 70,height = 55)
btn8 = tkinter.Button(root,text = '8',font = ('微软雅黑',20),fg = ('#4F4F4F'),bd = 0.5,command = lambda : pressNum('8'))
btn8.place(x = 70,y = 285,width = 70,height = 55)
btn9 = tkinter.Button(root,text = '9',font = ('微软雅黑',20),fg = ('#4F4F4F'),bd = 0.5,command = lambda : pressNum('9'))
btn9.place(x = 140,y = 285,width = 70,height = 55)

btn4 = tkinter.Button(root,text = '4',font = ('微软雅黑',20),fg = ('#4F4F4F'),bd = 0.5,command = lambda : pressNum('4'))
btn4.place(x = 0,y = 340,width = 70,height = 55)
btn5 = tkinter.Button(root,text = '5',font = ('微软雅黑',20),fg = ('#4F4F4F'),bd = 0.5,command = lambda : pressNum('5'))
btn5.place(x = 70,y = 340,width = 70,height = 55)
btn6 = tkinter.Button(root,text = '6',font = ('微软雅黑',20),fg = ('#4F4F4F'),bd = 0.5,command = lambda : pressNum('6'))
btn6.place(x = 140,y = 340,width = 70,height = 55)

btn1 = tkinter.Button(root,text = '1',font = ('微软雅黑',20),fg = ('#4F4F4F'),bd = 0.5,command = lambda : pressNum('1'))
btn1.place(x = 0,y = 395,width = 70,height = 55)
btn2 = tkinter.Button(root,text = '2',font = ('微软雅黑',20),fg = ('#4F4F4F'),bd = 0.5,command = lambda : pressNum('2'))
btn2.place(x = 70,y = 395,width = 70,height = 55)
btn3 = tkinter.Button(root,text = '3',font = ('微软雅黑',20),fg = ('#4F4F4F'),bd = 0.5,command = lambda : pressNum('3'))
btn3.place(x = 140,y = 395,width = 70,height = 55)
btn0 = tkinter.Button(root,text = '0',font = ('微软雅黑',20),fg = ('#4F4F4F'),bd = 0.5,command = lambda : pressNum('0'))
btn0.place(x = 70,y = 450,width = 70,height = 55)

#运算符号按钮
btnac = tkinter.Button(root,text = 'AC',bd = 0.5,font = ('黑体',20),fg = 'orange',command = lambda :pressCompute('AC'))
btnac.place(x = 0,y = 230,width = 70,height = 55)
btnback = tkinter.Button(root,text = '←',font = ('微软雅黑',20),fg = '#4F4F4F',bd = 0.5,command = lambda:pressCompute('b'))
btnback.place(x = 70,y = 230,width = 70,height = 55)
btndivi = tkinter.Button(root,text = '÷',font = ('微软雅黑',20),fg = '#4F4F4F',bd = 0.5,command = lambda:pressCompute('/'))
btndivi.place(x = 140,y = 230,width = 70,height = 55)
btnmul = tkinter.Button(root,text ='×',font = ('微软雅黑',20),fg = "#4F4F4F",bd = 0.5,command = lambda:pressCompute('*'))
btnmul.place(x = 210,y = 230,width = 70,height = 55)
btnsub = tkinter.Button(root,text = '-',font = ('微软雅黑',20),fg = ('#4F4F4F'),bd = 0.5,command = lambda:pressCompute('-'))
btnsub.place(x = 210,y = 285,width = 70,height = 55)
btnadd = tkinter.Button(root,text = '+',font = ('微软雅黑',20),fg = ('#4F4F4F'),bd = 0.5,command = lambda:pressCompute('+'))
btnadd.place(x = 210,y = 340,width = 70,height = 55)
btnequ = tkinter.Button(root,text = '=',bg = 'orange',font = ('微软雅黑',20),fg = ('#4F4F4F'),bd = 0.5,command = lambda :pressEqual())
btnequ.place(x = 210,y = 395,width = 70,height = 110)
btnper = tkinter.Button(root,text = '%',font = ('微软雅黑',20),fg = ('#4F4F4F'),bd = 0.5,command = lambda:pressCompute('%'))
btnper.place(x = 0,y = 450,width = 70,height = 55)
btnpoint = tkinter.Button(root,text = '.',font = ('微软雅黑',20),fg = ('#4F4F4F'),bd = 0.5,command = lambda:pressCompute('.'))
btnpoint.place(x = 140,y = 450,width = 70,height = 55)


#操作函数
lists = []                            #设置一个变量 保存运算数字和符号的列表
isPressSign = False                  #添加一个判断是否按下运算符号的标志,假设默认没有按下按钮
isPressNum = False
#数字函数
def pressNum(num):                   #设置一个数字函数 判断是否按下数字 并获取数字将数字写在显示版上
    global lists                     #全局化lists和按钮状态isPressSign
    global isPressSign
    if isPressSign == False:
        pass
    else:                            #重新将运算符号状态设置为否
        result.set(0)
        isPressSign = False

    #判断界面的数字是否为0
    oldnum = result.get()             #第一步
    if oldnum =='0':                 #如过界面上数字为0 则获取按下的数字
        result.set(num)
    else:                            #如果界面上的而数字不是0  则链接上新按下的数字
        newnum = oldnum + num
        result.set(newnum)            #将按下的数字写到面板中


#运算函数
def pressCompute(sign):
    global lists
    global isPressSign
    num = result.get()              #获取界面数字
    lists.append(num)               #保存界面获取的数字到列表中

    lists.append(sign)              #讲按下的运算符号保存到列表中
    isPressSign = True

    if sign =='AC':                #如果按下的是'AC'按键,则清空列表内容,讲屏幕上的数字键设置为默认数字0
        lists.clear()
        result.set(0)
    if sign =='b':                 #如果按下的是退格‘’,则选取当前数字第一位到倒数第二位
        a = num[0:-1]
        lists.clear()
        result.set(a)


#获取运算结果函数
def pressEqual():
    global lists
    global isPressSign

    curnum = result.get()           #设置当前数字变量,并获取添加到列表
    lists.append(curnum)

    computrStr = ''.join(lists)     #讲列表内容用join命令将字符串链接起来
    endNum = eval(computrStr)       #用eval命令运算字符串中的内容
#    a = str(endNum)
#   b = '='+a                       #给运算结果前添加一个 ‘=’ 显示   不过这样写会有BUG 不能连续运算,这里注释,不要 =
#   c = b[0:10]                     #所有的运算结果取9位数
    result.set(endNum)                   #讲运算结果显示到屏幕1
    result2.set(computrStr)         #将运算过程显示到屏幕2
    lists.clear()                   #清空列表内容


root.mainloop()
运行结果:
