SpringMVC 简介:
SpringMVC 中重要组件: DispatcherServlet : 前端控制器,接收所有请求(如果配置/不包含 jsp)、 HandlerMapping: 解析请求格式的.判断希望要执行哪个具体的方法. HandlerAdapter: 负责调用具体的方法. ViewResovler:视图解析器.解析结果,准备跳转到具体的物理视图。
SpringMVC 运行原理图:

Spring 容器和 SpringMVC 容器的关系:Spring 容器和 SpringMVC 容器是父子容器.
SpringMVC 容器中能够调用 Spring 容器的所有内容.

Spring环境的搭建:
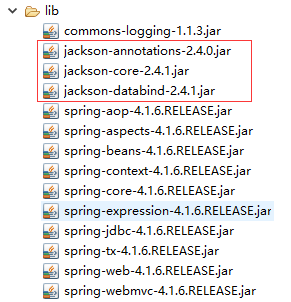
1.导入依赖的jar: 红框为jackson的jar 如果只是用springmvc可以不依赖,但后续用到@ResponseBody 注解是 需要此依赖
2.web.xml和spring核心配置文件的配置:
<?xml version="1.0" encoding="UTF-8"?>
<web-app xmlns:xsi="http://www.w3.org/2001/XMLSchema-instance" xmlns="http://java.sun.com/xml/ns/javaee" xsi:schemaLocation="http://java.sun.com/xml/ns/javaee http://java.sun.com/xml/ns/javaee/web-app_3_0.xsd" id="WebApp_ID" version="3.0">
  <!-- 配置前端控制器 -->
  <servlet>
  	<servlet-name>DispatcherServlet</servlet-name>
  	<servlet-class>org.springframework.web.servlet.DispatcherServlet</servlet-class>
  	<init-param>
  		<param-name>contextConfigLocation</param-name>
  		<param-value>classpath:springmvc.xml</param-value>
  	</init-param>
  	<load-on-startup>1</load-on-startup>
  </servlet>
  <servlet-mapping>
  	<servlet-name>DispatcherServlet</servlet-name>
  	<url-pattern>/</url-pattern>
  </servlet-mapping>

  <!-- 字符编码过滤器 -->
  <filter>
  	<filter-name>encoding</filter-name>
  	<filter-class>org.springframework.web.filter.CharacterEncodingFilter</filter-class>
  	<init-param>
  		<param-name>encoding</param-name>
  		<param-value>utf-8</param-value>
  	</init-param>
  </filter>
  <filter-mapping>
  	<filter-name>encoding</filter-name>
  	<url-pattern>/*</url-pattern>
  </filter-mapping>

</web-app>
注意:
<?xml version="1.0" encoding="UTF-8"?>
<beans xmlns="http://www.springframework.org/schema/beans"
	xmlns:xsi="http://www.w3.org/2001/XMLSchema-instance"
	xmlns:mvc="http://www.springframework.org/schema/mvc"
	xmlns:context="http://www.springframework.org/schema/context"
	xsi:schemaLocation="http://www.springframework.org/schema/beans
        http://www.springframework.org/schema/beans/spring-beans.xsd
        http://www.springframework.org/schema/context
        http://www.springframework.org/schema/context/spring-context.xsd
        http://www.springframework.org/schema/mvc
        http://www.springframework.org/schema/mvc/spring-mvc.xsd">

	<!-- 扫描注解 -->
	<context:component-scan base-package="com.tao.controller"></context:component-scan>

	<!-- 注解驱动 相当于配置了DefaultAnnotationHandlerMapping 和  AnnotationMethodHandlerAdapter-->
	<mvc:annotation-driven></mvc:annotation-driven>

	<!-- 静态资源的放行 location:表示本地路径 本地去哪个路径找  mapping:请求映射路径 -->
	<mvc:resources location="/js/" mapping="/js/**"></mvc:resources>
	<!-- 假设现在在js文件夹在WEB-INF下,用户请求/js/abc 那就应该这样写:
	<mvc:resources location="/WEB-INF/js/" mapping="/js/abc/**"></mvc:resources>
	 -->
	<mvc:resources location="css" mapping="/css/**"></mvc:resources>
	<mvc:resources location="/images/" mapping="/images/**"></mvc:resources>

	<!-- 视图解析器 -->
	<bean id="viewResolver" class="org.springframework.web.servlet.view.InternalResourceViewResolver">
    	<property name="prefix" value="/"></property>
    	<property name="suffix" value=".jsp"></property>
    </bean>
</beans>
写个controller往页面跳完事:
package com.tao.controller;

import java.util.List;
import org.springframework.stereotype.Controller;
import org.springframework.web.bind.annotation.PathVariable;
import org.springframework.web.bind.annotation.RequestMapping;
import org.springframework.web.bind.annotation.RequestParam;
import org.springframework.web.bind.annotation.ResponseBody;
import com.tao.pojo.Bean;
import com.tao.pojo.People;

@Controller
public class DemoController {

	/*
	 * 多个同名参数时,这样写会报:List<String> Fruit 接口不能实例化
	 * 那我们换成ArrayList<String> Fruit 不报错 但是会new 一个新的list给我们 不会把请求参数放入方法中
	 */
	@RequestMapping("/demo")
	public String demo(@RequestParam(value="name1") String name,
		           @RequestParam(value="password1") String password,
		           @RequestParam(value="age1") int age,
		           @RequestParam(value="Fruit")List<String> Fruit){
		System.out.println("name:"+name+" password:"+password+" age:"+age);
		System.out.println(Fruit);
		return "/main.jsp";

	}

	@RequestMapping(value="/demo7",produces="text/html;charset=utf-8")
	@ResponseBody
	public People demo7(){
		People p = new People();
		p.setName("张三");
		p.setPassword("123456");
		return p;

	}

}
写个main.jsp就可以完成跳转了。 这边主要讲下参数传递:
1.如果请求的参数名和方法入参的参数名一致,那就直接用即可,springmvc直接能取到;
如果请求参数名和方法入参参数名不一致,用@RequestParam(value="写前台的那个参数名") 然后自己定义一个入参的名字,springmvc会把取到的值 自动赋予后面的参数名
@RequestParam的三个用法:1.如果请求参数名和方法参数名不对应使用 2.设置默认值 3.如果强制要求必须有某个参数
2.请求参数时对象类型,对象的属性名和前台的参数名一致,也可以直接取,方法入参直接写对象,获取的参数会调用set自动封装到对象属性中。
3.前台是复选框,多个同名属性时,要这样接收:
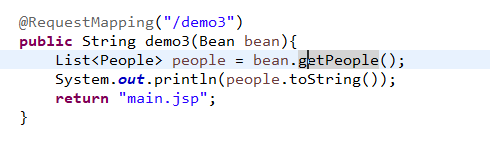
4.如果时对象.属性,就要先创建一个对象的类,然后对应其属性:
前台多个对象,组成集合也是一样的道理:
所以我们控制器方法的参数类型都写Bean就完事了,因为前台的对象.属性 这个对象 都只是bean的对象而已。


restful 传值方式.: 简化 jsp 中参数编写格式 ,在 jsp 中设定特定的格式

关于SpringMVC的视图跳转:
默认跳转方式请求转发.可以自己设定跳转方式:
redirect:资源路径 重定向、
forward:资源路径 或省略 forward: 转发

视图解析器:
SpringMVC 会提供默认视图解析器.
也可以自定义视图解析器:
<!-- 视图解析器 -->
<bean id="viewResolver" class="org.springframework.web.servlet.view.InternalResourceViewResolver">
    	<property name="prefix" value="/"></property>
    	<property name="suffix" value=".jsp"></property>
</bean>
如果希望不执行自定义视图解析器,在方法返回值前面添加forward:或 redirect:

@ResponseBody
1.在方法上只有@RequestMapping 时,无论方法返回值是什么认为需要跳转
2.在方法上添加@ResponseBody(恒不跳转)
如果返回值满足 key-value 形式(对象或 map) 把响应头设置为application/json;charset=utf-8,把转换后的内容输出流的形式响应给客户端。
如果返回值不满足 key-value,例如返回值为 String,把相应头设置为 text/html, 把方法返回值以流的形式直接输出.如果返回值包含中文,出现中文乱码 produces 表示响应头中 Content-Type 取值.

