SpringBoot 2.0 学习(七)使用Actuator监控服务
文章部分参考纯洁的微笑博客内容
## 为什么要用这个? 微服务的特点决定了功能模块的部署是分布式的,大部分功能模块都是运行在不同的机器上,彼此通过服务调用进行交互,前后台的业务流会经过很多个微服务的处理和传递,出现了异常如何快速定位是哪个环节出现了问题?
在这种框架下,微服务的监控显得尤为重要。本文主要结合Spring Boot Actuator,跟大家一起分享微服务Spring Boot
Actuator的常见用法,方便我们在日常中对我们的微服务进行监控治理。
可以看到哪些应用信息
服务的应用信息是通过Actuator提供的接口来实现的,Actuator 提供了 13 个接口,具体如下表所示。
| HTTP方法 | 路径 | 描述 |
|---|---|---|
| GET | /autoconfig | 提供一份自动配置报告,记录哪些自动配置条件通过,哪些没通过 |
| GET | /configprops | 描述配置属性(包含默认值)如何注入Bean |
| GET | /beans | 描述应用程序上下文里全部的Bean,以及它们的关系 |
| GET | /dump | 获取线程活动的快照 |
| GET | /env | 获取全部环境属性 |
| GET | /env/{name} | 根据名称获取特定的环境属性值 |
| GET | /health | 报告应用程序的健康指标,这些值由HealthIndicator的实现类提供 |
| GET | /info | 获取应用程序的定制信息,这些信息由info打头的属性提供 |
| GET | /mappings | 描述全部的URI路径,及它们和控制器(包含Actuator端点)映射关系 |
| GET | /metrics | 报告各种应用程序度量信息,比如内存用量和HTTP请求计数 |
| GET | /metrics/{name} | 报告指定名称的应用程序度量值 |
| GET | /shutdown | 关闭应用程序,要求endpoints.shutdown.enabled设置为true |
| GET | /trace | 提供基本的HTTP请求跟踪信息(时间戳、HTTP头等) |
怎么使用
添加依赖
	<!-- 使用actuator对springboot监控 -->
	<dependency>
		<groupId>org.springframework.boot</groupId>
		<artifactId>spring-boot-starter-web</artifactId>
	</dependency>
	<dependency>
        <groupId>org.springframework.boot</groupId>
        <artifactId>spring-boot-starter-actuator</artifactId>
    </dependency>
	<dependency>
	    <groupId>org.springframework.boot</groupId>
	    <artifactId>spring-boot-starter-security</artifactId>
	</dependency>
配置文件
#方式一
#启用端点 env
management.endpoint.env.enabled=true
# 暴露端点 env 配置多个,隔开
management.endpoints.web.exposure.include=env,beans,health,mappings

#方式2直接开启和暴露所有端点
#management.endpoints.web.exposure.include=*

#actuator的访问路径
#修改访问路径  2.0之前默认是/   2.0默认是 /actuator  可以通过这个属性值修改
management.endpoints.web.base-path=/monitor
#端点能否正常关闭
management.endpoint.shutdown.enabled=true

#security安全验证访问设置
spring.security.user.name=root
spring.security.user.password=root
启动程序,根据打印的日志文件,访问浏览器,查看对应服务信息

启用和禁用接口
虽然Actuator的接口都很有用,但你不一定需要全部这些接口。默认情况下,所有接口(除 了/shutdown)都启用。比如要禁用 /metrics 接口,则可以设置如下:
endpoints.metrics.enabled = false
如果你只想打开一两个接口,那就先禁用全部,再启用那几个你要的,这样更方便。
endpoints.enabled = false
endpoints.metrics.enabled = true
可能遇到的问题
这里引用russle在CSDN上的原创博客,详细可以了解地址https://blog.csdn.net/russle/article/details/82454921
解决方案
1.移除spring-boot-starter-security依赖
如果没有实际使用security的功能,可以直接移除spring-boot-starter-security依赖
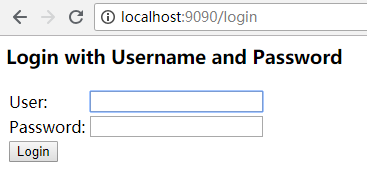
2.使用默认用户和密码登录
默认用户名是user ,密码是程序启动时自动生成的一串字符串

3.禁用安全设置或者设置对应的用户和密码
可以在application.properteis中配置对应的用户和密码
也可以设置对应的用户名和密码
spring.security.user.name=user1
spring.security.user.password=password1
通过在启动main类上禁用,添加注解
@EnableAutoConfiguration(exclude = {
org.springframework.boot.autoconfigure.security.servlet.SecurityAutoConfiguration.class
})