版权声明:本文为 [onefine] 原创文章,转载请注明出处: https://blog.csdn.net/jiduochou963/article/details/88095328
NoSQL的概述
什么是NoSQL
- NoSQL = Not Only SQL 非关系型数据库
为什么需要NoSQL
High performance高并发读写Huge Storage海量数据的高效率存储和访问High Scalability&&High Availability高可扩展性和高可用性
主流NoSQL产品

NoSQL数据库的四大分类
- 键值(Key-Value)存储
- 列存储
- 文档数据库
- 图像数据库
四类NoSQL数据库比较

NoSQL的特点
- 易扩展
- 灵活的数据模型
- 大数据量,高性能
- 高可用
Redis的概述
高性能键值对数据库,支持的键值数据类型:
- 字符串类型
- 列表类型
- 有序集合类型
- 离散类型
- 集合类型
Redis的应用场景
- 缓存
- 任务队列
- 网站访问统计
- 数据过期处理
- 用户排行榜
- 分布式集群架构中的session分离
Redis的使用和安装(CentOS为例)
Redis是C语言开发,安装Redis需要先将官网下载的源码进行编译,编译依赖gcc环境。
安装gcc:$ yum install gcc-c++
下载Redis:$ wget http://download.redis.io/releases/redis-5.0.3.tar.gz
解压:$ tar -zxvf redis-5.0.3.tar.gz
编译:
[root@localhost src]# cd redis-5.0.3/
[root@localhost redis-5.0.3]# make
...
安装:
# 指定安装路径并安装
[root@localhost redis-5.0.3]# make PREFIX=/usr/local/redis-5.0.3 install
启动Redis
前端启动方式
[root@localhost bin]# cd /usr/local/redis-5.0.3/bin/
[root@localhost bin]# ./redis-server
39271:C 03 Mar 2019 20:44:53.762 # oO0OoO0OoO0Oo Redis is starting oO0OoO0OoO0Oo
39271:C 03 Mar 2019 20:44:53.762 # Redis version=5.0.3, bits=64, commit=00000000, modified=0, pid=39271, just started
39271:C 03 Mar 2019 20:44:53.762 # Warning: no config file specified, using the default config. In order to specify a config file use ./redis-server /path/to/redis.conf
                _._
           _.-``__ ''-._
      _.-``    `.  `_.  ''-._           Redis 5.0.3 (00000000/0) 64 bit
  .-`` .-```.  ```\/    _.,_ ''-._
 (    '      ,       .-`  | `,    )     Running in standalone mode
 |`-._`-...-` __...-.``-._|'` _.-'|     Port: 6379
 |    `-._   `._    /     _.-'    |     PID: 39271
  `-._    `-._  `-./  _.-'    _.-'
 |`-._`-._    `-.__.-'    _.-'_.-'|
 |    `-._`-._        _.-'_.-'    |           http://redis.io
  `-._    `-._`-.__.-'_.-'    _.-'
 |`-._`-._    `-.__.-'    _.-'_.-'|
 |    `-._`-._        _.-'_.-'    |
  `-._    `-._`-.__.-'_.-'    _.-'
      `-._    `-.__.-'    _.-'
          `-._        _.-'
              `-.__.-'

39271:M 03 Mar 2019 20:44:53.764 # WARNING: The TCP backlog setting of 511 cannot be enforced because /proc/sys/net/core/somaxconn is set to the lower value of 128.
39271:M 03 Mar 2019 20:44:53.764 # Server initialized
39271:M 03 Mar 2019 20:44:53.764 # WARNING overcommit_memory is set to 0! Background save may fail under low memory condition. To fix this issue add 'vm.overcommit_memory = 1' to /etc/sysctl.conf and then reboot or run the command 'sysctl vm.overcommit_memory=1' for this to take effect.
39271:M 03 Mar 2019 20:44:53.764 # WARNING you have Transparent Huge Pages (THP) support enabled in your kernel. This will create latency and memory usage issues with Redis. To fix this issue run the command 'echo never > /sys/kernel/mm/transparent_hugepage/enabled' as root, and add it to your /etc/rc.local in order to retain the setting after a reboot. Redis must be restarted after THP is disabled.
39271:M 03 Mar 2019 20:44:53.764 * DB loaded from disk: 0.000 seconds
39271:M 03 Mar 2019 20:44:53.764 * Ready to accept connections
Ctrl+C停止前端启动模式,启动Redis一般采用后端启动方式。
后端启动方式
将编译之后的redis-5.0.3/redis.conf文件复制到安装目录redis-5.0.3/下面:
扫描二维码关注公众号,回复:
5448166 查看本文章

[root@localhost local]# ls -al /usr/local/redis-5.0.3/bin/
总用量 32656
drwxr-xr-x 2 root root     134 3月   3 19:33 .
drwxr-xr-x 3 root root      17 3月   3 19:33 ..
-rwxr-xr-x 1 root root 4365488 3月   3 19:33 redis-benchmark
-rwxr-xr-x 1 root root 8088920 3月   3 19:33 redis-check-aof
-rwxr-xr-x 1 root root 8088920 3月   3 19:33 redis-check-rdb
-rwxr-xr-x 1 root root 4800752 3月   3 19:33 redis-cli
lrwxrwxrwx 1 root root      12 3月   3 19:33 redis-sentinel -> redis-server
-rwxr-xr-x 1 root root 8088920 3月   3 19:33 redis-server
[root@localhost local]# ls -al /usr/local/src/redis-5.0.3
总用量 252
drwxrwxr-x   6 root root   309 12月 12 20:25 .
drwxr-xr-x.  6 root root   189 3月   3 19:20 ..
-rw-rw-r--   1 root root 92434 12月 12 20:25 00-RELEASENOTES
-rw-rw-r--   1 root root    53 12月 12 20:25 BUGS
-rw-rw-r--   1 root root  1894 12月 12 20:25 CONTRIBUTING
-rw-rw-r--   1 root root  1487 12月 12 20:25 COPYING
drwxrwxr-x   6 root root   192 3月   3 19:29 deps
-rw-rw-r--   1 root root   376 12月 12 20:25 .gitignore
-rw-rw-r--   1 root root    11 12月 12 20:25 INSTALL
-rw-rw-r--   1 root root   151 12月 12 20:25 Makefile
-rw-rw-r--   1 root root  4223 12月 12 20:25 MANIFESTO
-rw-rw-r--   1 root root 20555 12月 12 20:25 README.md
-rw-rw-r--   1 root root 62155 12月 12 20:25 redis.conf
-rwxrwxr-x   1 root root   275 12月 12 20:25 runtest
-rwxrwxr-x   1 root root   280 12月 12 20:25 runtest-cluster
-rwxrwxr-x   1 root root   281 12月 12 20:25 runtest-sentinel
-rw-rw-r--   1 root root  9710 12月 12 20:25 sentinel.conf
drwxrwxr-x   3 root root  8192 3月   3 19:33 src
drwxrwxr-x  10 root root   167 12月 12 20:25 tests
drwxrwxr-x   8 root root  4096 12月 12 20:25 utils
# 将编译之后的redis-5.0.3/redis.conf文件复制到安装目录redis-5.0.3/下面
[root@localhost local]# cp /usr/local/src/redis-5.0.3/redis.conf /usr/local/redis-5.0.3/
[root@localhost local]# cd /usr/local/redis-5.0.3/
[root@localhost redis-5.0.3]# ls -al
总用量 64
drwxr-xr-x   3 root root    35 3月   3 20:33 .
drwxr-xr-x. 20 root root   241 3月   3 19:33 ..
drwxr-xr-x   2 root root   134 3月   3 19:33 bin
-rw-r--r--   1 root root 62155 3月   3 20:33 redis.conf
[root@localhost redis-5.0.3]#
修改配置文件:
[root@localhost bin]# cd /usr/local/redis-5.0.3/
[root@localhost redis-5.0.3]# vim redis.conf
# 将daemonize no 改为 daemonize yes
启动:
[root@localhost bin]# cd /usr/local/redis-5.0.3/
[root@localhost redis-5.0.3]# ./bin/redis-server ./redis.conf
39582:C 03 Mar 2019 21:07:54.582 # oO0OoO0OoO0Oo Redis is starting oO0OoO0OoO0Oo
39582:C 03 Mar 2019 21:07:54.582 # Redis version=5.0.3, bits=64, commit=00000000, modified=0, pid=39582, just started
39582:C 03 Mar 2019 21:07:54.582 # Configuration loaded
[root@localhost redis-5.0.3]#
查看Redis是否已经成功启动:
[root@localhost redis-5.0.3]# ps -ef | grep -i redis
root      39583      1  0 21:07 ?        00:00:00 ./bin/redis-server 127.0.0.1:6379
root      39604  28546  0 21:09 pts/0    00:00:00 grep --color=auto -i redis
停止Redis:
... 接上
[root@localhost redis-5.0.3]# kill -9 39583
# 或者
[root@localhost redis-5.0.3]# cd /usr/local/redis-5.0.3/bin/
[root@localhost bin]# ./redis-cli shutdown
[root@localhost bin]# ps -ef | grep -i redis
root      39674  28546  0 21:12 pts/0    00:00:00 grep --color=auto -i redis
[root@localhost bin]#
简单使用Redis:
# 执行客户端
[root@localhost redis-5.0.3]# ./bin/redis-cli
127.0.0.1:6379> ping
PONG
127.0.0.1:6379>
# 向Redis中存入和获取数据,注意key-value的形式:
127.0.0.1:6379> set name onefine
OK
127.0.0.1:6379> get name
"onefine"
# 查看当前数据库中所有的key,删除操作:
127.0.0.1:6379> keys *
1) "name"
127.0.0.1:6379> del name
(integer) 1
127.0.0.1:6379> keys *
(empty list or set)
127.0.0.1:6379>
Redis 设置外网可访问
1、前提是你已经把redis的端口放到了防火墙(iptables)计划中,
在/etc/sysconfig/iptables文件中添加:
-A INPUT -m state --state NEW -m tcp -p tcp --dport 6379 -j ACCEPT
重启防火墙:
service iptables restart
或者关闭防火墙(Firewall)(不推荐):
防火墙设置:
安装:
yum install firewalld
启动:service firewalld start
检查状态:service firewalld status
关闭或禁用防火墙:service firewalld stop/disable
[root@localhost redis-5.0.3]# cat /etc/redhat-release
CentOS Linux release 7.5.1804 (Core)
# 关闭防火墙
[root@localhost redis-5.0.3]# service firewalld stop
Redirecting to /bin/systemctl stop firewalld.service
[root@localhost redis-5.0.3]#
2、Redis 设置外网可访问:更改/usr/local/redis-5.0.3/redis.conf文件:
找到:
bind 127.0.0.1

protected-mode yes
更改为:
# bind 127.0.0.1

protected-mode no
3、重启Redis,若没运行Redis则直接启动即可:
# 关闭redis,如果没运行则跳过
[root@localhost redis-5.0.3]# cd /usr/local/redis-5.0.3/bin/
[root@localhost bin]# ./redis-cli shutdown
# 启动redis
[root@localhost bin]# cd /usr/local/redis-5.0.3/
[root@localhost redis-5.0.3]# ./bin/redis-server ./redis.conf
这样设置外网访问就成功了。
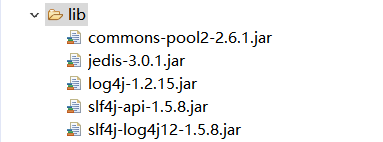
Jedis的入门
Jedis介绍
- Jedis是Redis官方首选的Java客户端开发包
- GitHub地址:https://github.com/xetorthio/jedis
导入包:
package top.onefine.redis;

import org.junit.Test;

import redis.clients.jedis.Jedis;
import redis.clients.jedis.JedisPool;
import redis.clients.jedis.JedisPoolConfig;

public class JedisDemo1 {

	@Test
	/**
	 * 单实例测试
	 */
	public void demo1() {
		// 1. 设置ip:port
		Jedis jedis = new Jedis("192.168.249.132", 6379);
		// 2. 保存数据
		//				jedis.set("name", "onefine");
		// 3. 获取数据
		String name = jedis.get("name");
		System.out.println("name:"+name);
		// 4. 释放资源
		jedis.close();

	}

	@Test
	/**
	 * 连接池方式连接
	 */
	public void demo2() {
		// 获得连接池的配置对象
		JedisPoolConfig config = new JedisPoolConfig();
		// 设置最大连接数
		config.setMaxTotal(30);
		// 设置最大空闲连接数
		config.setMaxIdle(10);

		// 获得连接池
		JedisPool jedisPool = new JedisPool(config, "192.168.249.132", 6379);
		// 获得核心对象
		Jedis jedis = null;
		try {
			// 通过连接池获得连接
			jedis = jedisPool.getResource();
			// 设置数据
			jedis.set("name", "xixi");
			// 获取数据
			String value = jedis.get("name");
			System.out.println("value:"+value);

		} catch (Exception e) {
			e.printStackTrace();
		} finally {
			// 释放资源
			if(jedis != null)  jedis.close();
			if(jedisPool != null)  jedisPool.close();
		}
	}

}