配置SpringBoot启动端口和访问路径
在application.properties中配置
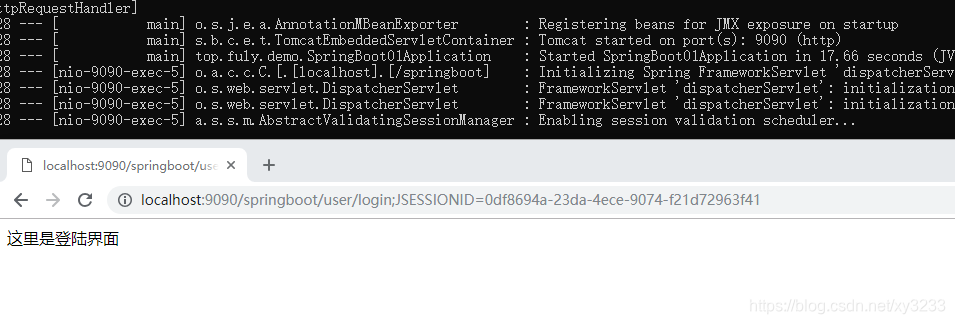
server.port=9090
server.context-path=/springboot
这时 访问路径 就变成了
http://localhost:9090/springboot
之前的808端口就访问不到了;
SpringBoot配置文件yml
yml是SpringBoot中另外一种格式的配置文件,springboot也是会默认读取的此配置文件的,这种配置文件带有提示功能
我们将application.properties文件中的内容转换为application.yml文件
application.properties文件
spring.datasource.url=jdbc:mysql://localhost:3306/springboot
spring.datasource.username=root
spring.datasource.password=123456
spring.datasource.driver-class-name=com.mysql.jdbc.Driver
#mybatis.mapper-locations=classpath:mapper/*.xml

spring.thymeleaf.suffix=.html
spring.thymeleaf.mode=HTML5
spring.thymeleaf.encoding=UTF-8
spring.thymeleaf.content-type=text/html

server.port=9090
server.context-path=/springboot
转为application.yml
server:
 port: 8080
 context-path: /
spring:
 datasource:
   username: root
   password: 123456
   url: jdbc:mysql://localhost:3306/springboot
 thymeleaf:
   cache: false
   mode: HTML5
   prefix: classpath:/templates/
   encoding: UTF-8
   suffix: .html
如果两个问价都存在则以application.propervies为主
SpringBoot多环境区分
我们在区分测试配置和应用配置时,可以配置多个yml文件
例如测试配置取名为application-test.yml
在application.propervies或者application.yml文件中增加
spring.profiles.active= test
或
    spring:
       profiles:
          active: test
application.properties最先被扫描,如果application.properties中有指定spring.profiles.active= test 则application-test.yml配置将会生效,application.properties中与application-test.yml冲突的配置不会生效.
如果在application.yml中配置 spring: profiles: active: test 则首先生效的时application.properties中的配置信息
SpringBoot打包发布
项目右键–>Run As…–>Maven Build…
clean package 运行即可
如果出现报错则pom.xml文件中少配置了 一些东西
<build>
		<plugins>
			<plugin>
				<groupId>org.springframework.boot</groupId>
				<artifactId>spring-boot-maven-plugin</artifactId>
				<configuration>
					<maimClass>com.majiaxueyuan.App</maimClass>
				</configuration>
				<executions>
					<execution>
						<goals>
							<goal>repackage</goal>
						</goals>
					</execution>
				</executions>
			</plugin>
			<plugin>
				<groupId>org.apache.maven.plugins</groupId>
				<artifactId>maven-compiler-plugin</artifactId>
				<configuration>
					<source>1.7</source>
					<target>1.7</target>
				</configuration>
			</plugin>
		</plugins>
	</build>
打包完成 , 刷新项目中的target文件夹, 会出现一个新的jar包
在cmd 命令框中运行

在浏览器中测试