目录
新建项目
1、H2 理论知识、手动操作数据的方式,可以参考《H2_Database 概述、下载与安装、及使用入门》,本文介绍使用 Java 应用来操作 H2 数据库
2、Java 使用 H2 数据库非常简单,H2 无需安装 ,直接将 Jar 包导入到项目中即可使用,非常方便。
3、环境:JDK 1.8 + Spring Boot 2.1.3 + H2 1.4.198 + Maven 3.5.2 + IDEA 14.


组件这里只选择了 H2(H2 Database)、JPA(Java 持久化API)。Spring Data JPA 专门用于简化关系型数据库的操作,忘记或不清楚的可以参考《Spring Data JPA 理论简介》
应用结构如下:

因为本文是演示操作 H2 数据库,不牵涉任何业务操作,所以省去了 Services 层,将从 H2SmileApplicationTests 测试类以及 TVController 控制器中直接调用 TVRepository。

pom.xml 文件内容如下:
<?xml version="1.0" encoding="UTF-8"?>
<project xmlns="http://maven.apache.org/POM/4.0.0" xmlns:xsi="http://www.w3.org/2001/XMLSchema-instance"
         xsi:schemaLocation="http://maven.apache.org/POM/4.0.0 http://maven.apache.org/xsd/maven-4.0.0.xsd">
    <modelVersion>4.0.0</modelVersion>
    <parent>
        <groupId>org.springframework.boot</groupId>
        <artifactId>spring-boot-starter-parent</artifactId>
        <version>2.1.3.RELEASE</version>
        <relativePath/>
        <!-- lookup parent from repository -->
    </parent>
    <groupId>www.wmx.com</groupId>
    <artifactId>H2_Smile</artifactId>
    <version>0.0.1-SNAPSHOT</version>
    <name>H2_Smile</name>
    <description>Demo project for Spring Boot</description>
    <properties>
        <java.version>1.8</java.version>
    </properties>
    <dependencies>
        <!-- JPA 中已经包含了 com.zaxxer.hikari 数据源 与 spring-jdbc-->
        <dependency>
            <groupId>org.springframework.boot</groupId>
            <artifactId>spring-boot-starter-data-jpa</artifactId>
        </dependency>
        <!-- h2Database 数据库,默认会使用稳定的新版本,也可以自己指定版本,如<version>1.4.198</version>-->
        <dependency>
            <groupId>com.h2database</groupId>
            <artifactId>h2</artifactId>
            <scope>compile</scope>
        </dependency>
        <!--Spring boot 测试模块-->
        <dependency>
            <groupId>org.springframework.boot</groupId>
            <artifactId>spring-boot-starter-test</artifactId>
            <scope>test</scope>
        </dependency>
    </dependencies>
    <build>
        <plugins>
            <plugin>
                <groupId>org.springframework.boot</groupId>
                <artifactId>spring-boot-maven-plugin</artifactId>
            </plugin>
        </plugins>
    </build>
</project>
实体类
1、pom.xml 文件自动生成后,现在开始一步步编写程序,从实体类开始。
2、Spring Data JPA 也是基于 ORM 思想,底层是 Hibernate 实现,所以 POJO 与数据库表的映射关系写法与以前写 Hibernate 时基本无异。
3、这里将通过在配置文件设置 ddl‐auto: update ,使用 JPA 根据映射自动建表。
import javax.persistence.Entity;
import javax.persistence.GeneratedValue;
import javax.persistence.GenerationType;
import javax.persistence.Id;
import java.util.Date;

/**
 * Created by Administrator on 2019/2/27 0027.
 * 电视机实体
 */
@Entity
public class Television {
    @Id//标识为主键
    @GeneratedValue(strategy = GenerationType.AUTO)//指定主键生成的方式,AUTO 指定 H2 数据库主键自动增长
    private Integer tvId;//电视id,主键

    /**
     * 下面没标识的属性都会以默认值和数据库表的字段进行映射对应
     * 如果修改默认值,又不属性的,可以参考:https://blog.csdn.net/wangmx1993328/article/details/82048775
     * 中的 "domain Area" 部分
     */
    private String tvName;//电视名称
    private Float tvPrice;//电视价格
    private Date dateOfProduction;//生产日期

    public Date getDateOfProduction() {
        return dateOfProduction;
    }

    public void setDateOfProduction(Date dateOfProduction) {
        this.dateOfProduction = dateOfProduction;
    }

    public Integer getTvId() {
        return tvId;
    }

    public void setTvId(Integer tvId) {
        this.tvId = tvId;
    }

    public String getTvName() {
        return tvName;
    }

    public void setTvName(String tvName) {
        this.tvName = tvName;
    }

    public Float getTvPrice() {
        return tvPrice;
    }

    public void setTvPrice(Float tvPrice) {
        this.tvPrice = tvPrice;
    }

    @Override
    public String toString() {
        return "Television{" +
                "dateOfProduction=" + dateOfProduction +
                ", tvId=" + tvId +
                ", tvName='" + tvName + '\'' +
                ", tvPrice=" + tvPrice +
                '}';
    }
}
Dao 接口
import com.wmx.www.entity.Television;
import org.springframework.data.jpa.repository.JpaRepository;

/**
 * Created by Administrator on 2019/2/27 0027.
 * 自己 dao 接口只需要实现 org.springframework.data.jpa.repository.JpaRepository
 * 便可以快捷操作数据库,因为 Spring Data JPA 就是专门用于简化关系型数据操作的
 * 自己的接口上无需再写 @Repository 注解,因为 JpaRepository 中已经设置了
 */
public interface TVRepository extends JpaRepository<Television, Integer> {
}
数据源配置

spring:
#数据源配置
  datasource:
    username: sa
    password: 123456
#    url: jdbc:h2:~/test
    url: jdbc:h2:E:\wmx\h2Database\test2;AUTO_SERVER=TRUE
    driver-class-name: org.h2.Driver
==更多详细配置,可以参考官网附录:https://docs.spring.io/spring-boot/docs/2.1.3.RELEASE/reference/htmlsingle/#appendix
1)全局配置文件 application.yml 配置数据源如上,参数解释如下:
2)username:数据库登录账号
3)password:数据库登录密码
4)url:连接的数据库地址,"jdbc:h2" 表示以 jdbc 方式连接 h2 数据库
5)url: jdbc:h2:~/test:表示连接系统当前登录用户的根目录下的 test 数据库,不存在时默认会新建。"~" 表示系统当前登录用户的根目录。默认以内嵌模式运行,此时 H2 数据库最多只能有一个连接,比如 Java 应用启动后占了一个 H2 连接后,手动运行 h2-version.jar,想从H2 Console控制台连接是报错的。
6)url: jdbc:h2:E:\wmx\h2Database\test2;AUTO_SERVER=TRUE:表示连接 E:\wmx\h2Database\test2 数据库,不存在时默认会新建,AUTO_SERVER=TRUE 表示使用混合模式,此时可以支持多个连接。
1、连接模式与连接设置都是通过 JDBC URL 指定,不熟悉或者忘记的,可以参考 "Database URL Overview"。
2、没有指定其它数据源时,Spring Boot 默认使用 HikariDataSource 数据源,测试运行如下:
import org.junit.Test;
import org.junit.runner.RunWith;
import org.springframework.boot.test.context.SpringBootTest;
import org.springframework.test.context.junit4.SpringRunner;

import javax.annotation.Resource;
import javax.sql.DataSource;
import java.sql.Connection;
import java.sql.SQLException;

@RunWith(SpringRunner.class)
@SpringBootTest
public class H2SmileApplicationTests {

    /**
     * Spring Boot 引用了 JPA 组件,JPA 组件引用了 JDBC,JDBC组件引用了 HikariCP 数据源
     * Spring Boot 默认使用 class com.zaxxer.hikari.HikariDataSource 数据源,
     * 程序员直接 DI 注入然后使用即可
     */
    @Resource
    DataSource dataSource;

    @Test
    public void contextLoads() throws SQLException {
        Connection connection = dataSource.getConnection();//获取连接
        System.out.println("数据源>>>>>>" + dataSource.getClass());
        System.out.println("连接>>>>>>>>>" + connection);
        System.out.println("连接地址>>>>>" + connection.getMetaData().getURL());
        connection.close();//关闭连接
    }
}
3、运行之后,控制台输出如下:
......
2019-02-28 16:46:09.627  INFO 3172 --- [           main] org.hibernate.Version                    : HHH000412: Hibernate Core {5.3.7.Final}
2019-02-28 16:46:09.629  INFO 3172 --- [           main] org.hibernate.cfg.Environment            : HHH000206: hibernate.properties not found
2019-02-28 16:46:09.783  INFO 3172 --- [           main] o.hibernate.annotations.common.Version   : HCANN000001: Hibernate Commons Annotations {5.0.4.Final}
2019-02-28 16:46:10.015  INFO 3172 --- [           main] org.hibernate.dialect.Dialect            : HHH000400: Using dialect: org.hibernate.dialect.H2Dialect
2019-02-28 16:46:10.686  INFO 3172 --- [           main] o.h.t.schema.internal.SchemaCreatorImpl  : HHH000476: Executing import script 'org.hibernate.tool.schema.internal.exec.ScriptSourceInputNonExistentImpl@c7f4457'
2019-02-28 16:46:10.691  INFO 3172 --- [           main] j.LocalContainerEntityManagerFactoryBean : Initialized JPA EntityManagerFactory for persistence unit 'default'
2019-02-28 16:46:11.102  INFO 3172 --- [           main] com.wmx.www.H2SmileApplicationTests      : Started H2SmileApplicationTests in 12.522 seconds (JVM running for 13.472)
数据源>>>>>>class com.zaxxer.hikari.HikariDataSource
连接>>>>>>>>>HikariProxyConnection@519249777 wrapping conn1: url=jdbc:h2:E:\wmx\h2Database\test2 user=SA
连接地址>>>>>jdbc:h2:E:\wmx\h2Database\test2
......
JPA 配置
spring:
#数据源配置
  datasource:
    username: sa
    password: 123456
#    url: jdbc:h2:~/test
    url: jdbc:h2:E:\wmx\h2Database\test2;AUTO_SERVER=TRUE
    driver-class-name: org.h2.Driver

#JPA配置
  jpa:
    show-sql: true
    hibernate:
ddl-auto: update==更多详细配置,可以参考官网附录:https://docs.spring.io/spring-boot/docs/2.1.3.RELEASE/reference/htmlsingle/#appendix
1、Spring Data JPA 专门用于简化关系型数据库的操作,相当于第三方的 Hibernate、MyBatis 等,通常使用 Spring Data JPA 足矣。
2、show-sql:表示在控制台显示 sql 语句
3、ddl-auto 选择项如下:
create :启动时删数据库中的表,然后创建,退出时不删除数据表
create-drop :启动时删数据库中的表,然后创建,退出时删除数据表 如果表不存在报错
update :如果启动时表格式不一致则更新表,原有数据保留
validate :项目启动表结构进行校验 如果不一致则报错
测试类测试
1、有了数据库 H2、数据源 HikariDataSource、操作数据库的 JPA,现在则可以进行测试了。
2、现在测试类中进行测试,之后从浏览器访问 Controller 控制层测试。
import com.wmx.www.entity.Television;
import com.wmx.www.repository.TVRepository;
import org.junit.Test;
import org.junit.runner.RunWith;
import org.springframework.boot.test.context.SpringBootTest;
import org.springframework.test.context.junit4.SpringRunner;
import javax.annotation.Resource;
import javax.sql.DataSource;
import java.sql.Connection;
import java.sql.SQLException;
import java.util.Date;
import java.util.List;
import java.util.Optional;
@RunWith(SpringRunner.class)
@SpringBootTest
public class H2SmileApplicationTests {
/**
* Spring Boot 引用了 JPA 组件,JPA 组件引用了 JDBC,JDBC组件引用了 HikariCP 数据源
* Spring Boot 默认使用 class com.zaxxer.hikari.HikariDataSource 数据源,
* 程序员直接 DI 注入然后使用即可
*/
@Resource
DataSource dataSource;
@Resource
private TVRepository tvRepository;//电视机·仓库
@Test
public void contextLoads() throws SQLException {
Connection connection = dataSource.getConnection();//获取连接
System.out.println("数据源>>>>>>" + dataSource.getClass());
System.out.println("连接>>>>>>>>>" + connection);
System.out.println("连接地址>>>>>" + connection.getMetaData().getURL());
connection.close();//关闭连接
}
//测试添加
@Test
public void saveTest() {
for (int i = 0; i < 3; i++) {
Television television = new Television();
television.setTvName("小米" + (i + 1));
television.setTvPrice(4400.0F);
television.setDateOfProduction(new Date());
tvRepository.save(television);
}
}
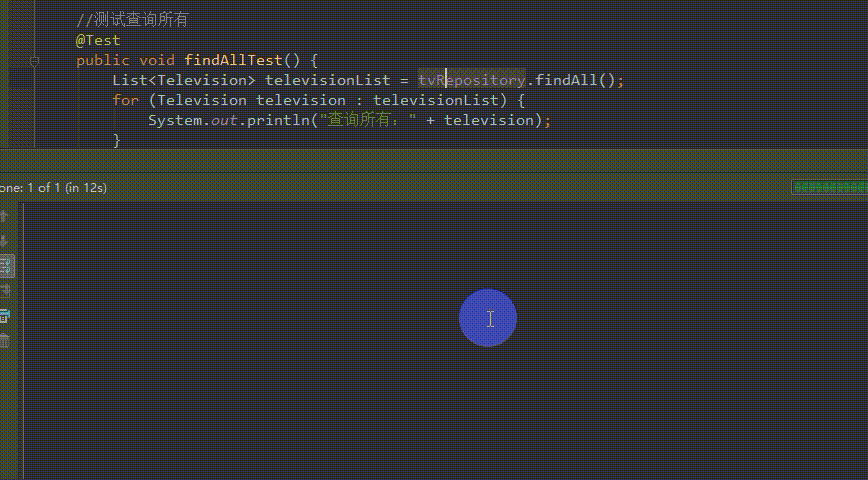
//测试查询所有
@Test
public void findAllTest() {
List<Television> televisionList = tvRepository.findAll();
for (Television television : televisionList) {
System.out.println("查询所有:" + television);
}
}
//测试查询单个
@Test
public void findOneTest() {
/**
* 推荐使用 findById 方式,而不是 getOne方法
* isPresent 判断 Optional是否为空,即有没有值
*/
Optional<Television> televisionOptional = tvRepository.findById(3);
if (televisionOptional.isPresent()) {
System.out.println("Television::" + televisionOptional.get());//取值
} else {
System.out.println("值为空...");
}
}
//测试更新
@Test
public void updateTest() {
Television television = new Television();
television.setTvId(3);
television.setTvName("小米3");
television.setTvPrice(8888F);
television.setDateOfProduction(new Date());
//没有专门的 update 方法,save 方法当主键存在时,则更新,否则新增
tvRepository.save(television);
}
//测试根据主键 id 删除
@Test
public void delOneTest() {
tvRepository.deleteById(1);
}
//测试删除所有
@Test
public void delAllTest() {
System.out.println("成功删除表中所有数据....");
}
}
2、整个测试类内容如上,下面挑选其中部分运行截图如下:
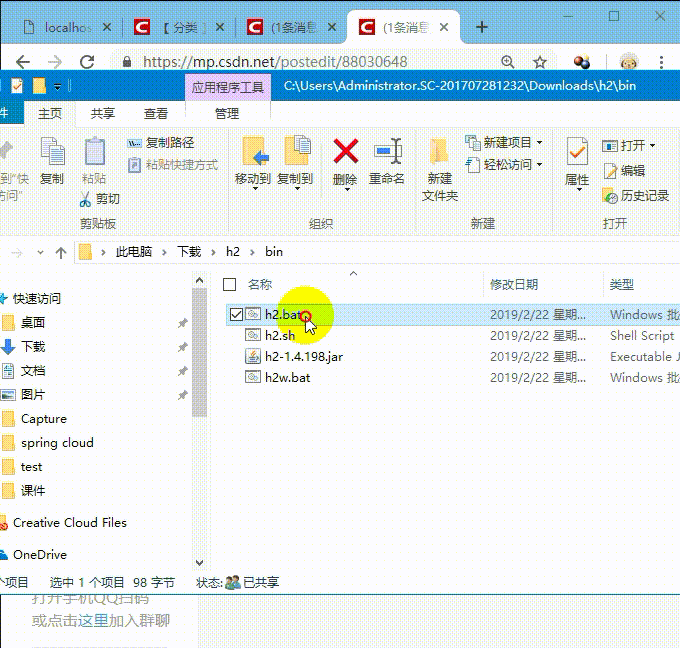
3、因为 JDBC URL 地址上加了 AUTO_SERVER=TRUE,使用了混合模式,所以在 Java 应用操作的同时,也可以手动操作 H2-version.jar 来连接数据库。


1)如上所示,检索结果与 Java 应用中diam调用完全是一样的
2)注意 H2 Console 控制台连接的时候,其 JDBC URL 必须和应用配置文件的地址保持一致。
浏览器访问测试
1、浏览器访问 TVController 控制层,TVController 直接调用 TVRepository 持久层,省略中间的 Services 层。
(因为之前只打算在测试类中测试,所以一开始未导入 web 组件,现在编写控制器层,然后从浏览器访问,则需要 web 模块的支持,所以在 pom.xml 中追加如下 web 组件)
        <!-- web项目导入 web 组件,需要使用服务器,Spring MVC等时,必须导入此组件-->
        <!-- 一言以蔽之:Java Web 项目必须导入 web 组件-->
        <dependency>
            <groupId>org.springframework.boot</groupId>
            <artifactId>spring-boot-starter-web</artifactId>
        </dependency>
2、TVController 控制层内容如下:
import com.wmx.www.entity.Television;
import com.wmx.www.repository.TVRepository;
import org.springframework.util.StringUtils;
import org.springframework.web.bind.annotation.GetMapping;
import org.springframework.web.bind.annotation.PathVariable;
import org.springframework.web.bind.annotation.RestController;

import javax.annotation.Resource;
import java.util.Date;
import java.util.List;
import java.util.Optional;

/**
 * Created by Administrator on 2019/2/28 0028.
 * 电视机控制层
 *
 * @RestController 注解是一个组合注解,相当于同时加了 @Controller、@ResponseBody。
 * @ResponseBody 表示类中所有方法的返回值,全部直接输出到浏览器请求页面
 */
@RestController
public class TVController {
    @Resource
    private TVRepository tvRepository;//电视机·仓库

    /**
     * Spring4.3 开始引进了 @GetMapping、@PostMapping、@PutMapping、@DeleteMapping、@PatchMapping
     * 来简化常用的HTTP方法的映射,并更好地表达被注解方法的语义。
     * 以 @GetMapping为例,其相当于 @RequestMapping(method = RequestMethod.GET)的缩写,-
     * 该注解将HTTP Get 映射到特定的处理方法上。
     *
     * @return
     */
    //测试添加
    @GetMapping("/saveTV")
    public String saveTest() {
        //添加3个电视机,主键未设值时,采用自动增长
        for (int i = 0; i < 3; i++) {
            Television television = new Television();
            television.setTvName("小米" + (i + 1));
            television.setTvPrice(4400.0F);
            television.setDateOfProduction(new Date());
            tvRepository.save(television);
        }
        return "添加成功...";
    }

    //测试查询所有
    @GetMapping("/findAllTV")
    public List<Television> findAllTest() {
        List<Television> televisionList = tvRepository.findAll();
        for (Television television : televisionList) {
            System.out.println("查询所有:" + television);
        }
        return televisionList;
    }

    //测试查询单个
    @GetMapping("/findOneTV")
    public String findOneById(Integer tvId) {
        /**
         * 推荐使用 findById 方式,而不是 getOne方法
         * isPresent 判断 Optional是否为空,即有没有值
         */
        if (!StringUtils.isEmpty(tvId)) {
            Optional<Television> televisionOptional = tvRepository.findById(tvId);
            if (televisionOptional.isPresent()) {
                System.out.println("Television::" + televisionOptional.get());//取值
                return televisionOptional.get().toString();
            } else {
                System.out.println("主键为 " + tvId + " 的值为空...");
                return "主键为 " + tvId + " 的值为空...";
            }
        } else {
            return "请传入需要检索的 tvId 参数值...";
        }
    }

    //测试更新
    //@PathVariable可以用来映射URL中的占位符到目标方法的参数中
    @GetMapping("/updateTV/{tvId}/")
    public String updateTest(@PathVariable(value = "tvId") Integer tvId) {
        //这里根据页面传入的 id 值更新它
        if (!StringUtils.isEmpty(tvId)) {
            if (tvRepository.existsById(tvId)) {
                Television television = new Television();
                television.setTvId(tvId);
                television.setTvName("努比亚小牛520");
                television.setTvPrice(8888F);
                television.setDateOfProduction(new Date());
                //没有专门的 update 方法,save 方法当主键存在时,则更新,否则新增
                tvRepository.save(television);
                return "数据更新完成...";
            } else {
                return "当前修改的 tvId=" + tvId + " 数据不存在...";
            }
        } else {
            return "请传入需要修改的 tvId 参数值...";
        }
    }

    //测试根据主键 id 删除
    @GetMapping("/delById")
    public String delById(Integer tvId) {
        if (!StringUtils.isEmpty(tvId)) {
            if (tvRepository.existsById(tvId)) {
                tvRepository.deleteById(tvId);
                return "删除数据完成...";
            } else {
                return "主键为 " + tvId + " 的数据不存在...";
            }
        } else {
            return "请传入需要修改的 tvId 参数值...";
        }
    }

    //测试删除所有
    @GetMapping("/delAllTV")
    public String delAllTest() {
        tvRepository.deleteAll();
        System.out.println("成功删除表中所有数据....");
        return ("成功删除表中所有数据....");
    }
}
3、为了更加符合实际应用,下面在全局配置文件加上服务器请求端口与应用上下文。
spring:
#数据源配置
  datasource:
    username: sa
    password: 123456
#    url: jdbc:h2:~/test
    url: jdbc:h2:E:\wmx\h2Database\test2;AUTO_SERVER=TRUE
    driver-class-name: org.h2.Driver

#JPA配置
  jpa:
    show-sql: true
    hibernate:
      ddl-auto: update

#配置服务器请求端口与上下文路径
server:
  port: 8080
  servlet:
    context-path: /H2_Smile
4、启动应用后控制台打印信息如下:
......
2019-03-01 08:41:07.702  INFO 13604 --- [           main] o.s.b.w.embedded.tomcat.TomcatWebServer  : Tomcat started on port(s): 8080 (http) with context path '/H2_Smile'
2019-03-01 08:41:07.705  INFO 13604 --- [           main] com.wmx.www.H2SmileApplication           : Started H2SmileApplication in 8.991 seconds (JVM running for 9.904)
2019-03-01 08:41:43.085  INFO 13604 --- [nio-8080-exec-3] o.a.c.c.C.[.[localhost].[/H2_Smile]      : Initializing Spring DispatcherServlet 'dispatcherServlet'
2019-03-01 08:41:43.085  INFO 13604 --- [nio-8080-exec-3] o.s.web.servlet.DispatcherServlet        : Initializing Servlet 'dispatcherServlet'
2019-03-01 08:41:43.095  INFO 13604 --- [nio-8080-exec-3] o.s.web.servlet.DispatcherServlet        : Completed initialization in 10 ms
......
5、按着配置,应用访问的测试路径如下:
添加数据:http://localhost:8080/H2_Smile/saveTV
查询所有:http://localhost:8080/H2_Smile/findAllTV
根据id查询:http://localhost:8080/H2_Smile/findOneTV?tvId=10
根据id更新:http://localhost:8080/H2_Smile/updateTV/10/
6、以其中部分访问截图如下:

7、因为 JDBC URl 中使用了 AUTO_SERVER=TRUE 混合模式,所以在程序操作 H2 数据库的同时,也可以使用下载的 H2 Database 程序运行,在 H2 Controller 中进行查看。(需要注意的是 H2 Controller 连接使用的 JDBC URL 路径、以及账号,密码要与应用配置文件中的保持一致即可)
对 H2 Controller 控制台不熟悉或者忘记的可以参考《 H2_Database 概述、下载与安装、及使用入门》
数据库文件
1、至此测试基本结束,本文也即将结束。全局配置文件中配置数据源时,url 配置为:
url: jdbc:h2:E:\wmx\h2Database\test2;AUTO_SERVER=TRUE
2、这表示 H2 生成的数据库文件会放在 E:\wmx\h2Database 目录下:

test2.mv.db:这是数据库存储数据的文件
test2.trace.db:这是一个跟踪文件
test2.lock.db:这是一个锁文件
Spring Boot 配置 H2 控制台
1、上面演示的是 Java 应用中使用 H2 数据库,使用 Java 程序来对 H2 进行增删改查,然后使用下载的 h2-version.jar 程序手动从网页管理界面 H2 Console 控制台进行了查看。
2、显然 Java 应用中也导入了 h2-version.jar 包,肯定无需再借助外部的 h2-version.jar 程序,也能进行 H2 Console 查询和管理,Spring Boot 既然提供了 H2 组件,则显然会提供专门的配置,如下所示:
# H2 Web Console (H2ConsoleProperties)
spring.h2.console.enabled=false # Whether to enable the console.是否启用控制台
spring.h2.console.path=/h2-console # Path at which the console is available. 控制台访问路径
spring.h2.console.settings.trace=false # Whether to enable trace output.是否启用跟踪输出
spring.h2.console.settings.web-allow-others=false # Whether to enable remote access.是否启用远程访问官网地址:https://docs.spring.io/spring-boot/docs/2.1.3.RELEASE/reference/htmlsingle/#appendix
3、现在修改全局配置 application.yml 文件,添加 h2 配置如下:
spring:
#数据源配置
  datasource:
    username: sa
    password: 123456
#    url: jdbc:h2:~/test
    url: jdbc:h2:E:\wmx\h2Database\test2;AUTO_SERVER=TRUE
    driver-class-name: org.h2.Driver

#JPA配置
  jpa:
    show-sql: true
    hibernate:
      ddl-auto: update

#H2 Web 控制台配置,启用 h2 Console 控制台,并设置访问路径,访问时此路径是 server.servlet.context-path 的下一级
  h2:
    console:
      enabled: true
      path: /h2_console

#配置服务器请求端口与上下文路径
server:
  port: 8080
  servlet:
    context-path: /H2_Smile
4、接着再次运行项目,进行浏览器访问:

如上所示,此时便可以直接从 Java web 应用访问 H2 Database 的 H2 Console 控制台了,而不需要使用下载的 h2-version.jar 程序了。