工程到下载去下
package com.test.learnmybatis;
import org.apache.ibatis.io.Resources;
import org.apache.ibatis.session.SqlSession;
import org.apache.ibatis.session.SqlSessionFactory;
import org.apache.ibatis.session.SqlSessionFactoryBuilder;
import org.junit.Test;
import com.zcz.learnmybatis.dao.UserDao;
import com.zcz.learnmybatis.entity.User;
import junit.framework.Assert;
public class UserDaoTest {
@Test
public void finUserById() {
//2,获取SqlSession
SqlSession sqlSession = getSessionFactory().openSession();
//3,获取UserDao代理类
UserDao userMapper = sqlSession.getMapper(UserDao.class);
//4,执行查询
User user = userMapper.findUserById(1);
Assert.assertNotNull("not find", user);
}
/**
* 1,获取SqlSessionFactory
* @return
*/
private static SqlSessionFactory getSessionFactory() {
SqlSessionFactory sessionFactory = null;
//配置文件名称
String resource = "configuration.xml";
try {
//使用配置文件构造SqlSessionFactory
sessionFactory = new SqlSessionFactoryBuilder().build(Resources.getResourceAsReader(resource));
}catch (Exception e) {
// TODO: handle exception
e.printStackTrace();
}
return sessionFactory;
}
}
整个过程可以分为四个步骤
1,获取SqlSessionFactory
2,获取SqlSession
3,获取UserDao代理类
4,执行查询
我接下来也会根据这四步进行源码的解析。
一,获取SqlSessionFactory
先来看一下静态方法getSessionFactory。在这个方法中我们读取configuration.xml,并使用configuration.xml配置文件实例化了一个SqlSessionFactory。
/**
     * 获取SqlSessionFactory
     * @return
     */
    private static SqlSessionFactory getSessionFactory() {
        SqlSessionFactory sessionFactory = null;
        //配置文件名称
        String resource = "configuration.xml";
        try {
            //使用配置文件构造SqlSessionFactory
            sessionFactory = new SqlSessionFactoryBuilder().build(Resources.getResourceAsReader(resource));
        }catch (Exception e) {
            // TODO: handle exception
            e.printStackTrace();
        }
        return sessionFactory;
    }
代码:sessionFactory = new SqlSessionFactoryBuilder().build(Resources.getResourceAsReader(resource));
相信大家都能看懂这段代码:
1,Resources.getResourceAsReader(resource),读取了配置文件configuration.xml,并返回一个字符输入流(Reader),这样configuration.xml中的配置信息就都被读取到了一个字符输入流中了。
2,使用new关键字创建了一个SqlSessionFactoryBuilder的匿名对象。
3,调用匿名对象的build(Reader reader)方法,并将1中的字符输入流作为参数传入。
这样SqlSessionFactory对象就创建成功了,接下来我们详细的分析一下build(Reader reader)方法,先看源码
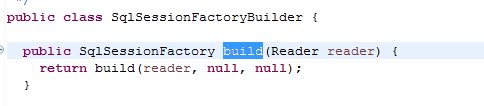
这里直接调用了public SqlSessionFactory build(Reader reader, String environment, Properties properties)方法,并且environment和properties是null;
方法详情如下:
public SqlSessionFactory build(Reader reader, String environment, Properties properties) {
    try {
      //构造(XML配置解析器)XMLConfigBuilder对象
      XMLConfigBuilder parser = new XMLConfigBuilder(reader, environment, properties);
      //调用build方法并返回SqlSessionFactory
      return build(parser.parse());
    } catch (Exception e) {
      throw ExceptionFactory.wrapException("Error building SqlSession.", e);
    } finally {
      ErrorContext.instance().reset();
      try {
        reader.close();
      } catch (IOException e) {
        // Intentionally ignore. Prefer previous error.
      }
    }
  }
代码:XMLConfigBuilder parser = new XMLConfigBuilder(reader, environment, properties);
这段代码的作用是使用上一步读取的configuration.xml字符输入流,实例化一个xml配置解析器(XMLConfigBuilder),并且我们已经知道 environment, properties的值为null;
在XMLConfigBuilder对象的实例化过程中初始化一个非常重要的对象:Configuration,而Configuration对象承载了configuration.xml中的所有配置内容,具体的初始化内容请查看:Mybatis源码解析,一步一步从浅入深(三):实例化xml配置解析器(XMLConfigBuilder)
代码:return build(parser.parse());
1,parser.parse()返回一个Configuration对象实例,这是一个及其重要的方法,因为解析configuration.xml并生成Configuration对象,都是在这个方法里完成的。具体的执行细节,请查阅:Mybatis源码解析,一步一步从浅入深(四):将configuration.xml的解析到Configuration对象实例,Mybatis源码解析,一步一步从浅入深(五):mapper节点的解析
2,调用SqlSessionFactoryBuilder的public SqlSessionFactory build(Configuration config)方法创建一个SqlSessionFactory对象实例,我们来看一下build(Configuration config)方法的内容:
public SqlSessionFactory build(Configuration config) {
    return new DefaultSqlSessionFactory(config);
  }
在这个方法中,使用parser.parse()解析出来的Configuration对象实例作为参数,实例化了一个DefaultSqlSessionFactory类的对象。
我们看一下类DefaultSqlSessionFactory的声明:
public class DefaultSqlSessionFactory implements SqlSessionFactory {
}
DefaultSqlSessionFactory类实现了SqlSessionFactory接口,我们知道java可以通过多态让SqlSessionFactory 父类引用指向DefaultSqlSessionFactory子类实例。
到这里我们的SqlSessionFactory就创建完成了。
二,获取SqlSession
关键代码:SqlSession sqlSession = getSessionFactory().openSession();
在上一步我们了解到,getSessionFactory()方法,返回一个DefaultSqlSessionFactory实例对象,那么接下来我们就看一下这个DefaultSqlSessionFactory的openSession方法:
 public SqlSession openSession() {
    //直接调用了openSessionFromDataSource方法
    return openSessionFromDataSource(configuration.getDefaultExecutorType(), null, false);
  }
private SqlSession openSessionFromDataSource(ExecutorType execType, TransactionIsolationLevel level, boolean autoCommit) {
    Transaction tx = null;
    try {
      // 获取运行环境
      final Environment environment = configuration.getEnvironment();
      // 从运行环境中获取事务工厂
      final TransactionFactory transactionFactory = getTransactionFactoryFromEnvironment(environment);
      // 实例化事务
      tx = transactionFactory.newTransaction(environment.getDataSource(), level, autoCommit);
      // 实例化sql执行器
      final Executor executor = configuration.newExecutor(tx, execType);
      // 返回默认SqlSession 实例化对象
      return new DefaultSqlSession(configuration, executor, autoCommit);
    } catch (Exception e) {
      closeTransaction(tx); // may have fetched a connection so lets call close()
      throw ExceptionFactory.wrapException("Error opening session.  Cause: " + e, e);
    } finally {
      ErrorContext.instance().reset();
    }
  }
 // 从运行环境中获取事务工厂
  private TransactionFactory getTransactionFactoryFromEnvironment(Environment environment) {
    if (environment == null || environment.getTransactionFactory() == null) {
      return new ManagedTransactionFactory();
    }
    return environment.getTransactionFactory();
  }
到这里SqlSession也获取成功了,获取到的是DefaultSqlSession的示例对象。
三,获取UserDao代理类
关键代码:UserDao userMapper = sqlSession.getMapper(UserDao.class);
从上一步知道这里的sqlSession是DefaultSqlSession的实例化对象,那么就来看一下getMapper方法的源码:
  public <T> T getMapper(Class<T> type) {
    // 这里的configuration就是一开始一直陪伴着我们的那个Configuration实例对象
    return configuration.<T>getMapper(type, this);
  }
在这里就有几个奇怪的问题:
1,为什么在以前的代码流程中从来没有addMapper,而这里却有getMapper?
2,UserDao明明是我们定义的一个接口类,根本没有定义实现类,那这个userMapper是什么?是mybatis自动为我们生成的实现类吗?
带着这两个问题,我们在文章Mybatis源码解析,一步一步从浅入深(六):映射代理类的获取进行了详细分析。
四,执行查询
经上一系列的分析,已经基本明确了configuration.xml,userDao-mapping.xml文件的解析,映射代理类实例化对象的生成的整个过程。接下来就剩余最后一个步骤:执行查询。一起来看一下吧。
关键代码:User user = userMapper.findUserById(1);
看过文章Mybatis源码解析,一步一步从浅入深(六):映射代理类的获取的同学们应该已经知道了,代理类对象在执行方法的时候,是调用了InvocationHandler实现类的Invoke方法:
 1 public Object invoke(Object proxy, Method method, Object[] args) throws Throwable {
 2     if (Object.class.equals(method.getDeclaringClass())) {
 3       try {
 4         return method.invoke(this, args);
 5       } catch (Throwable t) {
 6         throw ExceptionUtil.unwrapThrowable(t);
 7       }
 8     }
 9     final MapperMethod mapperMethod = cachedMapperMethod(method);
10     return mapperMethod.execute(sqlSession, args);
11   }
而真正执行查询的代码就在第10行,即:mapperMethod.execute(sqlSession, args);看源码:
 1 //根据查询类型执行不同的方法
 2 public Object execute(SqlSession sqlSession, Object[] args) {
 3     Object result;
 4     if (SqlCommandType.INSERT == command.getType()) {
 5     //insert
 6       Object param = method.convertArgsToSqlCommandParam(args);
 7       result = rowCountResult(sqlSession.insert(command.getName(), param));
 8     } else if (SqlCommandType.UPDATE == command.getType()) {
 9     //update
10       Object param = method.convertArgsToSqlCommandParam(args);
11       result = rowCountResult(sqlSession.update(command.getName(), param));
12     } else if (SqlCommandType.DELETE == command.getType()) {
13     //delete
14       Object param = method.convertArgsToSqlCommandParam(args);
15       result = rowCountResult(sqlSession.delete(command.getName(), param));
16     } else if (SqlCommandType.SELECT == command.getType()) {
17     //select
18       if (method.returnsVoid() && method.hasResultHandler()) {
19         executeWithResultHandler(sqlSession, args);
20         result = null;
21       } else if (method.returnsMany()) {
22         result = executeForMany(sqlSession, args);
23       } else if (method.returnsMap()) {
24         result = executeForMap(sqlSession, args);
25       } else {
26         //我们的代码执行的是这里
27         Object param = method.convertArgsToSqlCommandParam(args);
28         result = sqlSession.selectOne(command.getName(), param);
29       }
30     } else {
31       throw new BindingException("Unknown execution method for: " + command.getName());
32     }
33     if (result == null && method.getReturnType().isPrimitive() && !method.returnsVoid()) {
34       throw new BindingException("Mapper method '" + command.getName()
35           + " attempted to return null from a method with a primitive return type (" + method.getReturnType() + ").");
36     }
37     return result;
38   }
关键代码:result = sqlSession.selectOne(command.getName(), param);
别看这只是一行简单的代码,其实这句代码的背后有很多的逻辑操作,我在文章:Mybatis源码解析,一步一步从浅入深(七):执行查询中进行了详细的分析。请大家查阅;
源代码中的第28行代码的执行结果就是我们期望的查询结果了。