本文是接着上篇博客写的:Spring boot 入门(三):SpringBoot 集成结合 AdminLTE(Freemarker),利用 generate 自动生成代码,利用 DataTable 和 PageHelper 进行分页显示。按照前面的博客,已经可以搭建一个简单的 Spring Boot 系统,本篇博客继续对此系统进行改造,主要集成了 Shiro 权限认证框架,关于 Shiro 部分,在本人之前的博客(认证与Shiro安全框架)有介绍到,这里就不做累赘的介绍。
此系列的博客为实践部分,以代码和搭建系统的过程为主,如遇到专业名词,自行查找其含义。
1.Shiro 配置类
系统搭建到目前为止,主要用到了3个配置类,均与 Shiro 有关,后期随着项目的扩大,配置文件也会随之增多。
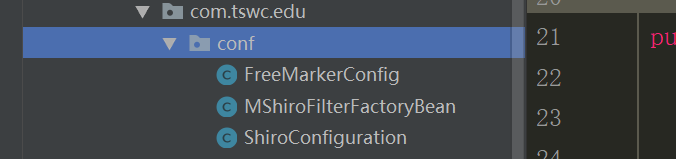
- FreeMarkerConfig:主要针对 FreeMarker 页面显示的配置,关于 Shiro 部分,为 Shiro 标签设置了共享变量
,如果不设置此变量,FreeMarker 页面将不能识别 Shiro 的标签,其主要代码如下:
1 configuration.setSharedVariable("shiro", new ShiroTags());
- MShiroFilterFactoryBean:设置了过滤器,当然也可以在 Config 文件里面配置过滤器,其缺点是:
在每次请求里面都做了 session 的读取和更新访问时间等操作,这样在集群部署 session 共享的情况下,数量级的加大了处理量负载。本项目后期将用到分布式,因此这里就直接将过滤器与 Config 配置文件分离,提高效率。
 1 private final class MSpringShiroFilter extends AbstractShiroFilter {
 2         protected MSpringShiroFilter(WebSecurityManager webSecurityManager, FilterChainResolver resolver) {
 3             super();
 4             if (webSecurityManager == null) {
 5                 throw new IllegalArgumentException("WebSecurityManager property cannot be null.");
 6             }
 7             setSecurityManager(webSecurityManager);
 8             if (resolver != null) {
 9                 setFilterChainResolver(resolver);
10             }
11         }
12
13         @Override
14         protected void doFilterInternal(ServletRequest servletRequest, ServletResponse servletResponse,
15                                         FilterChain chain) throws ServletException, IOException {
16             HttpServletRequest request = (HttpServletRequest) servletRequest;
17             String str = request.getRequestURI().toLowerCase();
18             boolean flag = true;
19             int idx = 0;
20             if ((idx = str.indexOf(".")) > 0) {
21                 str = str.substring(idx);
22                 if (ignoreExt.contains(str.toLowerCase()))
23                     flag = false;
24             }
25             if (flag) {
26                 super.doFilterInternal(servletRequest, servletResponse, chain);
27             } else {
28                 chain.doFilter(servletRequest, servletResponse);
29             }
30         }
31
32     }
- ShiroConfiguration:通用配置文件,此配置文件为 Shiro 的基础通用配置文件,只要是集成 Shiro,必有此文件,主要配置 Shiro 的登录认证相关的信息,其代码如下:
  1 /**
  2      * 设置shiro的缓存,缓存参数均配置在xml文件中
  3      * @return
  4      */
  5     @Bean
  6     public EhCacheManager getEhCacheManager() {
  7         EhCacheManager em = new EhCacheManager();
  8         em.setCacheManagerConfigFile("classpath:ehcache/ehcache-shiro.xml");
  9         return em;
 10     }
 11     /**
 12      * 凭证匹配器
 13      * (由于我们的密码校验交给Shiro的SimpleAuthenticationInfo进行处理了
 14      *  所以我们需要修改下doGetAuthenticationInfo中的代码;
 15      * )
 16      * @return
 17      */
 18     @Bean
 19     public HashedCredentialsMatcher hashedCredentialsMatcher(){
 20        HashedCredentialsMatcher hashedCredentialsMatcher = new HashedCredentialsMatcher();
 21        hashedCredentialsMatcher.setHashAlgorithmName("md5");//散列算法:这里使用MD5算法;
 22        hashedCredentialsMatcher.setHashIterations(1);//散列的次数,比如散列两次,相当于 md5(md5(""));
 23        return hashedCredentialsMatcher;
 24     }
 25     /**
 26      *
 27      * 主文件
 28      */
 29     @Bean(name = "myShiroRealm")
 30     public UserRealm myShiroRealm(EhCacheManager cacheManager) {
 31         UserRealm realm = new UserRealm();
 32         realm.setCacheManager(cacheManager);
 33         realm.setCredentialsMatcher(hashedCredentialsMatcher());
 34         return realm;
 35     }
 36    //会话ID生成器
 37     @Bean(name = "sessionIdGenerator")
 38     public JavaUuidSessionIdGenerator javaUuidSessionIdGenerator(){
 39         JavaUuidSessionIdGenerator javaUuidSessionIdGenerator = new JavaUuidSessionIdGenerator();
 40         return javaUuidSessionIdGenerator;
 41     }
 42     @Bean(name = "sessionIdCookie")
 43     public SimpleCookie getSessionIdCookie(){
 44         SimpleCookie sessionIdCookie = new SimpleCookie("sid");
 45         sessionIdCookie.setHttpOnly(true);
 46         sessionIdCookie.setMaxAge(-1);
 47         return sessionIdCookie;
 48
 49     }
 50     /*<!-- 会话DAO -->*/
 51     @Bean(name = "sessionDAO")
 52     public EnterpriseCacheSessionDAO enterpriseCacheSessionDAO(){
 53         EnterpriseCacheSessionDAO sessionDao = new EnterpriseCacheSessionDAO();
 54         sessionDao.setSessionIdGenerator(javaUuidSessionIdGenerator());
 55         sessionDao.setActiveSessionsCacheName("shiro-activeSessionCache");
 56         return sessionDao;
 57     }
 58     @Bean(name = "sessionValidationScheduler")
 59     public ExecutorServiceSessionValidationScheduler getExecutorServiceSessionValidationScheduler() {
 60         ExecutorServiceSessionValidationScheduler scheduler = new ExecutorServiceSessionValidationScheduler();
 61         scheduler.setInterval(1800000);
 62         return scheduler;
 63     }
 64     @Bean(name = "sessionManager")
 65     public DefaultWebSessionManager sessionManager(EnterpriseCacheSessionDAO sessionDAO){
 66         DefaultWebSessionManager sessionManager = new DefaultWebSessionManager();
 67         sessionManager.setGlobalSessionTimeout(1800000);
 68         sessionManager.setDeleteInvalidSessions(true);
 69         sessionManager.setSessionValidationSchedulerEnabled(true);
 70         sessionManager.setSessionValidationScheduler(getExecutorServiceSessionValidationScheduler());
 71         sessionManager.setSessionDAO(sessionDAO);
 72         sessionManager.setSessionIdCookieEnabled(true);
 73         sessionManager.setSessionIdCookie(getSessionIdCookie());
 74         return sessionManager;
 75     }
 76     @Bean(name = "lifecycleBeanPostProcessor")
 77     public LifecycleBeanPostProcessor getLifecycleBeanPostProcessor() {
 78         return new LifecycleBeanPostProcessor();
 79     }
 80     @Bean
 81     public DefaultAdvisorAutoProxyCreator getDefaultAdvisorAutoProxyCreator() {
 82         DefaultAdvisorAutoProxyCreator daap = new DefaultAdvisorAutoProxyCreator();
 83         daap.setProxyTargetClass(true);
 84         return daap;
 85     }
 86     @Bean(name = "securityManager")
 87     public DefaultWebSecurityManager getDefaultWebSecurityManager(UserRealm myShiroRealm, DefaultWebSessionManager sessionManager) {
 88         DefaultWebSecurityManager dwsm = new DefaultWebSecurityManager();
 89         dwsm.setRealm(myShiroRealm);
 90 //      <!-- 用户授权/认证信息Cache, 采用EhCache 缓存 -->
 91         dwsm.setCacheManager(getEhCacheManager());
 92         dwsm.setSessionManager(sessionManager);
 93         return dwsm;
 94     }
 95     /**
 96      *  开启shiro aop注解支持.
 97      *  使用代理方式;所以需要开启代码支持;
 98      * @param securityManager
 99      * @return
100      */
101     @Bean
102     public AuthorizationAttributeSourceAdvisor getAuthorizationAttributeSourceAdvisor(DefaultWebSecurityManager securityManager) {
103         AuthorizationAttributeSourceAdvisor aasa = new AuthorizationAttributeSourceAdvisor();
104         aasa.setSecurityManager(securityManager);
105         return aasa;
106     }
107     /**
108      * ShiroFilter<br/>
109      * 注意这里参数中的 StudentService 和 IScoreDao 只是一个例子,因为我们在这里可以用这样的方式获取到相关访问数据库的对象,
110      * 然后读取数据库相关配置,配置到 shiroFilterFactoryBean 的访问规则中。实际项目中,请使用自己的Service来处理业务逻辑。
111      *
112      */
113     @Bean(name = "shiroFilter")
114     public ShiroFilterFactoryBean getShiroFilterFactoryBean(DefaultWebSecurityManager securityManager) {
115         ShiroFilterFactoryBean shiroFilterFactoryBean = new MShiroFilterFactoryBean();
116         // 必须设置 SecurityManager
117         shiroFilterFactoryBean.setSecurityManager(securityManager);
118         // 如果不设置默认会自动寻找Web工程根目录下的"/login.jsp"页面
119         shiroFilterFactoryBean.setLoginUrl("/login");
120         // 登录成功后要跳转的连接
121         shiroFilterFactoryBean.setSuccessUrl("/certification");
122         //shiroFilterFactoryBean.setSuccessUrl("/index");
123         shiroFilterFactoryBean.setUnauthorizedUrl("/403");
124         loadShiroFilterChain(shiroFilterFactoryBean);
125         return shiroFilterFactoryBean;
126     }
127     /**
128      * 加载shiroFilter权限控制规则(从数据库读取然后配置)
129      *
130      */
131     private void loadShiroFilterChain(ShiroFilterFactoryBean shiroFilterFactoryBean){
132         /////////////////////// 下面这些规则配置最好配置到配置文件中 ///////////////////////
133         Map<String, String> filterChainDefinitionMap = new LinkedHashMap<String, String>();
134         // authc:该过滤器下的页面必须验证后才能访问,它是Shiro内置的一个拦截器org.apache.shiro.web.filter.authc.FormAuthenticationFilter
135         filterChainDefinitionMap.put("/login", "authc");
136         filterChainDefinitionMap.put("/logout", "logout");
137         // anon:它对应的过滤器里面是空的,什么都没做
138         logger.info("##################从数据库读取权限规则,加载到shiroFilter中##################");
139 //        filterChainDefinitionMap.put("/user/edit/**", "authc,perms[user:edit]");// 这里为了测试,固定写死的值,也可以从数据库或其他配置中读取
140         shiroFilterFactoryBean.setFilterChainDefinitionMap(filterChainDefinitionMap);
141     }
2.登录认证与权限管理
主要重写了 Realm域,完成权限认证和权限管理:
 1     protected AuthorizationInfo doGetAuthorizationInfo(PrincipalCollection principals) {
 2         //如果没有做权限验证,此处只需要return null即可
 3         SimpleAuthorizationInfo authorizationInfo = new SimpleAuthorizationInfo();
 4         String userName = (String) principals.getPrimaryPrincipal();
 5         Result<TUser> list = userService.getUserByUsername(userName);
 6         if(list.isStatus()) {
 7             //获取该用户所属的角色
 8             Result<List<TRole>> resultRole = roleService.getRoleByUserId(list.getResultData().getUserId());
 9             if(resultRole.isStatus()) {
10                 HashSet<String> role = new HashSet<String>();
11                 for(TRole tRole : resultRole.getResultData()) {
12                     role.add(tRole.getRoleId()+"");
13                 }
14                 //获取该角色拥有的权限
15                 Result<List<TPermission>> resultPermission = permissionService.getPermissionsByRoleId(role);
16                 if(resultPermission.isStatus()) {
17                     HashSet<String> permissions = new HashSet<String>();
18                     for(TPermission tPermission : resultPermission.getResultData()) {
19                         permissions.add(tPermission.getPermissionsValue());
20                     }
21                     System.out.println("权限:"+permissions);
22                     authorizationInfo.setStringPermissions(permissions);
23                 }
24             }
25         }
26         //return null;
27         return authorizationInfo;
28     }
29
30     @Override
31     protected AuthenticationInfo doGetAuthenticationInfo(AuthenticationToken authenticationToken) throws AuthenticationException {
32         //认证登录
33         String username = (String) authenticationToken.getPrincipal();
34         //String password = new String((char[]) authenticationToken.getCredentials());
35         Result<TUser> result = userService.getUserByUsername(username);
36         if (result.isStatus()) {
37             TUser user = result.getResultData();
38             return new SimpleAuthenticationInfo(user.getUsername(), user.getPassword(), getName());
39         }
40         //return new SimpleAuthenticationInfo(user., "123456", getName());
41         return null;
42     }
43 }
2.1.登录认证
首先创建一个前端登录界面,做一个简单的登录 Form 表单

点击登录即想后台发送一个请求,必须是Post请求,否则Shiro不能识别,认证部分主要在 Ream 中完成,新建一个类,继承 AuthorizingRealm ,然后在重写 doGetAuthenticationInfo 方法:

new SimpleAuthenticationInfo(user.getUsername(), user.getPassword(), getName())),我们可以自己重新定义密码比较器,密码比较器的写法较多,在认证与Shiro安全框架中,直接将密码比较器写入到Ream中,耦合度太高,本项目通过配置的方式重写密码比较器,具体代码请参考参考ShiroConfiguration配置类:

 1     @RequestMapping(value = "/login", method = RequestMethod.POST)
 2     public String postLogin(RedirectAttributes redirectAttributes, HttpServletRequest request, HttpSession session) {
 3         // 登录失败从request中获取shiro处理的异常信息。
 4         // shiroLoginFailure:就是shiro异常类的全类名.
 5         String exception = (String) request.getAttribute("shiroLoginFailure");
 6
 7         System.out.println("exception=" + exception);
 8         String msg = "";
 9         if (exception != null) {
10             if (UnknownAccountException.class.getName().equals(exception)) {
11                 System.out.println("UnknownAccountException -- > 账号不存在:");
12                 msg = "用户不存在!";
13             } else if (IncorrectCredentialsException.class.getName().equals(exception)) {
14                 System.out.println("IncorrectCredentialsException -- > 密码不正确:");
15                 msg = "密码不正确!";
16             } else if ("kaptchaValidateFailed".equals(exception)) {
17                 System.out.println("kaptchaValidateFailed -- > 验证码错误");
18                 msg = "验证码错误!";
19             } else {
20                 //msg = "else >> "+exception;
21                 msg = "密码不正确!";
22                 System.out.println("else -- >" + exception);
23             }
24         }
25         redirectAttributes.addFlashAttribute("msg", msg);
26         session.setAttribute("msg", msg);
27         //return redirect("/login");
28         return "redirect:login";
29         //return msg;
30     }
此时登录认证部门已经完成:一个页面+后台2个函数(1个认证函数+1个Login函数)
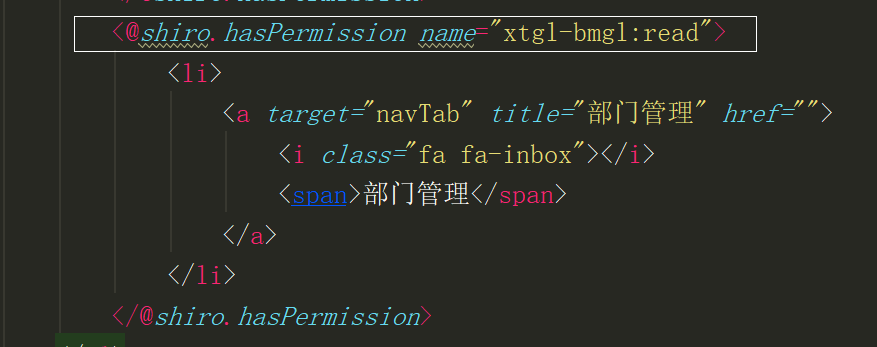
2.2.权限管理
总体来说,权限管理只需要在界面增加 Shiro 的权限标签即可,可以使用角色的标签,也可以使用权限的标签,一般情况下2种标签配合使用,效果最好 <@shiro.hasPermission name="xtgl-yhgl:read"> <@shiro.hasRolen name="xtgl-yhgl:read">
authorizationInfo.setStringPermissions(permissions);
authorizationInfo.setRoles(role);
本项目也是通过此逻辑完成权限管理的
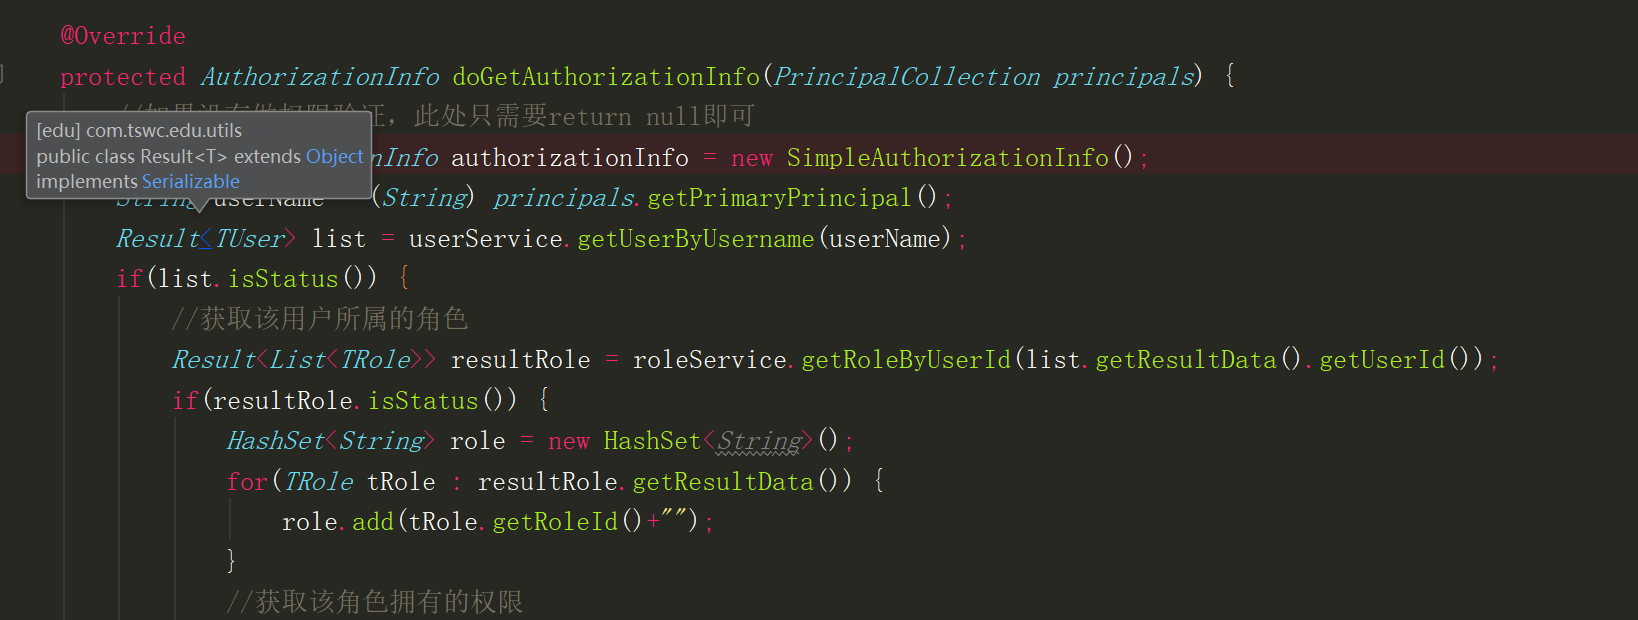
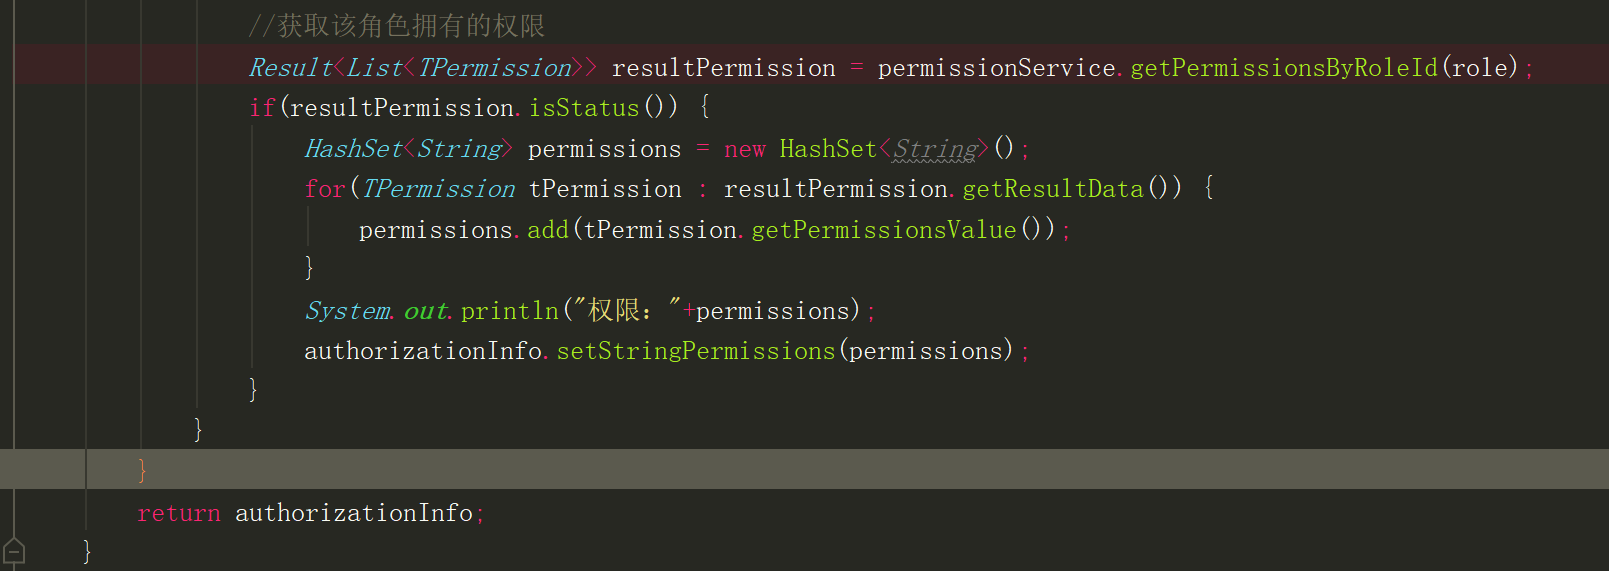
上面2张截图表示的是一个函数。
到此,Spring Boot集成Shiro框架的权限认证已经搭建完毕,可以实现简单的权限管理。
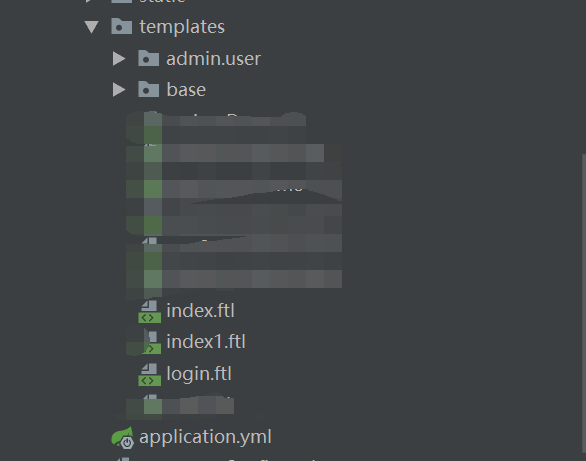
3.新增文件
较上一篇博客,Shiro 部分新增加的文件