版权声明:本文为博主原创文章,未经博主允许不得转载。 https://blog.csdn.net/aeoliancrazy/article/details/86627223
e2e cypress配置
官方文档
https://docs.cypress.io/guides/overview/why-cypress.html
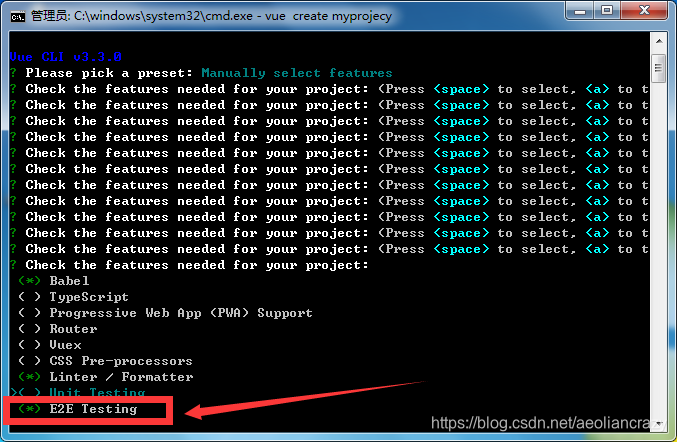
使用vue-cli脚手架初始化项目的时候
安装e2e
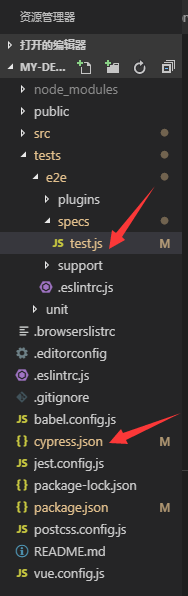
安装完成后,所在的配置文件,和目录层级如下
test.js文件配置如下
describe('My First Test', function () {
  it('Visits the Kitchen Sink', function () {
    // cy.visit('https://example.cypress.io')//官方文档的例子
    cy.visit('/')
    // cy.pause()// 暂停操作
    // cy.debug()// 强制添加断点
    // cy.contains('type').click()// 查找元素,并追加点击事件
    // // Should be on a new URL which includes '/commands/actions'
    // cy.url().should('include', '/commands/actions')// 在url后续路由是否有/commands/actions
    // // Get an input, type into it and verify that the value has been updated
    // cy.get('.action-email')// 根据css选择器选择一个元素
    //   .type('[email protected]')// 并通过type方法,在选中的输入文本
    //   .should('have.value', '[email protected]')// 通过should验证是否正确,是一种验证特定的事件和结果的一种方式
  })
})
cypress.json文件配置如下
{
  "pluginsFile": "tests/e2e/plugins/index.js",
  "baseUrl": "http://localhost:8080"//如果采用官方示例, 可注释掉此项
}
启动命令,在package.json中可以查看
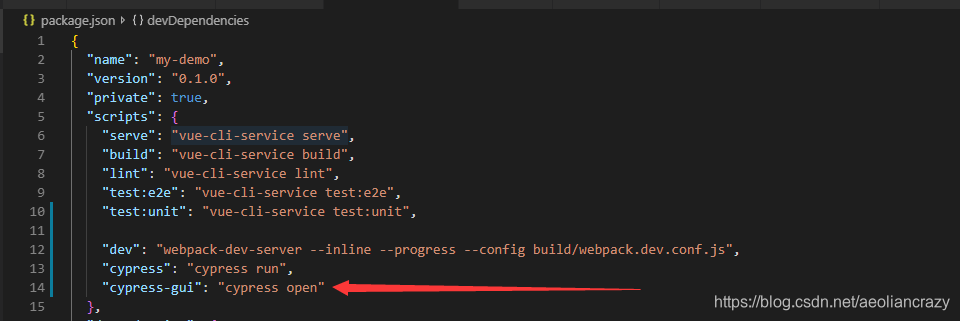
注意,在使用自己的项目,启动cypress的时候,应该先启动vue-serve服务,也就是先要 npm run serve 再在命令行中 npm run cypress-gui

此时也应该注意在中cypress.json和test.js中的相关配置,是否已经更改为自己的配置,而不是官方的教程配置