-
相关安装包下载
cm下载地址:
http://archive.cloudera.com/cm5/cm/5/cloudera-manager-el6-cm5.11.0_x86_64.tar.gz
cdh下载地址:
http://archive.cloudera.com/cdh5/parcels/5.11.0/CDH-5.11.0-1.cdh5.11.0.p0.34-el6.parcel
http://archive.cloudera.com/cdh5/parcels/5.11.0/CDH-5.11.0-1.cdh5.11.0.p0.34-el6.parcel.sha1
http://archive.cloudera.com/cdh5/parcels/5.11.0/manifest.json -
Linux环境准备(各个节点)
(1) 修改hostname[root@hadoop01 ~]# vim /etc/sysconfig/network(2) 关闭SELinux
[root@hadoop01 ~]# vim /etc/selinux/config# This file controls the state of SELinux on the system. # SELINUX= can take one of these three values: # enforcing - SELinux security policy is enforced. # permissive - SELinux prints warnings instead of enforcing. # disabled - No SELinux policy is loaded. SELINUX=disabled (改为disabled后重启 reboot) # SELINUXTYPE= can take one of these two values: # targeted - Targeted processes are protected, # mls - Multi Level Security protection. SELINUXTYPE=targeted(3) 关闭防火墙
[root@hadoop01 ~]# vim /etc/sysconfig/network(4) 安装依赖包(各个节点)
[root@hadoop01 ~]# yum install -y bind-utils chkconfig cyrus-sasl-gssapi cyrus-sasl-plain fuse   \
fuse-libs gcc httpd init-functions libxslt mod_ssl MySQL-python openssl openssl-devel perl \
portmap psmisc python-psycopg2 python-setuptools sed service sqlite swig useradd zlib
(5) 配置NTP服务
所有节点卸载chrony并安装Ntpyum -y remove chrony yum -y install ntp修改主节点配置
[root@hadoop01 ~]# vim /etc/ntp.conf
#server 0.rhel.pool.ntp.org iburst
#server 1.rhel.pool.ntp.org iburst
#server 2.rhel.pool.ntp.org iburst
#server 3.rhel.pool.ntp.org iburst
server 172.31.16.68  #(主节点ip)
修改从节点配置
[root@hadoop01 ~]# vim /etc/ntp.conf
#server 0.rhel.pool.ntp.org iburst
#server 1.rhel.pool.ntp.org iburst
#server 2.rhel.pool.ntp.org iburst
#server 3.rhel.pool.ntp.org iburst
server  127.127.1.0     # local clock
fudge   127.127.1.0 stratum 10
重启所有机器的ntp服务
systemctl restart ntpd #(重启ntp)
systemctl status ntpd #(查看状态)
验证时钟同步,在所有节点执行
ntpq -p命令[root@node01 ~]# ntpq -p remote refid st t when poll reach delay offset jitter ============================================================================== node00 LOCAL(0) 11 u 841 1024 7 0.179 25.578 0.020说明:
remote :远程NTP服务器的IP地址或域名,带 “*” 的表示本地NTP服务器与该服务器同步。
refid: 远程NTP服务器的上层服务器的IP地址或域名。
st:remote远程服务器的级别,即stratum阶层。由于NTP是层型结构,有顶端的服务器,多层的Relay Server再到客户端。所以服务器从高到低级别可以设定为1-16。为了减缓负荷和网络堵塞,原则上应该避免直接连接到级别为1的服务器的。
t:本地NTP服务器与远程NTP服务器的通信方式,u: 单播; b: 广播; l: 本地。
when:上一次校正时间与现在时间的差值。
poll:本机和远程服务器多少时间进行一次同步(单位为秒)。 在一开始运行NTP的时候这个poll值会比较小,那样和服务器同步的频率也就增加了,可以尽快调整到正确的时间范围,之后poll值会逐渐增大,同步的频率也就会相应减小。
reach:是一种衡量前8次查询是否成功的位掩码值,377表示都成功,0表示不成功。
delay:网络传输过程钟延迟的时间。
offset:本地NTP服务器与远程NTP服务器的时间偏移。
jitter:查询偏差的分布值,用于表示远程NTP服务器的网络延时是否稳定,单位为10的-6次方秒。
(6) 修改hosts文件[root@hadoop01 ~]# vim /etc/hosts127.0.0.1 localhost localhost.localdomain localhost4 localhost4.localdomain4 ::1 localhost localhost.localdomain localhost6 localhost6.localdomain6 192.168.194.131 hadoop01 192.168.194.132 hadoop02 192.168.194.133 hadoop03 192.168.194.134 hadoop04 192.168.194.135 hadoop05 192.168.194.136 hadoop06 192.168.194.137 hadoop07(7) SSH免密登陆
具体配置过程参照 [https://blog.csdn.net/weixin_43215250/article/details/82762149] -
jdk安装
具体安装过程参照 -
mysql安装
Cloudera Manager支持三种数据库类型:MySQL、PostgreSQL、Oracle,这里我们选择使用MySQL。
具体安装过程参照[https://blog.csdn.net/weixin_43215250/article/details/82762906] -
Cloudera Manager安装
(1) 上传并解压CM安装包[root@hadoop01 opt]# cd /opt/ [root@hadoop01 opt]# tar -zxvf cloudera-manager-el6-cm5.11.0_x86_64.tar.gz [root@hadoop01 opt]# ll total 681292 drwxr-xr-x. 4 1106 4001 4096 Apr 13 2017 cloudera -rw-r--r--. 1 root root 697623498 Sep 13 14:26 cloudera-manager-el6-cm5.11.0_x86_64.tar.gz drwxr-xr-x. 9 1106 4001 4096 Apr 13 2017 cm-5.11.0 drwxr-xr-x. 2 root root 4096 Mar 26 2015 rh(2) 配置CM使用的数据库实例
-
首先需要去MySql的官网下载JDBC驱动mysql-connector-java-5.1.44.jar,上传到/opt/cm-5.11.0/share/cmf/lib/中。
-
配置CM使用的数据库实例
[root@hadoop01 share]# mysql  -u root -p
.......
mysql> CREATE USER 'scm'@'%' IDENTIFIED BY 'scm';
Query OK, 0 rows affected (0.06 sec)Query OK, 0 rows affected (0.06 sec)

mysql> grant all privileges on *.* to 'scm'@'%'  with grant option;
Query OK, 0 rows affected (0.02 sec)

mysql> create database hive DEFAULT CHARSET utf8 COLLATE utf8_general_ci;
Query OK, 1 row affected (0.00 sec)

mysql> grant all privileges on *.* to 'root'@'%'  with grant option;
Query OK, 0 rows affected (0.00 sec)

mysql> flush privileges;
Query OK, 0 rows affected (0.00 sec)

mysql>
数据库创建语句:
create database hive default character set utf8; CREATE USER 'hive'@'%' IDENTIFIED BY 'password'; GRANT ALL PRIVILEGES ON hive. * TO 'hive'@'%'; FLUSH PRIVILEGES; create database scm default character set utf8; CREATE USER 'scm'@'%' IDENTIFIED BY 'password'; GRANT ALL PRIVILEGES ON scm. * TO 'scm'@'%'; FLUSH PRIVILEGES; create database am default character set utf8; CREATE USER 'am'@'%' IDENTIFIED BY 'password'; GRANT ALL PRIVILEGES ON am. * TO 'am'@'%'; FLUSH PRIVILEGES; create database rm default character set utf8; CREATE USER 'rm'@'%' IDENTIFIED BY 'password'; GRANT ALL PRIVILEGES ON rm. * TO 'rm'@'%'; FLUSH PRIVILEGES; create database hue default character set utf8; CREATE USER 'hue'@'%' IDENTIFIED BY 'password'; GRANT ALL PRIVILEGES ON hue. * TO 'hue'@'%'; FLUSH PRIVILEGES; create database oozie default character set utf8; CREATE USER 'oozie'@'%' IDENTIFIED BY 'password'; GRANT ALL PRIVILEGES ON oozie. * TO 'oozie'@'%'; FLUSH PRIVILEGES; create database sentry default character set utf8; CREATE USER 'sentry'@'%' IDENTIFIED BY 'password'; GRANT ALL PRIVILEGES ON sentry. * TO 'sentry'@'%'; FLUSH PRIVILEGES; create database nav_ms default character set utf8; CREATE USER 'nav_ms'@'%' IDENTIFIED BY 'password'; GRANT ALL PRIVILEGES ON nav_ms. * TO 'nav_ms'@'%'; FLUSH PRIVILEGES; create database nav_as default character set utf8; CREATE USER 'nav_as'@'%' IDENTIFIED BY 'password'; GRANT ALL PRIVILEGES ON nav_as. * TO 'nav_as'@'%'; FLUSH PRIVILEGES; -
在主节点初始化CM5的数据库
[root@hadoop01 share]# /opt/cm-5.11.0/share/cmf/schema/scm_prepare_database.sh mysql -hlocalhost -uroot -p123456 --scm-host localhost scm scm scm如前面已经创建了scm数据库则:
[root@localhost share]# /opt/cm-5.11.0/share/cmf/schema/scm_prepare_database.sh mysql scm scm scm
(3) Agent配置
[root@hadoop02 opt]# vim /opt/cm-5.11.0/etc/cloudera-scm-agent/config.ini
[General]
#Hostname of the CM server.
server_host=192.68.194.131                   (修改为cm节点IP)

#Port that the CM server is listening on.
server_port=7182
节点优化建议
echo "vm.swappiness = 0" >>/etc/sysctl.conf && sysctl -p
echo never >/sys/kernel/mm/transparent_hugepage/defrag
echo never > /sys/kernel/mm/transparent_hugepage/enabled
echo "echo never > /sys/kernel/mm/transparent_hugepage/defrag" >>/etc/rc.local
echo "echo never > /sys/kernel/mm/transparent_hugepage/enabled" >>/etc/rc.local
(4) 分发cm-5.11.0到各个节点
 [root@hadoop01 share]#scp -r /opt/cm-5.11.0/ root@hadoo02:/opt/
 ...
(5) 在所有节点创建cloudera-scm用户
useradd --system --home=/opt/cm-5.11.0/run/cloudera-scm-server/ --no-create-home --shell=/bin/false --comment "Cloudera SCM User" cloudera-scm -
-
准备Parcels,用以安装CDH5
上传CDH-5.11.0-1.cdh5.11.0.p0.34-el6.parcel,CDH-5.11.0-1.cdh5.11.0.p0.34-el6.parcel.sha,manifest.json 这三个文件到 /opt/cloudera/parcel-repo目录下。
(注意:将.sha1文件后缀更改为.sha)[root@hadoop01 parcel-repo]# cd /opt/cloudera/parcel-repo ... -
启动cloudera-scm-serve和cloudera-scm-agent
[root@hadoop01 local]# /opt/cm-5.11.0/etc/init.d/cloudera-scm-server start [root@hadoop01 local]# /opt/cm-5.11.0/etc/init.d/cloudera-scm-agent start ... -
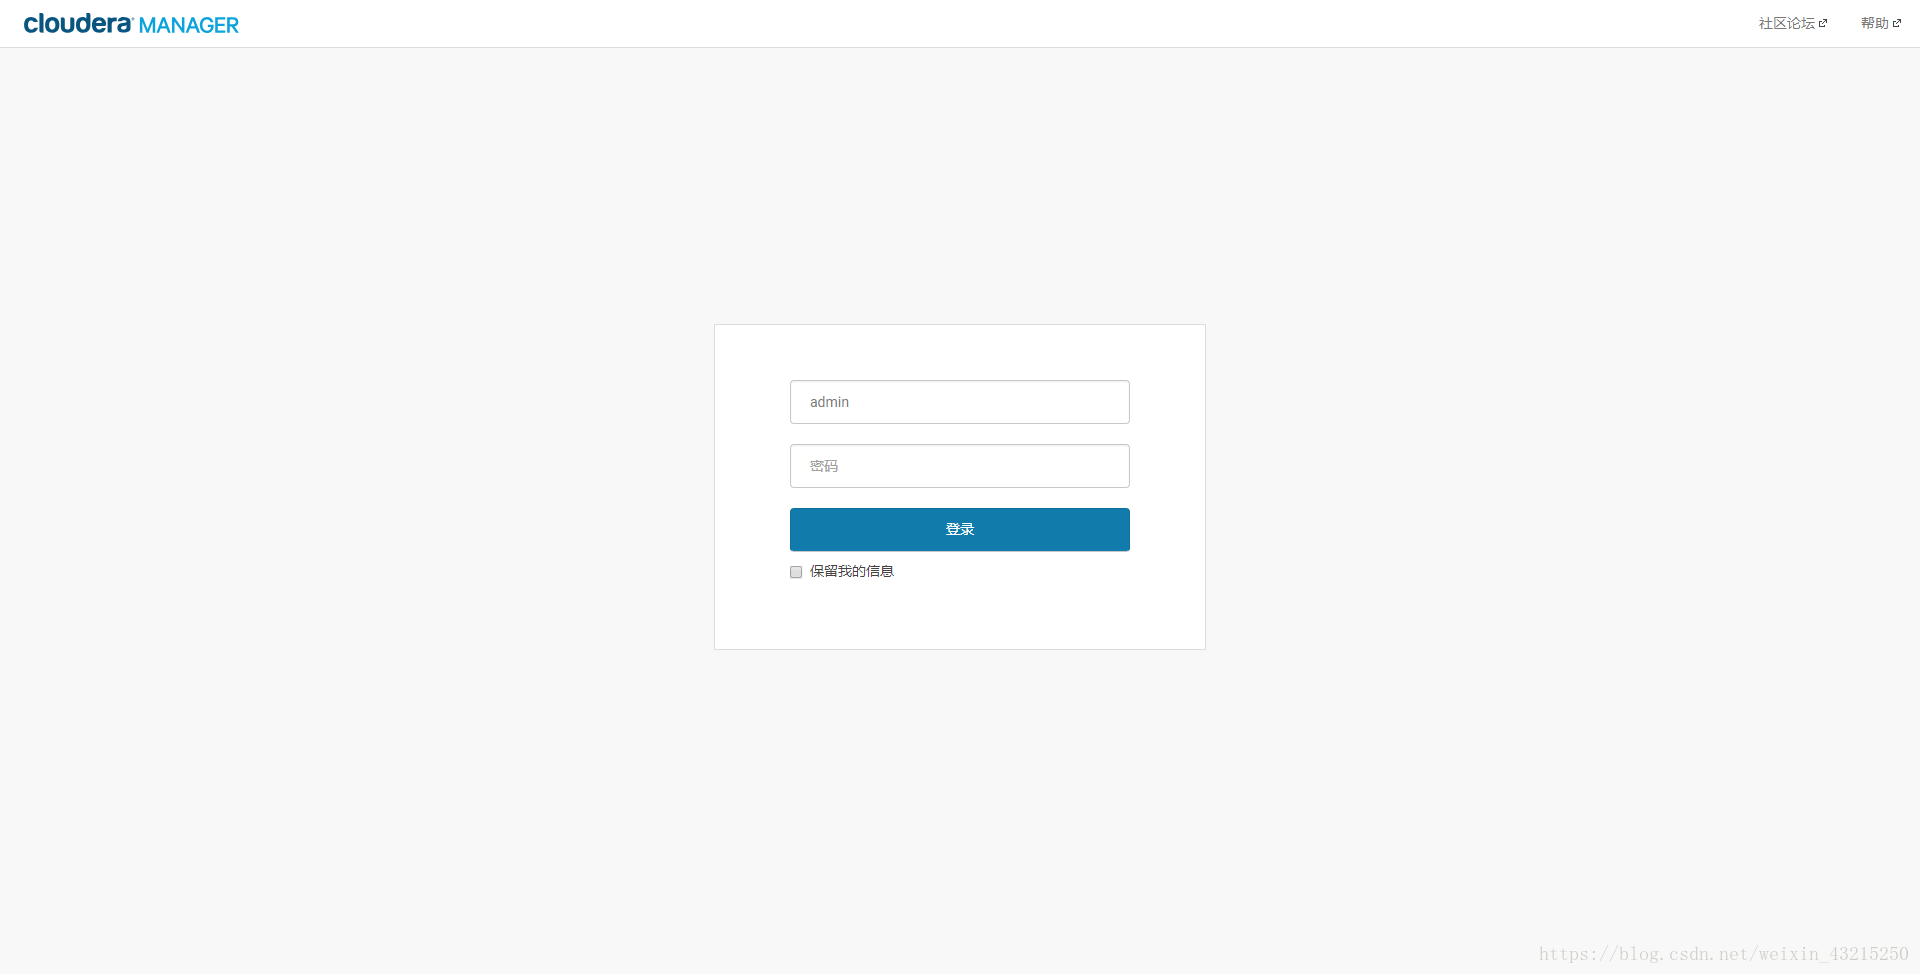
登录cm
http://hadoop01:7180/cmf/login
通过浏览器访问主节点的7180端口测试一下了(由于CM Server的启动需要花点时间,这里可能要等待一会才能访问),默认的用户名和密码均为admin:
-
安装时可能出现的相关问题
-
配置nginx转发访问CM
问题:
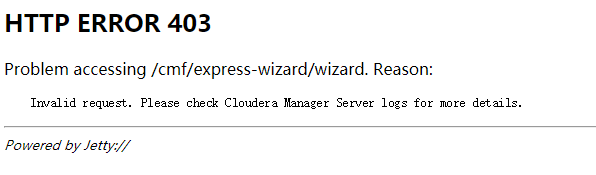
/opt/cm-5.11.0/log/cloudera-scm-server/cloudera-scm-server.log2018-11-29 09:51:04,900 WARN 499498894@scm-web-18:com.cloudera.server.web.cmf.csrf.CsrfRefererInterceptor: Rejecting request originating from 10.24.245.61 for http://10.30.252.186:7180/cmf/ charts/timeSeries with referrer http://cloud.hinabian.com/cmf/home 2018-11-29 09:51:04,909 WARN 499498894@scm-web-18:com.cloudera.server.web.cmf.csrf.CsrfRefererInterceptor: Rejecting request originating from 10.24.245.61 for http://10.30.252.186:7180/cmf/ charts/timeSeries with referrer http://cloud.hinabian.com/cmf/home 2018-11-29 09:51:04,910 WARN 499498894@scm-web-18:com.cloudera.server.web.cmf.csrf.CsrfRefererInterceptor: Rejecting request originating from 10.24.245.61 for http://10.30.252.186:7180/cmf/ services/landingPageStatusContent with referrer http://cloud.hinabian.com/cmf/home解决方法:
grep安装目录的csrf,直接注释CsrfRefererInterceptor拦截器后,重启cloudera-manager-server[[email protected] cmf]# grep -i -r csrf /usr/share/cmf/ Binary file ./cloudera-navigator-server/libs/cdh5/hadoop-yarn-server-nodemanager-2.6.0-cdh5.5.0.jar matches Binary file ./common_jars/hadoop-yarn-server-nodemanager-2.6.0-cdh5.5.0.jar matches Binary file ./common_jars/server-5.6.0.jar matches Binary file ./common_jars/hadoop-yarn-server-resourcemanager-2.5.0-cdh5.3.2.jar matches ./webapp/WEB-INF/spring/mvc-config.xml: <bean class="com.cloudera.server.web.cmf.csrf.CsrfRefererInterceptor" /> Binary file ./lib/cdh5-java6/hadoop-yarn-server-resourcemanager-2.5.0-cdh5.3.2.jar matches Binary file ./lib/server-5.6.0.jar matches Binary file ./lib/cdh5/hadoop-yarn-server-nodemanager-2.6.0-cdh5.5.0.jar matches [[email protected] cmf]# vi ./webapp/WEB-INF/spring/mvc-config.xml 注释掉这个bean,然后重启server,再访问nginx,就ok了 <!-- <bean class="com.cloudera.server.web.cmf.csrf.CsrfRefererInterceptor" /> --> -
Hive Metastore Canary 创建数据库失败
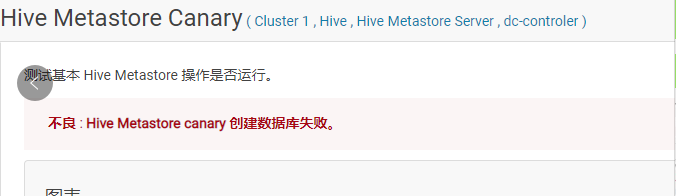
如其他正常,有可能是mysql的驱动包版本过低导致,mark下。 -
Error: JAVA_HOME is not set and could not be found.
解决办法:
在各个节点执行[root@ip-104 opt]# mkdir /usr/java [root@ip-104 opt]# ln -s /usr/local/soft/java/ /usr/java/default
-
CDH-5.11.0离线安装
版权声明:本文为博主原创文章,未经博主允许不得转载。 https://blog.csdn.net/weixin_43215250/article/details/82773656
猜你喜欢
转载自blog.csdn.net/weixin_43215250/article/details/82773656
今日推荐
周排行