01_数据库的安装和使用
# 安装
- yum install mariadb-server.x86_64
# 设置密码
- mysql_secure_installation
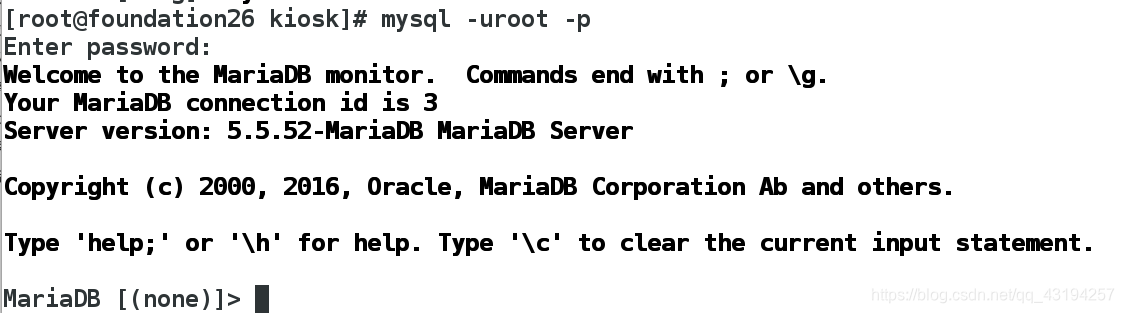
# 登陆mysql
- mysql -uroot -predhat -hlocalhost #-u(用户) -p(密码) -h(什么身份登陆)
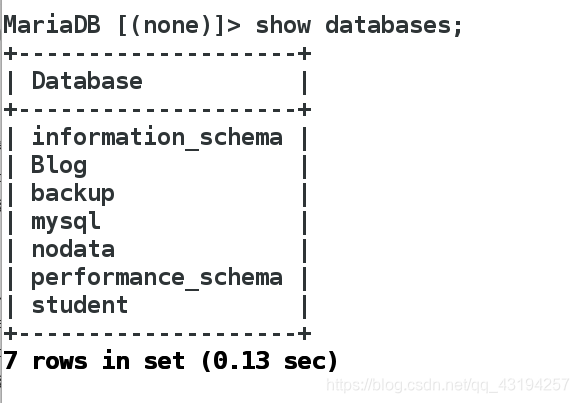
# 查看所有的数据库
- show databases;
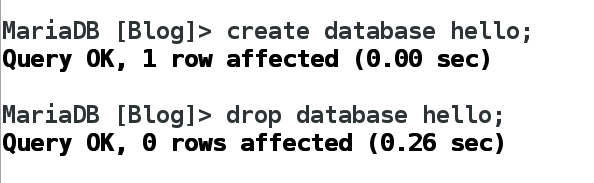
# 创建和删除数据库
- create database hello;
- drop database hello;
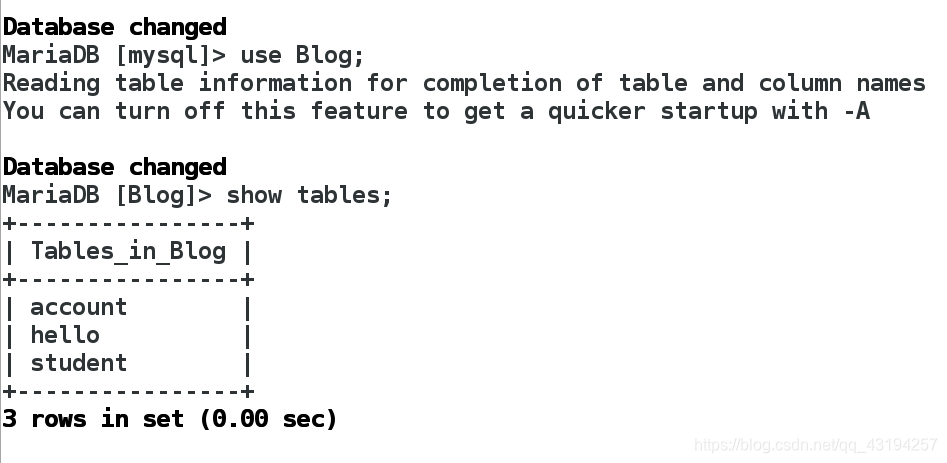
# 进入某个数据库并查看所有的数据表
- use Blogl;
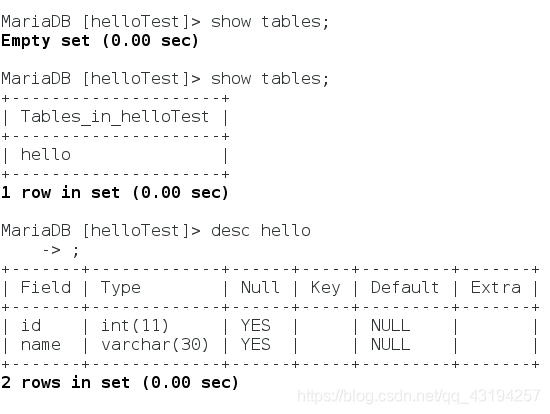
- show tables;
# 创建和删除数据表
- create table python(id varchar(50),name varchar(50),age int); #括号内为表头
- drop table python;

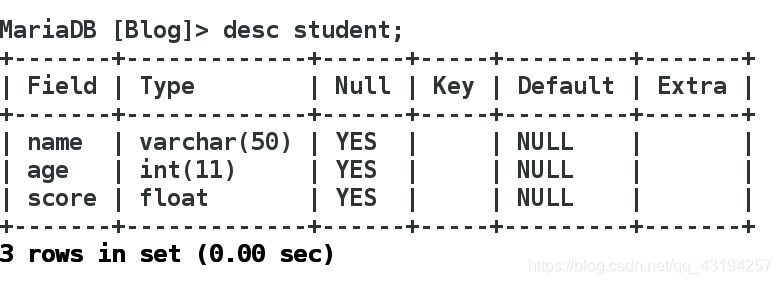
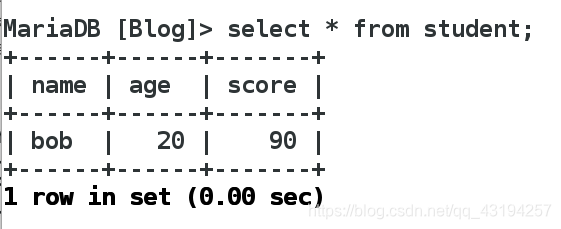
# 查看表结构和数据
- desc student;
- select * from student;
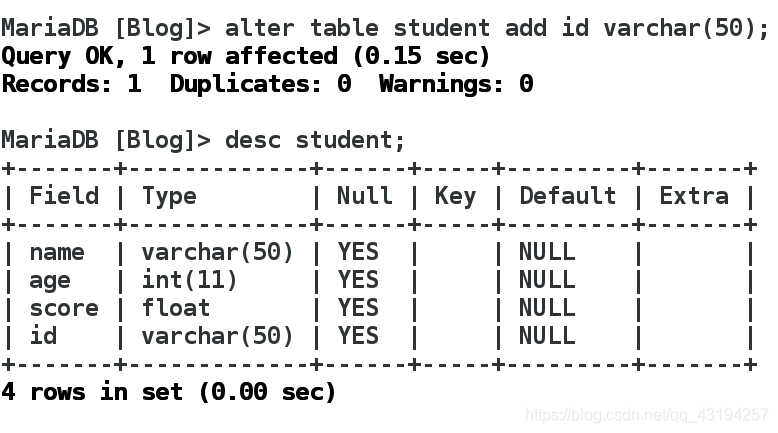
# 在数据表中插入和删除表头
- alter table student add id varchar(50);
- alter table student drop id;

# 在数据表中插入和删除数据
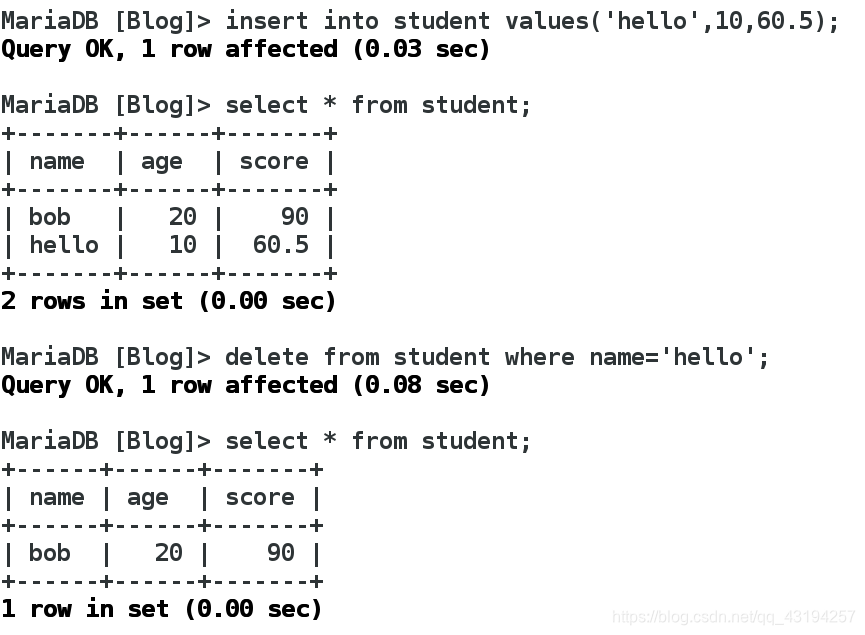
- insert into student values('hello',10,60.5);
- delete from student where name='hello';
- insert into student values('hello',10,60.5) default charset=utf8; # 编码格式为utf-8,支持中文
- create table if not exists employee(id varchar(50), name varchar(50), age int) default charset=utf8;# 如果表不存在则创建表,如果存在则不操作
# 找回root用户的密码
- 关闭mariadb服务:systemctl stop mariadb.service
- 跳过授权表:mysqld_safe	--skip-grant-table	&
- 进入数据库:mysql
- 更新授权表中的root用户的密码:update mysql.user set Password=password('westos') where User='root';
- 退出数据库并查看所有mysql相关的进程:ps aux |  grep mysql
- 结束跳过授权表的这个进程:kill -9 pid(跳过授权表的进程pid号)
- 开启mariadb服务
02_python连接数据库
安装第三方软件来建立python和数据库的连接
-python2-------》MySQL-python.x86_64
yum install MySQL-python.x86_64
-python3-------》pymysql
# 用pip下载,yum源中没有该软件包
pip install pymysql
import pymysql

# 1. 连接数据库,
conn = pymysql.connect(
    host='localhost',
    user='root',
    password='westos',
    db='helloTest',
    charset='utf8',
    # autocommit=True,    # 如果插入数据,, 是否自动提交? 和conn.commit()功能一致。
)
# ****python, 必须有一个游标对象, 用来给数据库发送sql语句, 并执行的.
# 2. 创建游标对象,
cur = conn.cursor()

# 3. 对于数据库进行增删改查
# 1). ************************创建数据表**********************************
try:
    create_sqli = "create table hello (id int, name varchar(30));"
    cur.execute(create_sqli)
except Exception as e:
    print("创建数据表失败:", e)
else:
    print("创建数据表成功;")
finally:
	# 4. 关闭游标
	cur.close()
	# 5. 关闭连接
	conn.close()
import pymysql
# 1. 连接数据库,
conn = pymysql.connect(
host='localhost',
user='root',
password='westos',
db='helloTest',
charset='utf8',
# autocommit=True, # 如果插入数据,, 是否自动提交? 和conn.commit()功能一致。
)
# ****python, 必须有一个游标对象, 用来给数据库发送sql语句, 并执行的.
# 2. 创建游标对象,
cur = conn.cursor()
# 3. 对于数据库进行增删改查
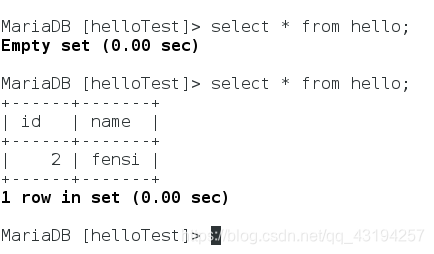
# 2). *********************插入数据****************************
try:
insert_sqli = "insert into hello values(2, 'fensi');"
cur.execute(insert_sqli)
except Exception as e:
print("插入数据失败:", e)
else:
# 如果是插入数据, 一定要提交数据, 不然数据库中找不到要插入的数据;
conn.commit()
print("插入数据成功;")
finally:
# 4. 关闭游标
cur.close()
# 5. 关闭连接
conn.close()
import pymysql
# 1. 连接数据库,
conn = pymysql.connect(
host='localhost',
user='root',
password='westos',
db='helloTest',
charset='utf8',
# autocommit=True, # 如果插入数据,, 是否自动提交? 和conn.commit()功能一致。
)
# ****python, 必须有一个游标对象, 用来给数据库发送sql语句, 并执行的.
# 2. 创建游标对象,
cur = conn.cursor()
# 3. 对于数据库进行增删改查
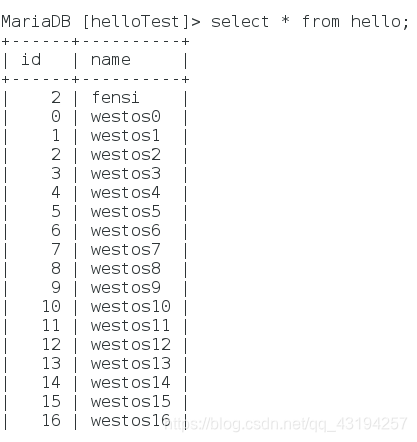
# 3). *********************插入多条数据****************************
try:
info = [(i, "westos%s" %(i)) for i in range(100)]
# *********************第一种方式********************
# # %s必须手动添加一个字符串, 否则就是一个变量名, 会报错.
# insert_sqli = "insert into hello values(%d, '%s');"
# for item in info:
# print('insert语句:', insert_sqli %item)
# cur.execute(insert_sqli %item)
# *********************第二种方式********************
insert_sqli = "insert into hello values(%s, %s);"
cur.executemany(insert_sqli, info )
except Exception as e:
print("插入多条数据失败:", e)
else:
# 如果是插入数据, 一定要提交数据, 不然数据库中找不到要插入的数据;
conn.commit()
print("插入多条数据成功;")
finally:
# 4. 关闭游标
cur.close()
# 5. 关闭连接
conn.close()
import pymysql
# 1. 连接数据库,
conn = pymysql.connect(
host='localhost',
user='root',
password='westos',
db='helloTest',
charset='utf8',
# autocommit=True, # 如果插入数据,, 是否自动提交? 和conn.commit()功能一致。
)
# ****python, 必须有一个游标对象, 用来给数据库发送sql语句, 并执行的.
# 2. 创建游标对象,
cur = conn.cursor()
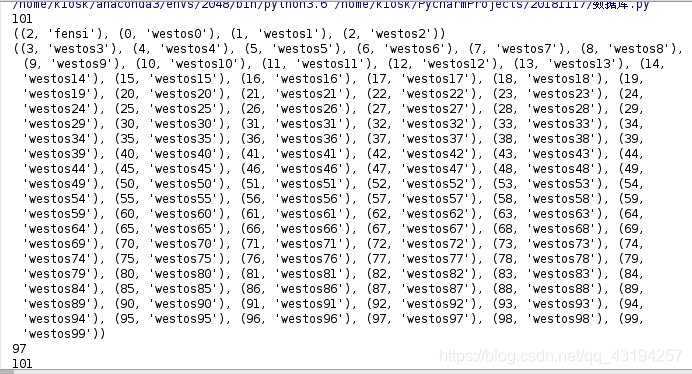
# 4). **************************数据库查询*****************************
sqli = "select * from hello;"
result = cur.execute(sqli) # 默认不返回查询结果集, 返回数据记录数。
print(result)
# cur的查询方式和文件读取方式类似
# 都是通过指针来确定查询的位置
print(cur.fetchone()) # 1). 获取下一个查询结果集;
print(cur.fetchone())
print(cur.fetchone())
print(cur.fetchmany(4)) # 2). 获取制定个数个查询结果集;
# 4. 关闭游标
cur.close()
# 5. 关闭连接
conn.close()
03_获取表的字段名和信息
import time

import pymysql

# 1. 连接数据库,
conn = pymysql.connect(
    host='localhost',
    user='root',
    password='westos',
    db='helloTest',
    charset='utf8',
    # autocommit=True,    # 如果插入数据,, 是否自动提交? 和conn.commit()功能一致。
)
# ****python, 必须有一个游标对象, 用来给数据库发送sql语句, 并执行的.


# __enter__, __exit__

# with语句实现的效果是: with语句执行结束, 如果成功, 则提交改变的数据, 如果不成功, 则回滚.
with conn:
    # ****** 判断是否连接?
    print(conn.open)  # True
    # 2. 创建游标对象,
    cur = conn.cursor()
    # 3).
    sqli = "select * from hello;"
    result = cur.execute(sqli)  # 默认不返回查询结果集, 返回数据记录数。

    # 显示每列的详细信息,是一个元组
    des = cur.description
    print("表的描述:", des)

    # 获取表头
    print("表头:", ",".join([item[0] for item in des]))
    cur.close()


conn.close()
print("with语句之外:", conn.open)   # False

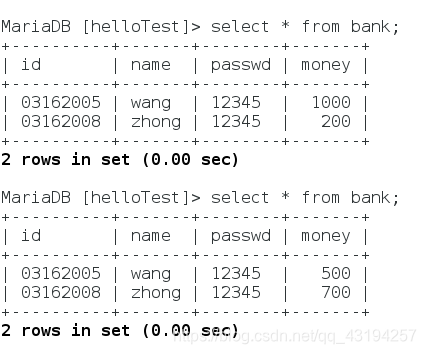
04_基于mysql数据库银行转账功能实现
import pymysql
# 在python2中需要安装MySQL-python.x86_64
# import MySQLdb as pymysql


class TransferMoney(object):
    # 构造方法
    def __init__(self, conn):
        self.conn = conn
        self.cur = conn.cursor()

    def transfer(self, source_id, target_id, money):
        # 1). 判断两个银行卡号是否存在?
        # 2). 判断source_id是否有足够的钱?
        # 3). source_id扣钱
        # 4). target_id加钱
        if not self.check_account_avaialbe(source_id):
            raise  Exception("账户不存在")
        if not self.check_account_avaialbe(target_id):
            raise  Exception("账户不存在")

        if self.has_enough_money(source_id, money):
            try:
                self.reduce_money(source_id, money)
                self.add_money(target_id, money)
            except Exception as e:
                print("转账失败:", e)
                self.conn.rollback()
            else:
                self.conn.commit()
                print("%s给%s转账%s金额成功" % (source_id, target_id, money))

    def check_account_avaialbe(self, acc_id):
        """判断帐号是否存在, 传递的参数是银行卡号的id"""
        select_sqli = "select * from bankData where id=%d;" % (acc_id)
        print("execute sql:", select_sqli)
        res_count = self.cur.execute(select_sqli)
        if res_count == 1:
            return True
        else:
            # raise  Exception("账户%s不存在" %(acc_id))
            return False

    def has_enough_money(self, acc_id, money):
        """判断acc_id账户上金额> money"""
        # 查找acc_id存储金额?
        select_sqli = "select money from bankData where id=%d;" % (acc_id)
        print("execute sql:", select_sqli)
        self.cur.execute(select_sqli)  # ((1, 500), )

        # 获取查询到的金额钱数;
        acc_money = self.cur.fetchone()[0]
        # 判断
        if acc_money >= money:
            return True
        else:
            return False

    def add_money(self, acc_id, money):
        update_sqli = "update bankData set money=money+%d  where id=%d" % (money, acc_id)
        print("add money:", update_sqli)
        self.cur.execute(update_sqli)

    def reduce_money(self, acc_id, money):
        update_sqli = "update bankData set money=money-%d  where id=%d" % (money, acc_id)
        print("reduce money:", update_sqli)
        self.cur.execute(update_sqli)

    # 析构方法
    def __del__(self):
        self.cur.close()
        self.conn.close()


if __name__ == '__main__':
    # 1. 连接数据库,
    conn = pymysql.connect(
        host='localhost',
        user='root',
        password='redhat',
        db='helloTest',
        charset='utf8',
        autocommit=True,    # 如果插入数据,, 是否自动提交? 和conn.commit()功能一致。
    )
    trans = TransferMoney(conn)
    transfer.transfer('03162005','03162008',500)