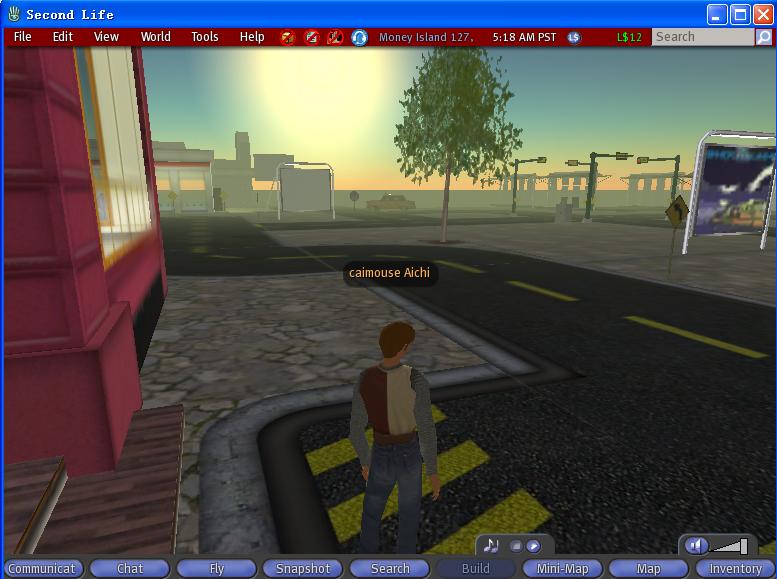
在虚拟世界里,自然现象的实现是最需要实现的,比如天空的实现,以便反映是白天还是晚上,这样才逼真反映现实世界。在第二人生里实现的天空,还是比较好的,如下图所示:
蔡军生 2008/01/10 QQ:9073204 深圳
从上面的图片里,可以看到太阳在远处,并具有雾化的效果,这是早上太阳升起的效果。看到远处是浅蓝色的天空,与海边连接成一体。在室外场境的模拟中,最重要的就是天空体的实现。目前实现天空体有两种不同的实现方式:天体盒和天空穹。而第二人生里是采用天空盒的实现方式,这种方式是渲染的速度比较快,但纹理需要特别处理,才让人们看到的所有地方一样远的感觉。跟实现地面是一样的,都是使用网格和纹理来实现。下面就来通过代码仔细地分析怎么创建天空盒的网格,以及纹理的坐标设置。
#001
#002 BOOL LLVOSky::updateGeometry(LLDrawable *drawable)
#003 {
#004
if (mFace[FACE_REFLECTION] == NULL)
#005
{
#006
LLDrawPoolWater *poolp = (LLDrawPoolWater*) gPipeline.getPool(LLDrawPool::POOL_WATER);
#007
mFace[FACE_REFLECTION] = drawable->addFace(poolp, NULL);
#008
}
创建反射表面。
#009
#010
mCameraPosAgent = drawable->getPositionAgent();
#011
mEarthCenter.mV[0] = mCameraPosAgent.mV[0];
#012
mEarthCenter.mV[1] = mCameraPosAgent.mV[1];
#013
#014
LLVector3 v_agent[8];
#015
for (S32 i = 0; i < 8; ++i)
#016
{
#017
F32 x_sgn = (i&1) ? 1.f : -1.f;
#018
F32 y_sgn = (i&2) ? 1.f : -1.f;
#019
F32 z_sgn = (i&4) ? 1.f : -1.f;
#020
v_agent[i] = HORIZON_DIST*0.25f * LLVector3(x_sgn, y_sgn, z_sgn);
#021
}
#022
#023
LLStrider<LLVector3> verticesp;
#024
LLStrider<LLVector3> normalsp;
#025
LLStrider<LLVector2> texCoordsp;
#026
LLStrider<U32> indicesp;
#027
S32 index_offset;
#028
LLFace *face;
#029
下面开始创建天空盒的6个平面。
#030
for (S32 side = 0; side < 6; ++side)
#031
{
#032
face = mFace[FACE_SIDE0 + side];
#033
#034
if (face->mVertexBuffer.isNull())
#035
{
#036
face->setSize(4, 6);
设置每个表面有4个顶点构成,共有6个索引顶点。
#037
face->setGeomIndex(0);
#038
face->setIndicesIndex(0);
#039
face->mVertexBuffer = new LLVertexBuffer(LLDrawPoolSky::VERTEX_DATA_MASK, GL_STREAM_DRAW_ARB);
#040
face->mVertexBuffer->allocateBuffer(4, 6, TRUE);
上面分配顶点缓冲区和索引缓冲区。
#041
#042
index_offset = face->getGeometry(verticesp,normalsp,texCoordsp, indicesp);
#043
#044
S32 vtx = 0;
#045
S32 curr_bit = side >> 1; // 0/1 = Z axis, 2/3 = Y, 4/5 = X
#046
S32 side_dir = side & 1; // even - 0, odd - 1
#047
S32 i_bit = (curr_bit + 2) % 3;
#048
S32 j_bit = (i_bit + 2) % 3;
#049
#050
LLVector3 axis;
#051
axis.mV[curr_bit] = 1;
#052
face->mCenterAgent = (F32)((side_dir << 1) - 1) * axis * HORIZON_DIST;
#053
#054
vtx = side_dir << curr_bit;
#055
*(verticesp++) = v_agent[vtx];
#056
*(verticesp++) = v_agent[vtx | 1 << j_bit];
#057
*(verticesp++) = v_agent[vtx | 1 << i_bit];
#058
*(verticesp++) = v_agent[vtx | 1 << i_bit | 1 << j_bit];
上面计算4个顶点坐标。
#059
#060
*(texCoordsp++) = TEX00;
#061
*(texCoordsp++) = TEX01;
#062
*(texCoordsp++) = TEX10;
#063
*(texCoordsp++) = TEX11;
#064
设置4个顶点的纹理坐标。
#065
// Triangles for each side
#066
*indicesp++ = index_offset + 0;
#067
*indicesp++ = index_offset + 1;
#068
*indicesp++ = index_offset + 3;
#069
#070
*indicesp++ = index_offset + 0;
#071
*indicesp++ = index_offset + 3;
#072
*indicesp++ = index_offset + 2;
上面设置每个表面由两个三角形构成索引。
#073
}
#074
}
#075
#076
const LLVector3 &look_at = gCamera->getAtAxis();
#077
LLVector3 right = look_at % LLVector3::z_axis;
#078
LLVector3 up = right % look_at;
#079
right.normVec();
#080
up.normVec();
#081
#082
const static F32 elevation_factor = 0.0f/sResolution;
#083
const F32 cos_max_angle = cosHorizon(elevation_factor);
#084
mSun.setDraw(updateHeavenlyBodyGeometry(drawable, FACE_SUN, TRUE, mSun, cos_max_angle, up, right));
#085
mMoon.setDraw(updateHeavenlyBodyGeometry(drawable, FACE_MOON, FALSE, mMoon, cos_max_angle, up, right));
#086
#087
const F32 water_height = gAgent.getRegion()->getWaterHeight() + 0.01f;
#088
// gWorldPointer->getWaterHeight() + 0.01f;
#089
const F32 camera_height = mCameraPosAgent.mV[2];
#090
const F32 height_above_water = camera_height - water_height;
#091
#092
BOOL sun_flag = FALSE;
#093
#094
if (mSun.isVisible())
#095
{
#096
if (mMoon.isVisible())
#097
{
#098
sun_flag = look_at * mSun.getDirection() > 0;
#099
}
#100
else
#101
{
#102
sun_flag = TRUE;
#103
}
#104
}
#105
#106
if (height_above_water > 0)
#107
{
#108 #if 1 //1.9.1
#109
BOOL render_ref = gPipeline.getPool(LLDrawPool::POOL_WATER)->getVertexShaderLevel() == 0;
#110 #else
#111
BOOL render_ref = !(gPipeline.getVertexShaderLevel(LLPipeline::SHADER_ENVIRONMENT) >= LLDrawPoolWater::SHADER_LEVEL_RIPPLE);
#112 #endif
#113
if (sun_flag)
#114
{
#115
setDrawRefl(0);
#116
if (render_ref)
#117
{
#118
updateReflectionGeometry(drawable, height_above_water, mSun);
#119
}
#120
}
#121
else
#122
{
#123
setDrawRefl(1);
#124
if (render_ref)
#125
{
#126
updateReflectionGeometry(drawable, height_above_water, mMoon);
#127
}
#128
}
#129
}
#130
else
#131
{
#132
setDrawRefl(-1);
#133
}
#134
#135
#136
LLPipeline::sCompiles++;
#137
return TRUE;
#138 }
#139
上面计算太阳和月亮的出现位置以及光照效果。
通过上面的分析,了解天空体的网格创建,纹理坐标的设置,以及太阳、月亮的效果计算。
再分享一下我老师大神的人工智能教程吧。零基础!通俗易懂!风趣幽默!还带黄段子!希望你也加入到我们人工智能的队伍中来!https://blog.csdn.net/jiangjunshow