一、本地存储设备的识别
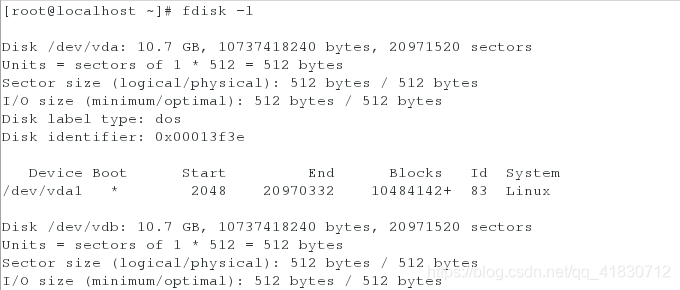
fdisk -l ##真实存在的设备
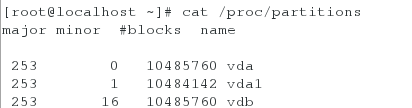
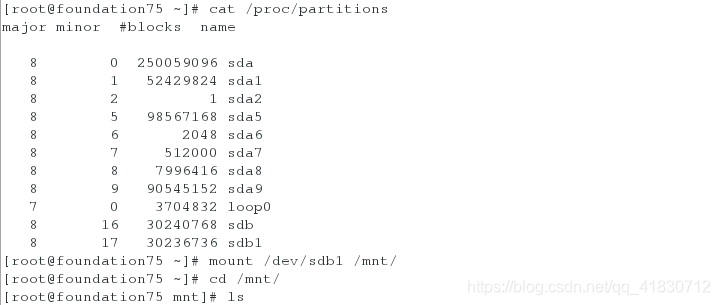
cat /proc/partitions ##查看系统识别的设备
blkid ##系统可使用的设备

df ##系统正在挂载的设备

二、设备的挂载和卸载
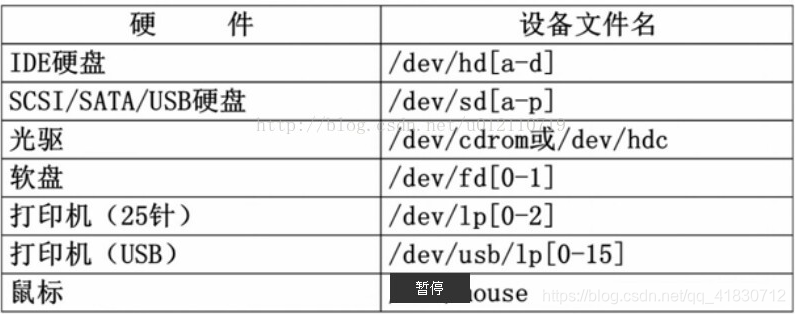
1、设备的名称
/dev/xdx	##/dev/hd0 /dev/hd1 /dev/sda /dev/sdb /dev/sda1 /dev/sda2 /dev/sdb1
/dev/sr0	##光驱
/dec/mapper/*	##虚拟设备
2、设备的挂载
为什么需要挂载呢?Linux将所有的硬件设备都当做文件来处理,因此当使用光驱等硬件设备时,必须将其挂载到系统中,只有这样Linux才能识别。
如何挂载呢?
mount   设备    挂载点
mount /dev/sdb1 /mnt			##挂载sdb1到mnt
umount /mnt | /dev/sdb1 ##卸载

mount -o ro /dev/sdb1 /mnt ##只读挂载
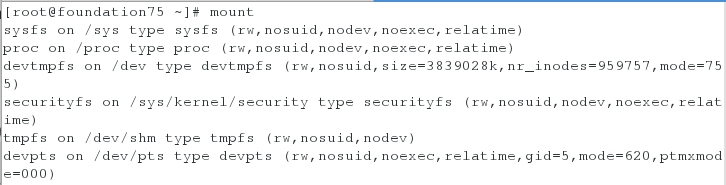
mount ##查看挂载信息
mount -o remount,rw /dev/sdb1 | /mnt ##重新读写挂载
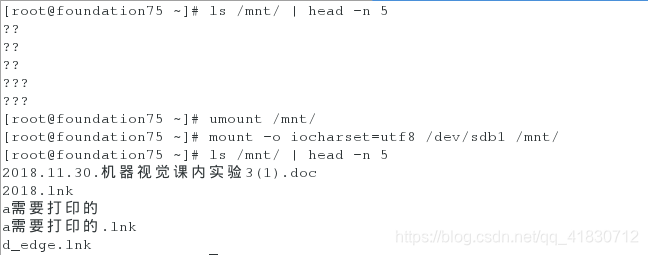
mount -o iocharset=utf8 /dev/sdb1 /mnt ##挂载支持中文


3、解决下载时设备正忙的问题
示例:
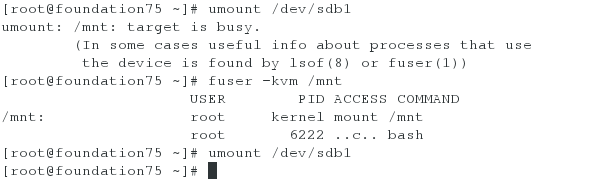
[root@foundation33 ~]# umount /dev/sdb1
umount: /run/media/kiosk/KINGSTON: target is busy.
        (In some cases useful info about processes that use
         the device is found by lsof(8) or fuser(1))
解决方法一:
fuser -kvm /mnt		##结束占用的进程
umount /dev/sdb1	##卸载设备
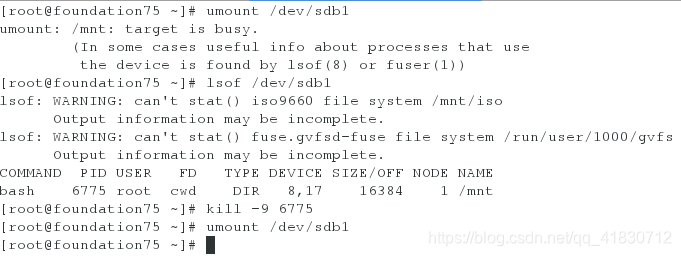
解决方法二:
lsof /dev/sdb1		##查看占用sdb1的进程
kill -9 进程id
umount /dev/sdb1
三、磁盘分区
1、硬盘0磁道1扇区的512个字节中记录的信息如下:
512=446	    +		64	    +		2
  ^			         ^			    ^
mbr(主引导记录)	 mpt(主分区表) 55aa(硬盘的有效性标示)
硬盘分区表,只有64字节。一个分区占用16个字节,一块硬盘最多可以划分为4个主分区。
2、分区步骤
以对/dev/vdb分区为例:
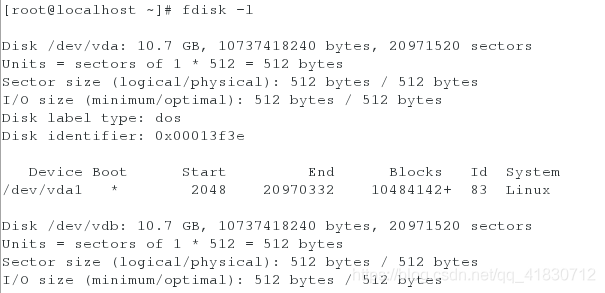
1、fdisk -l 查看硬盘及分区信息
2、fdisk /dev/vdb
fdisk /dev/vdb
Command (m for help): m
Command action
   a   toggle a bootable flag
   b   edit bsd disklabel
   c   toggle the dos compatibility flag
   d   delete a partition		##删除
   g   create a new empty GPT partition table
   G   create an IRIX (SGI) partition table
   l   list known partition types
   m   print this menu
   n   add a new partition		##新建
   o   create a new empty DOS partition table
   p   print the partition table	##显示分区信息
   q   quit without saving changes	##退出
   s   create a new empty Sun disklabel
   t   change a partition's system id	##修改分区id
   u   change display/entry units
   v   verify the partition table
   w   write table to disk and exit	##保存分区表信息到硬盘
   x   extra functionality (experts only)
1、建立主分区
[root@localhost ~]# fdisk /dev/vdb		##对/dev/vdb进行分区
Welcome to fdisk (util-linux 2.23.2).

Changes will remain in memory only, until you decide to write them.
Be careful before using the write command.

Device does not contain a recognized partition table
Building a new DOS disklabel with disk identifier 0x202e297a.

Command (m for help): n		##新建
Partition type:
   p   primary (0 primary, 0 extended, 4 free)
   e   extended
Select (default p): 		##默认主分区
Using default response p
Partition number (1-4, default 1): 		##选择默认id。
First sector (2048-20971519, default 2048): 		##分区起始
Using default value 2048
Last sector, +sectors or +size{K,M,G} (2048-20971519, default 20971519): +100M		##分区大小
Partition 1 of type Linux and of size 100 MiB is set

Command (m for help): n
Partition type:
   p   primary (1 primary, 0 extended, 3 free)
   e   extended
Select (default p):
Using default response p
Partition number (2-4, default 2):
First sector (206848-20971519, default 206848):
Using default value 206848
Last sector, +sectors or +size{K,M,G} (206848-20971519, default 20971519): +100M
Partition 2 of type Linux and of size 100 MiB is set

Command (m for help): n
Partition type:
   p   primary (2 primary, 0 extended, 2 free)
   e   extended
Select (default p):
Using default response p
Partition number (3,4, default 3):
First sector (411648-20971519, default 411648):
Using default value 411648
Last sector, +sectors or +size{K,M,G} (411648-20971519, default 20971519): +100M
Partition 3 of type Linux and of size 100 MiB is set

2、建立拓展分区。
fdisk /dev/vdb
Command (m for help):
Command (m for help): n ##当系统已经有三个主分区时
Partition type:
p primary (3 primary, 0 extended, 1 free)
e extended
Select (default e): ##第四块分区默认扩展分区
Using default response e
Selected partition 4
First sector (616448-20971519, default 616448):
Using default value 616448
Last sector, +sectors or +size{K,M,G} (616448-20971519, default 20971519): ##大小默认剩余全部
Using default value 20971519
Partition 4 of type Extended and of size 9.7 GiB is set
Command (m for help): p ##显示分区信息
Disk /dev/vdb: 10.7 GB, 10737418240 bytes, 20971520 sectors
Units = sectors of 1 * 512 = 512 bytes
Sector size (logical/physical): 512 bytes / 512 bytes
I/O size (minimum/optimal): 512 bytes / 512 bytes
Disk label type: dos
Disk identifier: 0x202e297a
Device Boot Start End Blocks Id System
/dev/vdb1 2048 206847 102400 83 Linux
/dev/vdb2 206848 411647 102400 83 Linux
/dev/vdb3 411648 616447 102400 83 Linux
/dev/vdb4 616448 20971519 10177536 5 Extended
Command (m for help): wq ##退出保存分区信息到硬盘,否则不生效。
The partition table has been altered!
Calling ioctl() to re-read partition table.
Syncing disks.
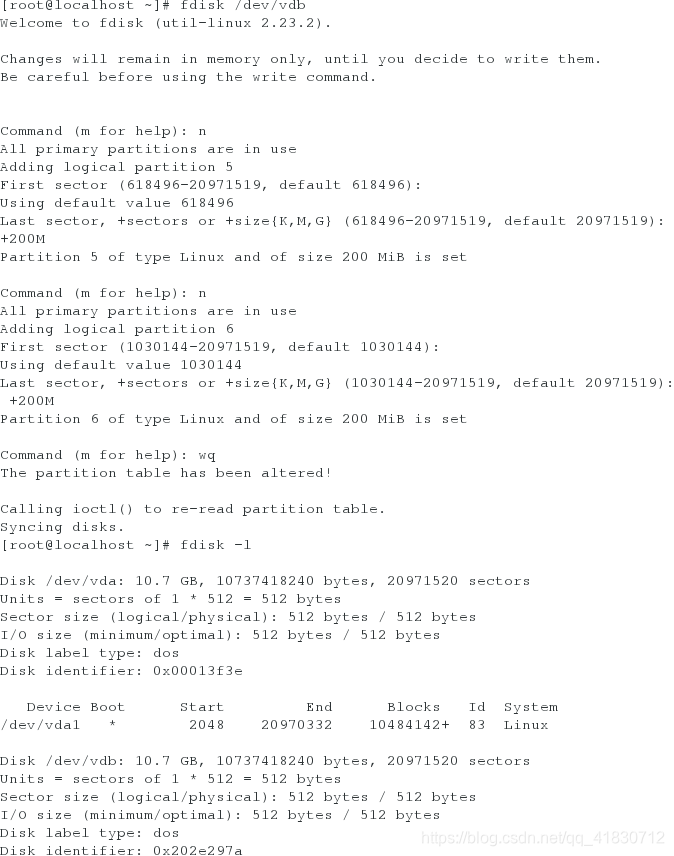
[root@localhost ~]# fdisk /dev/vdb
Welcome to fdisk (util-linux 2.23.2).
Changes will remain in memory only, until you decide to write them.
Be careful before using the write command.
Command (m for help): n
All primary partitions are in use
Adding logical partition 5
First sector (618496-20971519, default 618496):
Using default value 618496
Last sector, +sectors or +size{K,M,G} (618496-20971519, default 20971519): +200M
Partition 5 of type Linux and of size 200 MiB is set
Command (m for help): n
All primary partitions are in use
Adding logical partition 6
First sector (1030144-20971519, default 1030144):
Using default value 1030144
Last sector, +sectors or +size{K,M,G} (1030144-20971519, default 20971519): +200M
Partition 6 of type Linux and of size 200 MiB is set
Command (m for help): wq
The partition table has been altered!
Calling ioctl() to re-read partition table.
Syncing disks.
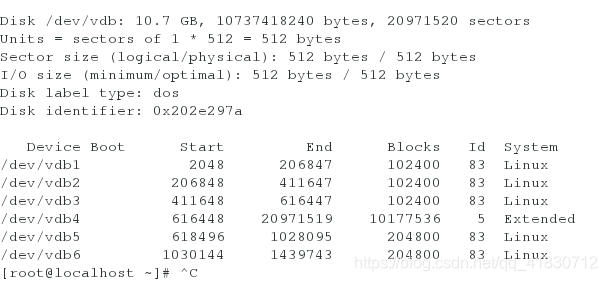
[root@localhost ~]# fdisk -l
Disk /dev/vda: 10.7 GB, 10737418240 bytes, 20971520 sectors
Units = sectors of 1 * 512 = 512 bytes
Sector size (logical/physical): 512 bytes / 512 bytes
I/O size (minimum/optimal): 512 bytes / 512 bytes
Disk label type: dos
Disk identifier: 0x00013f3e
Device Boot Start End Blocks Id System
/dev/vda1 * 2048 20970332 10484142+ 83 Linux
Disk /dev/vdb: 10.7 GB, 10737418240 bytes, 20971520 sectors
Units = sectors of 1 * 512 = 512 bytes
Sector size (logical/physical): 512 bytes / 512 bytes
I/O size (minimum/optimal): 512 bytes / 512 bytes
Disk label type: dos
Disk identifier: 0x202e297a
Device Boot Start End Blocks Id System
/dev/vdb1 2048 206847 102400 83 Linux
/dev/vdb2 206848 411647 102400 83 Linux
/dev/vdb3 411648 616447 102400 83 Linux
/dev/vdb4 616448 20971519 10177536 5 Extended
/dev/vdb5 618496 1028095 204800 83 Linux
/dev/vdb6 1030144 1439743 204800 83 Linux
四、给设备安装文件系统。
了解知识:
| 文件系统 | 支持的版本 | 最大支持的文件系统 | 最大支持的文件 |
|---|---|---|---|
| ext3 | rehl5及之前的版本 | 16TB | 2TB |
| ext4 | rhel6 | 1EB | 16TB |
| xfs | rhel7 | 18EB | 9EB |
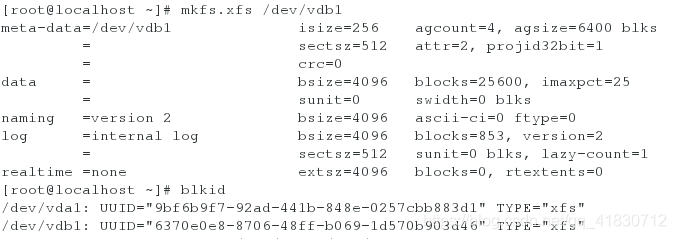
XFS 能以接近裸设备I/O的性能存储数据。在单个文件系统的测试中,其吞吐量最高可达7GB每秒,对单个文件的读写操作,其吞吐量可达4GB每秒。
示例:
mkfs.xfs /dev/vdb1	##格式化,也就是给硬盘装文件系统
mount /dev/vdb1 /mnt

设定系统启动硬盘自动挂载:
vim /etc/fstab

设备	     挂载点 文件系统	挂载参数 是否备份 是否检测
/dev/vdb1 /mnt xfs defaults 0 0
mount -a	##查看文件书写是否有错误
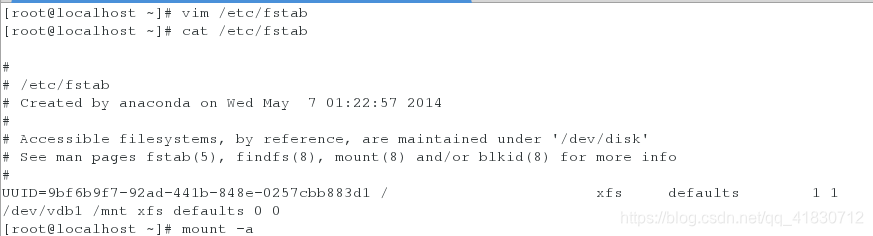
这样系统在开机启动或者重启时就不需要手动挂载了,系统会自动挂载。
五、swap分区的管理
1、swap分区建立
fdisk /dev/vdb ##划分分区并设定分区标签为82
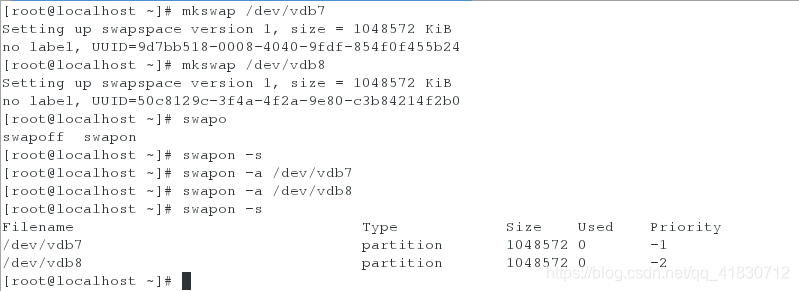
mkswap /dev/vdb6 ##格式化swap分区
swapon -a /dev/vdb6 ##设定swap分区
swapon -s ##查看swap分区
示例:
[root@localhost ~]# fdisk /dev/vdb
Welcome to fdisk (util-linux 2.23.2).
Changes will remain in memory only, until you decide to write them.
Be careful before using the write command.
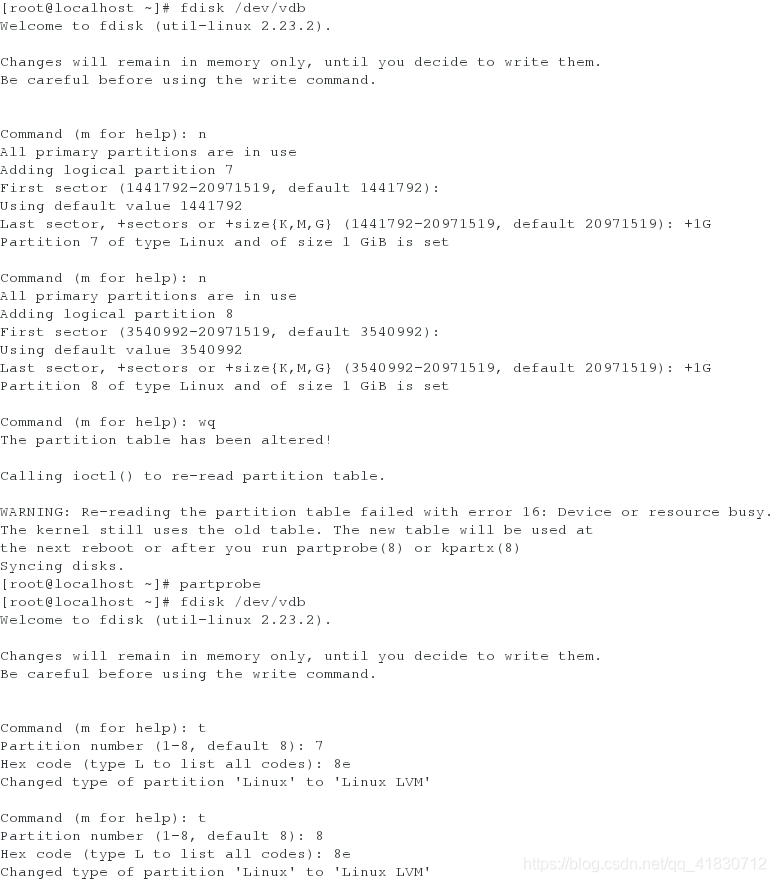
Command (m for help): n
All primary partitions are in use
Adding logical partition 7
First sector (1441792-20971519, default 1441792):
Using default value 1441792
Last sector, +sectors or +size{K,M,G} (1441792-20971519, default 20971519): +1G
Partition 7 of type Linux and of size 1 GiB is set
Command (m for help): n
All primary partitions are in use
Adding logical partition 8
First sector (3540992-20971519, default 3540992):
Using default value 3540992
Last sector, +sectors or +size{K,M,G} (3540992-20971519, default 20971519): +1G
Partition 8 of type Linux and of size 1 GiB is set
Command (m for help): wq
The partition table has been altered!
Calling ioctl() to re-read partition table.
WARNING: Re-reading the partition table failed with error 16: Device or resource busy.
The kernel still uses the old table. The new table will be used at
the next reboot or after you run partprobe(8) or kpartx(8)
Syncing disks.
[root@localhost ~]# partprobe
[root@localhost ~]# fdisk /dev/vdb
Welcome to fdisk (util-linux 2.23.2).
Changes will remain in memory only, until you decide to write them.
Be careful before using the write command.
Command (m for help): t
Partition number (1-8, default 8): 7
Hex code (type L to list all codes): 8e
Changed type of partition 'Linux' to 'Linux LVM'
Command (m for help): t
Partition number (1-8, default 8): 8
Hex code (type L to list all codes): 8e
Changed type of partition 'Linux' to 'Linux LVM'
Command (m for help): p
Disk /dev/vdb: 10.7 GB, 10737418240 bytes, 20971520 sectors
Units = sectors of 1 * 512 = 512 bytes
Sector size (logical/physical): 512 bytes / 512 bytes
I/O size (minimum/optimal): 512 bytes / 512 bytes
Disk label type: dos
Disk identifier: 0x202e297a
Device Boot Start End Blocks Id System
/dev/vdb1 2048 206847 102400 83 Linux
/dev/vdb2 206848 411647 102400 83 Linux
/dev/vdb3 411648 616447 102400 83 Linux
/dev/vdb4 616448 20971519 10177536 5 Extended
/dev/vdb5 618496 1028095 204800 83 Linux
/dev/vdb6 1030144 1439743 204800 83 Linux
/dev/vdb7 1441792 3538943 1048576 8e Linux LVM
/dev/vdb8 3540992 5638143 1048576 8e Linux LVM
Command (m for help): wq
The partition table has been altered!
Calling ioctl() to re-read partition table.
WARNING: Re-reading the partition table failed with error 16: Device or resource busy.
The kernel still uses the old table. The new table will be used at
the next reboot or after you run partprobe(8) or kpartx(8)
Syncing disks.
[root@localhost ~]# partprobe
[root@localhost ~]# mkswap /dev/vdb7
Setting up swapspace version 1, size = 1048572 KiB
no label, UUID=9d7bb518-0008-4040-9fdf-854f0f455b24
[root@localhost ~]# mkswap /dev/vdb8
Setting up swapspace version 1, size = 1048572 KiB
no label, UUID=50c8129c-3f4a-4f2a-9e80-c3b84214f2b0
[root@localhost ~]# swapo
swapoff swapon
[root@localhost ~]# swapon -s
[root@localhost ~]# swapon -a /dev/vdb7
[root@localhost ~]# swapon -a /dev/vdb8
[root@localhost ~]# swapon -s
Filename Type Size Used Priority
/dev/vdb7 partition 1048572 0 -1
/dev/vdb8 partition 1048572 0 -2
mkswap	/dev/vdb6		##格式化swap分区
swapon	-a /dev/vdb6	##设定swap分区
swapon -s				##查看swap分区
注意:我们现在设定的swap分区只是暂时设定,那么如何永久设定呢?
vim /etc/fstab

/dev/vdb6 swap swap defaults 0 0
mount -a
2、swap分区的删除
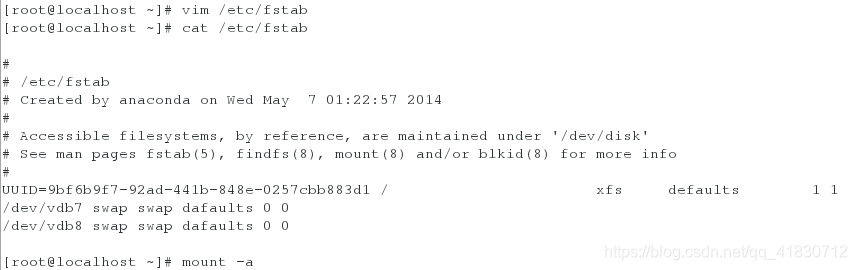
vim /etc/fstab ##清空需要删除的swap分区信息
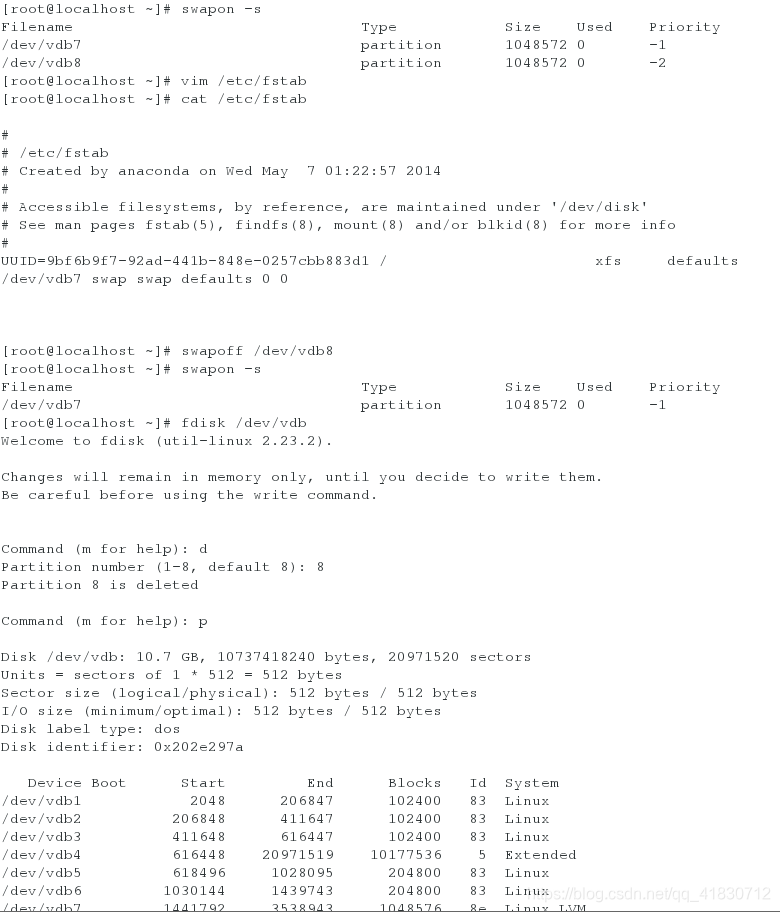
swapoff /dev/vdb8 ##取消swap分区vdb8
swapon -s ##查看swap分区
fdisk /dev/vdb ##删除vdb8分区
partprobe ##更新分区
[root@localhost ~]# swapon -s
Filename				Type		Size	Used	Priority
/dev/vdb7                              	partition	1048572	0	-1
/dev/vdb8                              	partition	1048572	0	-2
[root@localhost ~]# vim /etc/fstab
[root@localhost ~]# cat /etc/fstab

#
# /etc/fstab
# Created by anaconda on Wed May  7 01:22:57 2014
#
# Accessible filesystems, by reference, are maintained under '/dev/disk'
# See man pages fstab(5), findfs(8), mount(8) and/or blkid(8) for more info
#
UUID=9bf6b9f7-92ad-441b-848e-0257cbb883d1 /                       xfs     defaults        1 1
/dev/vdb7 swap swap defaults 0 0


[root@localhost ~]# swapoff /dev/vdb8
[root@localhost ~]# swapon -s
Filename				Type		Size	Used	Priority
/dev/vdb7                              	partition	1048572	0	-1
[root@localhost ~]# fdisk /dev/vdb
Welcome to fdisk (util-linux 2.23.2).

Changes will remain in memory only, until you decide to write them.
Be careful before using the write command.


Command (m for help): d
Partition number (1-8, default 8): 8
Partition 8 is deleted

Command (m for help): p

Disk /dev/vdb: 10.7 GB, 10737418240 bytes, 20971520 sectors
Units = sectors of 1 * 512 = 512 bytes
Sector size (logical/physical): 512 bytes / 512 bytes
I/O size (minimum/optimal): 512 bytes / 512 bytes
Disk label type: dos
Disk identifier: 0x202e297a

   Device Boot      Start         End      Blocks   Id  System
/dev/vdb1            2048      206847      102400   83  Linux
/dev/vdb2          206848      411647      102400   83  Linux
/dev/vdb3          411648      616447      102400   83  Linux
/dev/vdb4          616448    20971519    10177536    5  Extended
/dev/vdb5          618496     1028095      204800   83  Linux
/dev/vdb6         1030144     1439743      204800   83  Linux
/dev/vdb7         1441792     3538943     1048576   8e  Linux LVM

Command (m for help): wq
The partition table has been altered!

Calling ioctl() to re-read partition table.

WARNING: Re-reading the partition table failed with error 16: Device or resource busy.
The kernel still uses the old table. The new table will be used at
the next reboot or after you run partprobe(8) or kpartx(8)
Syncing disks.
[root@localhost ~]# partprobe
六、配置额度
首先建立一个共享目录。
mkdir /pub/
把挂载信息写入/etc/fstab 文件中,设置永久挂载。
vim /etc/fstab
/dev/vdb5 /pub/  xfs defaults 0 0
接下来,就可以配置额度了。
mount -o usrquota /dev/vdb5		##挂载vd5时开启用户配额
edquota -u redhat /dev/vdb5		##给redhat用户在vd5硬盘开启配额文件,文件里面的默认单位是kb。

Disk quotas for user redhat (uid 1001):
  Filesystem      blocks       soft       hard     inodes     soft     hard
  /dev/vdb5        20480         0      20480          1       0	     0
chmod 1777 /pub/				##设置共享目录权限

| 限制配额分区 | 总文件大小 | 额度软限 | 额度硬限 | 文件个数 | 文件个数软限 | 文件个数硬限 |
|---|---|---|---|---|---|---|
| Filesystem | blocks | soft | hard | inodes | soft | hard |
分析:所谓总文件大小就是这个用户在这个硬盘建立的所有文件实际大小,限制额度软线就是用户创建的文件大于这个设定值时会发出警告信息,额度硬线就是用户所能创建的文件最大大小。文件个数同理。
测试:
dd if=/dev/zero of=/pub/redhatfile bs=1M count=18
du -sh /pub/redhatfile

dd if=/dev/zero of=/pub/redhatfile bs=1M count=25
du -sh /pub/redhatfile
示例:
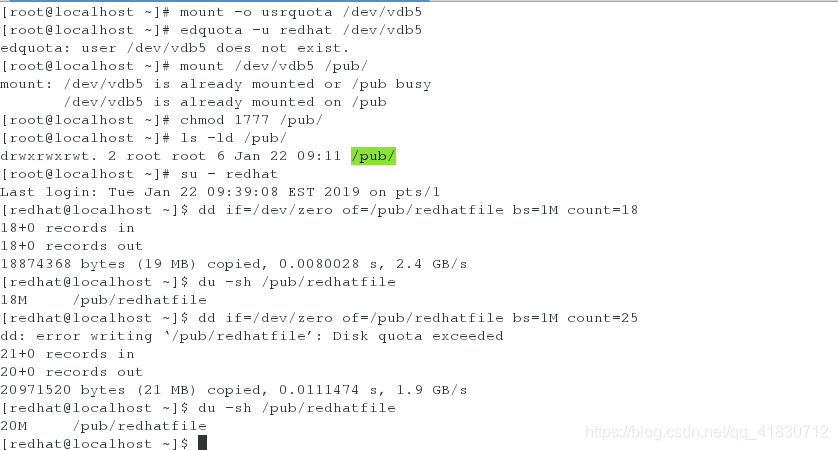
分析:用户写入硬盘的文件的总大小最多就是额度硬线的值。
七、磁盘加密
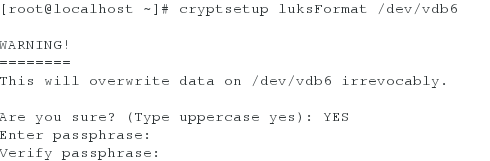
1、对硬盘进行加密,如果硬盘已经有文件系统会被覆盖和清除所有内容。
cryptsetup luksFormat /dev/vdb6 ##加密
2、打开加密服务,对硬盘进行格式化及写入文件系统。
cryptsetup open /dev/vdb6 westos		##打开加密服务
mkfs.xfs /dev/mapper/westos				##格式化分区

3、挂载、卸载以及关闭加密服务。
mount /dev/mapper/westos /mnt/		##挂载
touch /mnt/file
umount /mnt/						##卸载
cryptsetup close westos				##关闭加密服务
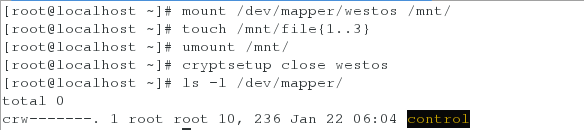
分析:打开加密服务就会在/dev/mapper/提供一个可以挂载的接口,挂载后才可以正常的读写操作。使用后,卸载、关闭加密服务则会关闭这个接口。
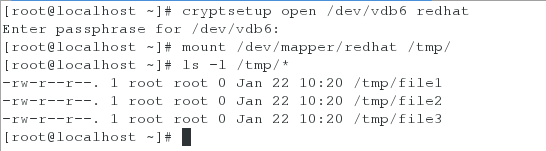
示例:
上面我们已经在打开、挂载后建立了三个文件。重新打开加密服务,挂载在其他位置,查看建立的文件。
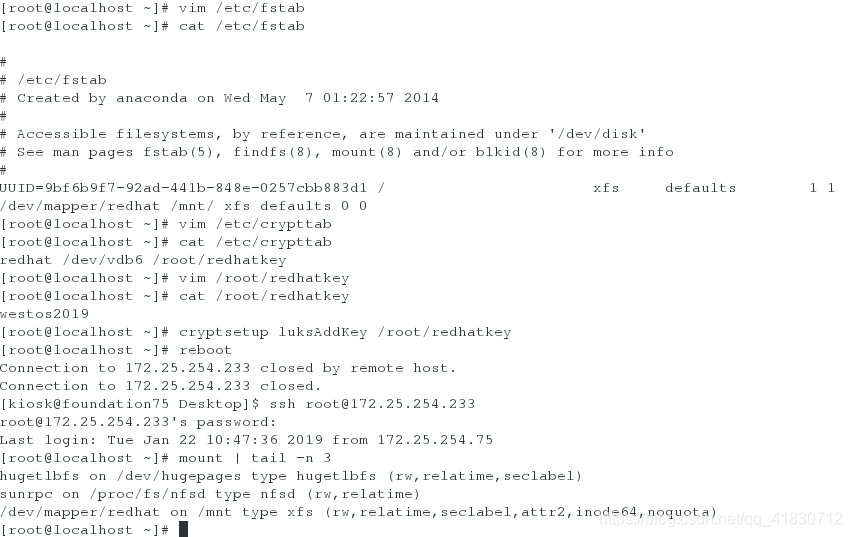
如何设置加密磁盘开机自动挂载呢?挂载时需要我们输入密码,怎么可以使开机时不需要我们输入密码也能挂载?
vim /etc/fstab
/dev/mapper/redhat      /mnt    xfs     defaults        0 0

vim /etc/crypttab
redhat  /dev/vdb6       /root/redhatkey

vim /root/redhatkey
westos2019

cryptsetup luksAddKey /dev/vd6 /root/redhatkey