【系统配置功能】
1.需求分析
用户点击系统配置菜单,右侧显示配置项信息,带分页功能,每条记录的右侧有编辑,查看按钮
“查看”按钮,通过弹窗的方式查看
"编辑"按钮,点进去可以修改配置项信息
2.系统设计
数据库表字段如下

其中配置信息是以json字符串的格式存入数据库

3.编码阶段
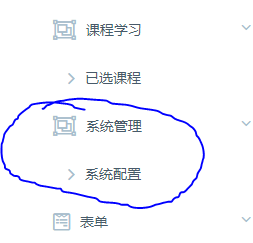
点击左侧菜单配置信息
发送ajax请求到后端
    //系统配置管理按钮绑定事件
    $(document).on('click', '#system-config-list', function () {
        $.ajax({
            url: "/system/config_List",
            success: function (data) {
                open_content.empty().html(data);
            },
            error: function () {
                console.log("加载系统配置列表出问题了!");
            }
        });
    });
控制层(@requestmapping后面produces属性声明返回的类型)
调用service方法执行完后再进行分页处理
  @RequestMapping(value = "/configLists", method = {RequestMethod.GET}, produces = {"application/json;charset=UTF-8"})
    @ResponseBody()
    public Object configLists(HttpServletRequest request) {
        int pageNum = 0;
        int pageSize = 5;
//这个参数没用到,好像是请求次数
        int dwar = 0;
        String start = request.getParameter("start");
        String length = request.getParameter("length");
        String dwarStr = request.getParameter("dwar");
        if (StringUtil.isNotEmpty(length)) {
            pageSize = Integer.parseInt(length);
        }
        if (StringUtil.isNotEmpty(start)) {
            pageNum = Integer.parseInt(start) / pageSize + 1;
        }

        dwar = StringUtil.isEmpty(dwarStr) ? dwar : Integer.parseInt(dwarStr);
        PageInfo pageInfo = null;
        try {
            pageInfo = sysManageService.selectAllConifg(pageNum, pageSize, null);
        } catch (Exception e) {
            e.printStackTrace();
        }
        PageData page = new PageData();
        List<SysConfiguration> sysconfig = null;
        if (pageInfo != null) {
            sysconfig = pageInfo.getList();
            page.setDraw(dwar);
            page.setData(sysconfig);
            page.setRecordsTotal(pageInfo.getTotal());
            page.setRecordsFiltered(pageInfo.getTotal());
        }

        return page;
    }
service层
    @Override
    public PageInfo selectAllConifg(int pageNum, int pageSize, String configName) throws Exception {
        PageHelper.startPage(pageNum, pageSize);
        List<Map<String,Object>> sysconfig = sysManageMapper.selectAllConfig(configName);
        if (CollectionUtils.isEmpty(sysconfig)) {
            return null;
        }
        PageInfo<Map<String,Object>> pageInfo = new PageInfo<>(sysconfig);
        return pageInfo;
    }
xml文件(没有筛选效果)
<mapper namespace="com.ebpm.mapper.SysManageMapper">
    <resultMap id="BaseResultMap" type="com.ebpm.model.SysConfiguration">
        <id column="id" property="id" jdbcType="VARCHAR"/>
        <result column="no" property="no" jdbcType="VARCHAR"/>
        <result column="name" property="name" jdbcType="VARCHAR"/>
        <result column="value" property="value" jdbcType="VARCHAR"/>

    </resultMap>
    <sql id="Config_Column_List">
        id,no,name,value
    </sql>

    <select id="selectAllConfig" resultMap="BaseResultMap" parameterType="string">
        select
        <include refid="Config_Column_List"/>
        from configuration
        <if test="_parameter != null and _parameter != ''">
            where name like '%' ||#{_parameter,jdbcType=VARCHAR} ||'%'
        </if>

    </select>
前端页面
因为是采用的模版,只需要把对应的key写出来就行了
id ,no,name字段
            "columns": [ //表格要显示的列定义(字段名称做了处理)
                {
                    "data": "id",
                    "visible": true,
                    "render": function (data, type, full, meta) {
                        return '<input type="checkbox" value="' + data + '"/>';
                    }
                },
                {
                    "data": "no", //此列名要与服务端返回的JSON串中的值一致
                    "render": function (data, type, full, meta) {
                        return '<a href="#">' + data + '</a>';
                    }
                },
                {"data": "name"},
                /*                { "data": "xl" },
                                { "data": "age" },
                                { "data": "xllb"}*/
            ]
编辑和查看按钮,openid属性里的值是配置项的id
            columnDefs: [{
                targets: 3,// 操作例的位置,从0开始数为第几例,
                data: "id",
                width: 80,
                "render": function (data, type, full) {
                    return '<div class="am-btn-toolbar">' +
                        '   <div class="am-btn-group am-btn-group-xs">' +
                        '       <a href="#" open-id="' + data + '" class="am-btn am-btn-default am-btn-xs am-text-secondary  sys-edit-config-one"><span class="am-icon-pencil-square-o"></span> 编辑</a>' +
                        '       <a href="#" open-id="' + data + '" class="am-btn am-btn-default am-btn-xs am-text-danger am-hide-sm-only  sys-select-config-one"><span class="am-icon-space-shuttle"></span> 查看</a>' +
                        '   </div>' +
                        '</div>'
                }
            }]
渲染效果如下

查看功能
点击查看按钮显示单个的配置项对应的信息,以弹窗形式显示
前端发送ajax请求(get方式),携带配置项id到后端查询出configuration的value,返回到前端遍历,以弹窗形式显示
//显示单个配置项信息

        $("#syt-config-list-table").on("click", ".sys-select-config-one", function () {
            var configID = $(this).attr("open-id");
            console.log(configID);
            select_configInfo(configID);
        });


        function select_configInfo(configID) {
            $.ajax({
                url: '/system/selectstudentinfo',
                data: {id: configID},
                async: false,
                dataType: 'json',
                type: 'GET',
                success: function (data) {
                    var value = "";
                    $(".message").text("");
                    for (var i in data) {
                        value += "<div>";
                        value += data[i].value;
                        value += "</div>";
                        $(".message").append(value);
                        value = "";

                    }

                    $('#my-confirm').modal({
                        relatedTarget: this,
                        onConfirm: function (options) {
                            $(this).modal('close');

                        }
                    });


                },
                error: function () {
                    console.log("显示配置项信息错误!");
                }
            });
        }
后端xml文件:
    <select id="selectConifgInfoById" resultMap="BaseResultMap" parameterType="string">
        select
        <include refid="Config_Column_List"/>
        from configuration
        where id=#{id}

    </select>
效果如图

编辑功能
效果如下:

讲一下要注意的点
freemarker模版上可以直接渲染json数据,也就是说,json格式的配置信息可以直接显示
 <#assign json="${config.value}"?eval />
 <#list json as item>
      <label class="am-checkbox">
            <input type="checkbox" checked="checked" value="${item.value}">
            ${item.value}
      </label>
 </#list>
界面按钮触发的方法解析:
添加一个配置项
    //新增配置信息   +
    $(document).on('click', '.bt-add-config', function () {
        $(".outer").after($("<div class=\"am-form-group\">\n" +
            "        <label for=\"user-major\" class=\"am-u-sm-3 am-form-label\">新增配置信息:<input type='button' class='bt-minus-config'  value='-'/></label>\n" +
            "    <div class=\"am-u-sm-9\"><input type='text' class='am-form-field'></div>\n" +
            "    </div>"));
    });
删除一个配置项
//移除新增的配置项   -
    $(document).on('click', '.bt-minus-config', function () {
        $(this).parent().parent().remove();
    });
保存配置项
//保存按钮,把多选框选中的和新增的非空文本框内的值组装成json字符串发送到后端保存
    $(document).on('click', '#open-save-sysconfig', function () {
        var i = 0;
        var params = [];
        $.each($('input:checkbox'), function () {
            if (this.checked) {
                i++;
                params.push({"key": i, "value": $(this).val()});
            }
        })
        $.each($('input:text'), function () {
            if ($(this).val() != "") {
                i++;
                params.push({"key": i, "value": $(this).val()});
            }
        })
        var data = JSON.stringify(params);
        $.ajax({
            url: "/system/editsysconfig",
            data: {"data": data, "id": $("#configid").val()},
            type: 'GET',
            contentType: 'application/json; charset=UTF-8',
            dataType: 'json',
            success: function (data) {
                if (data.success == 'success') {
                    alert(data.msg);
                    $('#system-config-list').click();
                }
            },
            error: function () {
                alert("修改配置信息失败!");
                $('#system-config-list').click();
            }

        });
    });