本文作者:smeli(俄罗斯人,于2009年完成该教程)
PS:要比国内写的那些教程完整,详细,希望大家喜欢
-
VS运行库安装………………………………………..2
-
SQL数据库安装…………………………………………..3
-
L2Server设置………………………………………………11
-
GM账户创建………………………………………….15
-
运行服务端(1).………………….………………………..16
-
老版服务端设置……………………………………………..19
-
运行服务端 (2)……………………………………………...39
-
Two servers on one auth双线设置……...…………………………39
-
Eventmatch………………………………………………52
-
GM命令………………………………………..…63
-
GM commands russian………………………………….77
-
-
Web注册页……………………………………..…80
-
红色错误……………………………………………………82
1 .VS运行库安装
In directiory “Install_runtime” or “l2server/_visualC_2008” you can find redistributable instalation file, or download it directly from Microsoft web site.
Just install it. In picture below this is already installed, so it asking for repair or uninstall.

Maybe you need also to install Dot.Net 2.0 or Dot.Net 3.5+
2. SQL数据库安装
MSSQL 2005安装
Here we assume that you already have installed MSSQL 2005 server or express in mixed mode: “sa” and “Windows Authentification”
Chechk your SQL server is up and running
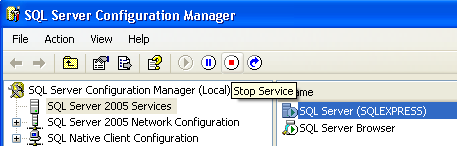
I am using SQL Server Management Studio Express version
Run your SQL server manager and connect to it
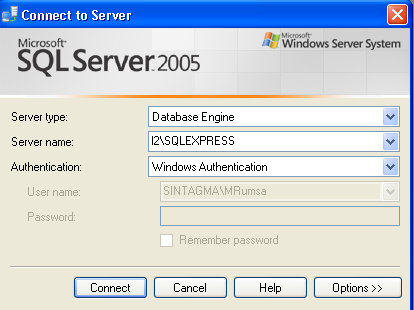
After sucessul login at the left side we have
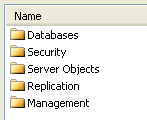
Double click on “Databases”, then Right click on blank area
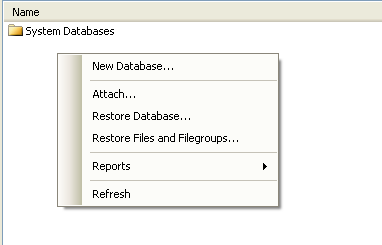
Now select “New Database”

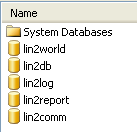
and create database “lin2db” (enter name of database and press “OK” button
The same way create all other databases
“lin2comm”
“lin2log”
“lin2world”
“lin2report”
-----------------------------------------------------------------------------------------------
Setting up Database Scripts
-----------------------------------------------------------------------------------------------
Note: “l2online” is your chosen password, it can be “l2offline” or “bigbunny” – it is your password for user “sa”
Using NOTEPAD form DBScripts directory,
open 3.lin2comm.sql (or lin2comm_new.sql) under DBScript
find
set @conn_str = '127.0.0.' + @world_id + ''';''sa'';''l2online'
change 127.0.0. to the first 3 sets of numbers of your internal IP (If your internal IP is 192.168.0.121 then enter 192.168.0.)
change "sa" as your SQL database account
change "l2online" as your SQL database password
there are 3 lines you have to change
find
'SQLOLEDB', '127.0.0.1';'sa';'l2online'
change 127.0.0.1 to your internal IP
change "sa" as your SQL database account
change "l2online" as your SQL database password
there is only 1 line you have to change
save and close the file.
open 6.lin2world.sql (lin2world_20040609_all.sql) under DBScript
find
set @conn_str = '127.0.0.' + @world_id + ''';''sa'';''l2online'
change 127.0.0. to the first 3 sets of numbers of your internal IP (If your internal IP is 192.168.0.121 then enter 192.168.0.)
change "sa" as your SQL database account
change "l2online" as your SQL database password
there are 3 lines you have to change
find
'SQLOLEDB', '127.0.0.1';'sa';'l2online'
change 127.0.0.1 to your internal IP
change "sa" as your SQL database account
change "l2online" as your SQL database password
there are 2 lines you have to change
save and close the file.
As database scripts are ready. Apply them.
Use “File->Open->File”
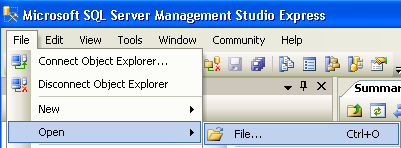
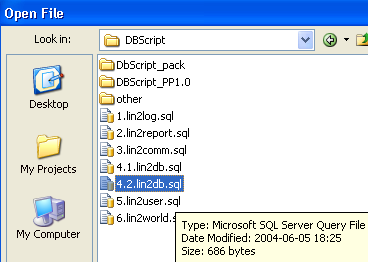
For database “lin2db” choose first 4.1. lin2db.sql
Apply it, then choose 4.2 lin2db.sql and apply it too (see pictures below)
After we opened it
Change “master” database to our “lin2db” (see picture below)
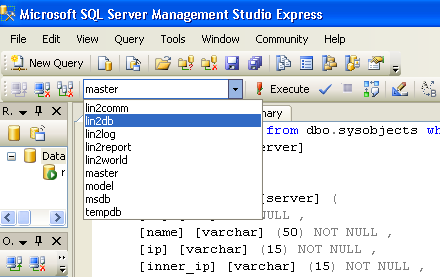
Press Blue “Check” button for error parsing and Red “Execute” Button for aplying script to database

Completion window will appear
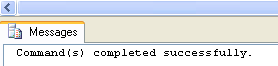
In case of errors, try to fix them until all will be ok.
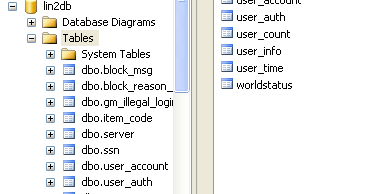
Check out your database
Now,
Process all other databases the same maner……………..
Now it is time for DNS Configuration
Open your windows control panel
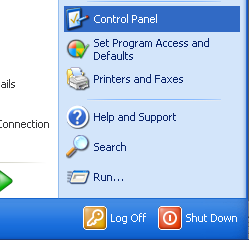
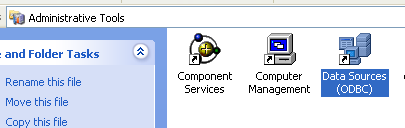
Select “Administrative Tools” and then open (double click) “Data Sources (ODBC)”
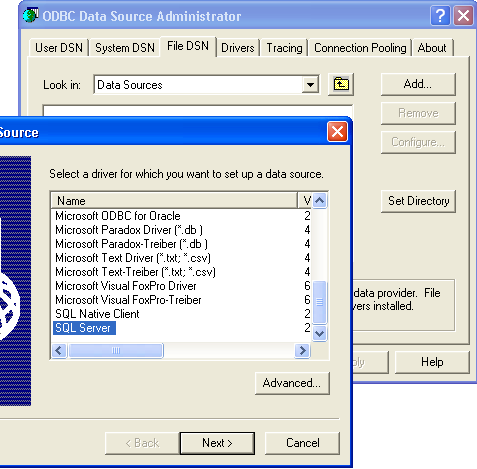
Choose the File DSN tab then click the Add.. button.
Select SQL Server and click next
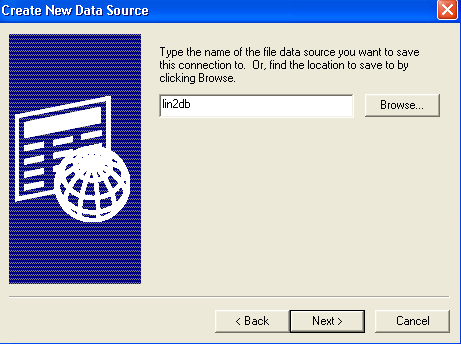
Enter your File DSN name, for example “lin2db” and press Next> button, then press Finish> button
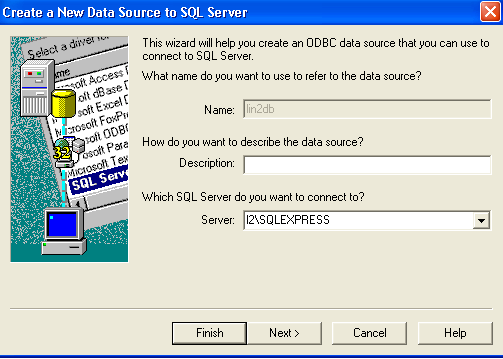
Enter your server name. Press Next> button. Leave Windows Authetification and press Next>button again
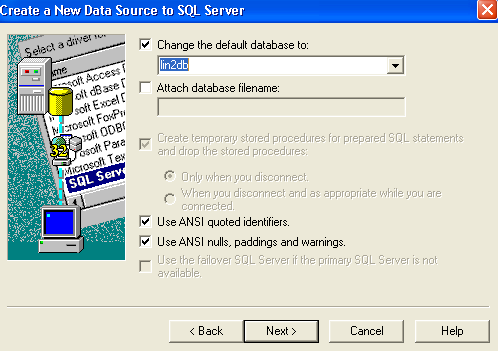
Change default database to our “lin2db” and press Next> button, and then press Next> button again.
Now you can test your DSN.

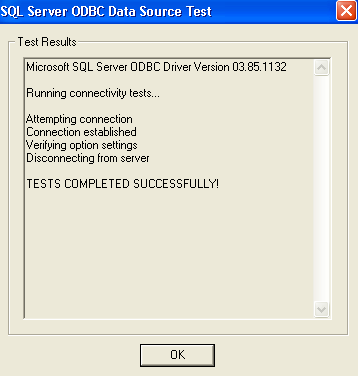
Press OK button three two times to confirm your work.
Process all other databases DSNs the same maner……………..
3. 服务端配置文件设置
-----------------------------------------------------------------------------------------------
IP Configurations
-----------------------------------------------------------------------------------------------
Go to your Lineage 2 Server folder.
In each of these following folders: L2LogD, CacheD, NewAuth, PetitionD, L2NPC, and L2Server, they contain a configuration file that is either a *.ini or *.txt document. You don't need to change anything and make sure they're set at 127.0.0.1. The only time you would need to change them is if you are loading them from multiple computers! It doesn't matter if you even have a router! As long as you are loading all 6 Process from the same machine, you just need to keep most of the IP adress as 127.0.0.1.
Change the following lines in config.txt under "NewAuth\etc" folder:
DevServerIP="24.68.124.198" //Change this to your Internet IP address, your WAN, the IP that you get from your ISP. Visit http://whatismyip.com to find it.
logdip="127.0.0.1" //Change this to what you used for your L2LogD.ini address.
Change the following lines in l2cache.ini under CacheD folder:
address="127.0.0.1" //Change this only if you plan to load this from a different computer! Adjust it to the ip of that computer! If PC2 has IP of 192.168.0.121 and it is planning to load L2CacheD.exe there. Then change it, otherwise leave it as 127.0.0.1!
Change the following lines in l2logd.ini under L2LogD folder:
address="127.0.0.1" //Same thing as L2CacheD.ini
Change the following lines in config.txt under PetitionD\etc folder:
webAuthServer="127.0.0.1" //Same thing as L2CacheD.ini
Change the following lines in L2NPC.ini under L2NPC folder:
//Change them accordingly to what you adjusted for them. If L2LogD.ini has ip of 192.168.0.121 on PC2. Then change that IP in L2NPC.ini to that. You are pointing L2NPC.exe to connect to the other Server Processes. Leave the ports alone!
[LogD]
address="127.0.0.1"
port=3999
[CacheD]
address="127.0.0.1"
port=2008
[server]
address="127.0.0.1"
port=2002
[map]
directory="map"
[World]
WorldId=1
[db]
address="127.0.0.1"
user="gamma" //This should be your MSSQL Login (I used sa since it sets up the sa account for you when you install SQL and sa has all permissions)
password="l2online" //This should be your MSSQL Password
[Setting]
;Country=0 KR
;Country=1 US
;Country=2 JP
;Country=3 TW
;Country=4 CN
Country=1 //Change this accordingly to what "CLIENT" version you allow to connect!
ExceptionMailing=false
MailServer=ncs-mail.ncsoft.co.kr
Change the following lines in l2server.ini under L2Server folder:
//Again, the same explaination from L2NPC.ini config applies here as well!
[LogD]
address="127.0.0.1"
port=3999
[CacheD]
address="127.0.0.1"
port=2006
[AuthD]
address="127.0.0.1"
port=2104
[petitionD]
address="127.0.0.1"
port=2107
WorldId=1 //Leave this as 1 if you don't plan to run multiple servers! WorldId = ServerId in lin2db (will be explained furtherdown). If they're not the same number, your server won't be connecting to the same gameworld or won't find one to connect to!
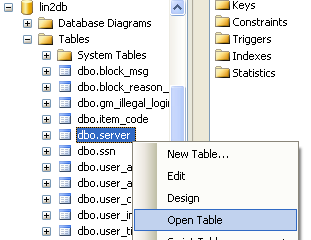
Now setup server record in “lin2db” database. Open lin2db tables, and rightclick on “dbo.server” table, then choose “Open Table”
To add information in for the example [ id = 1 ] you would put the number 1 in the id column:
id = 1
name = same as the worldname in l2server.ini
ip = your external IP
inner_ip = your internal IP
ageLimit = 0
pk_flag = 0 PK not allow; 1 allow
kind=0
port=7777

The same server setup for local network access and for the internet access requires a little bit of magic:

-----------------------------------------------------------------------------------------------
System INI Configuration
-----------------------------------------------------------------------------------------------
Go to your control panel (from start menu) then click the system icon, advanced tab, under performance click settings, then choose the advanced tab again and click the change button under virtual memory. Set Custom size with minimum set at 1024 and maximum set at 4096
You must do this to run all the NPC's.
Locate your boot.ini file in C:\ Drive. You'll need to change folder view setting to include hidden and system files or else you won't be able to find it.
Open C:\Boot.ini in notepad, the last line should look like:
multi(0)disk(0)rdisk(0)partition(1)\WINDOWS="Micro soft Windows XP Professional" /nodetect
or something similar, add the /3GB tag at the end. It should look like this (if your line was the same as the line above)
multi(0)disk(0)rdisk(0)partition(1)\WINDOWS="Micro soft Windows XP Professional" /nodetect /3GB
Reboot your computer
4. GM帐号创建
To create test acounts or restricted accounts, you do not need registration page. Just use Account creation tool.
Open directory 2_HomePage->L2AC

O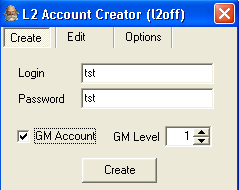 pen l2ac.ini file, enter your values and save it
[DB Connection]
HostName=l2\SQLEXPRESS
DataBase=lin2db
User=sa
Password=l2online
[Common]
SavePass=1
Now run l2ac.exe
Enter your GM login and password and press “Create” button
-----------------------------------------------------------------------------------------------
Setting up Administration Account / GM Characters
-----------------------------------------------------------------------------------------------
For this to work you must have created an user account.
Open SQL Server Enterprise Manager (start menu again), double click SQL Server Group, double click on your local server then click OK. Double click on databases folder and select lin2db. Click on tables then find user_account, right click on it and select Open Table then Return All Rows. Note the name and uid of the account that you want to make a gm.
Go back to databases and this time select lin2world. Click tables and select builder_account, right click select Open table then Return All Rows. Under account name enter the name of your character (that you noted before in user_account) and under default builder enter 1 and under account_id enter the uid you noted from user_account.
When you make a new character on this account it will have GM powers, the commands are located in script/BuilderCmdAlias.txt and are used //command so to disable invisible mode you would type in: //hide off
To give a current character GM powers, Go back to databases and select lin2world. Click tables and select user_data, right click select Open table then Return All Rows. All the character on the server will be listed, you can just change the builder value from 0 to 9 for any character you want to give GM powers.
5. 运行服务端
If you want to stay on track, you'll need to have a secure server.
Otherwise people will jump in your server, burn it and destroy all of your work with no mercy. Apart from protection DLLs, you'll also need to configure your Firewall to block certain ports or else you'll be susceptible to SQL/CacheD injections, and that's not good.
Filter the following ports in your firewall: (windows firewall, for example)
# 1433 (SQL) (only local area network access / closed)
# 2002 (only local area network access / closed)
# 2008 (only local area network access / closed)
# 2012 (only local area network access / closed)
# 2106 (auth) (open to the public / open)
# 7777 (l2server) (open to the public / open)
Open the files in the following order.
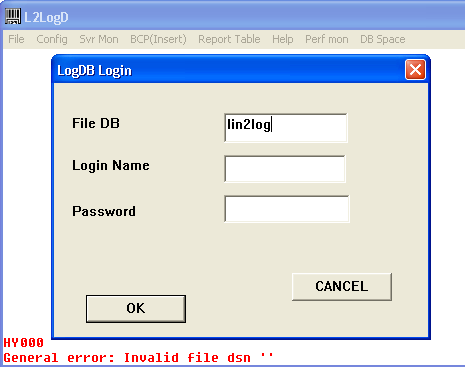
L2LogD.exe
File DB = lin2log
login name = your SQL account
password = your SQL password
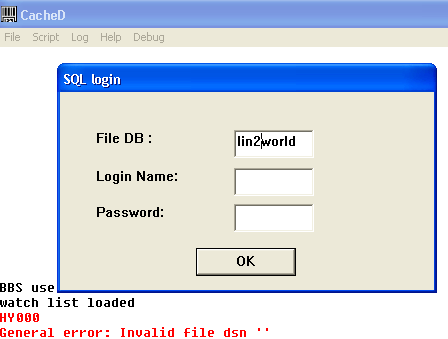
CacheD.exe
File DB = lin2world
login name = your SQL account
password = your SQL password
L2AuthD.exe
File DSN = lin2db
login name = your SQL account
password = your SQL password
L2Server.exe
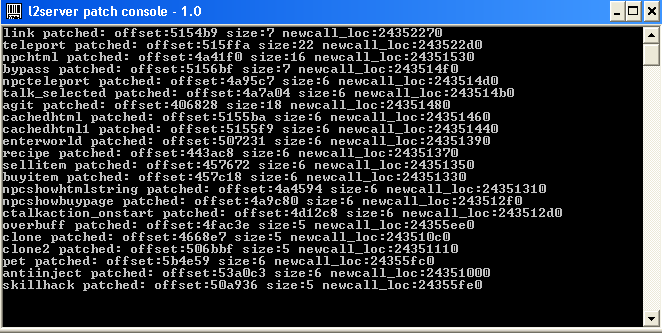
If needed, rightclick on second server tab and select Maximize
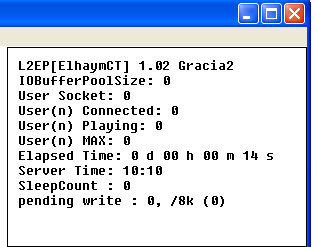 Make sure your of server version
L2NPC.exe
Congrats with setting up your server!
Note. L2Server.exe must be running on the same machine with L2NPC.exe! You cannot load them on separate computers!
6. 老版教程