Kubernetes1.13安装kubernetes-dashboard
kubernetes-dashboard.yaml简介
官网参考
官网推荐安装模式
kubectl create -f https://raw.githubusercontent.com/kubernetes/dashboard/master/src/deploy/recommended/kubernetes-dashboard.yaml
我为了看下kubernetes-dashboard.yaml的内容,所有先把kubernetes-dashboard.yaml下载下来
wget https://raw.githubusercontent.com/kubernetes/dashboard/master/src/deploy/recommended/kubernetes-dashboard.yaml
spec.containers.image:填写dashboard的镜像路径。大家可以通过docker search查询1.10.0版本的dashboard。
spec.containers.args:此处填写的是一些参数,由于kubernetes1.13.0是通过HTTPS安全验证的安装,访问的是http://masterip:6443,因此,此处默认填写了- --auto-generate-certificates,用以自动生成dashboard证书,此处不需要填写apiserver地址。
RBAC配置
因为kubernetes1.13开启了 RBAC 所以这里需要创建一个 RBAC 认证。在Kubernetes1.13安装Helm文中已详述rbac的配置过程,请参考helm rbac配置;
dashboard安装启动
官网推荐了两种启动访问方式
执行kubectl proxy命令
可以通过下面的地址进行访问
http://localhost:8001/api/v1/namespaces/kube-system/services/https:kubernetes-dashboard:/proxy/
但是存在一个问题
The UI can only be accessed from the machine where the command is executed.
只能从执行命令的机器进行访问
这明显不符合我们的需求,我们是打算通过其他管理机访问
直接通过apiserver访问
https://<master-ip>:<apiserver-port>/api/v1/namespaces/kube-system/services/https:kubernetes-dashboard:/proxy/, where <master-ip> is IP address or domain name of the Kubernetes master.
通过第二种又遇到了一些坑
访问dashboard网页时,可能出现下面这种报错:
- 403 Forbidden问题
{
  "kind": "Status",
  "apiVersion": "v1",
  "metadata": {

  },
  "status": "Failure",
  "message": "services \"https:kubernetes-dashboard:\" is forbidden: User \"system:anonymous\" cannot get services/proxy in the namespace \"kube-system\"",
  "reason": "Forbidden",
  "details": {
    "name": "https:kubernetes-dashboard:",
    "kind": "services"
  },
  "code": 403
}
Kubernetes API Server新增了–anonymous-auth选项,允许匿名请求访问secure port。没有被其他authentication方法拒绝的请求即Anonymous requests, 这样的匿名请求的username为system:anonymous, 归属的组为system:unauthenticated。并且该选线是默认的。这样一来,当采用chrome浏览器访问dashboard UI时很可能无法弹出用户名、密码输入对话框,导致后续authorization失败。为了保证用户名、密码输入对话框的弹出,需要将–anonymous-auth设置为false。
解决方法:
在api-server配置文件中添加–anonymous-auth=false,系统会自动重启apiserver;文件路径/etc/kubernetes/manifests/kube-apiserver.yaml
apiVersion: v1
kind: Pod
metadata:
  annotations:
    scheduler.alpha.kubernetes.io/critical-pod: ""
  creationTimestamp: null
  labels:
    component: kube-apiserver
    tier: control-plane
  name: kube-apiserver
  namespace: kube-system
spec:
  containers:
  - command:
    - kube-apiserver
    - --authorization-mode=Node,RBAC
    - --advertise-address=192.168.112.38
    - --allow-privileged=true
    - --anonymous-auth=false //添加的配置
    - --client-ca-file=/etc/kubernetes/pki/ca.crt
    - --enable-admission-plugins=NodeRestriction
    - --enable-bootstrap-token-auth=true
    - --etcd-cafile=/etc/kubernetes/pki/etcd/ca.crt
    - --etcd-certfile=/etc/kubernetes/pki/apiserver-etcd-client.crt
    - --etcd-keyfile=/etc/kubernetes/pki/apiserver-etcd-client.key
    - --etcd-servers=https://127.0.0.1:2379
    - --insecure-port=0
    - --kubelet-client-certificate=/etc/kubernetes/pki/apiserver-kubelet-client.crt
    - --kubelet-client-key=/etc/kubernetes/pki/apiserver-kubelet-client.key
    - --kubelet-preferred-address-types=InternalIP,ExternalIP,Hostname
    - --proxy-client-cert-file=/etc/kubernetes/pki/front-proxy-client.crt
    - --proxy-client-key-file=/etc/kubernetes/pki/front-proxy-client.key
    - --requestheader-allowed-names=front-proxy-client
    - --requestheader-client-ca-file=/etc/kubernetes/pki/front-proxy-ca.crt
    - --requestheader-extra-headers-prefix=X-Remote-Extra-
    - --requestheader-group-headers=X-Remote-Group
    - --requestheader-username-headers=X-Remote-User
    - --secure-port=6443
    - --service-account-key-file=/etc/kubernetes/pki/sa.pub
    - --service-cluster-ip-range=10.96.0.0/12
    - --tls-cert-file=/etc/kubernetes/pki/apiserver.crt
    - --tls-private-key-file=/etc/kubernetes/pki/apiserver.key
    image: k8s.gcr.io/kube-apiserver:v1.13.0
    imagePullPolicy: IfNotPresent
    livenessProbe:
      failureThreshold: 8
      httpGet:
        host: 192.168.112.38
        path: /healthz
        port: 6443
        scheme: HTTPS
      initialDelaySeconds: 15
      timeoutSeconds: 15
    name: kube-apiserver
    resources:
      requests:
        cpu: 250m
    volumeMounts:
    - mountPath: /etc/ssl/certs
      name: ca-certs
      readOnly: true
    - mountPath: /etc/pki
      name: etc-pki
      readOnly: true
    - mountPath: /etc/kubernetes/pki
      name: k8s-certs
      readOnly: true
  hostNetwork: true
  priorityClassName: system-cluster-critical
- Unauthorized问题
解决了上面那个问题之后,再度访问dashboard页面,发现还是有问题,出现下面这个问题:
{
  "kind": "Status",
  "apiVersion": "v1",
  "metadata": {

  },
  "status": "Failure",
  "message": "Unauthorized",
  "reason": "Unauthorized",
  "code": 401
}
参考一些网友的解决方案是:
新建/etc/kubernetes/basic_auth_file文件,并在其中添加:
admin,admin,1002
文件内容格式:password,username,uid
然后在api-server配置文件(即上面的配置文件)中添加–basic-auth-file=/etc/kubernetes/basic_auth_file
发现这样做后,apiserver起不来了;
感觉这个方法不靠谱后,再次回到官网参考kubectl proxy方法
 kubectl proxy --help
 Creates a proxy server or application-level gateway between localhost and the Kubernetes API Server. It also allows
serving static content over specified HTTP path. All incoming data enters through one port and gets forwarded to the
remote kubernetes API Server port, except for the path matching the static content path.

Examples:
  # To proxy all of the kubernetes api and nothing else, use:

  $ kubectl proxy --api-prefix=/

  # To proxy only part of the kubernetes api and also some static files:

  $ kubectl proxy --www=/my/files --www-prefix=/static/ --api-prefix=/api/

  # The above lets you 'curl localhost:8001/api/v1/pods'.

  # To proxy the entire kubernetes api at a different root, use:

  $ kubectl proxy --api-prefix=/custom/

  # The above lets you 'curl localhost:8001/custom/api/v1/pods'

  # Run a proxy to kubernetes apiserver on port 8011, serving static content from ./local/www/
  kubectl proxy --port=8011 --www=./local/www/

  # Run a proxy to kubernetes apiserver on an arbitrary local port.
  # The chosen port for the server will be output to stdout.
  kubectl proxy --port=0

  # Run a proxy to kubernetes apiserver, changing the api prefix to k8s-api
  # This makes e.g. the pods api available at localhost:8001/k8s-api/v1/pods/
  kubectl proxy --api-prefix=/k8s-api

Options:
      --accept-hosts='^localhost$,^127\.0\.0\.1$,^\[::1\]$': Regular expression for hosts that the proxy should accept.
      --accept-paths='^.*': Regular expression for paths that the proxy should accept.
      --address='127.0.0.1': The IP address on which to serve on.
      --api-prefix='/': Prefix to serve the proxied API under.
      --disable-filter=false: If true, disable request filtering in the proxy. This is dangerous, and can leave you
vulnerable to XSRF attacks, when used with an accessible port.
      --keepalive=0s: keepalive specifies the keep-alive period for an active network connection. Set to 0 to disable
keepalive.
  -p, --port=8001: The port on which to run the proxy. Set to 0 to pick a random port.
      --reject-methods='^$': Regular expression for HTTP methods that the proxy should reject (example
--reject-methods='POST,PUT,PATCH').
      --reject-paths='^/api/.*/pods/.*/exec,^/api/.*/pods/.*/attach': Regular expression for paths that the proxy should
reject. Paths specified here will be rejected even accepted by --accept-paths.
  -u, --unix-socket='': Unix socket on which to run the proxy.
  -w, --www='': Also serve static files from the given directory under the specified prefix.
  -P, --www-prefix='/static/': Prefix to serve static files under, if static file directory is specified.

Usage:
  kubectl proxy [--port=PORT] [--www=static-dir] [--www-prefix=prefix] [--api-prefix=prefix] [options]

Use "kubectl options" for a list of global command-line options (applies to all commands).
最终解决方案
kubectl proxy --address=192.168.112.38 --disable-filter=true &
这样,我们即可以用如下地址访问登录界面:
http://192.168.112.38:8001/api/v1/namespaces/kube-system/services/https:kubernetes-dashboard:/proxy/#!/login

该方案遇到的问题
Dashboard的配置是难点,尤其是涉及到安全权限相关,相当复杂,坑也比较多。
进入Dashboard的登录界面后,认证方式有Kubeconfig和令牌两种方式(实际上还有账号密码的方式,默认不开启不显示)。看到Kubeconfig和令牌,预计头都大了。能否有简便的方法,让我们可以直接访问Dashboard?当然有,选择跳过,会出现如下页面:
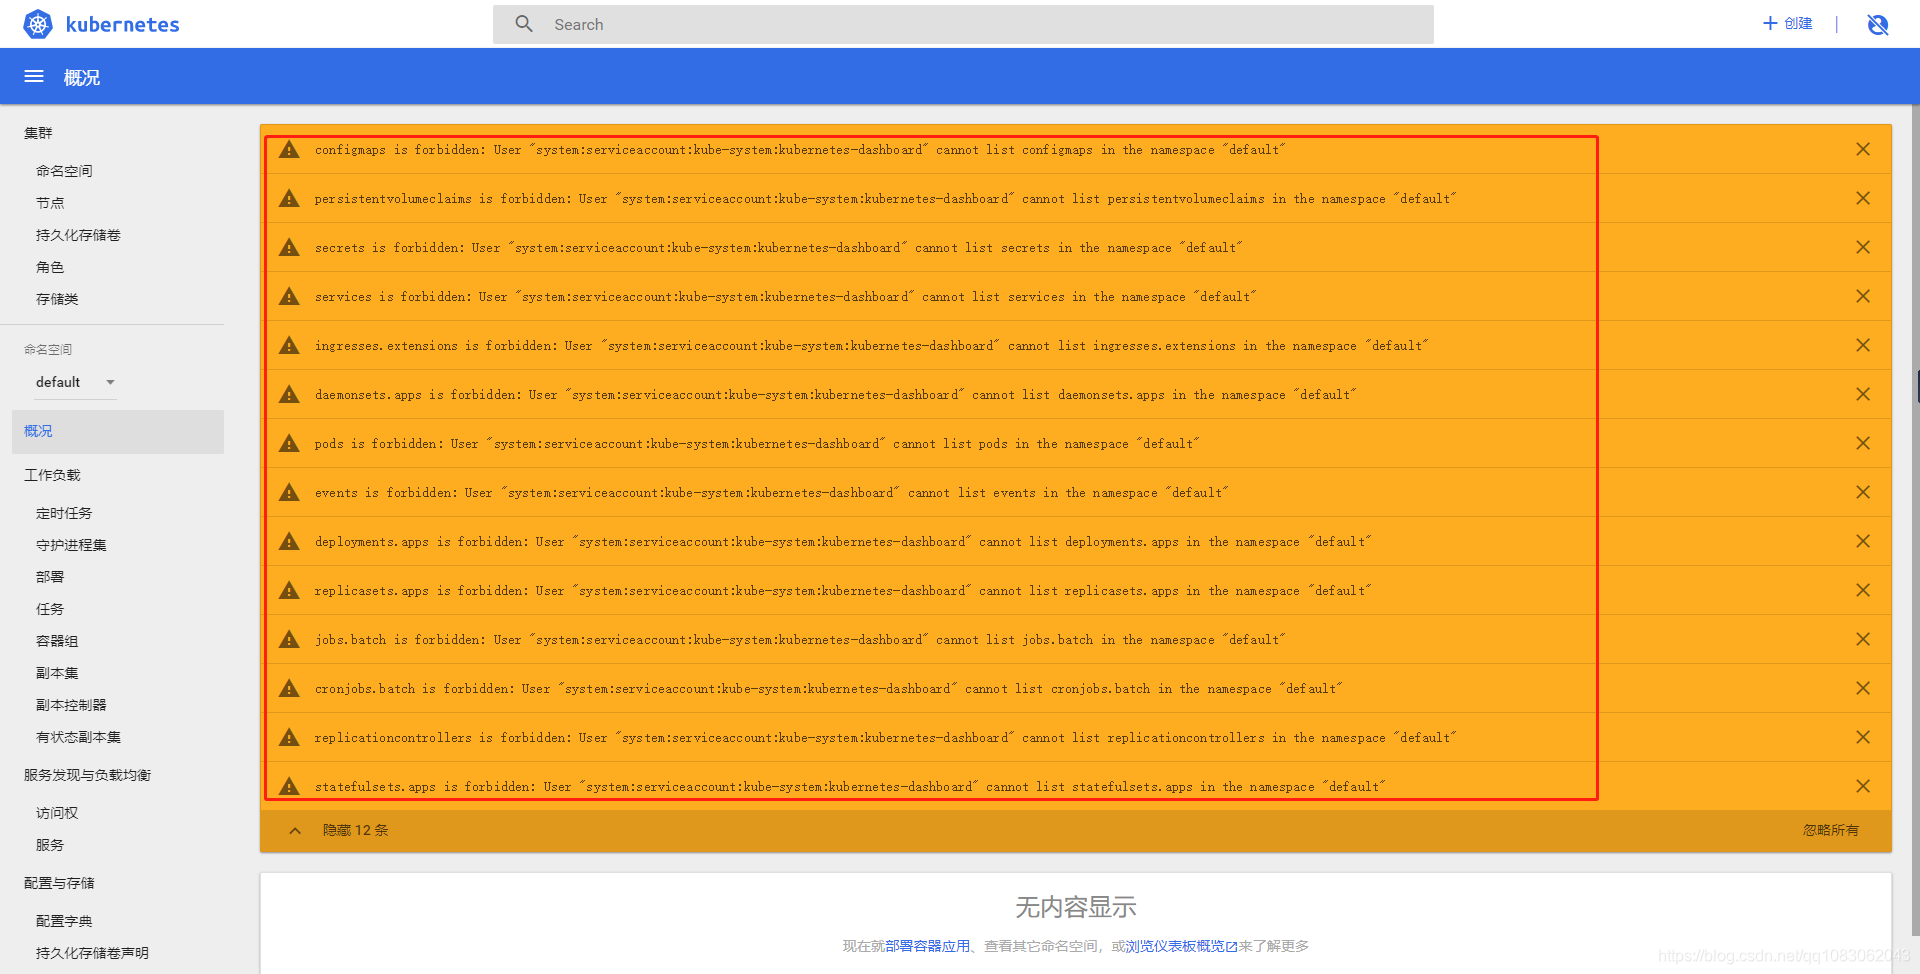
如上图,很遗憾,我们看到了很多权限错误提醒,主要是system:serviceaccount:kube-system:kubernetes-dashboard的权限不足引起的。
解决方案
修改下载的kubernetes-dashboard.yaml文件,更改RoleBinding修改为ClusterRoleBinding,并且修改roleRef中的kind和name,用cluster-admin这个非常牛逼的CusterRole(超级使用户权限,其拥有访问kube-apiserver的所有权限)。如下:
---
apiVersion: rbac.authorization.k8s.io/v1
kind: ClusterRoleBinding
metadata:
  name: kubernetes-dashboard-minimal
  namespace: kube-system
roleRef:
  apiGroup: rbac.authorization.k8s.io
  kind: ClusterRole
  name: cluster-admin
subjects:
- kind: ServiceAccount
  name: kubernetes-dashboard
  namespace: kube-system

---
## 三步重新启动kubernetes-dashboard
- 删除原先配置
kubectl delete -f kubernetes-dashboard.yaml
- 重新加载配置
kubectl create -f kubernetes-dashboard.yaml
- 重启代理
kubectl proxy --address=192.168.112.38 --disable-filter=true &
