首先配置好下载好的ABP框架后(详细看上一遍)
前言:
我们先不要急配置实体,首先得到一个接口
我们在应用层创建一个文件夹persons(主要为来好区分,不用太乱)
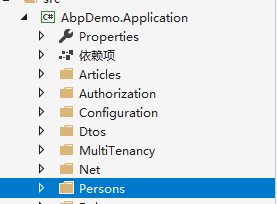
然后创建一个类PersonApplicaticationService,(命名后缀为 ApplicaticationService :为什么呢?按规矩来总有好处,因为ABP框架可以根据这个后缀名进行自动的依赖注入,这都是后话与本篇无关)
这个类继承(自己的项目名)AppServiceBase,我们就可以得到一个接口了
    public class PersonApplicationService : AbpDemoAppServiceBase
    {   public string Test()
        {
             return "Hello World";
        }
    }
我们运行一下 Web.Host,就可以看到我们创建的接口了

接下来我们一起来创建一个Person实体,和对它的增删查改吧!
第一步:现在我们有一个接口了。那么就开始创建实体了
我们只需要在Core层(核心层),创建对应的实体就好了
我们的Person实体,拥有Name、Sex,2个列,
创建一个Persons文件夹(为了整洁),创建一个Person的实体类

(我们需要继承:FullAuditedEntity实体表的接口约定,具体作用可以参考这个:http://note.youdao.com/noteshare?id=0ed4659b7beccb49999664faa67939e5&sub=WEB28d32e2226877eaf8791c76bf4702fd6)
[Table(“Person”)]需要对应你的数据库的表名
    [Table("Person")]
    public class Person : FullAuditedEntity
    {
        public string Name { get; set; }
        public int Sex { get; set; }
}在你的项目名DbContext 类, 引入实体的数据库映射
public DbSet<Person> Peoples { get; set; }
    public class AbpDemoDbContext : AbpZeroDbContext<Tenant, Role, User, AbpDemoDbContext>
    {  /* Define a DbSet for each entity of the application */
        public AbpDemoDbContext(DbContextOptions<AbpDemoDbContext> options)
            : base(options)
        { }
        public DbSet<Person> Peoples { get; set; }
        //省略代码
}
为了更加简洁,我们不使用数据迁移,我们直接在数据库用脚本创建对应的Person表
CREATE TABLE [dbo].[Person](
--是继承:FullAuditedEntity约定要有的列,必须添加
         [Id] [int] IDENTITY(1,1) NOT NULL,
         [CreationTime] [datetime2](7) NOT NULL,
         [CreatorUserId] [bigint] NULL,
         [LastModificationTime] [datetime2](7) NULL,
         [LastModifierUserId] [bigint] NULL,
         [IsDeleted] [bit] NOT NULL,
         [DeleterUserId] [bigint] NULL,
         [DeletionTime] [datetime2](7) NULL,
--以下是你自己的列
         [Name] [nvarchar](max) NULL,
         [Sex] [int]  NULL
 CONSTRAINT [PK_Person] PRIMARY KEY CLUSTERED
(
	[Id] ASC
));
那么我们就有了实体了,数据库也和我们的实体对应了
第二步(查):我们拥有了实体,就可以对数据库Person表进行查询了
首先通过依赖注入,把储存仓引进PersonApplicationService(也就是我们的接口类)
_entityRepository:把储存仓通过依赖注入引进来,可以理解为,引入你的数据库表
public class PersonApplicationService : AbpDemoAppServiceBase
{
private readonly IRepository<Person, int> _entityRopository;
public PersonApplicationService(IRepository<Person,int> entityRopository) {
_entityRopository = entityRopository;
}//省略
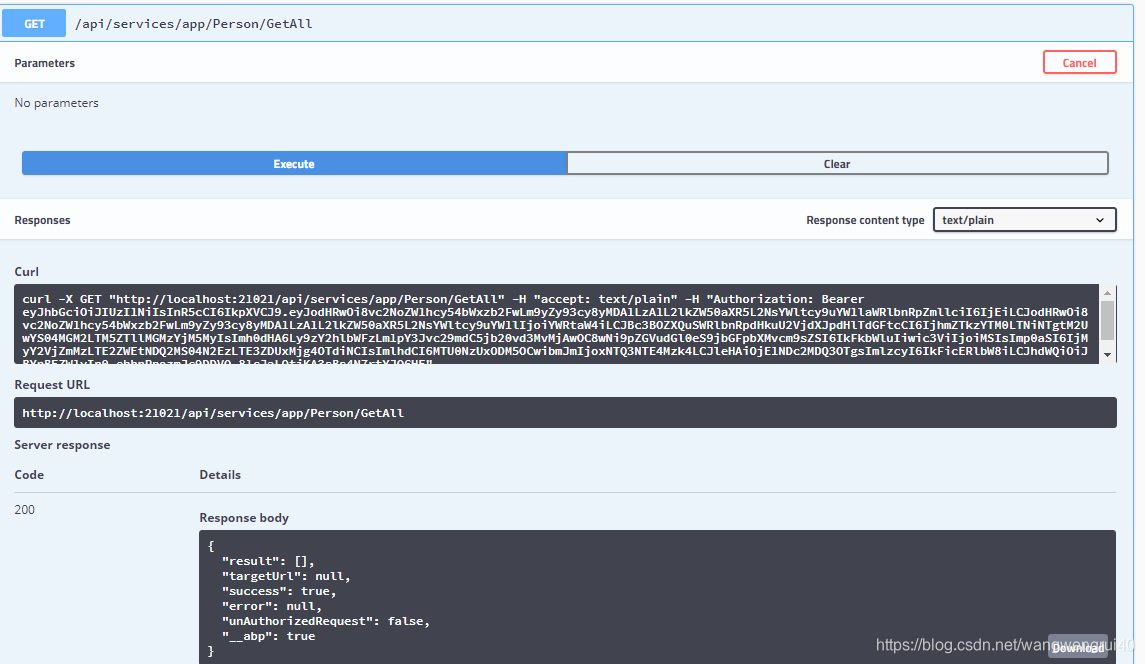
}然后写一个 得到全部表信息的接口
.GetAllListAsync()是ABP框架封装好给你的异步查询全部的方法(有关多线程的知识,当然也有非线程的GetAllList方法)
     public async Task<List<Person>> GetAll()
        {
            var entity = await _entityRopository.GetAllListAsync();
            return entity;
        }
然后查询接口就完成了
拓展一下我们的查询
数据库操作有很多,用封装好的查询方法是满足不了我们的
所有我们可以用Linq或者Lambda语句进行查询,查询的进阶,剩下的就是Linq或Lambda的知识了
也可以用Lambda
  //通过Name查询,方法语法
        public async Task<List<Person>> GetNameLambda(string name)
        {
            var entity = await _entityRopository.GetAllListAsync();
            var getentity = entity.Where(a => a.Name == name).ToList();
            return getentity;
        }
        //通过Name查询,查询语法
        public async Task<List<Person>> GetNameLinq(string name)
        {
            var entity = from person in await _entityRopository.GetAllListAsync()
                         where person.Name == name
                         select person;
            var getentity = entity.ToList();
            return getentity;
        }
第三步(增&改):查询的完成我们就已经完成了一大步了,接下来就是创建和修改
上面的步骤还不足以完成创建和修改
我们需要创建几个类,告诉EF层我们要创建什么,建一个Dto文件夹
创建:CreateOrUpdataPersonInput、PersonEditDto、PersonListDto、PersonMappings 4个类
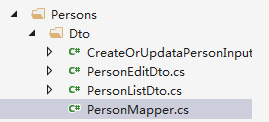
CreateOrUpdataPersonInput:是为了输入创建或修改信息的时候更加方便。
PersonEditDto:是创建的时候输入的内容,和Person实体一样就可以了
PersonListDto:是修改的时候输入的内容
PersonMappings:是用于映射创建和修改的动作
具体实现
PersonEditDto
    public class PersonEditDto
    {
        public int? id { get; set; }
        public string Name { get; set; }
        public int Sex { get; set; }
    }
PersonListDto
    public class Person : FullAuditedEntity
    {
        public string Name { get; set; }
        public int Sex { get; set; }
    }
PersonMappings
 internal static class PersonMapper
    {
        public static void CreateMappings(IMapperConfigurationExpression configuration)
        {//创建
            configuration.CreateMap<Person, PersonListDto>();
            configuration.CreateMap<PersonListDto, Person>();
            //修改
            configuration.CreateMap<PersonEditDto, Person>();
            configuration.CreateMap<Person, PersonEditDto>();
        }
    }
CreateOrUpdataPersonInput
   public class CreateOrUpdataPersonInput
    {
       [Required]
        public PersonEditDto person { get; set; }
}修改应用层下的:
项目名ApplicationModule.cs类中的 PreInitialize 方法:
// 添加自定义类型映射。PersonMapper.CreateMappings(cfg);
public override void Initialize()
{
var thisAssembly = typeof(AbpDemoApplicationModule).GetAssembly();
IocManager.RegisterAssemblyByConvention(thisAssembly);
Configuration.Modules.AbpAutoMapper().Configurators.Add(
// Scan the assembly for classes which inherit from AutoMapper.Profile
cfg =>
{
cfg.AddProfiles(thisAssembly);
PersonMapper.CreateMappings(cfg);
});
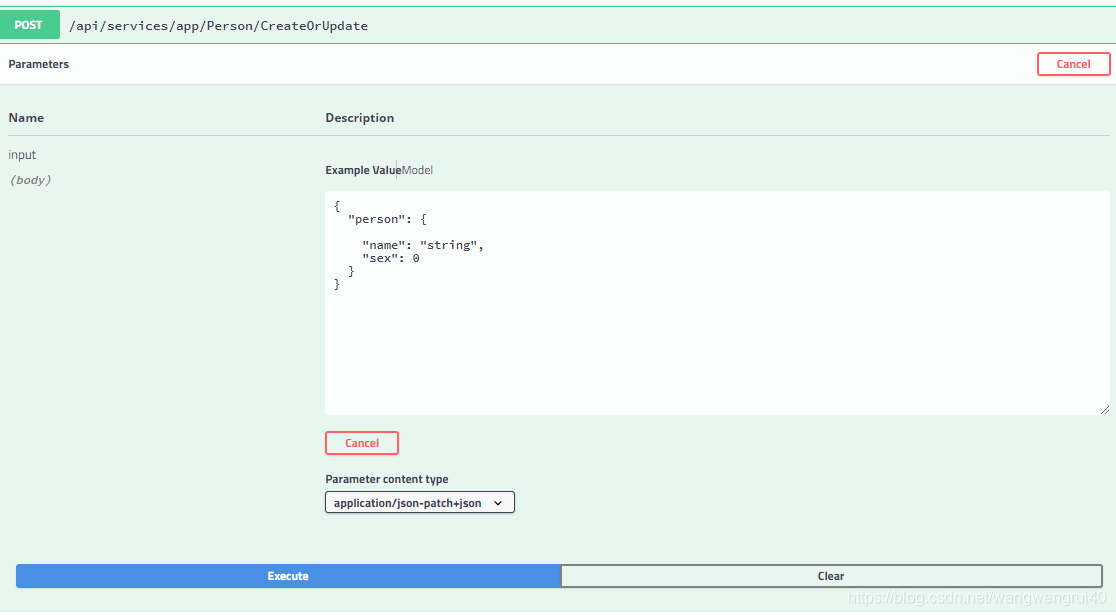
}然后我们就可以回到PersonApplicationService接口愉快地添加创建和修改了
        public async Task CreateOrUpdate(CreateOrUpdataPersonInput input)
        {
            if (input.person.Id.HasValue)
            { await Update(input.person); }
            else
            {   await Create(input.person);}
        }
        // 新增
        protected virtual async Task<PersonEditDto> Create(PersonEditDto input)
        {
            var entity = input.MapTo<Person>();
            entity = await _entityRepository.InsertAsync(entity);//调用创建方法
            return entity.MapTo<PersonEditDto>();
        }
        // 编辑
        protected virtual async Task Update(PersonEditDto input)
        {
            var entity = await _entityRepository.GetAsync(input.Id.Value); //根据ID找到对应要修改的数据
            input.MapTo(entity);//把输入的input映射到entity中,MapTo的具体作用请百度
            await _entityRepository.UpdateAsync(entity); //把实体传入到修改方法
        }
玩一下,创建、修改接口吧!
第四步(删):增删查改,我们还确少删除
ABP为我们提供了批量删除,和单个删除2个方法。把它加进我们的PersonApplicationService接口,就好了
      //根据ID删除
      public async Task Delete(EntityDto<int> input)
        {
            await _entityRepository.DeleteAsync(input.Id);
        }
        // 批量删除ActivityApply的方法
        public async Task BatchDelete(List<int> input)
        {
            await _entityRepository.DeleteAsync(s => input.Contains(s.Id));
        }
番外:添加一个分页查询功能
原来的查询全部是没有查询功能的
为了实现分页,我们添加2个类
![]()
PagedSortedAndFilteredInputDto:是输入分页的参数
GetPersonInput:滤一下输入的参数
具体实现:
PagedSortedAndFilteredInputDto
    public class PagedSortedAndFilteredInputDto:IPagedResultRequest,ISortedResultRequest
    {        //跳读数
        [Range(0, int.MaxValue)]
        public int SkipCount { get; set; }
        //每一页,1到500条
        [Range(1, 500)]
        public int MaxResultCount { get; set; }
        //排序方式
        public string Sorting { get; set; }
    }
GetPersonInput
  public string FilterText { get; set; }
        /// <summary>
        /// 正常化排序使用
        /// </summary>
        public void Normalize()
        {
            if (string.IsNullOrEmpty(Sorting))
            {
                Sorting = "Id";
            }
        }
最后就是实现分页接口代码(添加在:PersonApplicationService(也就是我们的接口类))
  public async Task<PagedResultDto<PersonListDto>> GetPaged(GetPersonInput input)
        {
            var entity =  _entityRepository.GetAll();
            //安装输入的进行分页
           var entityList = await entity
                .OrderBy(input.Sorting)
                 .PageBy(input)
                 .ToListAsync();
            var entityListDtos = entityList.MapTo<List<PersonListDto>>();
            //得到查询的数量
            var count =await entity.CountAsync();
            //分页输出
            return new PagedResultDto<PersonListDto>(count,entityListDtos); ;
        }