一、环境配置
1、安装cocoapods的打包插件
sudo gem install cocoapods-packager
2、注册cocoapods账户
1)使用trunk方式注册CocoaPods
$ pod trunk register [email protected] ‘名字’ --verbose
或者
$ pod trunk register [email protected] 名字 --verbose
eg:
iMac:~ gongairong$ pod trunk register [email protected] ‘JolieYa’
[!] Please verify the session by clicking the link in the verification email that has been sent to [email protected]
2) 点击邮件中的链接确认即注册成功,查看是否注册成功:
iMac:~ gongairong$ pod trunk me
  - Name:     JolieYa
  - Email:    [email protected]
  - Since:    December 14th, 20:48
  - Pods:     None
  - Sessions:
    - December 14th, 20:48 - April 21st, 2018 20:53. IP: 183.14.30.167
二、创建公有Pod库
1)创建远端公有仓库

2)将远程仓库备份到本地
$ git clone https://github.com/Kxx*/frameworkSDK.git
3) 新建个文件夹,存放.framework 和.bundle,如下

4) 进入仓库,推送.framework和.bundle到git服务器
$ cd ./frameworkSDK/
$ git add .
$ git commit -m “提交Framework和Bundle”
$ git push
5)打版本
$ git tag 1.0.1
$ git push --tags
6)配置.podspec文件
cd到你项目的目录,执行命令新建.podspec文件
$ pod spec create frameworkSDK
Specification created at XHWLCoreSDK.podspec
Pod::Spec.new do |s|
  s.name             = "WQLTPodDemo"  #名称
  s.version          = "0.0.1"        # 与打的tag一致,版本号
  s.summary          = "Demo for Pod" #简短介绍,下面是详细介绍
  s.description      = <<-DESC
                     描述
                       DESC
  s.homepage         = "https://github.com/liugangios/IFMMenu"   #主页,这里要填写可以访问到的地址,不然验证不通过
  # s.screenshots     = "www.example.com/screenshots_1", "www.example.com/screenshots_2"           #截图
  s.license          = 'MIT'              #开源协议
  s.author           = { "wangqiang" => "[email protected]" }                   #作者信息
  s.source           = { :git => "https://github.com/liugangios/IFMMenu.git", :tag => "0.0.1" }      #项目地址,这里不支持ssh的地址,验证不通过,只支持HTTP和HTTPS,最好使用HTTPS
  # s.social_media_url = 'https://twitter.com/<twitter_username>'                       #多媒体介绍地址

  s.platform     = :ios, '8.0'            #支持的平台及版本
  s.requires_arc = true                   #是否使用ARC,如果指定具体文件,则具体的问题使用ARC

  s.vendored_frameworks = 'RKBluetoothLEKit/*.{framework}'
  s.source_files = 'Pod/Classes/**/*'     #代码源文件地址,**/*表示Classes目录及其子目录下所有文件,如果有多个目录下则用逗号分开,如果需要在项目中分组显示,这里也要做相应的设置
  s.resource_bundles = {
    'PodTestLibrary' => ['Pod/Assets/*.png']
  }                                       #资源文件地址

  s.public_header_files = 'Pod/Classes/**/*.h'   #公开头文件地址
  s.frameworks = 'UIKit'                  #所需的framework,多个用逗号隔开
  s.libraries = 'sqlite3'                 #引入libsqlite3.tbd库
  s.dependency 'AFNetworking', '~> 2.3'   #依赖关系,该项目所依赖的其他库,如果有多个需要填写多个s.dependency

  #将文件按文件夹分类
  s.subspec 'Proto' do |sp|
  sp.source_files = '**/proto/**/*'
  sp.requires_arc = false #proto文件夹下的文件使用MRC
  end
end
注释:
s.name:名称,pod search搜索的关键词,注意这里一定要和.podspec的名称一样,否则报错
s.version:版本号,to_s:返回一个字符串
s.author:作者
s.homepage:项目主页地址
s.summary: 项目简介
s.source:项目源码所在地址
s.license:许可证
s.platform:项目支持平台
s.source_files:需要包含的源文件
s.public_header_files:需要包含的头文件
s.ios.deployment_target:支持的pod最低版本
其他一些非必要字段
s.social_media_url:社交网址
s.resources:资源文件
s.dependency:依赖库,不能依赖未发布的库
source_files写法及含义
"IFMMenu/*
"IFMMenu/IFMMenu/*.{h,m}"
"IFMMenu/**/*.h"
*表示匹配所有文件
*.{h,m}表示匹配所有以.h和.m结尾的文件
**表示匹配所有子目录
s.source常见写法
s.source = { :git => "https://github.com/liugangios/IFMMenu.git", :commit => "68defea" }
s.source = { :git => "https://github.com/liugangios/IFMMenu.git", :tag => 1.0.0 }
s.source = { :git => "https://github.com/liugangios/IFMMenu.git", :tag => s.version }
commit => "68defea" 表示将这个Pod版本与Git仓库中某个commit绑定
tag => 1.0.0表示将这个Pod版本与Git仓库中某个版本的comit绑定
tag => s.version表示将这个Pod版本与Git仓库中相同版本的comit绑定
7) 验证和发布podspec文件
1.方法一:
$ pod spec lint
$ pod trunk push ./FrameworkTestTool.podspec #提交到Cocoapods
$ pod trunk me # 查看下pod信息
2.方法二:
$ pod spec lint IFMMenu.podspec --verbose
$ pod lib lint 文件名称.podspec
如有警告或者错误请重新检查你的编写正确性, 如果没有问题会出现:
8)验证Pod库,验证是否成功
$ pod setup
$ pod search frameworkSDK
若一直查找不到该pod库,执行下面代码删除查找的历史索引文件
$ rm ~/Library/Caches/CocoaPods/search_index.json
$ pod search 库名
8) 更新维护
修改如下:
podspec中的版本号, 并重新打tag上传, 再进行新一轮的验证podspec文件和发布
三、创建私有Pod库
1)
创建管理私有podspec文件的远端私有仓库
需要:
1.建立一个远端仓库去管理私有Pod库的podspec文件.
2.创建管理私有podspec文件的远端私有仓库
git的私有仓库需要收费,可以使用其他第三方免费的git服务(如:coding).拿到私有仓库的地址后,终端输入如下命令:
pod repo add podspec仓库名 仓库地址
eg: pod repo add WQLT https://git.coding.net/w2m/WQLT.git
之后在/.cocoapods/repos/目录下可以看到官方的specs:master和刚刚加入的specs:WQLT
注:若多人合作开发,在他的有这个仓库权限的前提下执行上述相同的代码添加这个远端库
2)创建存放源码的远端私有仓库
上一步创建的是管理podspec文件的远端仓库,这一步创建是管理pod库源码的远端仓库,这里必须创建私有仓库
3)配置pod库
按照创建公有Pod库的2,3,4,5步进行操作,完成添加源码,配置并验证podspec文件的操作.下附一个最简单的podspec文件
#将podspec文件加入到第1部创建的远端仓库中
公有库使用trunk方式将.podspec文件发布到CocoaPods/Specs, 内部的pod组件库则是添加到我们第一步创建的私有Spec repo中去, 在podspec文件目录下终端执行:
pod repo push podspec仓库名 podspec文件名
eg : pod repo push WQLT WQLTPrivatePodDemo.podspec
可以前往~/.cocoapods/repos文件下查看,同时管理podspec文件的远端仓库也更新了
4)更新维护
私有库的更新维护和公有库类似, 修改源码及podspec文件,然后验证podspec文件, 然后执行上述第4部将新版本的podspec文件添加到管理podspec文件的私有仓库中.
文件目录如下:
.cocopods
---repos
------master
------WQLT
---------WQLTPrivatePodDemo
------------0.0.1
---------------WQLTPrivatePodDemo.podspec
------------0.0.2
---------------WQLTPrivatePodDemo.podspec
删除私有Pod库如果需要删除私有的Pod库,在终端执行:
pod repo remove 管理podspec文件的库名
eg: pod repo remove WQLT
这样就在本地删除了私有的Pod库,还可以通过, 把它再加回来
pod repd add 管理podspec文件的库名
1) CocoaPods提供了pod lib create命令创建库项目
$ pod lib create 库名
zhijianuandeMBP:~ YuanZhiJian$ pod lib create 'BluetoothKit'
Cloning `https://github.com/CocoaPods/pod-template.git` into `BluetoothKit`.
Configuring BluetoothKit template.

------------------------------

To get you started we need to ask a few questions, this should only take a minute.

If this is your first time we recommend running through with the guide:
 - http://guides.cocoapods.org/making/using-pod-lib-create.html
 ( hold cmd and double click links to open in a browser. )


What language do you want to use?? [ Swift / ObjC ]
 > ObjC

Would you like to include a demo application with your library? [ Yes / No ]
 > Yes

Which testing frameworks will you use? [ Specta / Kiwi / None ]
 > None

Would you like to do view based testing? [ Yes / No ]
 > No

What is your class prefix?
 > RK
将上面生成的BluetoothKit. framework拷贝到生成的BluetoothKit 库项目的RKBluetoothLEKit目录下
先简单介绍下:
*.podspec:文件是私有库的配置文件
BluetoothKit:该文件夹是存放私有库的类和资源的地方
Example:是根据上图提示,我们选择创建的demo工程,如果选择No,则不会生成此工程
2) 编辑库的Spec描述文件BluetoothKit.podspec
同公有库,编辑好后,导入库到Example中
$ cd Example
$ pod install
或者
$ pod update --no-repo-update
3)验证pod配置文件
$ pod lib lint
或者
$ pod lib lint BluetoothKit.podspec
或者
$ pod lib lint BluetoothKit.podspec --verbose
–verbose会给出详细的信息。
–allow-warnings允许警告,默认有警告的podspec会验证失败。
–fail-fast 遇到错误马上停止,默认会完成全过程再停止。
–use-libraries 如果项目中引用了.a、.framework,在验证和提交时需要加。
–sources 如果此podspec 依赖了其他不包含在官方specs里的pod,则用它来指明源,比如依赖了某个私有库。多个值以逗号分隔。
4) 推送SDK项目到GitHub仓库
Example测试项目运行成功并且验证配置文件成功后,上传git仓库
$ git remote add origin https://gitee.com/Better_Y/BluetoothKit.git # 连接远程仓库并建了一个名叫:origin的别名
$ git add .
$ git commit -a -m “第一次提交 版本为0.0.1”
$ git pull origin master --allow-unrelated-histories
$ git push origin master
// 打版本
$ git tag 0.0.1 # 提交版本号
$ git push origin 0.0.1 # push到远程分支
或者
$ git tag -a 0.1.0 -m “first release”
$ git push origin --tags
# --allow-unrelated-histories
# git pull origin maste会失败 ,提示:fatal: refusing to merge unrelated histories
# 原因是远程仓库origin上的分支master和本地分支master被Git认为是不同的仓库,所以不能直接合并,需要添加 --allow-unrelated-histories
5)创建Sepc管理库,并发布
创建步骤跟上面码云创建的git私有库同理
在终端执行Specs创建命令
$ pod repo add PrintSpecs https://gitee.com/Better_Y/PrintSpecs.git #创建
$ pod repo push PrintSpecs PrivateHelloWorld.podspec # 发布
发布成功后,我们可以去码云看看PrivateSpecs的git项目有没有提交成功
查看我们本地的Specs库:
直接Findle ->右键 -> 前往文件夹 -> 输入:~/.cocoapods/repos ->点击前往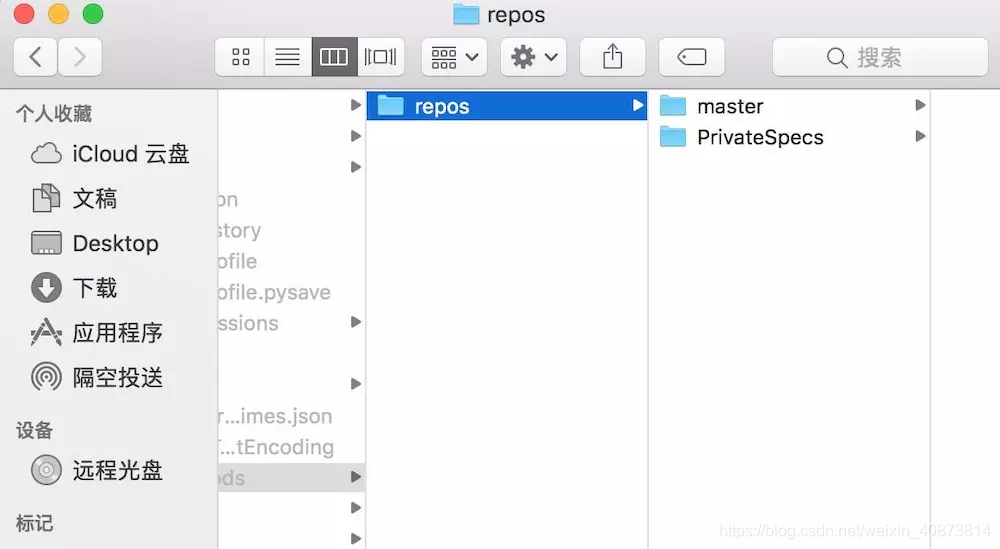
6)检验私有库发布
四、使用
1)公有pod库:项目的Podfile文件
pod ‘pod库名’,’~>版本号’
若公有pod库更新后,直接修改Podfile库的版本后,在Podfile文件目录下执行pod install即可
2) 私有pod库: 项目的Podfile文件
source ‘[email protected]:wangwenpeng/cocoapods-app-ios.git’ #私有库地址
source 'https://github.com/CocoaPods/Specs.git' #pod官方库
pod 'YDToolKit', ‘~>2.1.9’
或者
platform :ios,'8.0'
target 'privateDemo' do
pod 'PrintHelloWorld',:git => 'https://gitee.com/Better_Y/PrintHelloWorld.git'
end
$ pod install --no-repo-update
若私有Pod库更新后,不用修改Podfile文件,在Podfile文件目录下执行pod update即可
$ pod spec lint LPPushService.podspec --verbose --use-libraries --allow-warnings
$ git tag 0.1.1
$ git push --tags
$ git tag -d 0.1.0  # 删除本地tag 0.1.0
$ git push origin --delete tag 0.1.0 # 删除远端tag 0.1.0
$ pod trunk info yooweiTest