前提是 UNIX/LINUX 系统
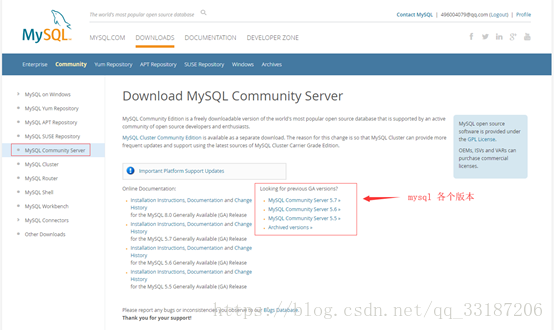
1、 mysql 下载地址
https://dev.mysql.com/downloads/mysql/
下载版本:我这里选择的5.7.22,通用版,linux下64位
1)、鼠标向下拉
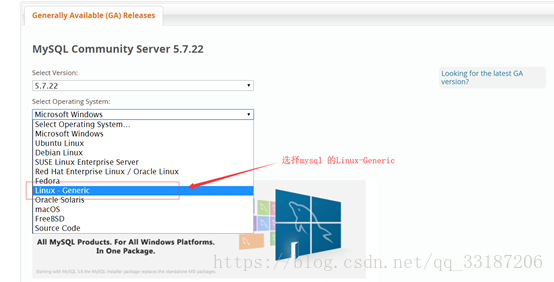
2)、选择 mysql-5.7.22-linux-glibc2.12-x86_64.tar.gz点击下载

2、 解压并重命名
1)、解压
tar -zxvfmysql-5.7.22-linux-glibc2.12-x86_64.tar.gz -C /usr/local/
2)、重命名
mvmysql-5.7.22-linux-glibc2.12-x86_64/ mysql/
3、 添加用户组和用户
1)、添加用户组
groupadd mysql
2)、添加用户mysql 到用户组mysql
useradd -g mysql mysql
4、 安装
1)、切换到mysql 解压目录下
cd /usr/local/
2)、创建文件夹
mkdir -p data/mysql
3)、用户授权
chown -R mysql:mysql mysql/
5、进入mysql的bin目录安装和初始化mysql
1)、切换到
cd/usr/local/mysql/bin
1)、初始化mysql:
[root@centos bin]# ./mysqld --initialize--user=mysql --basedir=/usr/local/mysql/-datadir=/usr/local/mysql/data/
注意:
a)、如果报.
/mysqld: errorwhile loading shared libraries: libnuma.so.1: cannot open shared object file:No such file or directory
则执行
[root@centos bin]# yum -y installnumactl
命令执行完成后再次执行
[root@centos bin]#./mysqld --initialize --user=mysql--basedir=/usr/local/mysql/--datadir=/usr/local/mysql/data/
b)、如果报以下错误
2018-03-22T05:52:45.732447Z 0[ERROR] Can't find error-message file'/usr/local/mysql/--datadir=/usr/local/mysql/data/share/errmsg.sys'. Checkerror-message file location and 'lc-messages-dir' configuration directive.
则执行以下命令
[[root@centos bin]# ./mysqld --initialize --user=mysql--basedir=/usr/local/mysql/ --datadir=/usr/local/mysql/data/--lc_messages_dir=/usr/local/mysql/share --lc_messages=en_US
c)、 如果报以下错误
2018-03-22T07:08:58.802194Z0 [ERROR] --initialize specified but the data directory has files in it.Aborting.
2018-03-22T07:08:58.802220Z0 [ERROR] Aborting
则删除/usr/local/mysql/data目录下的data文件夹,再新建一个data。或者清空data文件夹
6.配置my.cnf
进入etc目录编辑my.cnf
[root@centos bin]##cd /etc
[root@centos etc]#vi my.cnf
将以下配置加入到my.cnf中
[mysqld]
port = 3306
basedir=/usr/local/mysql
datadir=/usr/local/mysql/data
max_connections=500
character-set-server=utf8
default-storage-engine=INNODB
lower_case_table_names=1
max_allowed_packet=20M
7.启动服务
[root@centos etc]# cd /usr/local/mysql/support-files
[root@centossupport-files]# cp mysql.server /etc/init.d/mysql
[root@centossupport-files]# chmod +x /etc/init.d/mysql
配置好之后我们来启动mysql的服务
[root@centos bin]# service mysql start
注意:
a)、 如果报以下错误
StartingMySQL.2018-03-22T07:00:17.265252Z mysqld_safe error: log-error set to'/var/log/mariadb/mariadb.log', however file don't exists. Create writable foruser 'mysql'.
ERROR! The server quit without updatingPID file (/var/lib/mysql/centos.pid).
则执行以下命令
[root@centos bin]# mkdir /var/log/mariadb
[root@centos bin]# touch /var/log/mariadb/mariadb.log
[root@centos bin]# chown -R mysql:mysql /var/log/mariadb/
再次启动服务
[root@centosbin]# service mysql start
StartingMySQL. SUCCESS!
出现以上信息说明mysql服务启动成功
8.登录数据并修改密码
1)、进入/usr/local/mysql/bin目录
[root@centos bin]# ./mysql -u root -p
这里的密码是初始化数据库是产生的密码
登录数据库后,执行以下操作修改root用户密码
2)、设置root用户密码
[root@centos bin]#. /mysqladmin -u root password '123456'
注意:
a)、遇到的问题
ERROR 1045 (28000): Access denied foruser 'root'@'localhost' (using password: NO)
解决方法
[root@centos bin]# ./mysqld_safe--user=mysql --skip-grant-tables --skip-networking &
[root@centos bin]# ./mysql -u root mysql
mysql> UPDATEuser SET Password=PASSWORD('123456') where USER='root';
mysql> FLUSHPRIVILEGES;
b)、遇到的问题
[root@centos ~]# mysql -u root
-bash: mysql: command not found
原因:这是由于系统默认会查找/usr/bin下的命令,如果这个命令不在这个目录下,当然会找不到命令,我们需要做的就是映射一个链接到/usr/bin目录下,相当于建立一个链接文件。
首先得知道mysql命令或mysqladmin命令的完整路径,比如mysql的路径是:/usr/local/mysql/bin/mysql,我们则可以这样执行命令:
# ln -s /usr/local/mysql/bin/mysql /usr/bin
9.设置远程登录权限
mysql> grant all privileges on*.* to'root' @'%' identified by 'root';
10.【开机自启】Linux下设置MySql自动启动
1)、将服务文件拷贝到init.d下,并重命名为mysql (如果存在跳过这步骤)
cp /usr/local/mysql/support-files/mysql.server /etc/init.d/mysql
2)、赋予可执行权限 (如果存在跳过这步骤)
chmod +x /etc/init.d/mysql
3)、添加服务
chkconfig --add mysql
4)、显示服务列表
chkconfig --list
如果看到mysql的服务,并且3,4,5都是on的话则成功,如果是off,则键入
chkconfig --level 345 mysql on
5)、重启电脑
reboot
6)、验证
netstat -na | grep 3306
如果看到有监听说明服务启动了