文章目录
一、Linux操作系统启动流程
1.1、简单回顾linux系统组成以及内核作用
linux系统的组成可以理解为分为两部分:内核 + 根文件系统
内核的作用大概有:
- 进程管理;
- 内存管理;
- 网络协议栈;
- 文件系统;
- 驱动程序;
- 安全功能;
运行中的系统环境可以理解为分为两层:内核空间 + 用户空间
- 内核空间(内核态):内核代码,有系统调用接口;
- 用户空间(用户态):应用程序(发起为进程或者线程);
内核设计流派:
- 单内核设计:把所有功能集成于同一程序;(linux遵循这一准则)
- 微内核设计:每种功能使用一个单独的子系统实现;(windows和solaris遵循这一准则)
linux设计虽说是单内核原则,也吸取了微内核设计的一些思想:
- 支持模块化:以.ko(kernel object)为后缀的文件;
- 支持模块运行时动态装载和卸载;
内核组成部分:
- 核心文件:/boot/vmlinuz-VERSION-release
##查看:
#CentOS 5.x:
[root@xiaotang ~]# ls -l /boot/vmlinuz-2.6.18-398.el5
-rw-r--r-- 1 root root 2127852 2014-09-17 /boot/vmlinuz-2.6.18-398.el5
[root@xiaotang ~]# cat /etc/redhat-release
CentOS release 5.11 (Final)
#CentOS 6.x:
[root@xt-vhost1 ~]# ls -l /boot/vmlinuz-2.6.32-696.el6.x86_64
-rwxr-xr-x. 1 root root 4274992 Mar 22  2017 /boot/vmlinuz-2.6.32-696.el6.x86_64
[root@xt-vhost1 ~]# cat /etc/redhat-release
CentOS release 6.9 (Final)
#CentOS 7.x:
[root@localhost ~]# ls -l /boot/vmlinuz-3.10.0-229.el7.x86_64
-rwxr-xr-x. 1 root root 5029136 Mar  6  2015 /boot/vmlinuz-3.10.0-229.el7.x86_64
[root@localhost ~]# cat /etc/redhat-release
CentOS Linux release 7.1.1503 (Core)
- ramdisk文件:
CentOS 5.x:/boot/initrd-VERSION-release.img
CentOS 6.x:/boot/initramfs-VERSION-release.img
#CentOS 5.x:
[root@xiaotang ~]# ls -l /boot/initrd-2.6.18-398.el5.img
-rw------- 1 root root 2793000 11-13 06:05 /boot/initrd-2.6.18-398.el5.img
[root@xiaotang ~]# cat /etc/redhat-release
CentOS release 5.11 (Final)
#CentOS 6.x:
[root@xt-vhost1 ~]# ls -l /boot/initramfs-2.6.32-696.el6.x86_64.img
-rw-------. 1 root root 26660924 Nov 18 15:02 /boot/initramfs-2.6.32-696.el6.x86_64.img
[root@xt-vhost1 ~]# cat /etc/redhat-release
CentOS release 6.9 (Final)
#CentOS 7.x:
[root@localhost ~]# ls -l /boot/initramfs-3.10.0-229.el7.x86_64.img
-rw-------. 1 root root 16267705 Nov 18  2018 /boot/initramfs-3.10.0-229.el7.x86_64.img
[root@localhost ~]# cat /etc/redhat-release
CentOS Linux release 7.1.1503 (Core)
- 模块文件:/lib/modules/VERSION-release
#CentOS 5.x:
[root@xiaotang ~]# cat /etc/redhat-release
CentOS release 5.11 (Final)
[root@xiaotang ~]# ls /lib/modules/2.6.18-398.el5/
build   modules.alias   modules.ieee1394map  modules.ofmap     modules.symbols  updates
extra   modules.ccwmap  modules.inputmap     modules.pcimap    modules.usbmap   weak-updates
kernel  modules.dep     modules.isapnpmap    modules.seriomap  source
[root@xiaotang ~]# ls  /lib/modules/2.6.18-398.el5/kernel/
arch  crypto  drivers  fs  lib  net  sound
[root@xiaotang ~]# ls /lib/modules/2.6.18-398.el5/kernel/drivers/
acpi  block      char     dma     firewire  hwmon  infiniband  leds   message  mtd      pci     scsi    usb     xenpv_hvm
ata   bluetooth  cpufreq  dma_v3  firmware  i2c    input       md     misc     net      pcmcia  serial  video
atm   cdrom      dca      edac    hv        ide    isdn        media  mmc      parport  rtc     uio     virtio
[root@xiaotang ~]# ls /lib/modules/2.6.18-398.el5/kernel/drivers/pci/
hotplug  pcie
[root@xiaotang ~]# ls /lib/modules/2.6.18-398.el5/kernel/drivers/pci/hotplug/
acpiphp_ibm.ko  acpiphp.ko  fakephp.ko  pciehp.ko  shpchp.ko

#CentOS 6.x:
[root@xt-vhost1 ~]# cat /etc/redhat-release
CentOS release 6.9 (Final)
[root@xt-vhost1 ~]# ls /lib/modules/2.6.32-696.el6.x86_64/
build          modules.alias.bin  modules.dep.bin      modules.isapnpmap    modules.order     modules.symbols      updates
extra          modules.block      modules.drm          modules.modesetting  modules.pcimap    modules.symbols.bin  vdso
kernel         modules.ccwmap     modules.ieee1394map  modules.networking   modules.seriomap  modules.usbmap       weak-updates
modules.alias  modules.dep        modules.inputmap     modules.ofmap        modules.softdep   source
[root@xt-vhost1 ~]# ls /lib/modules/2.6.32-696.el6.x86_64/kernel/
arch  crypto  drivers  fs  kernel  lib  mm  net  sound
[root@xt-vhost1 ~]# ls /lib/modules/2.6.32-696.el6.x86_64/kernel/net/
802    9p   bluetooth  can   dccp        ipv4  key  mac80211   openvswitch  rds     sched  sunrpc  wireless
8021q  atm  bridge     core  ieee802154  ipv6  llc  netfilter  phonet       rfkill  sctp   wimax   xfrm
[root@xt-vhost1 ~]# ls /lib/modules/2.6.32-696.el6.x86_64/kernel/net/ipv4/
ah4.ko        ip_gre.ko     tcp_bic.ko        tcp_hybla.ko     tcp_vegas.ko     tunnel4.ko               xfrm4_tunnel.ko
esp4.ko       ipip.ko       tcp_diag.ko       tcp_illinois.ko  tcp_veno.ko      xfrm4_mode_beet.ko
inet_diag.ko  ip_tunnel.ko  tcp_highspeed.ko  tcp_lp.ko        tcp_westwood.ko  xfrm4_mode_transport.ko
ipcomp.ko     netfilter     tcp_htcp.ko       tcp_scalable.ko  tcp_yeah.ko      xfrm4_mode_tunnel.ko

#CentOS 7.x:
[root@localhost ~]# cat /etc/redhat-release
CentOS Linux release 7.1.1503 (Core)
[root@localhost ~]# ls /lib/modules/3.10.0-229.el7.x86_64/
build   modules.alias      modules.builtin      modules.dep.bin  modules.modesetting  modules.softdep      source   weak-updates
extra   modules.alias.bin  modules.builtin.bin  modules.devname  modules.networking   modules.symbols      updates
kernel  modules.block      modules.dep          modules.drm      modules.order        modules.symbols.bin  vdso
[root@localhost ~]# ls /lib/modules/3.10.0-229.el7.x86_64/kernel/
arch  crypto  drivers  fs  kernel  lib  mm  net  sound
[root@localhost ~]# ls /lib/modules/3.10.0-229.el7.x86_64/kernel/kernel/
trace
[root@localhost ~]# ls /lib/modules/3.10.0-229.el7.x86_64/kernel/kernel/trace/
ring_buffer_benchmark.ko
1.2、简单了解一下磁盘构成以及相关基础知识
摘抄、参考引用:
https://blog.csdn.net/qq_32740675/article/details/80955547
https://www.cnblogs.com/joydinghappy/articles/2511948.html
https://www.cnblogs.com/joydinghappy/articles/2511948.html
https://blog.csdn.net/heuguangxu/article/details/80072024
ps:这里讲解的是机械硬盘的构成;
先简单看看物理结构图和逻辑结构图解:


相关名词:
磁头(head):
磁道(track): 每个盘片的盘面被划分成多个狭窄的同心圆环,数据就存储在这样的同心圆环上面,我们将这样的圆环称为 磁道 (Track),每个盘面可以划分多个磁道。最外圈的磁道是0号磁道,向圆心靠近依次为1磁道、2磁道……磁盘的数据存放就是从最外圈开始的;
柱面(cylinder):柱面实际上就是我们抽象出来的一个逻辑概念,简单来说就是处于同一个垂直区域的磁道称为 柱面 ,即各盘面上面相同位置磁道的集合;
扇区(sector):每个扇区,512字节,扇区是硬盘上存储的物理单位;
盘片(platter):一个硬盘由多个盘片组成,盘片分为两面,第一个盘片的上面为0面,下面为1面,第二个盘片上面为2面,反面为3面,依次类推;
分区:一个硬盘有几个分区,每个分区里面有N个磁道,一个磁道有N个扇区。分区并不是按照我们平常理解的切大饼的形式划分来,知识为了好理解。
二、CentOS 启动流程(只适用于MBR类型的PC架构主机)
1、BIOS加电自检(POST,power-on self-test)
BIOS(Basic Input/Output System),基本输入输出系统,该系统存储于主板的ROM芯片上(POST的程序存在于ROM芯片上,是只读的),计算机在开机时,会最先读取该系统,然后会有一个加电自检过程,这个过程其实就是检查CPU和内存,计算机最基本的组成单元(控制器、运算器和存储器),还会检查其他硬件,若没有异常就开始加载BIOS程序到内存当中。(要保证计算机的五大基本部件存在)
可被CPU寻址的区域包括ROM和RAM;
2、启动序列(Boot Sequence)
按次序查找各引导设备,第一个有引导程序的设备即为本次启动要用到的设备;
(1) 读取引导程序(bootloader)
BIOS主要的一个功能就是存储了磁盘的启动顺序,BIOS会按照启动顺序去查找第一个磁盘头的MBR信息,并加载和执行MBR中的Bootloader程序,若第一个磁盘不存在MBR,则会继续查找第二个磁盘(PS:启动顺序可以在BIOS的界面中进行设置),一旦BootLoader程序被检测并加载内存中,BIOS就将控制权交接给了BootLoader程序。
MBR:主引导记录(Master Boot Record)
MBR构成:总共512字节
其中446字节用来存放bootloader程序;
其中64字节用来存放分区表(fat)信息;
剩余的2字节用来存放一个叫做魔数(magic number)的东西,用来记录MBR有效与否,通常为55AA这个4个16进制的数字(2进制表示16位),表示MBR是有效的;
windows和linux系统的引导程序:
windows:一般叫ntloader(Windows NT以后的版本);
Linux:
(a). LILO
Linux Loader(现在大部分的安卓手机就是通过LILO引导的);
早期设计没考虑硬盘会这么大,不支持大硬盘;内核或者加载的系统如何位于1024柱面以后的分区上,则加载不了;
(b). GRUB
GRand Unified Bootloader.(统一引导加载器)
GRUB 0.x:CentOS 5.x, CentOS 6.x ,后来GRUB 1.x出现后,GRUB 0.x版本重命名了 GRUB Legacy(GRUB 经典版);
GRUB 1.x:CentOS 7.x ,其实GRUB 1.x和GRUB 0.x没有任何关系,GRUB 1.x完全重新设计的。GRUB 1.x也叫Grub2;
关于bootloader的功能:
提供一个菜单,允许用户选择要启动的系统或不同的内核版本;把用户选定的内核装载到RAM中的特定空间中,解压、展开,而后把系统控制权移交给内核;
(2) GRUB 设计实现(解决bootloader空间太小的问题)
GRUB(Grand Unified Bootloader),启动程序,其执行过程可分为三个步骤:
phase 1:在bootloader中实现,加载第二阶段(从磁盘加载到内存中);
phase1.5(这个阶段了解一下):也在磁盘空间上,文件系统驱动。该步骤就是为了识别文件系统(加载文件系统驱动)
phase 2:放在硬盘空间上(分区上),/boot/grub。由该阶段来加载内核文件到内存空间;
GRUB程序会根据/boot/grub/grub.conf文件查找Kernel的信息,然后开始加载Kernel程序,当Kernel程序被检测并在加载到内存中,GRUB就将控制权交接给了Kernel程序。
ps:实际上这个步骤/boot还没被挂载,GRUB直接识别grub所在磁盘的文件系统(有了1.5阶段加载的驱动程序,所以能识别),所以实际上应该是/grub/grub.conf。
3、内核(kernel)
自身初始化的工作。
(1) 探测可识别到的所有硬件设备;
(2) 加载硬件驱动程序;(有可能会借助于ramdisk加载驱动)
(3) 以只读方式挂载根文件系统(root filesystem);
(4) 运行用户控件的第一个应用程序:/sbin/init
initrd(Initial RAM Disk),它在GRUB phase 2 这个步骤就被拷贝到了内存中,这个文件是在安装系统时产生的,是一个临时的根文件系统(rootfs)。因为Kernel为了精简,只保留了最基本的模块,因此,Kernel上并没有各种硬件的驱动程序,也就无法识rootfs所在的设备,故产生了initrd这个文件,该文件装载了必要的驱动模块,当Kernel启动时,可以从initrd文件中装载驱动模块,直到挂载了真正的rootfs,然后将initrd从内存中移除。
4、init程序(主要是完成linux系统初始化和之后的管理)
linux的init程序类型:
(1) CentOS 5.x以及之前
init是SysV init;
配置文件:/etc/inittab
(2) CentOS 6.x
init是upstart来实现的一部分;
配置文件:/etc/inittab,为了向后兼容,其实该配置文件作用很小
实质的配置读取的配置文件:
/etc/init/*.conf
(3) CentOS 7.x
init是systemd实现的一部分;
配置文件:/usr/lib/systemd/system/, /etc/systemd/system/
实际/sbin/init是一个指向/lib/systemd/systemd程序的一个链接文件;
CentOS5.x下ramdisk文件解压和查看:
[root@xiaotang tmp]# cat /etc/redhat-release
CentOS release 5.11 (Final)
[root@xiaotang tmp]# mkdir test
[root@xiaotang tmp]# cd test/
[root@xiaotang test]# cp /boot/initrd-2.6.18-398.el5.img .
[root@xiaotang test]# file initrd-2.6.18-398.el5.img
initrd-2.6.18-398.el5.img: gzip compressed data, from Unix, last modified: Tue Nov 13 06:05:50 2018, max compression
[root@xiaotang test]# mv initrd-2.6.18-398.el5.img initrd-2.6.18-398.el5.img.gz
[root@xiaotang test]# gunzip initrd-2.6.18-398.el5.img.gz
[root@xiaotang test]# ls
initrd-2.6.18-398.el5.img
[root@xiaotang test]# file initrd-2.6.18-398.el5.img
initrd-2.6.18-398.el5.img: ASCII cpio archive (SVR4 with no CRC)
[root@xiaotang test]# cpio -idm < initrd-2.6.18-398.el5.img
14318 blocks
[root@xiaotang test]# ls
bin  dev  etc  init  initrd-2.6.18-398.el5.img  lib  proc  sbin  sys  sysroot
[root@xiaotang test]# ls -l init
-rwx------ 1 root root 2592 11-13 06:05 init
[root@xiaotang test]# ls -l bin/
总计 5000
-rwx------ 1 root root 1129512 11-13 06:05 dmraid
-rwx------ 1 root root  542872 11-13 06:05 insmod
-rwx------ 1 root root  953688 11-13 06:05 kpartx
lrwxrwxrwx 1 root root      10 11-19 07:00 modprobe -> /sbin/nash
-rwx------ 1 root root 2453256 11-13 06:05 nash
[root@xiaotang test]# ls lib/
ahci.ko      dm-mem-cache.ko  dm-raid45.ko       ext3.ko   libata.ko    mptspi.ko    scsi_transport_spi.ko
ata_piix.ko  dm-message.ko    dm-region_hash.ko  firmware  mptbase.ko   ohci-hcd.ko  sd_mod.ko
dm-log.ko    dm-mod.ko        ehci-hcd.ko        jbd.ko    mptscsih.ko  scsi_mod.ko  uhci-hcd.ko
[root@xiaotang test]# ls dev/
console  null  ram   ram1  systty  tty0  tty10  tty12  tty3  tty5  tty7  tty9   ttyS1  ttyS3
mapper   ptmx  ram0  rtc   tty     tty1  tty11  tty2   tty4  tty6  tty8  ttyS0  ttyS2  zero
CentOS 6.x 下ramdisk文件解压和查看:
[root@xt-vhost1 tmp]# cat /etc/redhat-release
CentOS release 6.9 (Final)
[root@xt-vhost1 tmp]# mkdir test
[root@xt-vhost1 tmp]# cp -a /boot/initramfs-2.6.32-696.el6.x86_64.img test/
cd [root@xt-vhost1 tmp]# cd test/
[root@xt-vhost1 test]# ls
initramfs-2.6.32-696.el6.x86_64.img
[root@xt-vhost1 test]# file initramfs-2.6.32-696.el6.x86_64.img
initramfs-2.6.32-696.el6.x86_64.img: gzip compressed data, from Unix, last modified: Sun Nov 18 15:02:02 2018, max compression
[root@xt-vhost1 test]# mv initramfs-2.6.32-696.el6.x86_64.img initramfs-2.6.32-696.el6.x86_64.img.gz
[root@xt-vhost1 test]# gunzip initramfs-2.6.32-696.el6.x86_64.img.gz
[root@xt-vhost1 test]# file initramfs-2.6.32-696.el6.x86_64.img
initramfs-2.6.32-696.el6.x86_64.img: ASCII cpio archive (SVR4 with no CRC)
[root@xt-vhost1 test]# cpio -idm < initramfs-2.6.32-696.el6.x86_64.img
152169 blocks
[root@xt-vhost1 test]# ls
bin                     emergency  initqueue-finished                   lib      pre-mount    proc     tmp
cmdline                 etc        initqueue-settled                    lib64    pre-pivot    sbin     usr
dev                     init       initqueue-timeout                    mount    pre-trigger  sys      var
dracut-004-409.el6_8.2  initqueue  initramfs-2.6.32-696.el6.x86_64.img  netroot  pre-udev     sysroot
[root@xt-vhost1 test]# ls  bin/
awk       bash  cp    dd     gawk  gzip  loadkeys  mkdir  mount  plymouth   readlink  rmdir  setfont  sleep   uname
basename  cat   dash  dmesg  grep  ln    ls        mknod  mv     plymouthd  rm        sed    sh       umount
[root@xt-vhost1 test]# ls lib/modules/2.6.32-696.el6.x86_64/kernel/drivers/scsi/
3w-9xxx.ko  bfa             hv_storvsc.ko        libiscsi.ko  pm8001         scsi_tgt.ko              sd_mod.ko
3w-sas.ko   bnx2fc          imm.ko               libsas       pmcraid.ko     scsi_transport_fc.ko     smartpqi
3w-xxxx.ko  device_handler  initio.ko            lpfc         ppa.ko         scsi_transport_iscsi.ko  sr_mod.ko
aacraid     fcoe            ips.ko               megaraid     qla2xxx        scsi_transport_sas.ko    stex.ko
aic7xxx     fnic            isci                 mpt3sas      qla4xxx        scsi_transport_spi.ko    sym53c8xx_2
aic94xx     hpsa.ko         iscsi_boot_sysfs.ko  mvsas        raid_class.ko  scsi_transport_srp.ko    virtio_scsi.ko
arcmsr      hptiop.ko       libfc                osd          scsi_debug.ko  scsi_wait_scan.ko        vmw_pvscsi.ko
CentOS 7.x ramdisk文件解压和查看:
[root@localhost test]# ls bin/
bash                dracut-emergency    dracut-pre-udev  journalctl  loginctl  mv        rm       stty              teamnl   vi
cat                 dracut-initqueue    echo             kbd_mode    ls        ping      sed      systemctl         tr
cp                  dracut-mount        findmnt          kmod        mkdir     ping6     setfont  systemd-cgls      true
dmesg               dracut-pre-mount    flock            less        mkfifo    plymouth  setsid   systemd-tmpfiles  udevadm
dracut-cmdline      dracut-pre-pivot    grep             ln          mknod     ps        sh       teamd             umount
dracut-cmdline-ask  dracut-pre-trigger  gzip             loadkeys    mount     readlink  sleep    teamdctl          uname
[root@localhost test]# ls lib/
dracut/        fs-lib.sh      modprobe.d/    net-lib.sh     systemd/
dracut-lib.sh  kbd/           modules/       sysctl.d/      udev/
[root@localhost test]# ls lib/modules/
3.10.0-229.el7.x86_64
[root@localhost test]# ls lib/modules/3.10.0-229.el7.x86_64/
kernel         modules.alias.bin  modules.builtin.bin  modules.dep.bin  modules.order    modules.symbols
modules.alias  modules.builtin    modules.dep          modules.devname  modules.softdep  modules.symbols.bin
[root@localhost test]# ls lib/modules/3.10.0-229.el7.x86_64/kernel/drivers/
ata  block  cdrom  gpu  i2c  md  message  net  scsi
[root@localhost test]# ls lib/modules/3.10.0-229.el7.x86_64/kernel/drivers/scsi/
fcoe  libfc  libiscsi.ko  scsi_tgt.ko  scsi_transport_fc.ko  scsi_transport_iscsi.ko  scsi_transport_spi.ko  sd_mod.ko  sr_mod.ko
[root@localhost test]# ls -l init
lrwxrwxrwx 1 root root 23 Nov 18 23:08 init -> usr/lib/systemd/systemd
[root@localhost test]# ls -l usr/
total 20
drwxr-xr-x 2 root root 4096 Nov 18 23:08 bin
drwxr-xr-x 9 root root  153 Nov 18 23:08 lib
drwxr-xr-x 4 root root 8192 Nov 18 23:08 lib64
drwxr-xr-x 2 root root 4096 Nov 18 23:08 sbin
drwxr-xr-x 5 root root   50 Nov 18 23:08 share
[root@localhost test]# ls -l usr/lib
total 64
drwxr-xr-x 3 root root   146 Nov 18 23:08 dracut
-rwxr-xr-x 1 root root 31088 Mar  6  2015 dracut-lib.sh
-rwxr-xr-x 1 root root  6347 Sep 12  2013 fs-lib.sh
drwxr-xr-x 6 root root    72 Nov 18 23:08 kbd
drwxr-xr-x 2 root root   106 Nov 18 23:08 modprobe.d
drwxr-xr-x 3 root root    34 Nov 18 23:08 modules
-rwxr-xr-x 1 root root 19438 Mar  6  2015 net-lib.sh
drwxr-xr-x 2 root root    49 Nov 18 23:08 sysctl.d
drwxr-xr-x 4 root root  4096 Nov 18 23:08 systemd
drwxr-xr-x 3 root root    62 Nov 18 23:08 udev
启动流程概要:
POST(加电自检)
– BIOS(硬件检测,找到启动的设备) – MBR(Bootloader) – GRUB(查看并加载内核) – Kernel(可能要记住ramdisk,挂载rootfs,加载init程序) – 用户空间启动初始化工作(init程序通过不同机制来事先)
三、CentOS下grub介绍
3.1、grub基础配置知识介绍
以CentOS 5.x为例简单说明。
grub legacy:
(1) phase 1,读取mbr;
(2) phase 1.5,读取mbr之后的扇区,让phase 1中的bootloader能识别分区上的文件系统;
(3) phase 2,/boot/grub
grub的配置文件:/boot/grub/grub.conf
[root@xiaotang test]# ls -l /etc/grub.conf
lrwxrwxrwx 1 root root 22 11-13 06:06 /etc/grub.conf -> ../boot/grub/grub.conf
[root@xiaotang test]# cat /etc/grub.conf
# grub.conf generated by anaconda
#
# Note that you do not have to rerun grub after making changes to this file
# NOTICE:  You have a /boot partition.  This means that
#          all kernel and initrd paths are relative to /boot/, eg.
#          root (hd0,0)
#          kernel /vmlinuz-version ro root=/dev/sda3
#          initrd /initrd-version.img
#boot=/dev/sda
default=0
timeout=5
splashimage=(hd0,0)/grub/splash.xpm.gz
hiddenmenu
title CentOS (2.6.18-398.el5)
	root (hd0,0)
	kernel /vmlinuz-2.6.18-398.el5 ro root=LABEL=/
	initrd /initrd-2.6.18-398.el5.img
phase 2及内核等通常放置于一个基本磁盘分区,其作用:
(1) 提供菜单、并提供交互式接口
e:编辑模式,用于编辑菜单;
c:命令模式,交互式接口;
(2) 加载用户选择的内核或操作系统
允许传递参数给内核;
可隐藏此菜单;
(3) 为菜单提供保护机制
为编辑菜单进行认证;
为启用内核或操作系统进行认证。
如何识别设备:
(hd#,#):
hd#: 磁盘编号,用数字表示;从0开始编号;
#: 分区编号,用数字表示; 从0开始编号;
例如:(hd0,0)
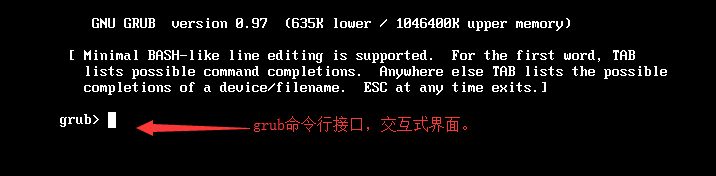
grub命令行接口:
help: 获取帮助列表
help KEYWORD: 详细帮助信息
find (hd#,#)/PATH/TO/SOMEFILE:
root (hd#,#)
kernel /PATH/TO/KERNEL_FILE: 设定本次启动时用到的内核文件;额外还可以添加许多内核支持使用的cmdline参数;
	例如:init=/path/to/init, selinux=0
initrd /PATH/TO/INITRAMFS_FILE: 设定为选定的内核提供额外文件的ramdisk;
boot: 引导启动选定的内核;

手动在grub命令行接口启动系统:
	grub> root (hd#,#)
	grub> kernel /vmlinuz-VERSION-RELEASE ro root=/dev/DEVICE
	grub> initrd /initramfs-VERSION-RELEASE.img
    grub> boot
配置文件注解:
配置项:
	default=#: 设定默认启动的菜单项;单项(title)编号从0开始;
	timeout=#:指定菜单项等待选项选择的时长;
	splashimage=(hd#,#)/PATH/TO/XPM_PIC_FILE:指明菜单背景图片文件路径;
	hiddenmenu:隐藏菜单;
	password [--md5] STRING: 菜单编辑认证;
	title TITLE:定义菜单项“标题”, 可出现多次;
		root (hd#,#):grub查找stage2及kernel文件所在设备分区;为grub的“根”;
		kernel /PATH/TO/VMLINUZ_FILE [PARAMETERS]:启动的内核
		initrd /PATH/TO/INITRAMFS_FILE: 内核匹配的ramfs文件;
		password [--md5] STRING: 启动选定的内核或操作系统时进行认证;
[root@xiaotang test]# cat /etc/grub.conf
# grub.conf generated by anaconda
#
# Note that you do not have to rerun grub after making changes to this file
# NOTICE:  You have a /boot partition.  This means that
#          all kernel and initrd paths are relative to /boot/, eg.
#          root (hd0,0)
#          kernel /vmlinuz-version ro root=/dev/sda3
#          initrd /initrd-version.img
#boot=/dev/sda
default=0   #第一个菜单,从0开始
timeout=5  #菜单项等待选项选择的时长为5秒;
splashimage=(hd0,0)/grub/splash.xpm.gz #第一块硬盘第一个分区下有存放菜单背景图片文件路径;
hiddenmenu  #表示隐藏grub菜单,要求用户操作键盘才显示菜单,若省略此项表示开启
title CentOS (2.6.18-398.el5)  #菜单的标题
	root (hd0,0) #grub查找stage2及kernel文件所在设备分区;为grub的“根”。第一块硬盘的第一个分区上;
	kernel /vmlinuz-2.6.18-398.el5 ro root=LABEL=/   #启动加载真正的内核以及传递的参数,只读加载内核。这里的根(/)是相对于grub而言的(及/boot),也就是实际操作系统启动好后,常见的/boot/vmlinuz-xxx
	initrd /initrd-2.6.18-398.el5.img      #内核匹配的ramdisk文件,也是相对于grub的根而言的;
3.2、启动菜单介绍以及单用户模式启动系统(以CentOS 6.x为例)
启动界面:

图上可以看出,GRUB版本是0.97版本,符合我们之前说的GRUB 0.x。这个界面输入e可以编辑;输入a可以修改,输入c可以进入到grub交互式界面(命令行)。以上命令,输入后想返回,可以输入ESC键。
输入e后界面:

输入a后界面:

输入c后界面:
至于如何启动单用户模式,非常简单。
(1) 编辑grub菜单(选定要编辑的title,而后使用e命令);
(2) 在选定的kernel后附加
1, s, S或single都可以;
(3) 在kernel所在行,键入“b”命令;
第一步:

第二步:


第三步:
键入回车返回(不要ESC,否则传递的1就没有来),输入b引导;
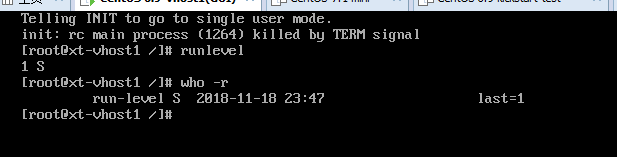
可以看到,启动后没有走登录验证程序,直接只有一个管理员用户root。
3.3、手动启动grub
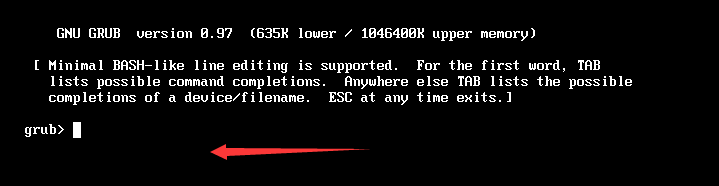
第一步:调出grub命令行交互式界面
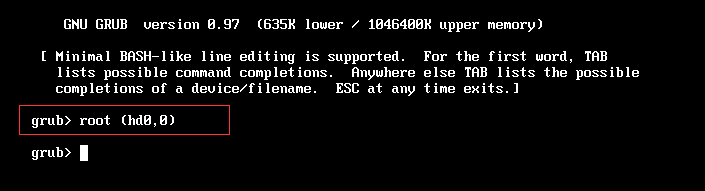
第二步:输入相关参数
我的启动分区为第一块硬盘的第一个分区上,所以应该调用root指令传入:
root (hd0,0)

由于我其他分区使用的是LVM,所以有事先截图一张,主要是要根分区(/dev/mapper/myvg1-lv5_rt)


键入回车,等待启动即可。
3.4、修复grub(轻量级错误演示)
1、不重启修复grub
#人为破坏硬盘(启动分区在这块硬盘)的前200个字节,MBR中的bootloader被破坏了
[root@xt-vhost1 ~]# dd if=/dev/zero of=/dev/sda bs=200 count=1
1+0 records in
1+0 records out
200 bytes (200 B) copied, 0.000142393 s, 1.4 MB/s
[root@xt-vhost1 ~]# sync
#修复
#方法1:
grub> root (hd0,0)
root (hd0,0)
 Filesystem type is ext2fs, partition type 0x83
grub> setup (hd0)   #安装到第一块硬盘上
setup (hd0)
 Checking if "/boot/grub/stage1" exists... no
 Checking if "/grub/stage1" exists... yes   #第一阶段文件要存在
 Checking if "/grub/stage2" exists... yes
 Checking if "/grub/e2fs_stage1_5" exists... yes
 Running "embed /grub/e2fs_stage1_5 (hd0)"...  27 sectors are embedded.
succeeded
 Running "install /grub/stage1 (hd0) (hd0)1+27 p (hd0,0)/grub/stage2 /grub/grub.conf"... succeeded
Done.

方法2:
[root@xt-vhost1 ~]# grub-install --help
Usage: grub-install [OPTION] install_device
Install GRUB on your drive.

  -h, --help              print this message and exit
  -v, --version           print the version information and exit
  --root-directory=DIR    install GRUB images under the directory DIR
                          instead of the root directory
  --grub-shell=FILE       use FILE as the grub shell
  --no-floppy             do not probe any floppy drive
  --force-lba             force GRUB to use LBA mode even for a buggy
                          BIOS
  --recheck               probe a device map even if it already exists
                          This flag is unreliable and its use is
                          strongly discouraged.

INSTALL_DEVICE can be a GRUB device name or a system device filename.

grub-install copies GRUB images into the DIR/boot directory specfied by
--root-directory, and uses the grub shell to install grub into the boot
sector.

Report bugs to <[email protected]>.
[root@xt-vhost1 ~]# grub-install --root-directory=/ /dev/sda
Installation finished. No error reported.
This is the contents of the device map //boot/grub/device.map.
Check if this is correct or not. If any of the lines is incorrect,
fix it and re-run the script `grub-install'.

# this device map was generated by anaconda
(hd0)     /dev/sda
2、重启修复grub
#人为破坏
[root@xt-vhost1 ~]# dd if=/dev/zero of=/dev/sda count=1 bs=200
1+0 records in
1+0 records out
200 bytes (200 B) copied, 0.00023147 s, 864 kB/s
[root@xt-vhost1 ~]# sync
#重启
[root@xt-vhost1 ~]# init 6

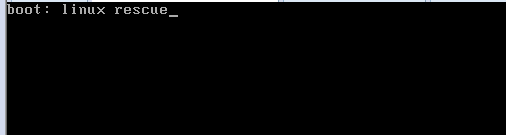
选择救援模式:
界面选择"Rescue installed system" 或在命令行(ESC键到命令行)接口输入"linux rescue";
输入OK,


是否要启用网络功能(如果有用到可以启动,没用到可以不用启动)

接下来的几步,就是真正的系统挂载到/mnt/sysimage


打开shell接口:


修复:


四、kickstart文件制作
4.1、kickstart配置说明
安装引导,指明ks文件的几种方式:
(1) 本地光盘
DVD drive: ks=cdrom:/PATH/TO/KICKSTART_FILE
(2) 本地硬盘
Hard Drive: ks=hd:/DEVICE/PATH/TO/KICKSTART_FILE
(3) http服务
HTTP Server: ks=http://HOST[:PORT]/PATH/TO/KICKSTART_FILE
(4) ftp服务
FTP Server: ks=ftp://HOST[:PORT]/PATH/TO/KICKSTART_FILE
(5) https服务
HTTPS Server: ks=https://HOST[:PORT]/PATH/TO/KICKSTART_FILE
kickstart文件的格式
命令段:
		指定各种安装前配置选项,如键盘类型等;
			必备命令
			可选命令
程序包段:
		指明要安装程序包,以及包组,也包括不安装的程序包;
			%packages
			@group_name
			package
			-package
			%end
脚本段:
		%pre:安装前脚本
			运行环境:运行安装介质上的微型Linux系统环境;

		%post:安装后脚本
			运行环境:安装完成的系统;


命令段中的必备命令:
		authconfig:认证方式配置
			authconfig  --enableshadow  --passalgo=sha512
		bootloader:定义bootloader的安装位置及相关配置
			bootloader  --location=mbr  --driveorder=sda  --append="crashkernel=auto rhgb quiet"
		keyboard:设置键盘类型
			keyboard us
		lang:语言类型
			lang  zh_CN.UTF-8
		part:分区布局;
			part  /boot  --fstype=ext4  --size=500
			part  pv.008002  --size=51200
		rootpw:管理员密码
			rootpw   --iscrypted  $6$4Yh15kMGDWOPtbbW$SGax4DsZwDAz4201.O97WvaqVJfHcISsSQEokZH054juNnoBmO/rmmA7H8ZsD08.fM.Z3Br/67Uffod1ZbE0s.
		timezone:时区
			timezone  Asia/Shanghai

补充:分区相关的其它指令
			clearpart:清除分区
				clearpart  --none  --drives=sda:清空磁盘分区;
			volgroup:创建卷组
				volgroup  myvg  --pesize=4096  pv.008002
			logvol:创建逻辑卷
				logvol  /home  --fstype=ext4  --name=lv_home  --vgname=myvg  --size=5120

			生成加密密码的方式:
				~]# openssl  passwd  -1  -salt `openssl rand -hex 4`

可选命令:
		install  OR  upgrade:安装或升级;
		text:安装界面类型,text为tui,默认为GUI
		network:配置网络接口
			network  --onboot yes  --device eth0  --bootproto dhcp  --noipv6
		firewall:防火墙
			firewall  --disabled
		selinux:SELinux
			selinux --disabled
		halt、poweroff或reboot:安装完成之后的行为;
		repo:指明安装时使用的repository;
			repo  --name="CentOS"   --baseurl=cdrom:sr0  --cost=100
		url: 指明安装时使用的repository,但为url格式;
			url --url=http://172.16.0.1/cobbler/ks_mirror/CentOS-6.7-x86_64/
4.2、通过ftp提供kickstart文件,通过http安装系统
CentOS 6.x作为实验环境;
(1) 确认能上网后,yum直接安装vsftpd
yum -y install vsftpd  #安装vsftpd软件包
service vsftpd start   #启动vsftpd服务
chkconfig iptables stop  #关闭防火墙
setenforce 0 #如果SElinx是Enforcing状态,请执行这个命令
#如果会配置SELINX以及iptables也可以自行配置,并非一样要关闭才能操作。
(2) 浏览器测试一下ftp能否访问

我打算利用匿名用户访问ftp,并把制作号的kickstart文件放入pub目录下。
(3) 制作kickstart文件
我这里之前有做好一份模板:
#/var/ftp/pub/路径下,这个是ftp默认匿名用户访问的公共区域
[root@xt-vhost1 pub]# cat ks4.cfg
#platform=x86, AMD64, 或 Intel EM64T
#version=DEVEL
# Firewall configuration
firewall --disabled
# Install OS instead of upgrade
install
# Use network installation
url --url="http://192.168.56.5/CentOS6.9/"
# Root password
rootpw --iscrypted $1$AHyedeKy$eziuGPFt3USidY1ztdrpI1
# System authorization information
auth  --useshadow  --passalgo=sha512
# Use graphical install
graphical
firstboot --disable
# System keyboard
keyboard us
# System language
lang en_US
# SELinux configuration
selinux --disabled
# Do not configure the X Window System
skipx
# Installation logging level
logging --level=info
# Reboot after installation
reboot
# System timezone
timezone  Asia/Shanghai
# Network information
etwork  --bootproto=static --device=eth0 --gateway=192.168.56.2 --ip=192.168.56.112 --nameserver=114.114.114.114 --netmask=255.255.255.0 --onboot=on
# System bootloader configuration
bootloader --append="crashkernel=auto rhgb quiet" --location=mbr --driveorder="sda"
# Clear the Master Boot Record
zerombr
# Partition clearing information
clearpart --all --initlabel
# Disk partitioning information
part /boot --fstype="ext4" --size=500
part swap --fstype="swap" --size=2048
part / --fstype="ext4" --grow --size=1

%packages
@base
@chinese-support
@core
@debugging
@directory-client
@internet-applications
@internet-browser
@java-platform
@network-file-system-client
@office-suite
@print-client
@server-platform
@server-policy
@workstation-policy
certmonger
cjkuni-fonts-ghostscript
device-mapper-persistent-data
genisoimage
krb5-workstation
mtools
oddjob
pam_krb5
pax
python-dmidecode
samba-winbind
sgpio
wodim

%end
(4) 安装图形化和kickstart配置工具相关的软件包
yum groupinstall "X Window System" "Desktop" #这个是与X环境和桌面相关的两个开发包组,如果要使用图形化工具定制kickstart文件,要先安装X环境(如果之前已经安装,请忽视)
yum install system-config-kickstart #安装kickstart管理工具
[root@xt-vhost1 pub]# rpm -qi system-config-kickstart
Name        : system-config-kickstart      Relocations: (not relocatable)
Version     : 2.8.6.6                           Vendor: CentOS
Release     : 1.el6                         Build Date: Fri 24 Jul 2015 06:17:15 AM CST
Install Date: Sun 18 Nov 2018 03:38:31 PM CST      Build Host: c6b8.bsys.dev.centos.org
Group       : System Environment/Base       Source RPM: system-config-kickstart-2.8.6.6-1.el6.src.rpm
Size        : 1955553                          License: GPLv2+
Signature   : RSA/SHA1, Sat 25 Jul 2015 04:39:02 AM CST, Key ID 0946fca2c105b9de
Packager    : CentOS BuildSystem <http://bugs.centos.org>
URL         : http://fedoraproject.org/wiki/SystemConfig/Tools
Summary     : A graphical interface for making kickstart files
Description :
Kickstart Configurator is a graphical tool for creating kickstart files.
#我这里已经安装过来,主要是用使用到system-config-kickstart这个命令工具;
利用xshell的集成工具,这里我直接在回话级别让其自动打开图形连接:


(5) kickstart配置文件图形管理工具简单截图
中文版本:
[root@xt-vhost1 pub]# echo $LANG
en_US.UTF-8
[root@xt-vhost1 pub]# LANG=zh_CN.UTF-8
[root@xt-vhost1 pub]# system-config-kickstart
基本配置:

安装方法:

引导程序选项:

分区信息:

网络设置:

安全验证:

防火墙配置:

显示配置:

软件包选择:

预安装脚本:

安装后脚本:

(6) 载入模板,定制化
打开我们的模板文件,载入配置:

基本配置栏:

安装方法:


引导选项设置:

分区设置:

网络配置:

验证:

防火墙配置:

显示配置:

软件包选择:

我这里没有实现准备安装前脚本和安装后脚本,所以保持默认没有配置。
文件-保存到指定路径即可。
最终的文件内容为:
[root@xt-vhost1 pub]# cat /var/ftp/pub/yanhui.cfg
#platform=x86, AMD64, 或 Intel EM64T
#version=DEVEL
# Firewall configuration
firewall --enabled --ssh
# Install OS instead of upgrade
install
# Use network installation
url --url="http://mirrors.aliyun.com/centos/6/os/x86_64/"
# Root password
rootpw --iscrypted $1$AHyedeKy$eziuGPFt3USidY1ztdrpI1
# System authorization information
auth  --useshadow  --passalgo=sha512
# Use graphical install
graphical
firstboot --disable
# System keyboard
keyboard us
# System language
lang en_US
# SELinux configuration
selinux --disabled
# Do not configure the X Window System
skipx
# Installation logging level
logging --level=info
# Reboot after installation
reboot
# System timezone
timezone  Asia/Shanghai
# Network information
network  --bootproto=static --device=eth0 --gateway=192.168.56.2 --ip=192.168.56.76 --nameserver=114.114.114.114 --netmask=255.255.255.0 --onboot=on
# System bootloader configuration
bootloader --append="crashkernel=auto rhgb quiet" --location=mbr --driveorder="sda"
# Clear the Master Boot Record
zerombr
# Partition clearing information
clearpart --all --initlabel
# Disk partitioning information
part /boot --fstype="ext4" --size=500
part swap --fstype="swap" --size=2048
part / --fstype="ext4" --grow --size=1

%packages
@base
@chinese-support
@core
@debugging
@directory-client
@internet-applications
@internet-browser
@java-platform
@network-file-system-client
@office-suite
@print-client
@server-platform
@server-policy
@workstation-policy
certmonger
cjkuni-fonts-ghostscript
device-mapper-persistent-data
genisoimage
krb5-workstation
mtools
oddjob
pam_krb5
pax
python-dmidecode
samba-winbind
sgpio
wodim

%end

(7) 另外新建一个虚拟机,然后指定iso镜像,启动安装
引导界面,选择第一个安装,键入ESC到命令行模式


键入参数:(由于要访问同一个网段内的ftp服务器,所以要传入ip和网关)

上图传参,如果要以文本模式安装,可以传入一个text。
中间省略一些截图,看到类似于这样的选项,表示正在通过http网络安装系统:


其他方法说明:
可以把已经安装好的系统,挂载光盘,把光盘内容复制到一个目录。然后通过http或nginx提供 这个站点的访问(要配置目录展开显示)。然后走局域网,走http安装,这样速度要比网络安装快速一点,或者自己制作光盘格式。
4.3、简单制作iso光盘演示
[root@xt-vhost1 ~]# mkdir myboot #创建光盘文件保存路径
[root@xt-vhost1 myboot]# mount /dev/sr0 /mnt/
mount: block device /dev/sr0 is write-protected, mounting read-only
[root@xt-vhost1 myboot]# cp -r /mnt/isolinux/ .  #复制自带光盘的isolinux目录到我们的创建的光盘工作路径
[root@xt-vhost1 myboot]# cd isolinux/
[root@xt-vhost1 isolinux]# ls
boot.cat  boot.msg  grub.conf  initrd.img  isolinux.bin  isolinux.cfg  memtest  splash.jpg  TRANS.TBL  vesamenu.c32  vmlinuz
[root@xt-vhost1 isolinux]# chmod +w *  #给isolinux目录下的文件写权限,因为本地的光盘是只读的
[root@xt-vhost1 isolinux]# vim isolinux.cfg   #可以定义更改配置的显示信息
[root@xt-vhost1 myboot]# ls
isolinux
[root@xt-vhost1 myboot]# cp /var/ftp/pub/yanhui.cfg . #把我们之前制作的kickstart文件拷贝至这个路径
[root@xt-vhost1 ~]# mkisofs -R -J -T -v --no-emul-boot -boot-load-size 4 --boot-info-table -V "CentOS 6.10 x86_64 boot" -c isolinux/boot.cat -b isolinux/isolinux.bin -o /root/boot.iso myboot/
#创建光盘文件,这里有点复杂,可以不用记
I: -input-charset not specified, using utf-8 (detected in locale settings)
genisoimage 1.1.9 (Linux)
Scanning myboot/
Scanning myboot/isolinux
Excluded: myboot/isolinux/TRANS.TBL
Excluded by match: myboot/isolinux/boot.cat
Writing:   Initial Padblock                        Start Block 0
Done with: Initial Padblock                        Block(s)    16
Writing:   Primary Volume Descriptor               Start Block 16
Done with: Primary Volume Descriptor               Block(s)    1
Writing:   Eltorito Volume Descriptor              Start Block 17
Size of boot image is 4 sectors -> No emulation
Done with: Eltorito Volume Descriptor              Block(s)    1
Writing:   Joliet Volume Descriptor                Start Block 18
Done with: Joliet Volume Descriptor                Block(s)    1
Writing:   End Volume Descriptor                   Start Block 19
Done with: End Volume Descriptor                   Block(s)    1
Writing:   Version block                           Start Block 20
Done with: Version block                           Block(s)    1
Writing:   Path table                              Start Block 21
Done with: Path table                              Block(s)    4
Writing:   Joliet path table                       Start Block 25
Done with: Joliet path table                       Block(s)    4
Writing:   Directory tree                          Start Block 29
Done with: Directory tree                          Block(s)    2
Writing:   Joliet directory tree                   Start Block 31
Done with: Joliet directory tree                   Block(s)    2
Writing:   Directory tree cleanup                  Start Block 33
Done with: Directory tree cleanup                  Block(s)    0
Writing:   Extension record                        Start Block 33
Done with: Extension record                        Block(s)    1
Writing:   The File(s)                             Start Block 34
 21.94% done, estimate finish Mon Nov 19 01:34:47 2018
 43.79% done, estimate finish Mon Nov 19 01:34:49 2018
 65.71% done, estimate finish Mon Nov 19 01:34:48 2018
 87.57% done, estimate finish Mon Nov 19 01:34:48 2018
Total translation table size: 4705
Total rockridge attributes bytes: 1442
Total directory bytes: 2048
Path table size(bytes): 26
Done with: The File(s)                             Block(s)    22659
Writing:   Ending Padblock                         Start Block 22693
Done with: Ending Padblock                         Block(s)    150
Max brk space used 0
22843 extents written (44 MB)
[root@xt-vhost1 ~]# ls -l boot.iso
-rw-r--r-- 1 root root 46782464 11月 19 01:34 boot.iso
[root@xt-vhost1 ~]# file boot.iso
boot.iso: ISO 9660 CD-ROM filesystem data 'CentOS 6.10 x86_64 boot' (bootable)
ps:光盘使用,就不演示了。