要点:
跨域问题
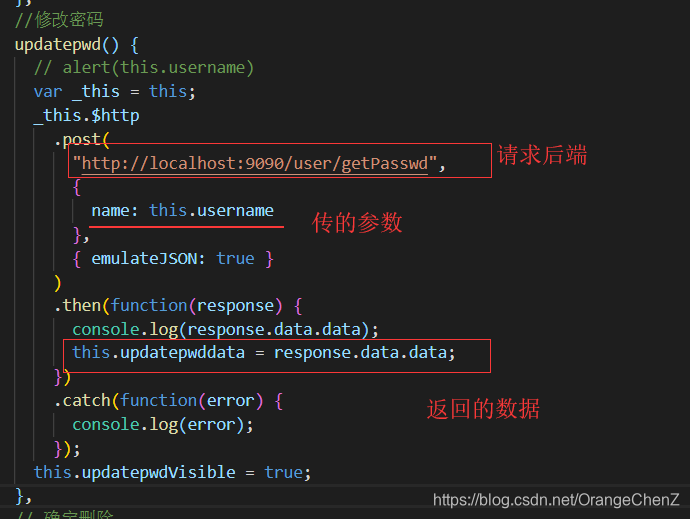
前端请求数据
后端返回数据
问题:
Failed to load resource: net::ERR_CONNECTION_REFUSED
这个问题我是因为后端服务没有启动,报错的;
跨域问题:
Access to XMLHttpRequest at ‘http://localhost:9090/guidance/findGuidancePage’ from origin ‘http://localhost:8000’ has been blocked by CORS policy: No ‘Access-Control-Allow-Origin’ header is present on the requested resource.
解决办法1:
直接将vue打包(vue run build)放到webapp的路径下,就不用担心跨域问题了;
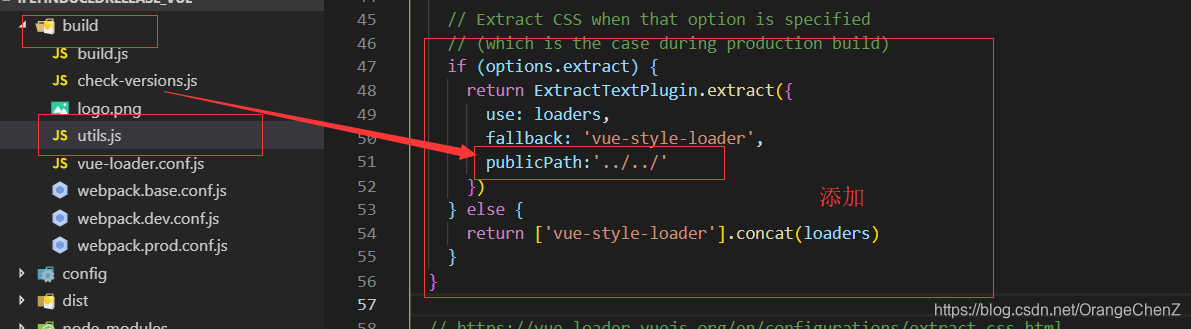
打包注意点:
修改build中的utils.js
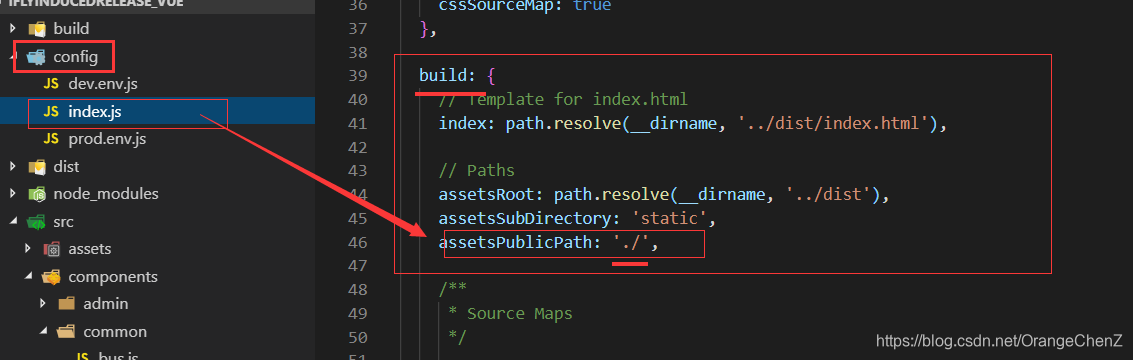
修改config中index.js
打包好,将dist文件夹中的文件拷贝到webapp中;
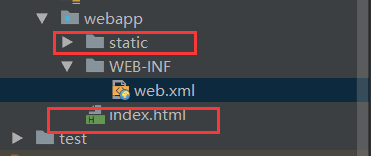
修改web.xml文件的启动首页:
  <welcome-file-list>
    <welcome-file>index.html</welcome-file>
  </welcome-file-list>
解决办法2:
在后端解决跨域问题:
在pom文件中加入:
<dependency>
            <groupId>com.thetransactioncompany</groupId>
            <artifactId>cors-filter</artifactId>
            <version>2.5</version>
        </dependency>
在配置文件web.xml中拦截进行处理:
- 配置1
<!--跨域-->
  <filter>
  <filter-name>corsFilter</filter-name>
  <filter-class>com.thetransactioncompany.cors.CORSFilter</filter-class>
  </filter>
  <filter-mapping>
  <filter-name>corsFilter</filter-name>
  <url-pattern>/*</url-pattern>
  </filter-mapping>
- 配置1解决不了就用终极配置:
<!--加入跨域过滤器配置-->
  <filter>
    <filter-name>CORS</filter-name>
    <filter-class>com.thetransactioncompany.cors.CORSFilter</filter-class>
    <init-param>
      <param-name>cors.allowOrigin</param-name>
      <param-value>*</param-value>
    </init-param>
    <init-param>
      <param-name>cors.supportedMethods</param-name>
      <param-value>GET, POST, HEAD, PUT, DELETE</param-value>
    </init-param>
    <init-param>
      <param-name>cors.supportedHeaders</param-name>
      <param-value>Accept, Origin, X-Requested-With, Content-Type, Last-Modified</param-value>
    </init-param>
    <init-param>
      <param-name>cors.exposedHeaders</param-name>
      <param-value>Set-Cookie</param-value>
    </init-param>
    <init-param>
      <param-name>cors.supportsCredentials</param-name>
      <param-value>true</param-value>
    </init-param>
  </filter>
  <filter-mapping>
    <filter-name>CORS</filter-name>
    <url-pattern>/*</url-pattern>
  </filter-mapping>
搞定!
现在来看前端如何请求:
两种方式教会你如何请求;
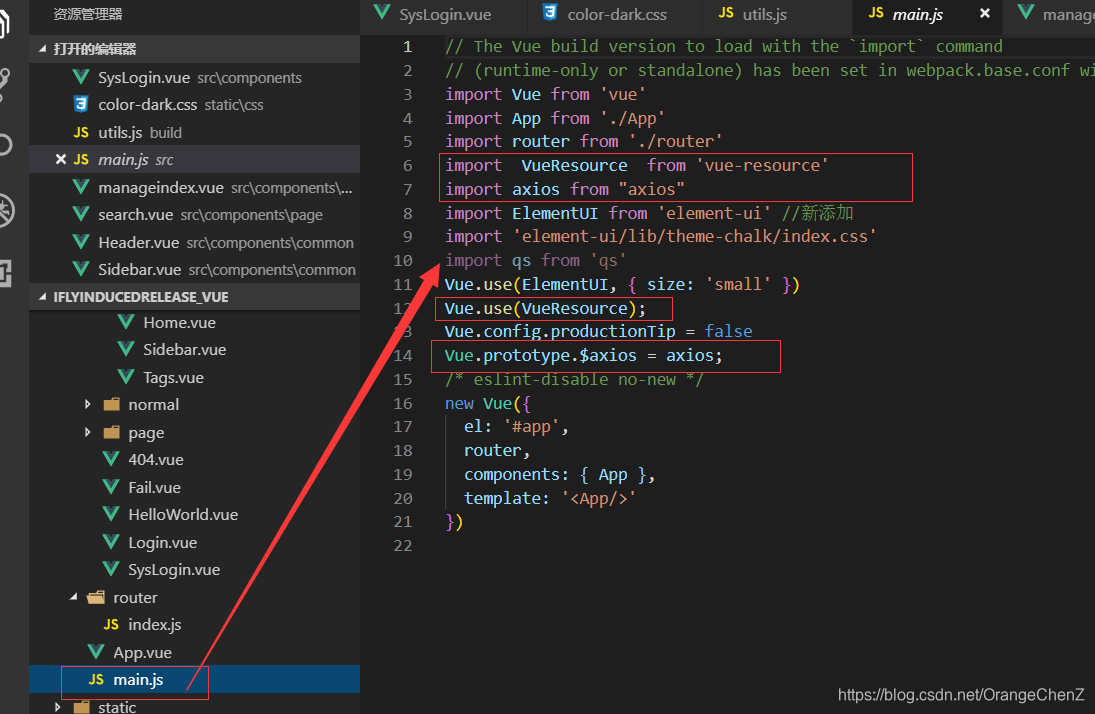
前期工作:你首先得安装vue-resource,axios
命令:npm install vue-resource,npm install axios --save(save的意思是只做开发用)
- 第一种请求方式:
post
 login: function () {
          var _this = this;
          console.log(_this.username+_this.password);
          _this.$http.post('http://localhost:8080/person/login', {
                username: _this.username,
                password: _this.password
          },{emulateJSON:true}
          )
            .then(function (response) {
              var errorcode = response.data.code;
              if (errorcode == "200") {
                _this.$router.push(
                  { path: '/HelloWorld',
                    query: {
                      user: response.data.data,
                    }
                  });
              } else {
                _this.$router.push({ path: '/Fail' });
              }
            })
            .catch(function (error) {
              console.log(error);
            });
        },
分析一下:
get
getData() {
      // 开发环境使用 easy-mock 数据,正式环境使用 json 文件
      if (process.env.NODE_ENV === "development") {
        this.url = "/ms/table/list";
      }
      this.$http
        .get(
          "http://localhost:9090/guidance/findGuidancePage",
          {
            page: this.cur_page
          },
          { emulateJSON: true }
        )
        .then(res => {
          console.log(res.data.data);
          this.tableData = res.data.data;
          // conso.log(this.tableData)
        });
    },
- 第二种请求方式:
axios.get('http://localhost:9090/guidance/findGuidancePage').then(function (response) {
  vm.newsContent = response.data;
  console.log(vm.newsContent);

})
  .catch(function (error) {
    console.log(error);
  });
后端返回数据:
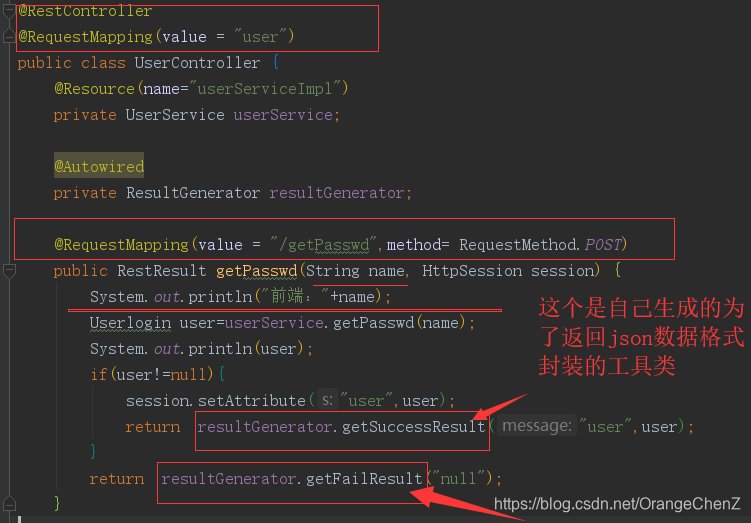
工具类代码:
https://blog.csdn.net/OrangeChenZ/article/details/86468642