在上一个博客中我们讲解了spring的对象获取和成员变量属性的注入方式;现在我们来讲解不适用配置文件而是直接在java中直接配置,这也是在springBoot流行之后,利用java类配置来取代xml文件配置的一种方式。
java类取代xml配置的详解:
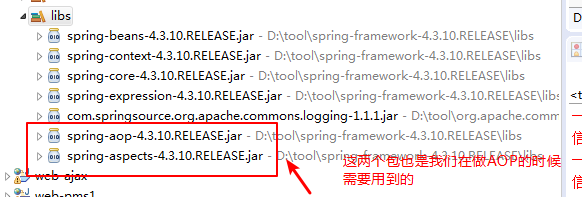
第一java配置需要引入的jar包:
第二:创建一个java类
在创建的java类中有两个注解要注意不要忘记:
一个是configuration;另一个是Bean。还要注意这两个注解所代表的意思
/**
*
*/
package com.sxt;
import org.springframework.context.annotation.Bean;
import org.springframework.context.annotation.Configuration;
/**
* @author ASUS
* 这是java的工具类来取代application.xml:
* 第一步:在该java类中添加一个注解configuration;注意这个注解所在的包;这一步加了注解就相当于application.xml
* 中只有<beans>这个标签内的内容是一样的
*
*/
@Configuration
public class javaConfig {
/**
* 这里也要加一个注解Bean,这里的注解就相当于在application.xml中的<bean class="com.sxt.Person /">一样
* 而且这里还可以给一个别名
* @return
*/
@Bean("a1")//这是给的别名
Person getPerson() {
return new Person();
}
}
第三:创建一个实体类
/**
*
*/
package com.sxt;
import java.util.List;
import java.util.Map;
import java.util.Properties;
/**
* @author ASUS
*
*/
public class Person {
private int age;
private String name;
//private Cat cat;
//private Map<String, Object> map;
private Properties properties;
@Override
public String toString() {
return "Person [age=" + age + ", name=" + name + ", properties=" + properties + "]";
}
public Person() {
System.out.println("我是无参构造!!");
}
//使用构造注入必须有带参构造方法
/*public Person(int age,String name) {
this.age=age;
this.name=name;
}*/
public int getAge() {
return age;
}
public void setAge(int age) {
this.age = age;
}
public String getName() {
return name;
}
public void setName(String name) {
this.name = name;
}
public void say() {
System.out.println("hello>>>>");
}
/**
* @return the properties
*/
public Properties getProperties() {
return properties;
}
/**
* @param properties the properties to set
*/
public void setProperties(Properties properties) {
this.properties = properties;
}
}
第四:在测试类可以看到
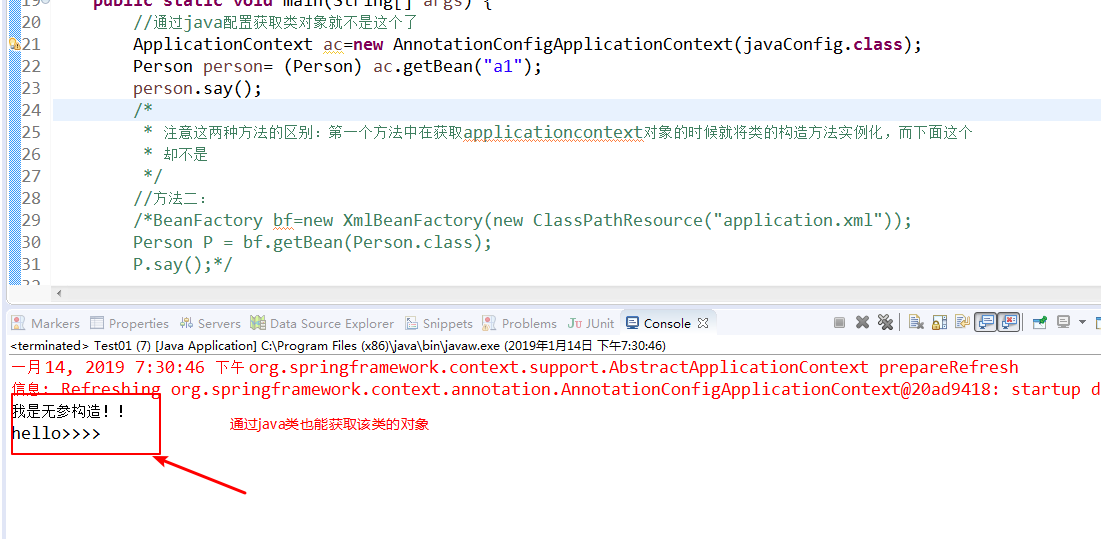
值得注意的是:(1)获取类对象的方法已经改变:ClassPathXmlApplicationContext变成了AnnotationConfigApplicationContext
(2)这个时候不需要配置文件application.xml
(3)需要在java类中添加两个注解了
(4)注解可以添加别名:通过别名也能获取类对象
利用spring解耦类之间的关系的通过设值注入的方式来简单的实现服务器dao,service,controller之间对象调用:
第一创建三个层之间的一个简单的方法;来模拟他们之间的调用关系:这里用到的是对象的设值注入
代码如下:
dao 层:
/**
*
*/
package com.sxt.dao;
/**
* @author ASUS
*
*/
public interface IUserDao {
public String add();
}
dao的实现层:
/**
*
*/
package com.sxt.daoimpl;
import com.sxt.dao.IUserDao;
/**
* @author ASUS
*
*/
public class UserDaoImpl implements IUserDao {
@Override
public String add() {
// TODO Auto-generated method stub
return "hahaha...";
}
}
service层:
/**
*
*/
package com.sxt.service;
/**
* @author ASUS
*
*/
public interface IUserService {
public String add();
}
service的实现层:
/**
*
*/
package com.sxt.serviceimppl;
import com.sxt.dao.IUserDao;
import com.sxt.daoimpl.UserDaoImpl;
import com.sxt.service.IUserService;
/**
* @author ASUS
*
*/
public class UserServiceImpl implements IUserService {
//在学习了spring框架之后的做法;这是某个类对象
private IUserDao dao;
public void setDao(IUserDao dao) {
this.dao = dao;
}
@Override
public String add() {
// TODO Auto-generated method stub
return dao.add();
}
/* //在没有实现spring框架之前的做法
private IUserDao dao=new UserDaoImpl();
@Override
public String add() {
// TODO Auto-generated method stub
return dao.add();
}
*/
}
controller层:
/**
*
*/
package com.sxt.controller;
import com.sxt.service.IUserService;
/**
* @author ASUS
*
*/
public class UserController {
private IUserService service;
public void setService(IUserService service) {
this.service = service;
}
public String add() {
return service.add();
}
}
配置文件:
<bean class="com.sxt.daoimpl.UserDaoImpl" id="userimpl"/>
<bean class="com.sxt.serviceimppl.UserServiceImpl" id="serviceimpl">
<property name="dao" ref="userimpl"></property>
</bean>
<bean class="com.sxt.controller.UserController">
<property name="service" ref="serviceimpl"></property>
</bean>
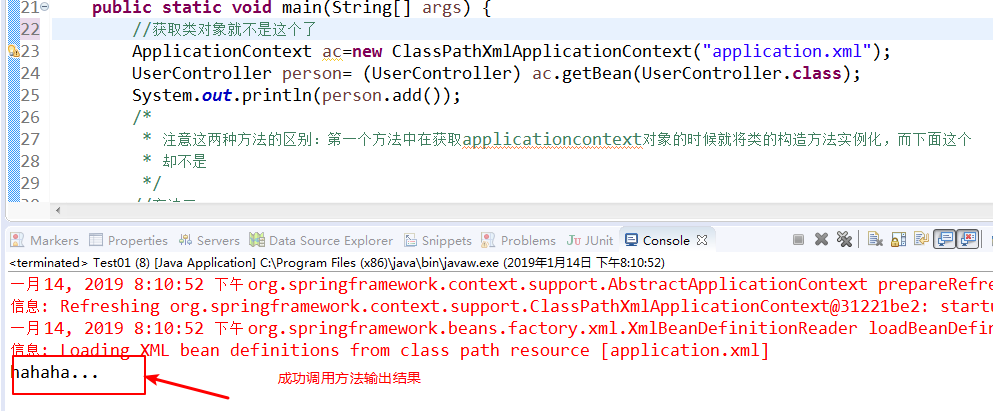
测试类:
但是,我们会发现一个问题,那就是配置文件中代码太多了,不方便管理;所以我们要知道自动配置。
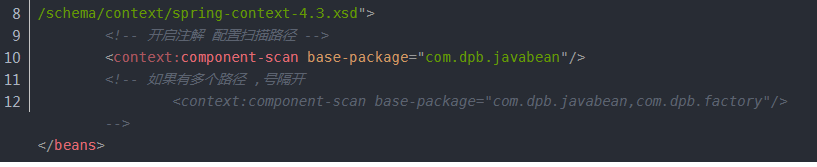
第一步:添加扫描路径:需要扫描的类必须在指定的路径中,如果不在的话会报错;在这里要在namespace中选择context;这种扫描是一种范围的扫描,只要在该包下的类都会被扫描
第二步:在相关类加一个component注解;这样就不用去配置文件注释了。
第三步:直接测试
将上面的案例的配置文件的修改成自动配置
然后在响应的三个类中添加两个注解:
/**
*
*/
package com.sxt.controller;
import org.springframework.beans.factory.annotation.Autowired;
import org.springframework.stereotype.Component;
import com.sxt.service.IUserService;
/**
* @author ASUS
*
*/
@Component//表示将注解交给spring容器管理
public class UserController {
@Autowired//表示spring容器在实例化的时候会自动到配置文件中给对应的对象赋值
private IUserService service;
public String add() {
return service.add();
}
}
注意这两个注解的不同之处;此外这里的类注解一定有四个
@Component:一般用在身份不明确的组件上
@Controller:用在controller层
@Service:用在service层
@Repository:用在数据库访问层
利用java类来代替配置文件的扫描
/**
*
*/
package com.sxt;
import org.springframework.context.annotation.ComponentScan;
import org.springframework.context.annotation.Configuration;
/**
* @author ASUS
*
*/
@Configuration
//添加扫描注解
@ComponentScan("com.sxt.bean")//多个扫描路径同样逗号隔开
public class javaConfig {
}
Profile:
在实际的工作中,在项目上线之前,可能需要不挺的在不同的测试环境中切换,
模拟DataSource:
/**
*
*/
package com.sxt;
import javax.xml.crypto.Data;
import org.springframework.context.annotation.Bean;
import org.springframework.context.annotation.Configuration;
import org.springframework.context.annotation.Profile;
import com.sxt.bean.DataSource;
/**
* @author ASUS
*
*/
@Configuration
public class javaConfig {
@Bean
@Profile("dev")
public DataSource devDs() {
return new DataSource("192.168.121.2","root", "123");
}
@Bean
@Profile("test")
public DataSource testDs() {
return new DataSource("192.168.142.3","admin", "admin");
}
}
java类:
/**
*
*/
package com.sxt;
import javax.xml.crypto.Data;
import org.springframework.context.annotation.Bean;
import org.springframework.context.annotation.Configuration;
import org.springframework.context.annotation.Profile;
import com.sxt.bean.DataSource;
/**
* @author ASUS
*
*/
@Configuration
public class javaConfig {
@Bean
@Profile("dev")
public DataSource devDs() {
return new DataSource("192.168.121.2","root", "123");
}
@Bean
@Profile("test")
public DataSource testDs() {
return new DataSource("192.168.142.3","admin", "admin");
}
}
测试类:
/**
*
*/
package com.sxt;
import org.springframework.context.annotation.AnnotationConfigApplicationContext;
import com.sxt.bean.DataSource;
/**
* @author ASUS
*
*/
public class Test01 {
public static void main(String[] args) {
//获取对象:方法一
AnnotationConfigApplicationContext ac=new AnnotationConfigApplicationContext(javaConfig.class);
//动态切换环境
ac.getEnvironment().setActiveProfiles("dev");
ac.register(javaConfig.class);
ac.refresh();
DataSource ds = ac.getBean(DataSource.class);
System.out.println(ds);
}
}
这个也可以中配置文件的方式:
<beans profile="dev">
<bean class="com.sxt.DataSource">
<constructor-arg name="url" value="192.168.121.3"/>
<constructor-arg name="username" value="root"/>
<constructor-arg name="password" value="123"/>
</bean>
</beans>
<beans profile="test">
<bean class="com.sxt.DataSource">
<constructor-arg name="url" value="192.168.121.2"/>
<constructor-arg name="username" value="admin"/>
<constructor-arg name="password" value="123"/>
</bean>
</beans>
测试类中:
ClassPathXmlApplicationContext ac=new ClassPathXmlApplicationContext("application.xml");
ac.getEnvironment().setActiveProfiles("dev");
ac.refresh();
DataSource bean = ac.getBean(DataSource.class);
System.out.println(bean);