版权声明:本文为博主原创文章,未经博主允许不得转载。 https://blog.csdn.net/yysyangyangyangshan/article/details/86443932
一、.net core环境准备
直接装visualstudio 2017,具体安装方法,自行下载安装即可。
二、.net core使用
用.net core编写一个webapi。
具体过程如下,
1、新建工程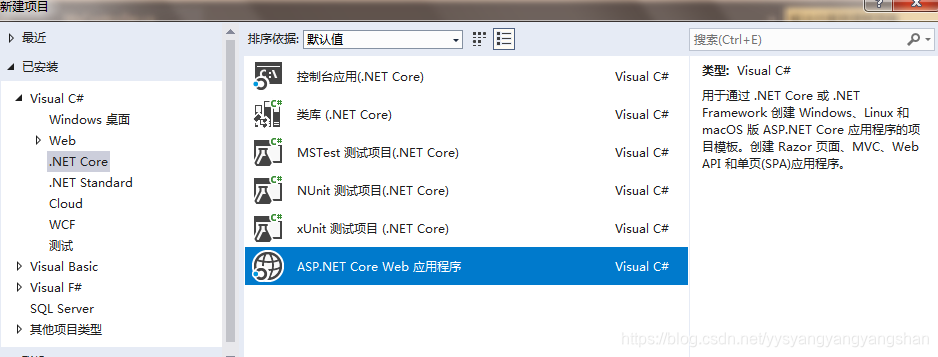
2、添加模型类
    public class MyItem
    {
        public long Id { get; set; }
        public string Name { get; set; }
        public bool IsComplete { get; set; }
    }
3、添加数据上下文
  public class MyContext: DbContext
    {
        public MyContext(DbContextOptions<MyContext> options)
            : base(options)
        {
        }
        public DbSet<MyItem> MyItems { get; set; }
    }
4、注册数据上下文
 public class Startup
    {
        public Startup(IConfiguration configuration)
        {
            Configuration = configuration;
        }

        public IConfiguration Configuration { get; }

        // This method gets called by the runtime. Use this method to add services to the container.
        public void ConfigureServices(IServiceCollection services)
        {
            //我的新增代码
            services.AddDbContext<MyContext>(opt =>
               opt.UseInMemoryDatabase("TodoList"));
            services.AddMvc().SetCompatibilityVersion(CompatibilityVersion.Version_2_2);
        }

        // This method gets called by the runtime. Use this method to configure the HTTP request pipeline.
        public void Configure(IApplicationBuilder app, IHostingEnvironment env)
        {
            if (env.IsDevelopment())
            {
                app.UseDeveloperExceptionPage();
            }
            else
            {
                // The default HSTS value is 30 days. You may want to change this for production scenarios, see https://aka.ms/aspnetcore-hsts.
                app.UseHsts();
            }

            app.UseHttpsRedirection();
            app.UseMvc();
        }
    }
5、添加控制器及相关方法
添加get,post,delete等方法
 public class MyController : Controller
    {
        private readonly MyContext _context;

        public MyController(MyContext context)
        {
            _context = context;

            if (_context.MyItems.Count() == 0)
            {
                _context.MyItems.Add(new MyItem {Id=99, Name = "我的自定义的控制器_99 "+DateTime.Now.ToLocalTime() });
                _context.MyItems.Add(new MyItem {Id =100, Name = "我的自定义的控制器_100 " + DateTime.Now.ToLocalTime() });
                _context.SaveChanges();
            }
        }

        // GET: api/Todo
        [HttpGet]
        public async Task<ActionResult<IEnumerable<MyItem>>> GetMyItems()
        {
            return await _context.MyItems.ToListAsync();
        }

        // GET: api/Todo/99
        [HttpGet("{id}")]
        public async Task<ActionResult<MyItem>> GetMyItem(long id)
        {
            var todoItem = await _context.MyItems.FindAsync(id);

            if (todoItem == null)
            {
                return NotFound();
            }

            return todoItem;
        }
        // POST: api/Todo
        [HttpPost]
        public async Task<ActionResult<MyItem>> PostMyItem(MyItem item)
        {
            _context.MyItems.Add(item);
            await _context.SaveChangesAsync();

            return CreatedAtAction("GetMyItem", new { id = item.Id , Name = item.Name}, item);
        }

        [HttpPut("{id}")]
        public async Task<IActionResult> PutMyItem(long id, MyItem item)
        {
            if (id != item.Id)
            {
                return BadRequest();
            }
            _context.Entry(item).State = EntityState.Modified;
            await _context.SaveChangesAsync();

            return NoContent();
        }

        // DELETE: api/Todo/101
        [HttpDelete("{id}")]
        public async Task<ActionResult<MyItem>> DeleteMyItem(long id)
        {
            var todoItem = await _context.MyItems.FindAsync(id);
            if (todoItem == null)
            {
                return NotFound();
            }

            _context.MyItems.Remove(todoItem);
            await _context.SaveChangesAsync();

            return todoItem;
        }
    }
6、设置路由
在刚新加的控制器上新增路由,比如
    [Route("api/My")]
    [ApiController]
    public class MyController : Controller
同时在launchSettings.json中设置,访问默认路径,比如
{
  "$schema": "http://json.schemastore.org/launchsettings.json",
  "iisSettings": {
    "windowsAuthentication": false,
    "anonymousAuthentication": true,
    "iisExpress": {
      "applicationUrl": "http://localhost:50228",
      "sslPort": 44364
    }
  },
  "profiles": {
    "IIS Express": {
      "commandName": "IISExpress",
      "launchBrowser": true,
      "launchUrl": "api/My",
      "environmentVariables": {
        "ASPNETCORE_ENVIRONMENT": "Development"
      }
    },
    "MyToDoApi": {
      "commandName": "Project",
      "launchBrowser": true,
      "launchUrl": "api/My",
      "applicationUrl": "https://localhost:5001;http://localhost:5000",
      "environmentVariables": {
        "ASPNETCORE_ENVIRONMENT": "Development"
      }
    }
  }
}
7、测试
在工程上启用调试,本文使用postman进行测试。
启用调试后,在浏览器页面中地址为:https://localhost:44364/api/My,显示内容如下,
[{"id":99,"name":"我的自定义的控制器_99 2019/1/13 23:26:24","isComplete":false},{"id":100,"name":"我的自定义的控制器_100 2019/1/13 23:26:24","isComplete":false}]7.1、测试get方法
GetMyItems调用如下,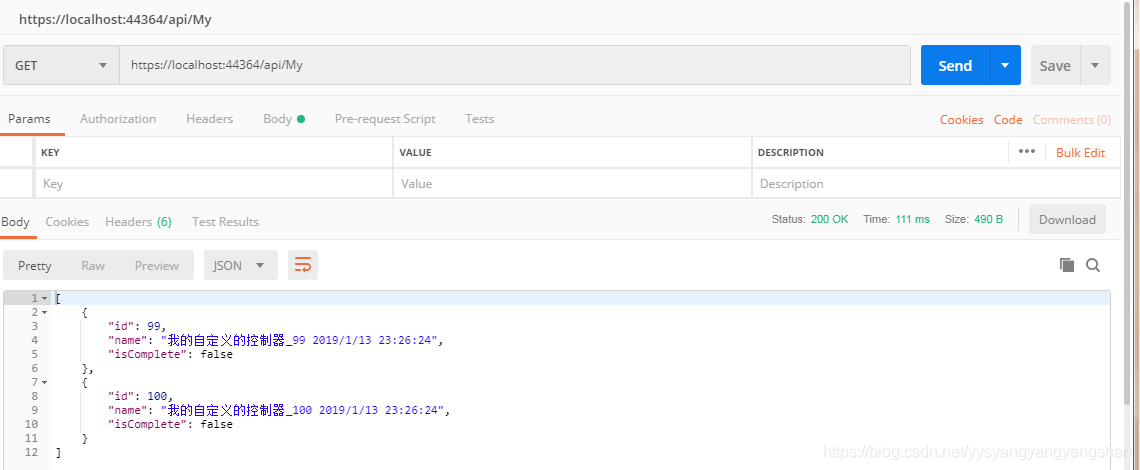
GetMyItem调用如下,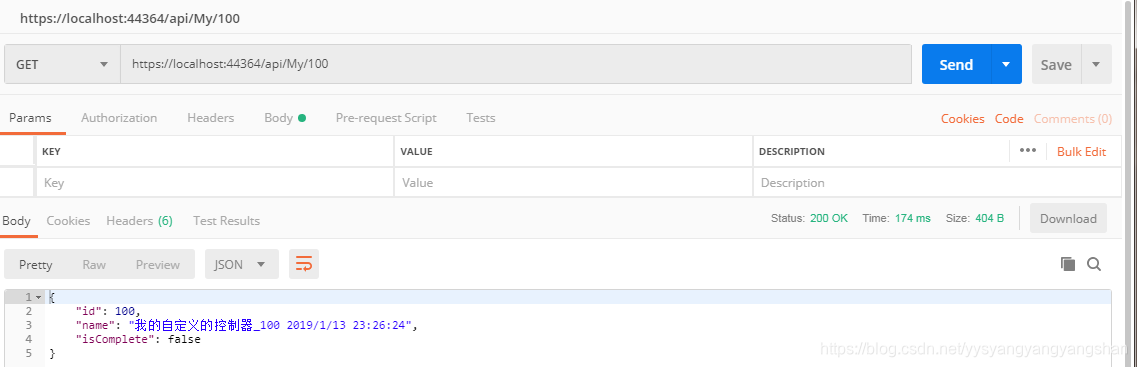
7.2、测试post方法
PostMyItem调用如下,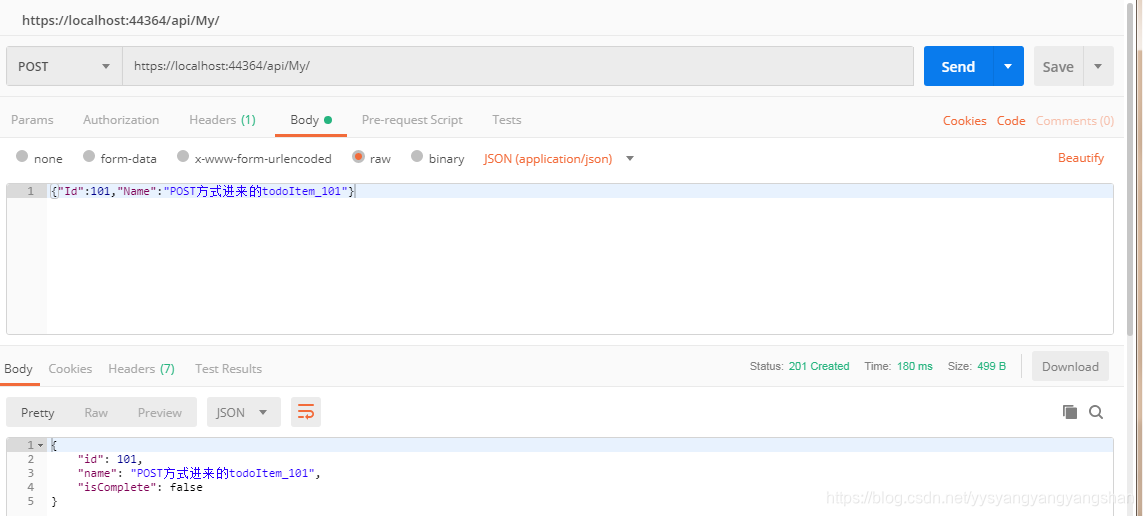
调用后,在浏览器页面验证如下
7.3、测试put方法
PutMyItem调用如下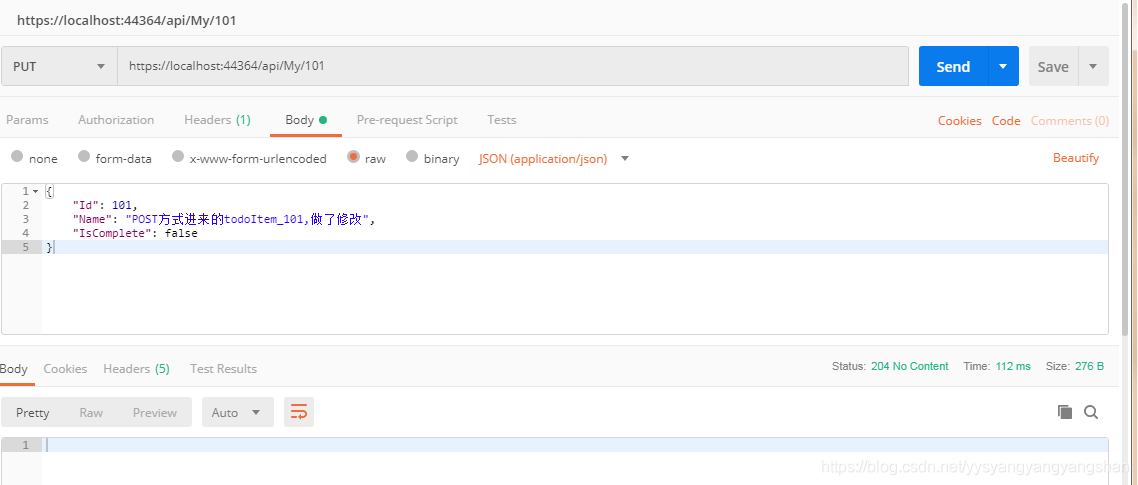
浏览器中验证,
7.4、测试delete方法
DeleteMyItem调用如下,
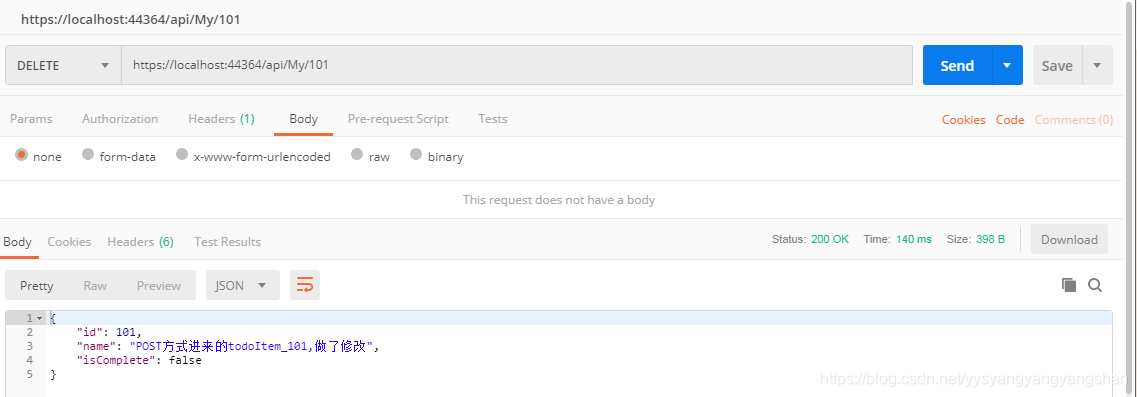
浏览器中验证,![]()