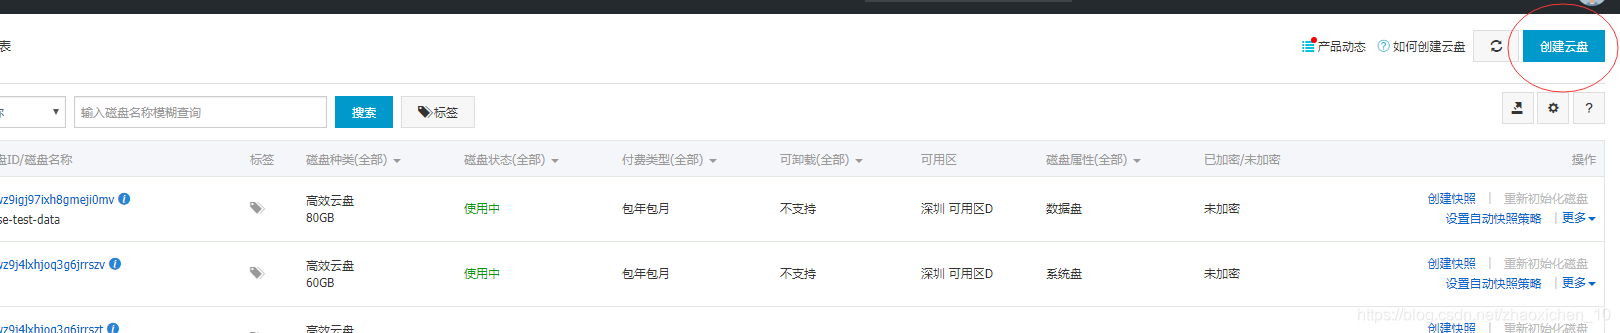
1、创建云盘
注意要购买和预挂载的服务器在同一个区的数据盘。
进入创建购买成功后,可以在列表中看到一块数据盘
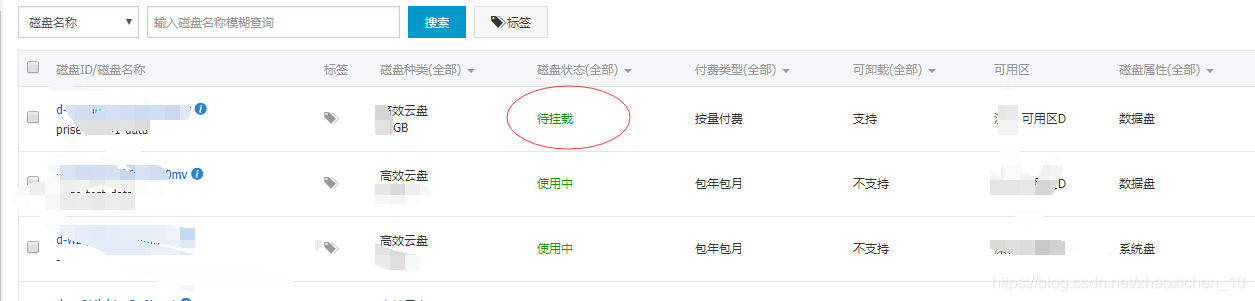
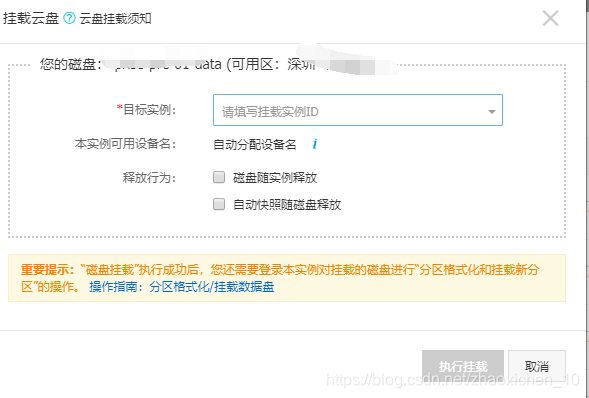
2、挂载数据盘
点击新创建的云盘右侧的“更多”,即可看到 挂载 字样,点击

3、格式化数据盘
如果您在创建 Linux 实例时添加了数据盘,需要先格式化数据盘并挂载文件系统后才能正常使用数据盘。本文描述如何用一块新的数据盘创建一个单分区数据盘并挂载文件系统。您还可以根据业务需要,为数据盘配置多分区。
本文仅适用于使用 fdisk 命令分区一块不大于 2 TiB 的数据盘。如果需要分区大于 2 TiB 的数据盘,请参阅 分区格式化大于2 TiB云盘。建议使用系统自带的工具进行分区操作。
警告
分区和格式化磁盘是高风险行为,请慎重操作。本文描述如何处理一块新购数据盘,如果您的数据盘上有数据,请务必 对数据盘创建快照 避免数据丢失。
云服务器 ECS 仅支持分区 数据盘,不支持分区 系统盘。强行使用第三方工具分区系统盘,可能引发未知风险,如系统崩溃和数据丢失等。
操作须知
单独 购买的数据盘 需要先 挂载数据盘,然后才能格式化。随实例一起购买的数据盘,无需挂载数据盘,直接格式化。
您需要知道挂载到实例的数据盘的设备名:您可以通过 ECS 管理控制台 > 云盘 > (磁盘 ID对应的)更多 > 修改属性 查看数据盘 设备名。设备名默认由系统分配,从 /dev/xvdb 递增排列,分布范围包括 /dev/xvdb−/dev/xvdz。
操作步骤
本示例采用一块新的 20 GiB 数据盘,设备名为 /dev/vdb,创建一个单分区数据盘并挂载一个 ext3 文件系统。使用了 I/O 优化实例,操作系统为 CentOS 6.8。
远程连接实例。
运行 fdisk -l 命令查看实例是否有数据盘。如果执行命令后,没有发现 /dev/vdb,表示您的实例没有数据盘,无需格式化数据盘,请忽略本文后续内容。
说明 如果数据盘设备名为 dev/xvd?,表示您使用的是非 I/O 优化实例。其中 ? 是 a−z 的任一个字母。
创建一个单分区数据盘,依次执行以下命令:
运行 fdisk /dev/vdb:分区数据盘。
输入 n 并按回车键:创建一个新分区。
输入 p 并按回车键:选择主分区。因为创建的是一个单分区数据盘,所以只需要创建主分区。
说明 如果要创建 4 个以上分区,您应该创建至少一个扩展分区,即选择 e(extended)。
输入分区编号并按回车键。因为这里仅创建一个分区,可以输入 1。
输入第一个可用的扇区编号:按回车键采用默认值 1。
输入最后一个扇区编号:因为这里仅创建一个分区,所以按回车键采用默认值。
输入 wq 并按回车键,开始分区。
[root@iXXXXXXX ~]# fdisk /dev/vdb
Device contains neither a valid DOS partition table, nor Sun, SGI or OSF disklabel
Building a new DOS disklabel with disk identifier 0x5f46a8a2.
Changes will remain in memory only, until you decide to write them.
After that, of course, the previous content won't be recoverable.
Warning: invalid flag 0x0000 of partition table 4 will be corrected by w(rite)
WARNING: DOS-compatible mode is deprecated. It's strongly recommended to
switch off the mode (command 'c') and change display units to
sectors (command 'u').
Command (m for help): n
Command action
e extended
p primary partition (1-4)
p
Partition number (1-4): 1
First cylinder (1-41610, default 1): 1
Last cylinder, +cylinders or +size{K,M,G} (1-41610, default 41610):
Using default value 41610
Command (m for help): wq
The partition table has been altered!
Calling ioctl() to re-read partition table.
Syncing disks.
查看新的分区:运行命令 fdisk -l。如果出现以下信息,说明已经成功创建了新分区 /dev/vdb1。
[root@iXXXXXXX ~]# fdisk -l
Disk /dev/vda: 42.9 GB, 42949672960 bytes
255 heads, 63 sectors/track, 5221 cylinders
Units = cylinders of 16065 * 512 = 8225280 bytes
Sector size (logical/physical): 512 bytes / 512 bytes
I/O size (minimum/optimal): 512 bytes / 512 bytes
Disk identifier: 0x00053156
Device Boot Start End Blocks Id System
/dev/vda1 * 1 5222 41942016 83 Linux
Disk /dev/vdb: 21.5 GB, 21474836480 bytes
16 heads, 63 sectors/track, 41610 cylinders
Units = cylinders of 1008 * 512 = 516096 bytes
Sector size (logical/physical): 512 bytes / 512 bytes
I/O size (minimum/optimal): 512 bytes / 512 bytes
Disk identifier: 0x5f46a8a2
Device Boot Start End Blocks Id System
/dev/vdb1 1 41610 20971408+ 83 Linux
在新分区上创建一个文件系统:运行命令 mkfs.ext3 /dev/vdb1。
本示例要创建一个 ext3 文件系统。您也可以根据自己的需要,选择创建其他文件系统,例如,如果需要在 Linux、Windows 和 Mac 系统之间共享文件,您可以使用 mkfs.vfat 创建 VFAT 文件系统。
创建文件系统所需时间取决于数据盘大小。
[root@iXXXXXXX ~]# mkfs.ext3 /dev/vdb1
mke2fs 1.41.12 (17-May-2010)
Filesystem label=
OS type: Linux
Block size=4096 (log=2)
Fragment size=4096 (log=2)
Stride=0 blocks, Stripe width=0 blocks
1310720 inodes, 5242852 blocks
262142 blocks (5.00%) reserved for the super user
First data block=0
Maximum filesystem blocks=4294967296
160 block groups
32768 blocks per group, 32768 fragments per group
8192 inodes per group
Superblock backups stored on blocks:
32768, 98304, 163840, 229376, 294912, 819200, 884736, 1605632, 2654208,
4096000
Writing inode tables: done
Creating journal (32768 blocks): done
Writing superblocks and filesystem accounting information: done
This filesystem will be automatically checked every 37 mounts or
180 days, whichever comes first. Use tune2fs -c or -i to override.
(建议)备份 etc/fstab:运行命令 cp /etc/fstab /etc/fstab.bak。
向 /etc/fstab 写入新分区信息:运行命令 echo /dev/vdb1 /mnt ext3 defaults 0 0 >> /etc/fstab。
说明 Ubuntu 12.04 不支持 barrier,所以对该系统正确的命令是: echo ‘/dev/vdb1 /mnt ext3 barrier=0 0 0’ >> /etc/fstab。
如果需要把数据盘单独挂载到某个文件夹,比如单独用来存放网页,请将以上命令 /mnt 替换成所需的挂载点路径。
查看 /etc/fstab 中的新分区信息:运行命令 cat /etc/fstab
[root@iXXXXXXX ~]# cat /etc/fstab
#
# /etc/fstab
# Created by anaconda on Thu Feb 23 07:28:22 2017
#
# Accessible filesystems, by reference, are maintained under '/dev/disk'
# See man pages fstab(5), findfs(8), mount(8) and/or blkid(8) for more info
#
UUID=3d083579-f5d9-4df5-9347-8d27925805d4 / ext4 defaults 1 1
tmpfs /dev/shm tmpfs defaults 0 0
devpts /dev/pts devpts gid=5,mode=620 0 0
sysfs /sys sysfs defaults 0 0
proc /proc proc defaults 0 0
/dev/vdb1 /mnt ext3 defaults 0 0
挂载文件系统:运行命令 mount /dev/vdb1 /mnt。
查看目前磁盘空间和使用情况:运行命令 df -h。如果出现新建文件系统的信息,说明挂载成功,可以使用新的文件系统了。
[root@iXXXXXXX ~]# mount /dev/vdb1 /mnt
[root@iXXXXXXX ~]# df -h
Filesystem Size Used Avail Use% Mounted on
/dev/vda1 40G 6.6G 31G 18% /
tmpfs 499M 0 499M 0% /dev/shm
/dev/vdb1 20G 173M 19G 1% /mnt
挂载操作完成后,不需要重启实例即可开始使用新的文件系统。