最近在学习安卓开源框架发现,很多的开源框架都使用到了注解处理器,例如EventBus3.0。本文通过一个简单的Demo来介绍如何使用注解处理器。如果喜欢的话,欢迎大家给star。
Demo需求描述
用户通过执行一个传入参数为A(类对象)的静态方法,该方法会最终把参数A中加了特定注解的所有方法执行一遍。
需求实现

整个项目分为四个部分:
- 注解–要使用的注解类型,这部分通常也可以放在lib中;
- 注解处理器–要对注解进行处理的逻辑,包括收集有特定注解类型的方法信息以及生成特定的java文件;
- lib–封装合适的接口,供具体调用方调用;
- sample–具体的调用方逻辑。
首先新建一个安卓工程,点击运行展示的是hello world。
注解
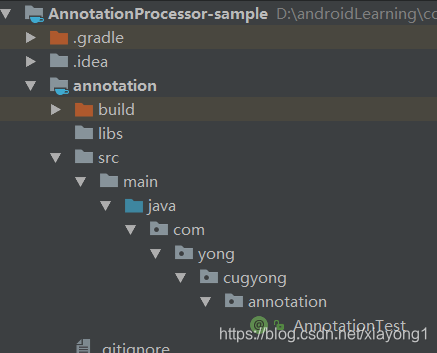
在上述工程中new->Module->Java Library,新建一个Java Library Module,命名为annotation。在该Module下创建一个文件AnnotationTest.java,
AnnotationTest.java里面代码如下:
@Retention(RetentionPolicy.CLASS)
@Target(ElementType.METHOD)
public @interface AnnotationTest {
    String name() default "test";
}
1、注解@Retention按生命周期来划分可分为3类:
- RetentionPolicy.SOURCE:注解只保留在源文件,当Java文件编译成class文件的时候,注解被遗弃;
- RetentionPolicy.CLASS:注解被保留到class文件,当jvm加载class文件时候被遗弃,这是默认的生命周期;
- RetentionPolicy.RUNTIME:注解不仅被保存到class文件中,jvm加载class文件之后,仍然存在。
这3个生命周期分别对应于:Java源文件(.java文件) —> .class文件 —> 内存中的字节码。
2、注解@Target表示修饰的注解能使用的范围,ElementType.METHOD表示@AnnotationTest注解只能作用在方法上。
注解处理器
参照上部分,在工程中new->Module->Java Library,新建一个Java Library Module, 在该Module下创建一个文件ProcessorTest.java。在该Module下的build.gradle的dependencies中添加如下配置:
// 自动为processor注册
implementation 'com.google.auto.service:auto-service:1.0-rc2'
// 该Module依赖上部分建立的annotation Module
implementation project(':annotation')
com.google.auto.service:auto-service:1.0-rc2依赖的作用是为注解处理器自动注册,它会生成META-INF文件夹。
注解处理器ProcessorTest的定义如下,其中@AutoService(Processor.class)就是build.gradle中加的依赖帮助其自动注册。
@AutoService(Processor.class) // 自动为ProcessorTest注册,生成META-INF文件
public class ProcessorTest extends AbstractProcessor{
注解处理器ProcessorTest主要包含以下几个部分:
@Override
public synchronized void init(ProcessingEnvironment processingEnvironment) {
    super.init(processingEnvironment);

    mMessager = processingEnvironment.getMessager();
    mFiler = processingEnvironment.getFiler();
}
init方法是注解处理器会自动调用的初始化方法,其中mFiler是用来生成java源文件的工具,mMessager是用来打印日志的,它们的具体使用会在后面介绍。
@Override
public Set<String> getSupportedAnnotationTypes() {
    Set<String> supportAnnotationTypes = new HashSet<>();
    supportAnnotationTypes.add(AnnotationTest.class.getCanonicalName());
    return supportAnnotationTypes;
}
getSupportedAnnotationTypes()方法返回该注解处理器支持的注解类型,这里返回的就是我们之前声明的新的注解类型@AnnotationTest。
@Override
public SourceVersion getSupportedSourceVersion() {
    return SourceVersion.latestSupported();
}
getSupportedSourceVersion()方法一般就按照上述实现就行。
@Override
public boolean process(Set<? extends TypeElement> annotations, RoundEnvironment roundEnvironment) {
	// 打印日志
    mMessager.printMessage(Diagnostic.Kind.NOTE, "process start");
    Map<String, List<String>> collectInfos = new HashMap<>();
    for (TypeElement annotation: annotations){
        Set<? extends Element> elements = roundEnvironment.getElementsAnnotatedWith(annotation);
        for (Element element: elements){
        	// 检查element是否符合我们定义的规范
            if (!checkValid(element)){
                mMessager.printMessage(Diagnostic.Kind.NOTE, "checkValid not pass");
                return false;
            }else {
                ExecutableElement executableElement = (ExecutableElement) element;
                // 获取被注解的方法所在的类
                TypeElement typeElement = (TypeElement) executableElement.getEnclosingElement();
                // 获取类的全名,包括包名
                String classFullName = typeElement.getQualifiedName().toString();
                // 被注解的方法的名字
                String methodName = executableElement.getSimpleName().toString();
                List<String> methods = collectInfos.get(classFullName);
                if (methods == null){
                    methods = new ArrayList<>();
                    collectInfos.put(classFullName, methods);
                }
                methods.add(methodName);
            }
        }
    }

    for (Map.Entry<String, List<String>> entry: collectInfos.entrySet()){
        mMessager.printMessage(Diagnostic.Kind.NOTE, entry.getKey());
        // 生成java源文件
        createJavaFile(entry.getKey(), entry.getValue());
    }

    return true;
}
process方法是我们的主要逻辑处理的地方,主要逻辑就是收集所有有@AnnotationTest注解的方法以及其所在的类信息,然后根据每个类信息,生成一个新的类文件,并在新的类文件的特定方法中调用所有关联的注解方法。生成java源文件将使用Filer对象,具体如何使用请下载demo看源代码。
注:
1、当你点击buid project时,注解处理器将会执行,而Messager对象打印出来的日志信息可以在Gradle Console窗口中看到。
2、如果你在该Module中使用中文注解,因为该Module为java library,可能会报GBK编码错误,解决办法是在该Module的build.gradle中添加如下代码:
//指定编译的编码
tasks.withType(JavaCompile){
    options.encoding = "UTF-8"
}
Lib
在工程中new->Module->Android Library ,新建一个Android Library Module,封装接口给调用方使用,具体逻辑请参考demo。
最终该demo的功能是点击Hello world文字,会依此执行MainActivity中使用@AnnotationTest注解的方法。