今天给大家带来的是BaseAdapter适配器的使用技巧。想来有过Android开发经验的开发者都知道Android适配器吧。没错,Android适配器就是将一些数据恰当的在view中显示,说白了就是数据和视图之间的桥梁。Android适配器有ArrayAdapter、SimpleAdapter、BaseAdapter等等。现在许多Android应用都要用到适配器,而BaseAdapter适配器相比其他的适配器更受开发者的喜爱。因为它可以按照开发者的自己的想法来定制自己的适配器,而不是固定死。当然BaseAdapter适配器也可以完成像ArrayAdapter、SimpleAdapter适配器一样的功能。本章主要是讲BaseAdapter适配器的使用方法。
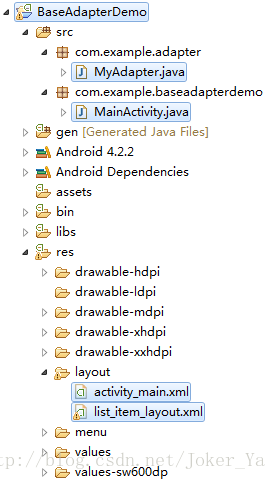
ok!一起来写一写一个简单的BaseAdapter的应用吧!新建名为BaseAdapterDemo的Android工程项目,目录如下:
先来看看主布局文件activity_main.xml:
[html] view plain copy
- <RelativeLayout xmlns:android="http://schemas.android.com/apk/res/android"
- xmlns:tools="http://schemas.android.com/tools"
- android:layout_width="match_parent"
- android:layout_height="match_parent"
- android:paddingBottom="@dimen/activity_vertical_margin"
- android:paddingLeft="@dimen/activity_horizontal_margin"
- android:paddingRight="@dimen/activity_horizontal_margin"
- android:paddingTop="@dimen/activity_vertical_margin"
- tools:context=".MainActivity" >
- <ListView
- android:id="@+id/listview"
- android:layout_width="match_parent"
- android:layout_height="wrap_content"
- />
- </RelativeLayout>
没错,就是那么简单。整个界面就一个ListView,用它来显示数据。
再来看看ListView显示的数据的布局文件list_item_layout.xml:
[html] view plain copy
- <?xml version="1.0" encoding="utf-8"?>
- <LinearLayout xmlns:android="http://schemas.android.com/apk/res/android"
- android:layout_width="match_parent"
- android:layout_height="match_parent"
- android:orientation="horizontal" >
- <ImageView
- android:id="@+id/imageview"
- android:layout_width="50dip"
- android:layout_height="50dip"
- />
- <TextView
- android:id="@+id/textview"
- android:layout_width="wrap_content"
- android:layout_height="match_parent"
- android:paddingTop="8dip"
- android:textSize="20sp"
- />
- <Button
- android:id="@+id/button"
- android:layout_width="wrap_content"
- android:layout_height="wrap_content"
- />
- </LinearLayout>
该布局文件也很简单,就一个ImageView,一个TextView和一个Button组成。用于ListView每一行的布局。
接下来就是整个应用的关键了,MyAdapter.java:
[java] view plain copy
- package com.example.adapter;
- import java.util.List;
- import java.util.Map;
- import com.example.baseadapterdemo.R;
- import android.content.Context;
- import android.view.LayoutInflater;
- import android.view.View;
- import android.view.ViewGroup;
- import android.widget.BaseAdapter;
- import android.widget.Button;
- import android.widget.ImageView;
- import android.widget.TextView;
- /**
- * MyAdapter继承BaseAdapter
- *
- * @author Joker_Ya
- *
- */
- public class MyAdapter extends BaseAdapter {
- private List<Map<String, Object>> datas;
- private Context mContext;
- /**
- * 构造函数
- *
- * @param datas
- * 需要绑定到view的数据
- * @param mContext
- * 传入上下文
- */
- public MyAdapter(List<Map<String, Object>> datas, Context mContext) {
- this.datas = datas;
- this.mContext = mContext;
- }
- @Override
- public int getCount() {
- // TODO Auto-generated method stub
- return datas.size();// 返回数据的总数
- }
- @Override
- public Object getItem(int position) {
- // TODO Auto-generated method stub
- return datas.get(position);// 返回在list中指定位置的数据的内容
- }
- @Override
- public long getItemId(int position) {
- // TODO Auto-generated method stub
- return position;// 返回数据在list中所在的位置
- }
- @Override
- public View getView(int position, View convertView, ViewGroup parent) {
- // TODO Auto-generated method stub
- final ViewHolder holder;
- if (convertView == null) {
- // 使用自定义的list_items作为Layout
- convertView = LayoutInflater.from(mContext).inflate(
- R.layout.list_item_layout, null);
- // 减少findView的次数
- holder = new ViewHolder();
- // 初始化布局中的元素
- holder.mImageView = (ImageView) convertView
- .findViewById(R.id.imageview);
- holder.mTextView = (TextView) convertView
- .findViewById(R.id.textview);
- holder.mButton = (Button) convertView.findViewById(R.id.button);
- convertView.setTag(holder);
- } else {
- holder = (ViewHolder) convertView.getTag();
- }
- // 从传入的数据中提取数据并绑定到指定的view中
- holder.mImageView.setImageResource((Integer) datas.get(position).get(
- "img"));
- holder.mTextView.setText(datas.get(position).get("title").toString());
- holder.mButton.setText(datas.get(position).get("button").toString());
- return convertView;
- }
- static class ViewHolder {
- ImageView mImageView;
- TextView mTextView;
- Button mButton;
- }
- }
MyAdapter类继承BaseAdapter,然后在getView()方法中设置ListView每一行的布局和数据绑定。其实也很简单,首先调用LayoutInflater的inflate()方法设置每一行的布局,然后得到布局中的各个元素,并把传入的数据设置在各个元素上即可。这样一来就完成自定义的Adapter。
最后是MainActivity.java
[java] view plain copy
- package com.example.baseadapterdemo;
- import java.util.ArrayList;
- import java.util.HashMap;
- import java.util.List;
- import java.util.Map;
- import android.app.Activity;
- import android.os.Bundle;
- import android.widget.ListView;
- import com.example.adapter.MyAdapter;
- /**
- * BaseAdapter使用技巧
- *
- * @author Joker_Ya
- *
- */
- public class MainActivity extends Activity {
- private ListView mListView;
- private MyAdapter myAdapter;
- private List<Map<String, Object>> list = new ArrayList<Map<String, Object>>();
- @Override
- protected void onCreate(Bundle savedInstanceState) {
- super.onCreate(savedInstanceState);
- setContentView(R.layout.activity_main);
- initData();// 初始化数据
- mListView = (ListView) findViewById(R.id.listview);
- myAdapter = new MyAdapter(list, this);
- // 设置mListView的适配器
- mListView.setAdapter(myAdapter);
- }
- /**
- * 模拟从网络上得到的数据
- */
- private void initData() {
- // TODO Auto-generated method stub
- Map<String, Object> map = new HashMap<String, Object>();
- map.put("img", R.drawable.su01);
- map.put("title", "数字零");
- map.put("button", "OPEN");
- list.add(map);
- map = new HashMap<String, Object>();
- map.put("img", R.drawable.su02);
- map.put("title", "数字一");
- map.put("button", "OPEN");
- list.add(map);
- map = new HashMap<String, Object>();
- map.put("img", R.drawable.su03);
- map.put("title", "数字二");
- map.put("button", "OPEN");
- list.add(map);
- map = new HashMap<String, Object>();
- map.put("img", R.drawable.su04);
- map.put("title", "数字三");
- map.put("button", "OPEN");
- list.add(map);
- map = new HashMap<String, Object>();
- map.put("img", R.drawable.su05);
- map.put("title", "数字四");
- map.put("button", "OPEN");
- list.add(map);
- map = new HashMap<String, Object>();
- map.put("img", R.drawable.su06);
- map.put("title", "数字五");
- map.put("button", "OPEN");
- list.add(map);
- map = new HashMap<String, Object>();
- map.put("img", R.drawable.su07);
- map.put("title", "数字六");
- map.put("button", "OPEN");
- list.add(map);
- map = new HashMap<String, Object>();
- map.put("img", R.drawable.su08);
- map.put("title", "数字七");
- map.put("button", "OPEN");
- list.add(map);
- map = new HashMap<String, Object>();
- map.put("img", R.drawable.su09);
- map.put("title", "数字八");
- map.put("button", "OPEN");
- list.add(map);
- map = new HashMap<String, Object>();
- map.put("img", R.drawable.su10);
- map.put("title", "数字九");
- map.put("button", "OPEN");
- list.add(map);
- }
- }
好了,主Activity内容很简单,就不多说了。这样一来整个应用就完成了,接下来就看看结果吧:
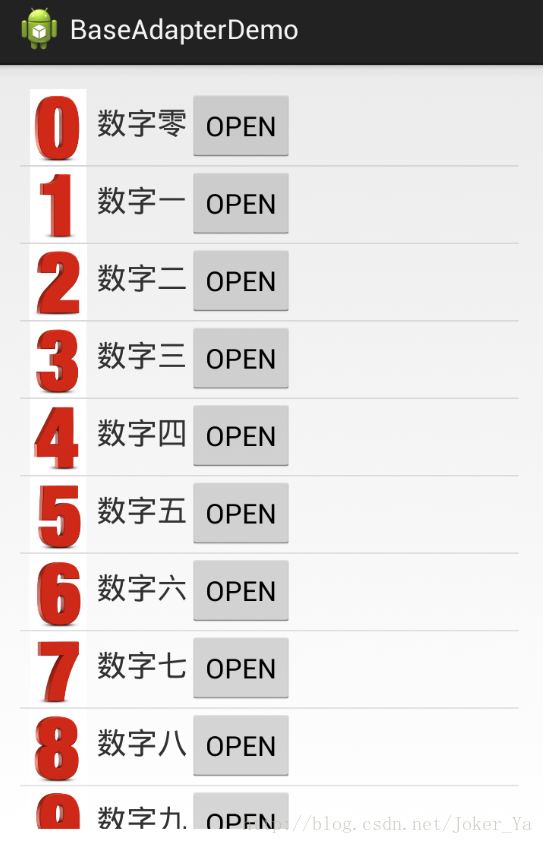
结果没有问题,和想象的一样。当然那个Button还是别点了,点了也没有用。因为我们没有写点击事件啊!
最后的最后附上源码下载地址: