开发中最流行的 commonjs、AMD、ES6、CMD 规范。
参考资料:
https://mp.weixin.qq.com/s/MPEhWlS9KiIc9I6Of5GpOQ
http://www.ruanyifeng.com/blog/2015/05/commonjs-in-browser.html
http://foio.github.io/requireJS/
https://github.com/ZhiCYue/requireJs-analysis/blob/master/require.js
学习笔记 + 原理分析
理解原理后,网上再搜集相关资料时,会对一些概念有更好的认识,比如:延时执行、立即执行、运行时、编译时等等。
再比如:“AMD是提前执行,CMD是延迟执行。” ,“CMD 推崇依赖就近,AMD 推崇依赖前置” 等等。
commonjs
Node 应用由模块组成,采用 CommonJS 模块规范。每个文件就是一个模块,有自己的作用域。在一个文件里面定义的变量、函数、类,都是私有的,对其他文件不可见。在服务器端,模块的加载是运行时同步加载的;在浏览器端,模块需要提前编译打包处理。
特点:
- 所有代码都运行在模块作用域,不会污染全局作用域。
- 模块可以多次加载,但是只会在第一次加载时运行一次,然后运行结果就被缓存了,以后再加载,就直接读取缓存结果。要想让模块再次运行,必须清除缓存。
- 模块加载的顺序,按照其在代码中出现的顺序。
基本语法:
- 暴露模块:module.exports = value 或 exports.xxx = value;
- 引入模块:require(xxx), 如果是第三方模块,xxx 为模块名;如果是自定义模块,xxx 为模块文件路径。
运行
- 服务端:node app.js
- 浏览器:借助 Browserify。参考: browserify js/src/app.js -o js/dist/bundle.js
记录点 1 CommonJS 模块的加载机制是,输入的是被输出的值的拷贝。也就是说,一旦输出一个值,模块内部的变化就影响不到这个值。
// lib.js
var counter = 3;
function incCounter() {
 counter++;
}
module.exports = {
 counter: counter,
 incCounter: incCounter,
};
// main.js
var counter = require('./lib').counter;
var incCounter = require('./lib').incCounter;

console.log(counter);  // 3
incCounter();
console.log(counter); // 3
记录点 2 浏览器用不支持 CommonJS 格式。要想让浏览器用上这些模块,必须转换格式。
浏览器不兼容CommonJS的根本原因,在于缺少四个Node.js环境的变量。
module
exports
require
global
只要能够提供这四个变量,浏览器就能加载 CommonJS 模块。
下面是一个简单的示例。
var module = {
  exports: {}
};

(function(module, exports) {
  exports.multiply = function (n) { return n * 1000 };
}(module, module.exports))

var f = module.exports.multiply;
f(5) // 5000
上面代码向一个立即执行函数提供 module 和 exports 两个外部变量,模块就放在这个立即执行函数里面。模块的输出值放在 module.exports 之中,这样就实现了模块的加载。
Browserify 的实现
请看一个例子,main.js 模块加载 foo.js 模块。
// foo.js
module.exports = function(x) {
  console.log(x);
};

// main.js
var foo = require("./foo");
foo("Hi");
使用下面的命令,就能将main.js转为浏览器可用的格式。
$ browserify main.js > compiled.js
browser 转换后的compiled.js 源码:
(function () {
  function r(e, n, t) {
    function o(i, f) {
      if (!n[i]) {
        if (!e[i]) {
          var c = "function" == typeof require && require;
          if (!f && c) return c(i, !0);
          if (u) return u(i, !0);
          var a = new Error("Cannot find module '" + i + "'");
          throw a.code = "MODULE_NOT_FOUND", a
        }
        var p = n[i] = { exports: {} };
        e[i][0].call(p.exports, function (r) {
          var n = e[i][1][r];
          return o(n || r)
        }, p, p.exports, r, e, n, t)
      }
      return n[i].exports
    }
    for (var u = "function" == typeof require && require, i = 0; i < t.length; i++) o(t[i]);
    return o
  }
  return r
})()({
  1: [function (require, module, exports) {
    // foo.js
    module.exports = function (x) {
      console.log(x);
    };

  }, {}], 2: [function (require, module, exports) {
    // main.js
    var foo = require("./foo.js");
    foo("Hi");
  }, { "./foo.js": 1 }]
}, {}, [2]);
compiled.js 在html文件中引入,浏览器打开,即可看到控制台输出 Hi。

重构后的compiled.js 代码如下:(方便理解)
/** 模块一 */
var module1 = function (require, module, exports) {
  // foo.js
  module.exports = function (x) {
    console.log(x);
  };
}

/** 模块二 */
var module2 = function (require, module, exports) {
  // main.js
  var foo = require("./foo.js");
  foo("Hi");
}

/** 将模块放置数组中,并保存对应依赖 */
var rObject = {
  1: [ module1, {} ],
  2: [ module2, { "./foo.js": 1 } ]
}

/** 相同依赖的进行缓存 */
var cObject = {};

/** 定义入口js 模块索引 */
var mArr = [ 2 ];

/**
 * run 函数
 * 注:commonjs 的核心
 * @param {Object} relation
 * @param {Object} cache
 * @param {*} t
 */
function run(relation, cache, t) {

  function schedule(i, flag) {
    if (!cache[i]) {
      if (!relation[i]) {
        // 如果require 存在,并且类型为function
        var _require = "function" == typeof require && require;
        // 执行require 方法,运行依赖的js 脚本
        if (!flag && _require) return _require(i, !0);
        if (_out_require) return _out_require(i, !0);

        // 抛出异常
        var err = new Error("Cannot find module '" + i + "'");
        err.code = "MODULE_NOT_FOUND";
        throw err;
      }

      // 为每个模块定义一个缓存对象
      var _module = cache[i] = { exports: {} };

      relation[i][0].call(_module.exports, function (path) {
        // 获取path 脚本在relation 中的序号
        var num = relation[i][1][path];
        return schedule(num || path)
      }, _module, _module.exports, run, relation, cache, t)
    }

    return cache[i].exports;
  }

  for (var _out_require = "function" == typeof require && require, i = 0; i < t.length; i++) {
    schedule(t[i]);
  }

  return schedule;
}

// 执行
run(rObject, cObject, mArr);
至此browserify 的原理一目了然。
但是,browserify 不能在浏览器中使用,但按照上述解析后的代码的方式编写模块,则可以在浏览器端使用commonjs。其他方式的浏览器端commonjs,可以学习阮老师的 tiny-browser-require .
node 实现
node中的require() 方法源码解读:http://www.ruanyifeng.com/blog/2015/05/require.html
AMD
CommonJS 规范加载模块是同步的,也就是说,只有加载完成,才能执行后面的操作。AMD 规范则是非同步加载模块,允许指定回调函数。
由于 Node.js 主要用于服务器编程,模块文件一般都已经存在于本地硬盘,所以加载起来比较快,不用考虑非同步加载的方式,所以 CommonJS 规范比较适用。但是,如果是浏览器环境,要从服务器端加载模块,这时就必须采用非同步模式,因此浏览器端一般采用 AMD 规范。此外 AMD 规范比 CommonJS 规范在浏览器端实现要来着早。
基本语法
定义暴露模块:
// 定义没有依赖的模块
define(function(){
  return 模块
})

// 定义有依赖的模块
define(['module1', 'module2'], function(m1, m2){
  return 模块
})
引入使用模块:
require(['module1', 'module2'], function(m1, m2){
  使用 m1/m2
})
主要的js 库:require.js
官网: http://www.requirejs.cn/
github : https://github.com/requirejs/requirejs
使用方法
在 index.html 引入
< script data-main="js/main" src="js/libs/require.js">< /script>
比较
如果不使用amd 的方式,使用通常的闭包方式引入js,如果js脚本多并且相互依赖复杂时,代码可能会是这样子:
// index.html 文件
<div><h1>Modular Demo 1: 未使用 AMD(require.js)</h1></div>
<script type="text/javascript" src="js/modules/dataService.js"></script>
<script type="text/javascript" src="js/modules/alerter.js"></script>
// ... 更多的脚本引入
<script type="text/javascript" src="js/main.js"></script>
弊端:引入顺序要要求严格,js请求次数多。
源码解析
源码:https://cdn.bootcss.com/require.js/2.3.6/require.js
相关资料:http://foio.github.io/requireJS/
分析require源码前,先了解一下脚本的异步加载相关:
并行的下载脚本
(1) XHR eval
在浏览器原理中知道,浏览器解析script标签的js脚本是同步的,即会阻塞dom的渲染过程。如以下代码:
// a.js
alert(document.getElementById('div'))
<!-- index.html -->
<!DOCTYPE html>
<html lang="en">
<head>
  <title>Document</title>
</head>
<body>
    <!-- 方式 1 -->
    <script>
      var XMLHttpReq = new XMLHttpRequest();
      XMLHttpReq.onreadystatechange = function(){
        if (XMLHttpReq.readyState == 4) {
          if (XMLHttpReq.status == 200) {
            var text = XMLHttpReq.responseText;
            eval(text)
          }
        }
      };
      XMLHttpReq.open("get", 'a.js', true);
      XMLHttpReq.send();
    </script>

    <!-- 方式 2 -->
    <!-- <script src='a.js'></script> -->

    <div id="div">Hello.</div>
</body>
</html>
通过静态服务访问index.html, 可知方式1 是异步方式,在请求a.js 脚本时不阻塞dom的渲染,模拟请求延时长一些,则可以拿到div 元素;方式 2 是同步方式,a.js脚本在执行时,页面是还没有id为"div"元素的,因此alert的内容始终为null。
xhr eval方式缺点: 不支持跨域请求。
(2) script dom element
我们也可以直接在浏览器中插入script dom节点。如下代码:
<!DOCTYPE html>
<html lang="en">
<head>
  <title>Document</title>
</head>
<body>
	<!-- 方式 1 -->
	<!-- 方式 2 -->

    <!-- 方式 3 -->
    <script>
      var scriptElem = document.createElement('script');
      scriptElem.src = 'http://127.0.0.1:9006/a.js';
      document.getElementsByTagName('head')[0].appendChild(scriptElem);
    </script>

    <div id="div">Hello.</div>
</body>
</html>
启动本机静态服务访问index.html, 地址:http://localhost:9006/index.html 可以看到结果,脚本的加载执行不阻塞dom的渲染(由于页面的div比较简单浏览器渲染很快,a.js脚本中的alert 测试时都能够获取到渲染后的div,而a.js是在加载完后就开始执行的)
优点:支持跨域请求。
缺点:需要工程师自己在代码层面实现执行顺序的控制。
记录点 3 requir.js 就是通过script dom element 的方式实现的。
(3) document write script tag
这种方式是使用document.write 方法:
document.write("<script type='text/javascript' src='A.js'></script>");
优点:
scritp Tag可以保证多个脚本并行加载。
可以保证脚本按文档中出现的顺序执行。
缺点:
会阻塞其他资源并行下载。
(4) defer和async属性
async="async"不会阻塞其他资源,但是无法保证脚本的执行顺序。defer="defer"阻塞其他资源的加载,并且可以保证脚本的执行顺序,但是要到页面解析完成后才开始执行脚本。
脚本的执行顺序
当外部脚本按常规方式加载时,它会阻塞行内脚本的执行,可以保证顺序。但是脚本通过上述的几种方式异步加载时,就无法保证行内脚本和异步脚本之间的顺序。
保证行内脚本和外部脚本的执行顺序:
(1) onlode事件
添加script dom节点时,监听加载事件:
//行内函数
function callback(){
    Console.log(‘calllback’);
}

//异步加载函数
function loadScript(url, callback){
    var script = document.createElement ("script")
    script.type = "text/javascript";
    if (script.readyState){ //IE
        script.onreadystatechange = function(){
            if (script.readyState == "loaded" || script.readyState == "complete"){
                script.onreadystatechange = null;
                callback();
            }
        };
    } else { //Others
        script.onload = function(){
            callback();
        };
    }
    script.src = url;
    document.getElementsByTagName("head")[0].appendChild(script);
}

//控制行内脚本和外部脚本的执行顺序
loadScript('a.js',callback);
(2) 定时器
通过定时检查外部脚本是否加载完成(即检查对应变量是否存在):
<script src="MyJs.js"></script>
<script>
function callback(){
}

function checkMyJs(){
    if(undefined===typeof(MyJs)){
        setTimeout(checkMyJs, 300)
    }else{
        callback();
    }
}
</script>
特点:
onload 和定时器的方式缺点:多个脚本的执行顺序不好控制。
多个外部脚本之间的执行顺序
(1) 同域脚本
对于同域中的多个外部脚本,可以使用XHR的方式加载脚本,并通过一个队列来控制脚本的执行顺序。
// a.js
console.log('a');
// b.js
console.log('b');
// c.js
console.log('c');
<!DOCTYPE html>
<html lang="en">
<head>
<title>Document</title>
</head>
<body>
<script>
var ScriptLoader = ScriptLoader || {}
ScriptLoader.Script = {
//脚本队列
queueScripts: [],
loadScriptXhrInjection: function (url, onload, bOrder) {
var iQ = ScriptLoader.Script.queueScripts.length;
if (bOrder) {
var qScript = { response: null, onload: onload, done: false };
ScriptLoader.Script.queueScripts[iQ] = qScript;
}
var xhrObj = ScriptLoader.Script.getXHROject();
xhrObj.onreadystatechange = function () {
if (xhrObj.readyState == 4) {
//有顺序要求的脚本需要添加的队列,按添加顺序执行
if (bOrder) {
//有顺序要求的脚本需要设置加载和执行状态
ScriptLoader.Script.queueScripts[iQ].response = xhrObj.responseText;
//执行脚本队列
ScriptLoader.Script.injectScripts();
} else {//没有顺序要求的脚本可直接执行
eval(xhrObj.responseText);
if (onload) {
onload();
}
}
}
}
xhrObj.open("get", url, true);
xhrObj.send();
},
injectScripts: function () {
var len = ScriptLoader.Script.queueScripts.length;
//按顺序执行队列中的脚本
for (var i = 0; i < len; i++) {
var qScript = ScriptLoader.Script.queueScripts[i];
//没有执行
if (!qScript.done) {
//没有加载完成
if (!qScript.response) {
//停止,等待加载完成, 由于脚本是按顺序添加到队列的,因此这里保证了脚本的执行顺序
break;
} else {//已经加载完成了
eval(qScript.response);
if (qScript.onload) {
qScript.onload();
}
qScript.done = true;
}
}
};
},
getXHROject: function () {
var xhrObj = new XMLHttpRequest();
return xhrObj;
}
}
function initB(){
console.log('initB.');
}
function initC(){
console.log('initC.');
}
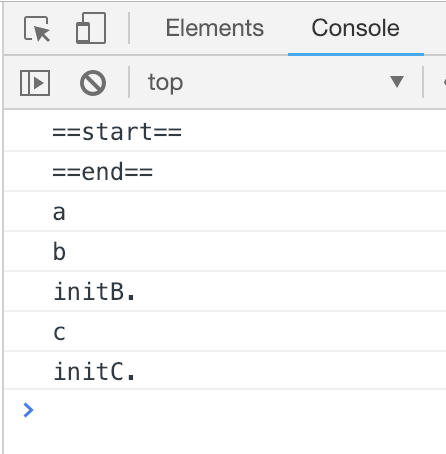
console.log('==start==')
// 说明:这里的路径不支持跨域
ScriptLoader.Script.loadScriptXhrInjection('a.js', null, false);
ScriptLoader.Script.loadScriptXhrInjection('b.js', initB, true);
ScriptLoader.Script.loadScriptXhrInjection('c.js', initC, true);
console.log('==end==')
</script>
<div>Hello.</div>
</body>
</html>
执行结果:
(2) 不同域脚本
script dom element 可以异步执行脚本,不阻塞其他资源;而document write script 可以异步加载脚本,会阻塞其他资源,在所有浏览器都可以保证执行顺序。因此我们可以根据浏览器选择以上两种方案来控制 不同域的脚本的执行顺序。
<!DOCTYPE html>
<html lang="en">
<head>
<title>Document</title>
</head>
<body>
<script>
var ScriptLoader = ScriptLoader || {}
function addEvent(element, type, handler){
if(element.addEventListener){
element.addEventListener(type, handler, false);
}else if(element.attchEvent){
element.attachEvent('on' + type, handler);
}
}
ScriptLoader.script = {
loadScriptDomElement: function (url, onload) {
var script = document.createElement("script");
script.type = "text/javascript";
if (script.readyState) {
//IE
script.onreadystatechange = function () {
if (script.readyState == "loaded" || script.readyState == "complete") {
script.onreadystatechange = null;
onload();
}
};
} else {
//Others
script.onload = function () {
onload();
};
}
script.src = url;
document.getElementsByTagName("head")[0].appendChild(script);
},
loadScriptDomWrite: function (url, onload) {
document.write('<script src="'+ url +'" type="text/javascript"><\/script>');
if (onload) {
addEvent(window, 'load', onload);
}
},
//根据浏览器选择浏览器加载js的方式
loadScript: function (url, onload) {
if (-1 != navigator.userAgent.indexOf('Firefox') ||
-1 != navigator.userAgent.indexOf('Opera')) {
//当浏览器为firefox和opera时通过Script Dom Element 保证脚本执行顺序
ScriptLoader.script.loadScriptDomElement(url, onload);
} else {
//当为其他浏览器时,通过document write Script保证脚本执行顺序。此时脚本的加载会阻塞其他资源,这是一种折衷
ScriptLoader.script.loadScriptDomWrite(url, onload);
}
}
}
function initA(){
console.log('initA.');
}
function initB(){
console.log('initB.');
}
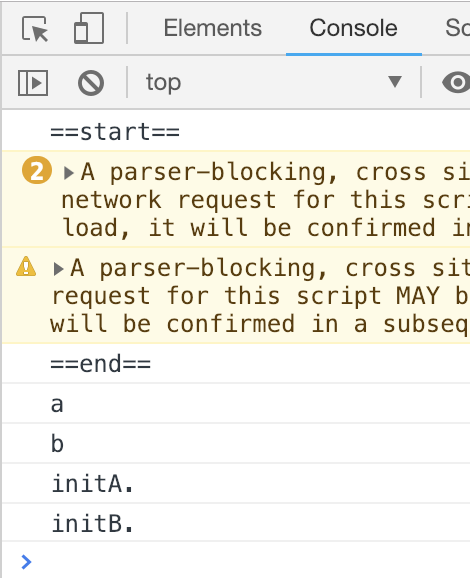
console.log('==start==')
// 说明:支持跨域
ScriptLoader.script.loadScript('http://127.0.0.1:9006/a.js', initA);
ScriptLoader.script.loadScript('http://127.0.0.1:9006/b.js', initB);
console.log('==end==')
</script>
<div>Hello.</div>
</body>
</html>
执行结果:
到这里,js异步加载、控制执行顺序都有所了解。那么接下来看看require.js 是怎么实现的吧。
require.js 如何异步加载js,同时控制依赖呢
如同上文描述,require.js 用的script dom element异步加载js 的方法,处理过程借助数据结构中的队列,可以从以下思路了解:
http://foio.github.io/requireJS/ 的实现思路:
- 全局定义require、define方法,定义队列queue;
- 执行require和define时分别将模块(即单个脚本文件,如a.js、b.js)的依赖和回调加入队列queue中(如果模块有依赖,则递归加载依赖,并设置onload方法),最后形成一个包含涉及到全部模块的队列;
- 在单个模块加载中,设置onload 回调处理,更新队列,标记对应模块为done;
- 循环检查队列模块,如果对应依赖全部标记为done,则利用call或apply方法执行callback;
- 继续步骤4,直到队列为空。
也可参看
require.js 2.3.6版简化代码(以理解其原理):
https://github.com/ZhiCYue/requireJs-analysis/blob/master/require.js
CMD
CMD 规范专门用于浏览器端,模块的加载是异步的,模块使用时才会加载执行。CMD 规范整合了 CommonJS 和 AMD 规范的特点。在 Sea.js 中,所有 JavaScript 模块都遵循 CMD 模块定义规范。
基本语法
定义暴露模块:
// 定义没有依赖的模块
define(function(require, exports, module){
 exports.xxx = value
 module.exports = value
})

// 定义有依赖的模块
define(function(require, exports, module){
 // 引入依赖模块 (同步)
 var module2 = require('./module2')
 // 引入依赖模块 (异步)
   require.async('./module3', function (m3) {
   })
 // 暴露模块
 exports.xxx = value
})
引入使用模块:
define(function (require) {
 var m1 = require('./module1')
 var m4 = require('./module4')
 m1.show()
 m4.show()
})
主要的js 库:sea.js
官网: http://seajs.org/
github : https://github.com/seajs/seajs
使用方法
在 index.html 引入
<script type="text/javascript" src="js/libs/sea.js"></script>
<script type="text/javascript">
 seajs.use('./js/modules/main')
</script>
使用示例:
https://github.com/ZhiCYue/seajs-cmd
源码可自行分析seajs源码,较requirejs 源码理解起来简单些(纯个人认为)
ES6 模块化
ES6 模块的设计思想是尽量的静态化,使得编译时就能确定模块的依赖关系,以及输入和输出的变量。CommonJS 和 AMD 模块,都只能在运行时确定这些东西。比如,CommonJS 模块就是对象,输入时必须查找对象属性。
ES6 模块化语法
export 命令用于规定模块的对外接口,import 命令用于输入其他模块提供的功能。
/** 定义模块 math.js **/
var basicNum = 0;
var add = function (a, b) {
   return a + b;
};
export { basicNum, add };

/** 引用模块 **/
import { basicNum, add } from './math';
function test(ele) {
   ele.textContent = add(99 + basicNum);
}
default 方式
// export-default.js
export default function () {
 console.log('foo');
}
// import-default.js
import customName from './export-default';
customName(); // 'foo'
使用方法
使用 Babel 将 ES6 编译为 ES5 代码,使用 Browserify 编译打包 js。
代码
比较
ES6 模块与 CommonJS 模块的差异
- CommonJS 模块输出的是一个值的拷贝,ES6 模块输出的是值的引用。
- CommonJS 模块是运行时加载,ES6 模块是编译时输出接口。
第二个差异是因为 CommonJS 加载的是一个对象(即 module.exports 属性),该对象只有在脚本运行完才会生成。而 ES6 模块不是对象,它的对外接口只是一种静态定义,在代码静态解析阶段就会生成。
举例:
// lib.js
export let counter = 3;
export function incCounter() {
 counter++;
}
// main.js
import { counter, incCounter } from './lib';
console.log(counter); // 3
incCounter();
console.log(counter); // 4
总结
CommonJS 规范主要用于服务端编程,加载模块是同步的,这并不适合在浏览器环境,因为同步意味着阻塞加载,浏览器资源是异步加载的,因此有了 AMD CMD 解决方案。
AMD 规范在浏览器环境中异步加载模块,而且可以并行加载多个模块。不过,AMD 规范开发成本高,代码的阅读和书写比较困难,模块定义方式的语义不顺畅。
CMD 规范与 AMD 规范很相似,都用于浏览器编程,依赖就近,延迟执行,可以很容易在 Node.js 中运行。不过,依赖 SPM 打包,模块的加载逻辑偏重ES6 在语言标准的层面上,实现了模块功能,而且实现得相当简单,完全可以取代 CommonJS 和 AMD 规范,成为浏览器和服务器通用的模块解决方案。
至此,结束。