版权声明:一只会飞的狼 https://blog.csdn.net/sinat_40697723/article/details/83684373
Canvas是在web画面中绘制位图的技术。
步骤:
1.取得Canvas对象。(相当于画布)
2.从Canvas对象中获取绘图用的上下文。(相当于绘画用的笔)
3.使用上下文中的方法和属性进行绘图。
1.简单例子:
	<style type="text/css">
		canvas {
			width: 300px;
			height: 300px;
		}
	</style>
</head>
<body>
	<canvas id="cas"></canvas>
	<script type="text/javascript">
		var canvas = document.getElementById("cas");
		//2d指绘制的是二维图形,3d指绘制三维图形
		var ctx = canvas.getContext("2d");

		ctx.fillStyle = "rgb(255, 0, 0)";    //设置填充颜色
		ctx.fillRect(50, 50, 200, 200);      //绘制矩形
	</script>
</body>
效果图:

属性知识:
1.颜色的指定方法通常有三种:
		ctx.fillStyle = "#ff0000";
		ctx.fillStyle = "rgb(255,0,0)";
		ctx.fillStyle = "rgba(255,0,0,0.5)";
2.坐标的指定方法:
扫描二维码关注公众号,回复:
4744855 查看本文章


以左上角为原点,向右和向下为正方向,单位是像素。
3.路径:所谓路径就是通常所说的“一笔绘图”的形式,在canvas中,通过多次重复路径绘制更复杂的图形。
(1).下面是绘制简单三角形的步骤:
- 取得Canvas绘图的上下文;
- 调用beginPath()方法宣布路径绘制的开始;
- 使用moveTo(), lineTo()方法依次指定坐标和绘制直线;
- 调用closePath()方法结束路径;
- 调用fill()方法进行图形绘制。
	<style type="text/css">
		canvas {
			width: 300px;
			height: 300px;
		}
	</style>
</head>
<body>
	<canvas id="cas"></canvas>
	<script type="text/javascript">
		//取得canvas对象和绘图用的上下文
		var canvas = document.getElementById("cas");
		var ctx = canvas.getContext("2d");

		//路径绘制的开始
		ctx.beginPath();

		//路径的绘制
		ctx.moveTo(0,0);
		ctx.lineTo(0,290);
		ctx.lineTo(290,290);

		//路径绘制结束
		ctx.closePath();

		//进行绘图处理
		ctx.fillStyle = "rgb(200,0,0)";
		ctx.fill();
	</script>
效果:

(2).进行路径绘制的各种办法:
| 方法 | 功能 |
| beginPath() | 重置路径的开始 |
| closePath() | 关闭到现在为止的路径 |
| moveTo(x, y) | 指定绘图开始时的基点(x, y) |
| lineTo(x, y) | 绘制从前一次绘图位置到(x, y)的直线 |
| 方法 | 功能 |
| stroke() | 绘制路径 |
| fill() | 填充路径 |
| 属性 | 功能 |
| fillStyle | 指定填充时使用的颜色和样式 |
| strokeStyle | 指定路径的线颜色和样式 |
| lineWidth | 制定路径线的粗细 |
下面是一个点击绘制三角形的程序:
	<style type="text/css">
		canvas {
			width: 300px;
			height: 300px;
		}
	</style>
</head>
<body>
	<canvas id="cas"></canvas>
	<script type="text/javascript">
		//取得canvas对象和绘图用的上下文
		var canvas = document.getElementById("cas");
		var ctx = canvas.getContext("2d");

		//设置canvas的onmouse事件
		canvas.onmousedown = function(event){

			//取得触摸处的坐标,event就是事件,包括了这个事件的所有参数和信息
			var x = event.x;
			var y = event.y;
			var r = Math.random()*10 + 5;
			//路径指定
			ctx.beginPath();
			ctx.moveTo(x, y);
			ctx.lineTo(x, y+r);
			ctx.lineTo(x+r, y+r);
			ctx.lineTo(x, y);

			//绘图
			ctx.strokeStyle = "red";
			ctx.stroke();

		};
	</script>
效果:

4.绘制方法介绍:
- arc()方法:可以绘制圆和圆弧。
注意:Math.PI()表示π,弧度 = 角度*π/180
语法:context.arc(x,y,半径,开始弧度,结束弧度,是否逆时针旋转);
- 绘制圆弧
	<canvas id="cas" width="300" height="300"></canvas>
	<script type="text/javascript">
		var canvas = document.getElementById("cas");
		var ctx = canvas.getContext("2d");

		var startAngle = 0;
		var endAngle = 1.2*Math.PI;

		ctx.beginPath();
		ctx.arc(150, 75, 50, startAngle, endAngle, true);
		ctx.strokeStyle = "#f00";
		ctx.stroke();
	</script>
注意:开始总把圆画成椭圆,后来查过以后发现最好把canvas宽高设置在行内,而且别写单位。
效果:

- 绘制圆
	<canvas id="cas" width="300" height="300"></canvas>
	<script type="text/javascript">
		var canvas = document.getElementById("cas");
		var ctx = canvas.getContext("2d");

		ctx.beginPath();
		ctx.arc(100,100,50,0,2*Math.PI);
		ctx.fillStyle = "yellow";
		ctx.fill();
	</script>
效果图:

2.arcTo()方法:此方法是创建介于两个切线之间的弧/曲线。
语法:context.arcTo(x1,y1,x2,y2,半径);
	<style type="text/css">
		canvas {
			border: 1px solid black;
		}
	</style>
</head>
<body>
	<canvas id="cas" width="300" height="300"></canvas>
	<script type="text/javascript">
		var canvas = document.getElementById("cas");
		var ctx = canvas.getContext("2d");

		//绘制路径
		ctx.beginPath();
		//开始点
		ctx.moveTo(20,20);
		//第一条线
		ctx.lineTo(200,20);
		//创建弧
		ctx.arcTo(250,20,250,70,50);
		//第二条线
		ctx.lineTo(250,280);

		ctx.strokeStyle = "green";
		ctx.lineWidth = 3;
		ctx.stroke();
	</script>
效果图:

3.quadraticCurveTo()和bezierCurveTo()方法
涉及到贝塞尔曲线,使用时查文档:
- http://www.w3school.com.cn/tags/canvas_quadraticcurveto.asp
- http://www.w3school.com.cn/tags/canvas_beziercurveto.asp
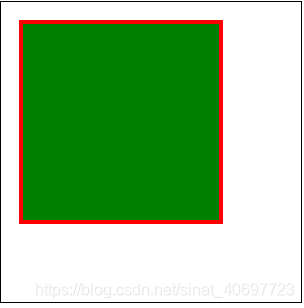
4.rect()方法:用于绘制矩形。
语法:context.rect(x,y,宽度,高度)
	<style type="text/css">
		canvas {
			border: 1px solid black;
		}
	</style>
</head>
<body>
	<canvas id="cas" width="300" height="300"></canvas>
	<script type="text/javascript">
		var canvas = document.getElementById("cas");
		var ctx = canvas.getContext("2d");

		ctx.rect(20,20,200,200);
		ctx.fillStyle = "green";
		ctx.strokeStyle = "red";
		ctx.lineWidth = 4;

		ctx.fill();
		ctx.stroke();
	</script>
效果:

canvas还提供三种特定的巨型绘制方法:
| 方法 | 功能说明 |
| context.strokeRect(x,y,w,h) | 绘制矩形的轮廓 |
| context.fillRect(x,y,w,h) | 填充矩形 |
| context.clearRect(x,y,w,h) | 清空矩形 |
	<canvas id="cas" width="300" height="300"></canvas>
	<script type="text/javascript">
		var canvas = document.getElementById("cas");
		var ctx = canvas.getContext("2d");
		//注意:颜色放在绘制的前面,否则是黑色的
		//用红色绘制矩形轮廓
		ctx.strokeStyle = "red";
		ctx.lineWidth = 4;
		ctx.strokeRect(20,20,200,200);


		//用绿色来填充矩形
		ctx.fillStyle = "green";
		ctx.fillRect(20,20,200,200);

		//中间挖空一个矩形
		ctx.clearRect(50,50,100,50);

		ctx.stroke();
		ctx.fill();
	</script>
效果图:
