This blog is meant for Android developers looking to apply their existing Android knowledge to build mobile apps with Flutter. In this blog, we are going to explore what is equivalent design widget for FrameLayout in Flutter.
Series
- How to design Activity UI in Flutter ?
- How to design LinearLayout in Flutter ?
- How to design FrameLayout in Flutter ? (You are here)
Prerequisites
This blog already assumes that you have setup the flutter in your machine and able to run a Hello World app. If you haven’t install flutter yet, gets started from here.
Dart is based on the object-oriented concept so as android java developer you will be able to catch up dart very easily.
Let’s get started
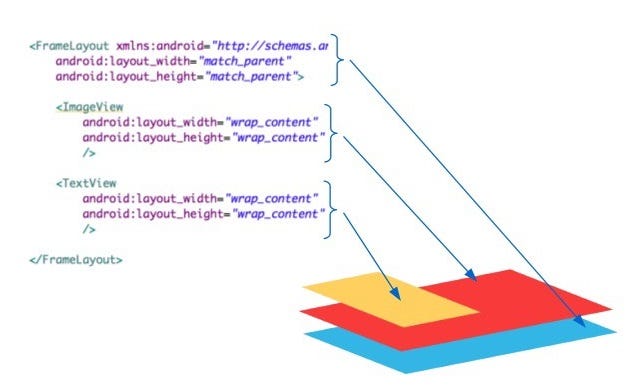
FrameLayout is one of the layouts which used very often while developing Android Designs. We define FrameLayout adding single or multiple child views which are drawn in a stack, with the most recently added child on top. Below its show how we do it in Android.
https://stackoverflow.com/questions/25679369/what-does-framelayout-do
FrameLayout is used for mostly two cases in Android.
- To draw a view on top of the other child view, i.e to overlaps views in a form of Stack with the most recently added child on top.
- It’s used as a container to draw
Fragments.
The second reason is true for Android, but in case of flutter because Everything is a widget that’s why the concept of Fragment doesn’t apply in flutter instead we use widgets.
Now the first used case is very obvious for designing. So flutter provides an equivalent widget which behaves as FrameLayout. Yes, I know its Stackwidget because I made the word bold-italic in the first use case.
Stack
Stack positions its children relative to the edges of its box. This class is equivalent to FrameLayout and its more useful when you want to overlap several children in a simple way, for example having some text and an image, overlaid with a gradient and a button attached to the bottom.

https://flutter.io/widgets/layout/
This is how we define Stack in the flutter.
Here is the output for the above code.
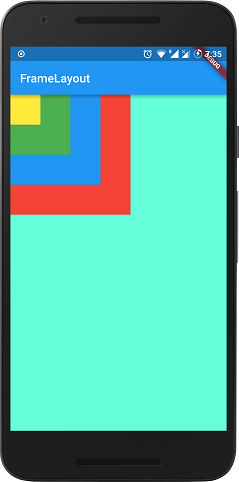
Screenshot-1
As we know in FrameLayout the child views are drawn in form of the stack which is one on the top of the other depending upon the order they have defined. The first child will be at the bottom and the last define child will be on the top.
The same concept goes to the Stack widget. The child widget defined first in children:<Widget>[] will be on the bottom and the last item in children:<Widget>[] will be drawn on top.
1. android:gravity
This is defined in the parent layout since FrameLayout does not have android:gravity attribute, you need to assigned layout_gravity to each child in order to achieve android:gravity behavior.
But the Stack went one step ahead and provide android:gravity behavior in-build which can be achieve using Stack.alignment property which takes AlignmentDirectional object which has a predefined enum like AlignmentDirectional.topStart , AlignmentDirectional.center etc.
Since android:gravity is defined in parent layout we will define Stack.alignment in the parent as well which is our Stack widget. This is how you define in the above example.
child: new Stack(
  alignment: AlignmentDirectional.center,
  children: [
   ...//all your child widgets
  ],
)
By default it takes AlignmentDirectional.topStart if you don’t assign any value to alignment property. You can refer Screenshot-1 where we didn’t define any alignment value which by default aligned it to top start corner.
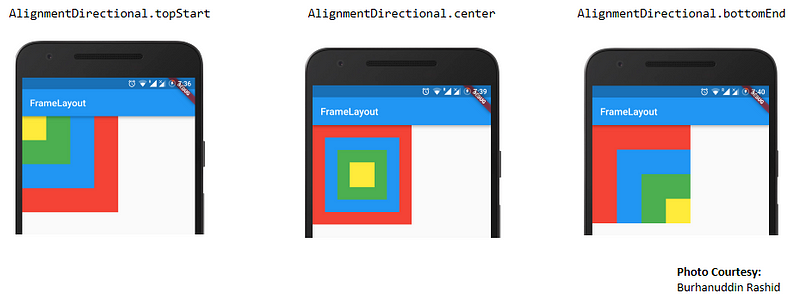
The beauty about flutter is there naming conventions you can make out what does it mean. From the alignment property enum name you can identify what it is going to do. AlignmentDirectional.topStart is going to set the children widgets of the top corner of the Stack widget and so on. This is how it looks with other AlignmentDirectional values.
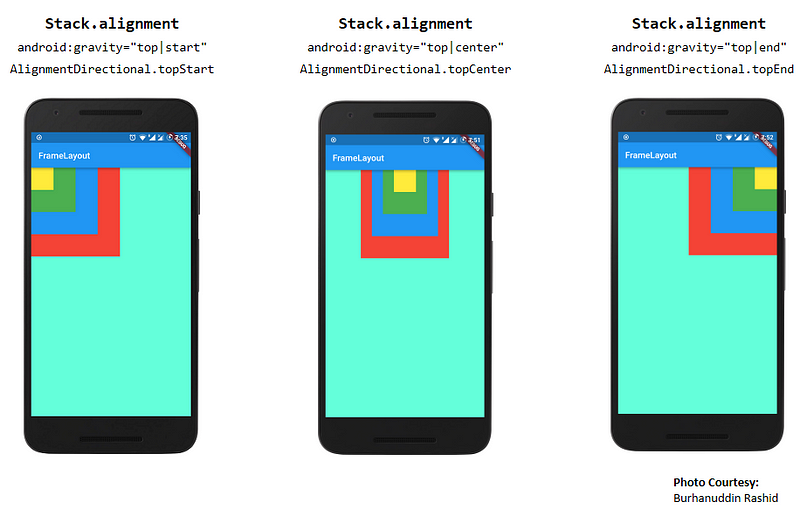
Top gravity
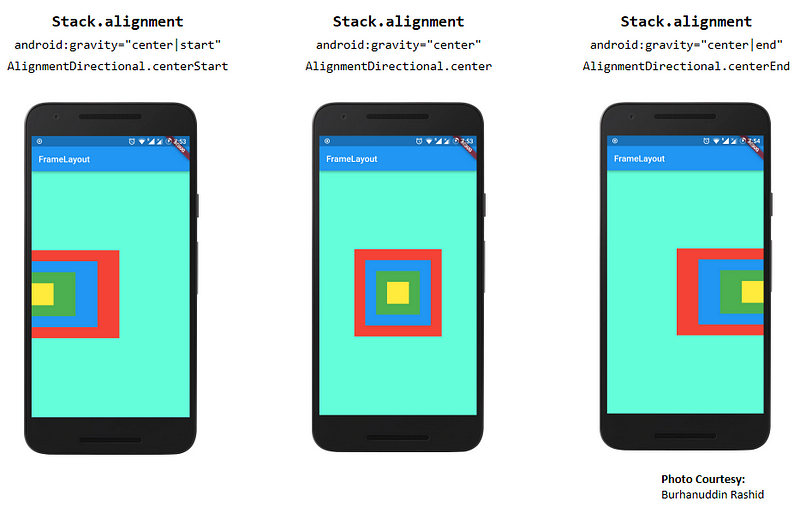
Center gravity
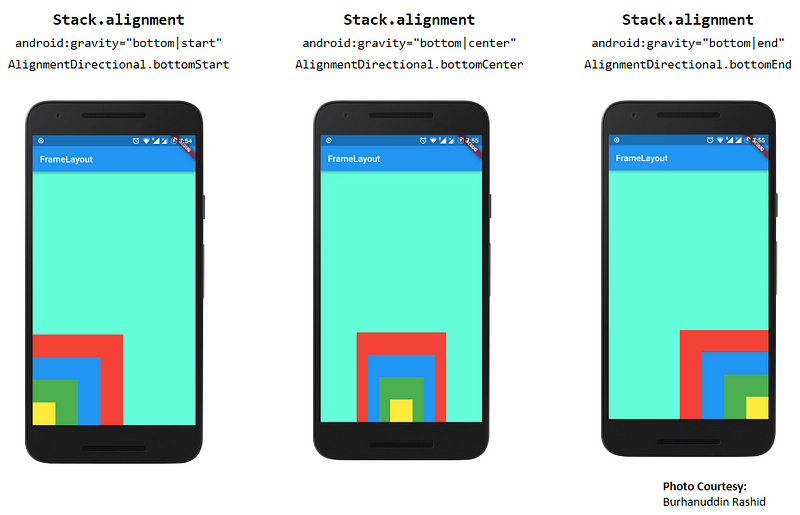
Bottom gravity
Note :
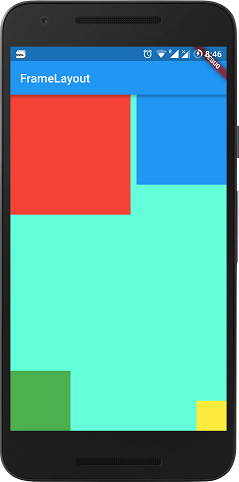
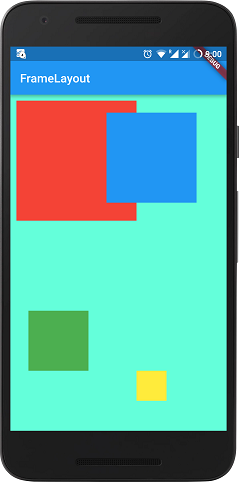
- If we do not define any size for Stack than it will take its parent size i.e
match_parent.In above example, we have madeContaineras expanded usingBoxConstraints.expand()so that it can take all the available space i.e whole screen in our case which can be identified bytealAccentcolor. Since we didn’t define any size toStackso it will be as big as its parent i.e whole screen, and Stack.alignment property will work according to the stack size which is ourContainerSize. - If we do not define any size to
Stackparent thanStackwill take the maximum size from its available children i.ewrap_content.So that Stack.alignment property will align widgets according to the size of the stack. Below is the output when we removeBoxConstraints.expand()constraint fromContainer.
2. android:layout_gravity
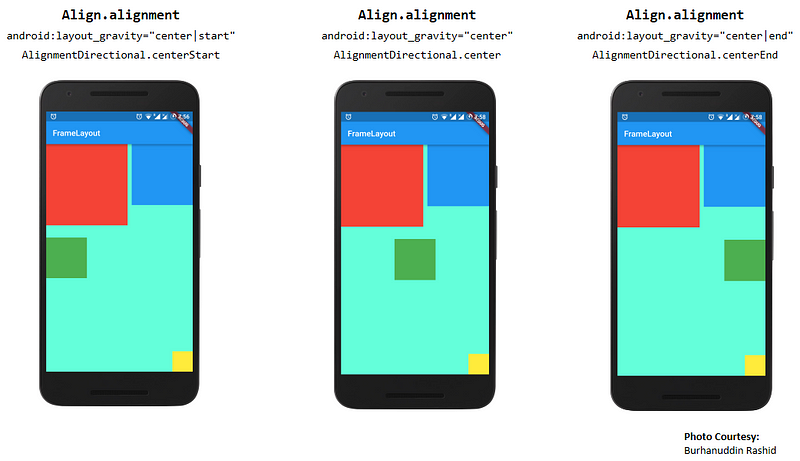
android:layout_gravity is the Outside gravity of the View. Specifies the direction in which the View should touch its parent’s border. This is what we use most of the time in FrameLayout. In order to add this behavior in Stack, you need to wrap the child in Align widget which behaves as layout_gravity in Android. This is how you define the Align widget to each child.
Screenshot-2
As per above code, we have aligned the child in four corners using Align.alignment property. If we don’t define any size to Stack with Alignwidget than by default Stack will expand to available space i.e the whole screen in our case and then it will align the widget according to the available space that’s why we are able to see tealAccent color without BoxConstraints.expand().
Let’s play with Align.alignment property in Green box widget and see how it looks.
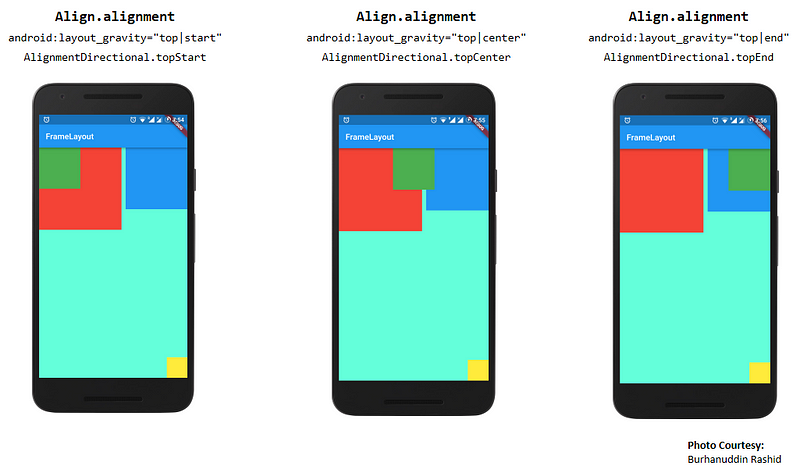
Top Alignments
Center Alignments
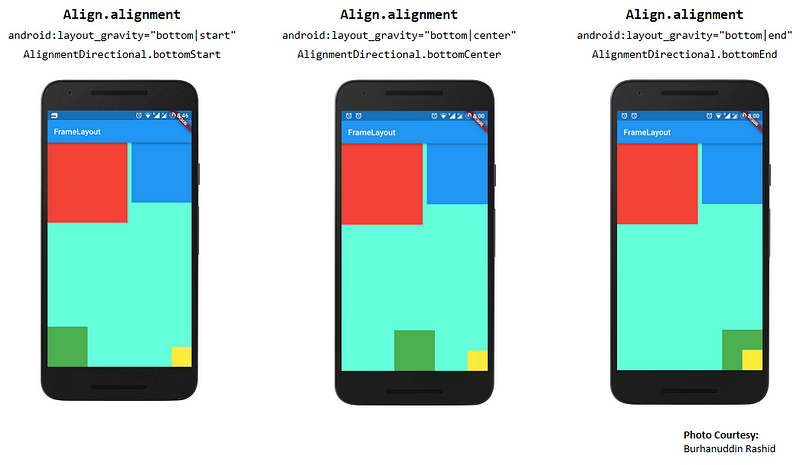
Bottom Alignments
3. Positioned
Now, this is bonus widget which we get in Stack. Currently, there is no Position behavior in FrameLayout .The Positioned widget is nothing but a widget that controls where a child of a Stack is positioned. To define a position of a child widget in Stack we need to wrap the child inside the Positioned widget and define the position using top,bottom left and right properties as per our need.
Here is the sample code to define positioned widget.
Screenshot-3
From Screenshot-3 output, you can see the widgets are aligned with the given positions.You can also define width and height for Positioned widget.
Conclusion
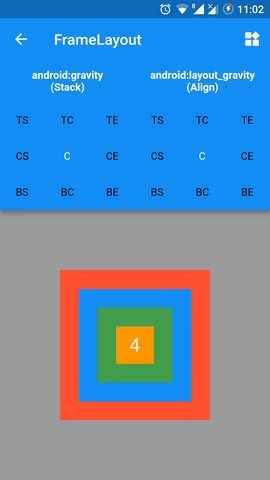
FrameLayout is most commonly used in Android. The overlapping widget is made easy with Stack with additional features like Positioned widget. Hope to cover more topics in the upcoming blogs. I have created a sample app to play around with stack attributes in reference to FrameLayout. You can click on the toolbar icon to see the output for Positioned Widget.
If you have any suggestions for Android topic that you want to learn in Flutter than please let me know in comments.
Check out flutter for android example here.
Thank you !!!
If you find this article helpful. Please like,share and clap so other people will see this here on Medium. If you have any quires or suggestions, feel free comment on the blog or hit me on Twitter, GitHub or Reddit.
To get latest updates for my upcoming blog you can follow me on Medium, Twitter, GitHub or Reddit.