版权声明:本文为博主原创文章,未经博主允许不得转载。 https://blog.csdn.net/zsl10/article/details/76169821
安装编译工具及库文件
yum install -y yasm apr* autoconf automake bison bzip2 bzip2* cloog-ppl compat* cpp curl curl-devel fontconfig fontconfig-devel freetype freetype* freetype-devel gcc gcc-c++ gtk+-devel gd gettext gettext-devel glibc kernel kernel-headers keyutils keyutils-libs-devel krb5-devel libcom_err-devel libpng libpng* libpng-devel libjpeg* libsepol-devel libselinux-devel libstdc++-devel libtool* libgomp libxml2 libxml2-devel libXpm* libX* libtiff libtiff* make mpfr ncurses* ntp openssl nasm nasm* openssl-devel patch pcre-devel perl php-common php-gd policycoreutils ppl telnet t1lib t1lib* wget zlib-devel配置端口
[root@localhost vagrant]vi /etc/sysconfig/iptables 粘贴如下:
# Firewall configuration written by system-config-firewall
# Manual customization of this file is not recommended.
*filter
:INPUT ACCEPT [0:0]
:FORWARD ACCEPT [0:0]
:OUTPUT ACCEPT [0:0]
-A INPUT -m state --state ESTABLISHED,RELATED -j ACCEPT
-A INPUT -p icmp -j ACCEPT
-A INPUT -i lo -j ACCEPT
-A INPUT -m state --state NEW -m tcp -p tcp --dport 22 -j ACCEPT
-A INPUT -m state --state NEW -m tcp -p tcp --dport 3306 -j ACCEPT
-A INPUT -m state --state NEW -m tcp -p tcp --dport 80 -j ACCEPT
-A INPUT -j REJECT --reject-with icmp-host-prohibited
-A FORWARD -j REJECT --reject-with icmp-host-prohibited
COMMIT重启使生效:
[root@localhost vagrant]#service iptables restart 查看已开启的端口:
[root@localhost vagrant]# /etc/init.d/iptables status关闭SELINUX
[root@localhost vagrant]# vi /etc/selinux/config注释掉:
SELINUXTYPE=targeted 新增:
SELINUX=disabled 关闭selinux防火墙:
[root@localhost vagrant]# setenforce 0 系统约定
软件源代码包存放位置:/usr/local/src
源码包编译安装位置:/usr/local/软件名字
下载软件包
1、下载nginx
[root@localhost src]# wget http://nginx.org/download/nginx-1.6.2.tar.gz2、下载MySQL
[root@localhost src]# wget http://cdn.mysql.com/archives/mysql-5.6/mysql-5.6.21.tar.gz3、下载php
[root@localhost src]# wget http://cn2.php.net/distributions/php-5.6.3.tar.gz4、下载pcre (支持nginx伪静态)
[root@localhost src]# wget http://jaist.dl.sourceforge.net/project/pcre/pcre/8.36/pcre-8.36.tar.gz5、下载openssl(nginx扩展)
[root@localhost src]# wget http://www.openssl.org/source/openssl-1.0.1j.tar.gz
6、下载zlib(nginx扩展)
[root@localhost src]# wget zlib.net/fossils/zlib-1.2.8.tar.gz7、下载cmake(MySQL编译工具)
[root@localhost src]# wget http://www.cmake.org/files/v3.0/cmake-3.0.2.tar.gz8、下载libmcrypt(php扩展)
[root@localhost src]# wget http://nchc.dl.sourceforge.net/project/mcrypt/Libmcrypt/2.5.8/libmcrypt-2.5.8.tar.gz9、下载yasm(php扩展)
[root@localhost src]# wget http://www.tortall.net/projects/yasm/releases/yasm-1.3.0.tar.gz10、t1lib(php扩展)
http://download.csdn.net/download/sunkaivg/969606411、下载gd库安装包
http://download.csdn.net/detail/long712905/939123412、libvpx(gd库需要)
http://download.csdn.net/download/huaweichina/848515913、tiff(gd库需要)
http://download.csdn.net/download/damys/932694314、libpng(gd库需要)
http://download.csdn.net/download/damys/932685715、freetype(gd库需要)
[root@localhost src]# wget http://ring.u-toyama.ac.jp/archives/graphics/freetype/freetype2/freetype-2.5.4.tar.gz16、jpegsrc(gd库需要)
[root@localhost src]# wget http://www.ijg.org/files/jpegsrc.v9a.tar.gz安装MySQL
1、安装cmake
[root@localhost vagrant]# cd /usr/local/src/
[root@localhost src]# tar zxvf cmake-3.0.2.tar.gz
[root@localhost src]# cd cmake-3.0.2
[root@localhost cmake-3.0.2]# ./configure
[root@localhost cmake-3.0.2]# make
[root@localhost cmake-3.0.2]# make install
2、安装MySQL
[root@localhost cmake-3.0.2]# cd /usr/local/src/
[root@localhost src]# groupadd mysql #添加mysql组
[root@localhost src]# useradd -g mysql mysql -s /bin/false #创建用户mysql并加入到mysql组,不允许mysql用户直接登录系统
[root@localhost src]# mkdir -p /data/mysql #创建MySQL数据库存放目录
[root@localhost src]# chown -R mysql:mysql /data/mysql #设置MySQL数据库存放目录权限
[root@localhost src]# mkdir -p /usr/local/mysql #创建MySQL安装目录
[root@localhost src]# tar zxvf mysql-5.6.21.tar.gz
[root@localhost src]# cd mysql-5.6.21
[root@localhost mysql-5.6.21]# cmake . -DCMAKE_INSTALL_PREFIX=/usr/local/mysql -DMYSQL_DATADIR=/data/mysql -DSYSCONFDIR=/etc #配置
[root@localhost mysql-5.6.21]# make
[root@localhost mysql-5.6.21]# make install
[root@localhost mysql-5.6.21]# rm -rf /etc/my.cnf #删除系统默认的配置文件
[root@localhost mysql-5.6.21]# cd /usr/local/mysql #进入MySQL安装目录
[root@localhost mysql-5.6.21]# ./scripts/mysql_install_db --user=mysql --basedir=/usr/local/mysql --datadir=/data/mysql #生成mysql系统数据库
[root@localhost mysql-5.6.21]# ln -s /usr/local/mysql/my.cnf /etc/my.cnf #添加到/etc目录的软连接
[root@localhost mysql-5.6.21]#  cp ./support-files/mysql.server /etc/rc.d/init.d/mysqld #把Mysql加入系统启动
[root@localhost mysql-5.6.21]# chmod 755 /etc/init.d/mysqld #增加执行权限
[root@localhost mysql-5.6.21]# chkconfig mysqld on #加入开机启动
[root@localhost mysql-5.6.21]#  vi /etc/rc.d/init.d/mysqld
#文件内容新增如下:
    basedir=/usr/local/mysql #MySQL程序安装路径
    datadir=/data/mysql #MySQl数据库存放目录

[root@localhost mysql-5.6.21]# service mysqld start #启动
[root@localhost mysql-5.6.21]# vi /etc/profile
#把mysql服务加入系统环境变量:在最后添加下面这一行:
    export PATH=$PATH:/usr/local/mysql/bin
[root@localhost mysql-5.6.21]# source /etc/profile #使配置立刻生效
[root@localhost mysql]# mysql_secure_installation #设置Mysql密码

#下面这几行把myslq的库文件链接到系统默认的位置,这样你在编译类似PHP等软件时可以不用指定mysql的库文件地址:
[root@localhost mysql]# ln -s /usr/local/mysql/lib/mysql /usr/lib/mysql
[root@localhost mysql]# ln -s /usr/local/mysql/include/mysql /usr/include/mysql
[root@localhost mysql]# mkdir /var/lib/mysql #创建目录
[root@localhost mysql]# ln -s /tmp/mysql.sock /var/lib/mysql/mysql.sock
安装Nginx
1、安装pcre
[root@localhost mysql]# cd /usr/local/src
[root@localhost src]# mkdir /usr/local/pcre
[root@localhost src]# tar zxvf pcre-8.36.tar.gz
[root@localhost src]# cd pcre-8.36
[root@localhost pcre-8.36]# ./configure --prefix=/usr/local/pcre
[root@localhost pcre-8.36]# make
[root@localhost pcre-8.36]# make install
2、安装openssl
[root@localhost pcre-8.36]# cd /usr/local/src
[root@localhost src]# mkdir /usr/local/openssl
[root@localhost src]# tar zxvf openssl-1.0.1j.tar.gz
[root@localhost src]# cd openssl-1.0.1j
[root@localhost openssl-1.0.1j]# ./config --prefix=/usr/local/openssl
[root@localhost openssl-1.0.1j]# make
[root@localhost openssl-1.0.1j]# make install
[root@localhost openssl-1.0.1j]# vi /etc/profile
    export PATH=$PATH:/usr/local/openssl/bin#添加
3、安装zlib
[root@localhost openssl-1.0.1j]# cd /usr/local/src
[root@localhost src]# mkdir /usr/local/zlib
[root@localhost src]# tar zxvf zlib-1.2.8.tar.gz
[root@localhost src]# cd zlib-1.2.8
[root@localhost zlib-1.2.8]# ./configure --prefix=/usr/local/zlib
[root@localhost zlib-1.2.8]# make
[root@localhost zlib-1.2.8]# make install
4、安装Nginx
[root@localhost zlib-1.2.8]# cd /usr/local/src/
[root@localhost src]# groupadd www
[root@localhost src]# useradd -g www www -s /bin/false
[root@localhost src]# tar zxvf nginx-1.6.2.tar.gz
[root@localhost src]# cd nginx-1.6.2
[root@localhost nginx-1.6.2]# ./configure --prefix=/usr/local/nginx --without-http_memcached_module --user=www --group=www --with-http_stub_status_module --with-http_ssl_module --with-http_gzip_static_module --with-openssl=/usr/local/src/openssl-1.0.1j --with-zlib=/usr/local/src/zlib-1.2.8 --with-pcre=/usr/local/src/pcre-8.36
#注意:--with-openssl=/usr/local/src/openssl-1.0.1j --with-zlib=/usr/local/src/zlib-1.2.8 --with-pcre=/usr/local/src/pcre-8.36指向的是源码包解压的路径,而不是安装的路径,否则会报错
[root@localhost nginx-1.6.2]# make
[root@localhost nginx-1.6.2]# make install
[root@localhost nginx-1.6.2]# /usr/local/nginx/sbin/nginx #启动Nginx

#设置nginx开机启动,添加到系统服务
[root@localhost /]# vi /etc/init.d/nginx
##添加如下代码
#!/bin/bash
# nginx Startup script for the Nginx HTTP Server
# it is v.0.0.2 version.
# chkconfig: - 85 15
# description: Nginx is a high-performance web and proxy server.
#  It has a lot of features, but it's not for everyone.
# processname: nginx
# pidfile: /var/run/nginx.pid
# config: /usr/local/nginx/conf/nginx.conf
nginxd=/usr/local/nginx/sbin/nginx
nginx_config=/usr/local/nginx/conf/nginx.conf
nginx_pid=/var/run/nginx.pid
RETVAL=0
prog="nginx"
# Source function library.
. /etc/rc.d/init.d/functions
# Source networking configuration.
. /etc/sysconfig/network
# Check that networking is up.
[ ${NETWORKING} = "no" ] && exit 0
[ -x $nginxd ] || exit 0
# Start nginx daemons functions.
start() {
if [ -e $nginx_pid ];then
   echo "nginx already running...."
   exit 1
fi
   echo -n $"Starting $prog: "

   daemon $nginxd -c ${nginx_config}

   RETVAL=$?

   echo

   [ $RETVAL = 0 ] && touch /var/lock/subsys/nginx

   return $RETVAL

}

# Stop nginx daemons functions.

stop() {

        echo -n $"Stopping $prog: "

        killproc $nginxd

        RETVAL=$?

        echo

        [ $RETVAL = 0 ] && rm -f /var/lock/subsys/nginx /var/run/nginx.pid

}

# reload nginx service functions.

reload() {

    echo -n $"Reloading $prog: "

    #kill -HUP `cat ${nginx_pid}`

    killproc $nginxd -HUP

    RETVAL=$?

    echo

}

# See how we were called.

case "$1" in

start)

        start

        ;;

stop)

        stop

        ;;

reload)

        reload

        ;;

restart)

        stop

        start

        ;;

status)

        status $prog

        RETVAL=$?

        ;;

*)

        echo $"Usage: $prog {start|stop|restart|reload|status|help}"

        exit 1

esac

exit $RETVAL


[root@localhost /]# chkconfig --add /etc/init.d/nginx
[root@localhost /]# chmod 755 /etc/init.d/nginx
[root@localhost /]# chkconfig --add nginx
[root@localhost /]# chkconfig nginx on
#访问

安装php
1、安装yasm
[root@localhost vagrant]# cd /usr/local/src
[root@localhost src]# tar zxvf yasm-1.3.0.tar.gz
[root@localhost src]# cd yasm-1.3.0
[root@localhost yasm-1.3.0]# ./configure
[root@localhost yasm-1.3.0]# make
[root@localhost yasm-1.3.0]# make install
2、安装libmcrypt
[root@localhost yasm-1.3.0]# cd /usr/local/src
[root@localhost src]# tar zxvf libmcrypt-2.5.8.tar.gz
[root@localhost src]# cd libmcrypt-2.5.8
[root@localhost libmcrypt-2.5.8]# ./configure
[root@localhost libmcrypt-2.5.8]# make
[root@localhost libmcrypt-2.5.8]# make install
3、安装libvpx
[root@localhost libmcrypt-2.5.8]# cd /usr/local/src
[root@localhost src]# tar xvf libvpx-v1.3.0.tar.bz2
[root@localhost src]# cd libvpx-v1.3.0
[root@localhost libvpx-v1.3.0]# ./configure --prefix=/usr/local/libvpx --enable-shared --enable-vp9
[root@localhost libvpx-v1.3.0]# make
[root@localhost libvpx-v1.3.0]# make install
4、安装tiff
[root@localhost libvpx-v1.3.0]# cd /usr/local/src
[root@localhost src]# tar zxvf tiff-4.0.3.tar.gz
[root@localhost src]# cd tiff-4.0.3
[root@localhost tiff-4.0.3]# ./configure --prefix=/usr/local/tiff --enable-shared
[root@localhost tiff-4.0.3]# make
[root@localhost tiff-4.0.3]# make install
5、安装libpng
[root@localhost tiff-4.0.3]# cd /usr/local/src
[root@localhost src]# tar zxvf libpng-1.6.16.tar.gz
[root@localhost src]# cd libpng-1.6.16
[root@localhost libpng-1.6.16]# ./configure --prefix=/usr/local/libpng --enable-shared
[root@localhost libpng-1.6.16]# make
[root@localhost libpng-1.6.16]# make install
6、安装freetype
[root@localhost libpng-1.6.16]# cd /usr/local/src
[root@localhost src]# tar zxvf freetype-2.5.4.tar.gz
[root@localhost src]# cd freetype-2.5.4
[root@localhost freetype-2.5.4]# ./configure --prefix=/usr/local/freetype --enable-shared
[root@localhost freetype-2.5.4]# make
[root@localhost freetype-2.5.4]# make install
7、安装jpeg
[root@localhost vagrant]# cd /usr/local/src
[root@localhost src]# tar zxvf jpegsrc.v9a.tar.gz
[root@localhost src]# cd jpeg-9a
[root@localhost jpeg-9a]# ./configure --prefix=/usr/local/jpeg --enable-shared
[root@localhost jpeg-9a]# make
[root@localhost jpeg-9a]# make  install
8、安装libgd
[root@localhost jpeg-9a]# cd /usr/local/src
[root@localhost src]# tar zxvf libgd-2.1.0.tar.gz
[root@localhost src]# cd libgd-2.1.0
[root@localhost libgd-2.1.0]# ./configure --prefix=/usr/local/libgd --enable-shared --with-jpeg=/usr/local/jpeg --with-png=/usr/local/libpng --with-freetype=/usr/local/freetype --with-fontconfig=/usr/local/freetype --with-xpm=/usr/ --with-tiff=/usr/local/tiff --with-vpx=/usr/local/libvpx
[root@localhost libgd-2.1.0]# make
[root@localhost libgd-2.1.0]# make install
9、安装t1lib
[root@localhost libgd-2.1.0]# cd /usr/local/src
[root@localhost src]# tar zxvf t1lib-5.1.2.tar.gz
[root@localhost src]# cd t1lib-5.1.2
[root@localhost t1lib-5.1.2]# ./configure --prefix=/usr/local/t1lib --enable-shared
[root@localhost t1lib-5.1.2]# make without_doc
[root@localhost t1lib-5.1.2]# make install
10、安装php
注意:如果系统是64位,请执行以下两条命令,否则安装php会出错(32位系统不需要执行)
# cp -frp /usr/lib64/libltdl.so*  /usr/lib/
# cp -frp /usr/lib64/libXpm.so* /usr/lib/[root@localhost t1lib-5.1.2]# cd /usr/local/src
[root@localhost src]# tar -zvxf php-5.6.3.tar.gz
[root@localhost src]# cd php-5.6.3
[root@localhost src]# export LD_LIBRARY_PATH=/usr/local/libgd/lib
[root@localhost php-5.6.3]# ./configure --prefix=/usr/local/php --with-config-file-path=/usr/local/php/etc --with-mysql=/usr/local/mysql --with-mysqli=/usr/local/mysql/bin/mysql_config --with-mysql-sock=/tmp/mysql.sock --with-pdo-mysql=/usr/local/mysql --with-gd --with-png-dir=/usr/local/libpng --with-jpeg-dir=/usr/local/jpeg --with-freetype-dir=/usr/local/freetype --with-xpm-dir=/usr/ --with-vpx-dir=/usr/local/libvpx/ --with-zlib-dir=/usr/local/zlib --with-t1lib=/usr/local/t1lib --with-iconv --enable-libxml --enable-xml --enable-bcmath --enable-shmop --enable-sysvsem --enable-inline-optimization --enable-opcache --enable-mbregex --enable-fpm --enable-mbstring --enable-ftp --enable-gd-native-ttf --with-openssl --enable-pcntl --enable-sockets --with-xmlrpc --enable-zip --enable-soap --without-pear --with-gettext --enable-session --with-mcrypt --with-curl --enable-ctype
[root@localhost php-5.6.3]# make
[root@localhost php-5.6.3]# make install
[root@localhost php-5.6.3]# cp php.ini-production /usr/local/php/etc/php.ini #复制php配置文件到安装目录
[root@localhost php-5.6.3]# rm -rf /etc/php.ini
[root@localhost php-5.6.3]# ln -s /usr/local/php/etc/php.ini /etc/php.ini #添加软链接到 /etc目录
cp /usr/local/php/etc/php-fpm.conf.default /usr/local/php/etc/php-fpm.conf #拷贝模板文件为php-fpm配置文件
[root@localhost php-5.6.3]# ln -s /usr/local/php/etc/php-fpm.conf /etc/php-fpm.conf #添加软连接到 /etc目录
[root@localhost php-5.6.3]# vi /etc/php-fpm.conf
#编辑如下
user = www #设置php-fpm运行账号为www
group = www #设置php-fpm运行组为www
pid = run/php-fpm.pid #取消前面的分号
#设置 php-fpm开机启动
[root@localhost php-5.6.3]# cp /usr/local/src/php-5.6.3/sapi/fpm/init.d.php-fpm /etc/rc.d/init.d/php-fpm #拷贝php-fpm到启动目录
[root@localhost php-5.6.3]# chmod +x /etc/rc.d/init.d/php-fpm #添加执行权限
[root@localhost php-5.6.3]# chkconfig php-fpm on #设置开机启动
##添加到全局环境变量##
[root@localhost /]# vi /etc/profile
##编辑如下:
export PATH=$PATH:/usr/local/mysql/bin:/usr/local/openssl/bin:/usr/local/php/bin
[root@localhost /]# source /etc/profile
[root@localhost php-5.6.3]# vi /usr/local/php/etc/php.ini
#编辑如下
#1、列出PHP可以禁用的函数
找到:disable_functions =
修改为:disable_functions = passthru,exec,system,chroot,scandir,chgrp,chown,shell_exec,proc_open,proc_get_status,ini_alter,ini_alter,ini_restore,dl,openlog,syslog,readlink,symlink,popepassthru,stream_socket_server,escapeshellcmd,dll,popen,disk_free_space,checkdnsrr,checkdnsrr,getservbyname,getservbyport,disk_total_space,posix_ctermid,posix_get_last_error,posix_getcwd, posix_getegid,posix_geteuid,posix_getgid, posix_getgrgid,posix_getgrnam,posix_getgroups,posix_getlogin,posix_getpgid,posix_getpgrp,posix_getpid, posix_getppid,posix_getpwnam,posix_getpwuid, posix_getrlimit, posix_getsid,posix_getuid,posix_isatty, posix_kill,posix_mkfifo,posix_setegid,posix_seteuid,posix_setgid, posix_setpgid,posix_setsid,posix_setuid,posix_strerror,posix_times,posix_ttyname,posix_uname
#2、设置时区
找到:;date.timezone =
修改为:date.timezone = PRC
#3、禁止显示php版本的信息
找到:expose_php = On
修改为:expose_php = Off
#3、支持opcode缓存
找到opcache.enable=0
修改为opcache.enable=1
在最后一行添加:zend_extension=opcache.so #开启opcode缓存功能
#4、开启报错
display_errors= On
error_reporting=E_ALL11、配置Nginx支持PHP
[root@localhost php-5.6.3]# vi /usr/local/nginx/conf/nginx.conf
    #编辑如下:
    # 1、设置user
    user www www; #首行user去掉注释,修改Nginx运行组为www www;必须与/usr/local/php/etc/php-fpm.conf中的user,group配置相同,否则php运行出错
    #2、设置支持php文件格式
    index index.html index.htm index.php; #添加index.php
    #3、取消FastCGI server部分location的注释,
    location ~ \.php$ {
    root html;
    fastcgi_pass 127.0.0.1:9000;
    fastcgi_index index.php;
    fastcgi_param SCRIPT_FILENAME $document_root$fastcgi_script_name;
    include fastcgi_params;
    }
    #注意fastcgi_param行的参数,改为$document_root$fastcgi_script_name,或者使用绝对路径

[root@localhost php-5.6.3]# /etc/init.d/nginx restart #重启nginx
[root@localhost vagrant]# service php-fpm start #启动php-fpm
测试
[root@localhost vagrant]# cd /usr/local/nginx/html/ #进入nginx默认网站根目录
[root@localhost html]# rm -rf * #删除默认测试页
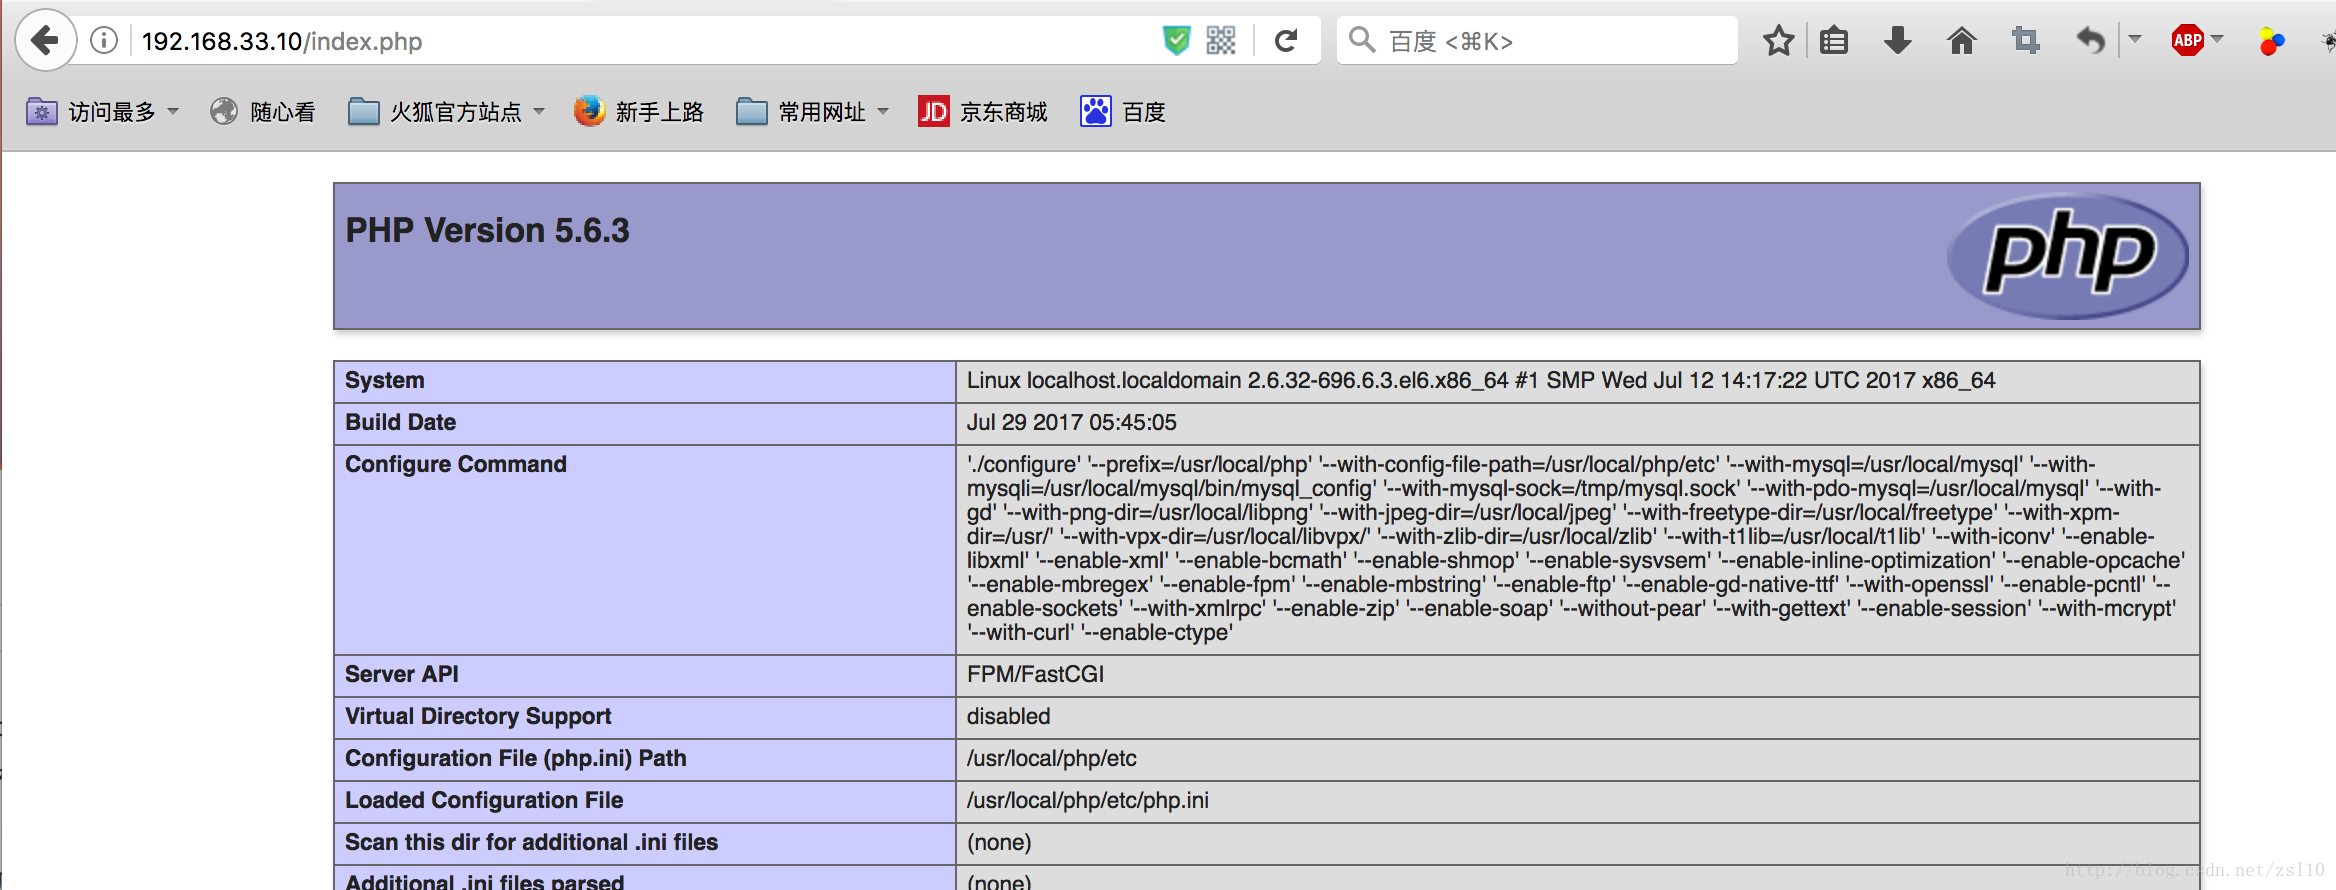
[root@localhost html]# vi index.php
<?php
phpinfo();
?>
[root@localhost html]# chown www.www /usr/local/nginx/html/ -R #设置目录所有者
[root@localhost html]# chmod 700 /usr/local/nginx/html/ -R #设置目录权限在浏览器输入网址访问:
安装配置redis
1、安装redis
#安装依赖库
[root@localhost src]# yum -y install tcl
[root@localhost src]# wget http://download.redis.io/releases/redis-4.0.2.tar.gz
[root@localhost src]# tar -zxvf   redis-4.0.2.tar.gz
[root@localhost src]# cd redis-4.0.2
[root@localhost src]# make
[root@localhost src]# make PREFIX=/usr/local/redis install
2、配置redis
[root@localhost redis-4.0.2]# cd /usr/local/redis/
[root@localhost redis]# cp /usr/local/src/redis-4.0.2/redis.conf  ./
#编辑配置文件

#修改如下:
daemonize yes
#bind 127.0.0.1
3、安装php的redis扩展
[root@localhost src]# [root@localhost src]# unzip phpredis-php7.zip
[root@localhost src]# [root@localhost src]# cd phpredis-php7
#用phpize生成configure配置文件
[root@localhost phpredis-2.2.4]# /usr/local/php/bin/phpize
[root@localhost phpredis-php7]# ./configure --with-php-config=/usr/local/php/bin/php-config
[root@localhost phpredis-php7]# make
[root@localhost phpredis-php7]# make install
#编辑配置文件,在最后一行添加以下内容:
extension=redis.so
#设置redis开机启动
[root@localhost vagrant]# vi /etc/init.d/redis
#添加如下内容:
###########################
    # chkconfig:   2345 90 10
    # description:  Redis is a persistent key-value database

    PATH=/usr/local/bin:/sbin:/usr/bin:/bin

    REDISPORT=6379
    EXEC=/usr/local/redis/bin/redis-server
    REDIS_CLI=/usr/local/redis/bin/redis-cli

    PIDFILE=/var/run/redis.pid
    CONF="/usr/local/redis/redis.conf"

    case "$1" in
        start)
            if [ -f $PIDFILE ]
            then
                    echo "$PIDFILE exists, process is already running or crashed"
            else
                    echo "Starting Redis server..."
                    $EXEC $CONF
            fi
            if [ "$?"="0" ]
             then
                  echo "Redis is running..."
            fi
            ;;
        stop)
            if [ ! -f $PIDFILE ]
            then
                    echo "$PIDFILE does not exist, process is not running"
            else
                    PID=$(cat $PIDFILE)
                    echo "Stopping ..."
                    $REDIS_CLI -p $REDISPORT SHUTDOWN
                    while [ -x ${PIDFILE} ]
                   do
                        echo "Waiting for Redis to shutdown ..."
                        sleep 1
                    done
                    echo "Redis stopped"
            fi
            ;;
       restart|force-reload)
            ${0} stop
            ${0} start
              ;;
      *)
        echo "Usage: /etc/init.d/redis {start|stop|restart|force-reload}" >&2
            exit 1
    esac
 ###################


[root@localhost vagrant]# chmod +x /etc/init.d/redis
[root@localhost vagrant]# chkconfig redis on