版权声明:本文为博主原创文章,未经博主允许不得转载。 https://blog.csdn.net/IKNOWNU/article/details/83785080
1,安装PyQt5,命令为: pip install pyqt5
一般情况可以找到你的python安装目录,按住shift,再右键“在此处打开命令窗口”

输入命令

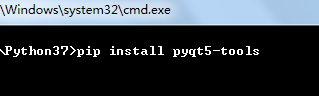
2,安装pyqt5-tools,命令为: pip install pyqt5-tools
PyQt5不再提供Qt Designer等工具,所以需要再安装pyqt5-tools
3、添加外部工具designer.exe
先确认该文件目录复制好该地址:G:\Python37\Lib\site-packages\pyqt5_tools\designer.exe, 
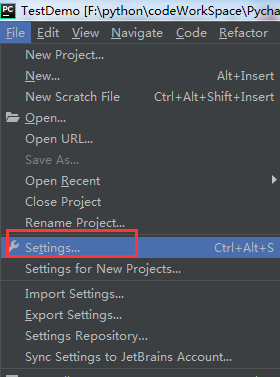
打开Pycharm,进入设置,添加外部工具

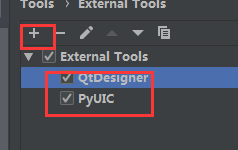
设置QtDesigner和PyUIC
QtDesigner设置,作用:设置快捷路径,可以直接打开designer.exe
看图输入两个变量值
Program: G:\Python37\Lib\site-packages\pyqt5_tools\designer.exe
Working directory: $FileDir$

PyUIC设置,作用:可将.ui文件转化为.py文件
看图输入两个变量值
Program: G:\Python37\python.exe
Arguments: -m PyQt5.uic.pyuic $FileName$ -o $FileNameWithoutExtension$.py
Working directory: $FileDir$

4、开发布局文件
打开工具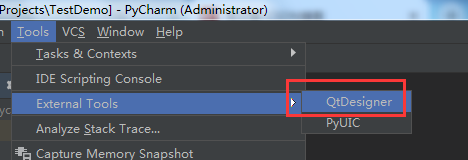
显示下图

随意新建个窗口

保存后会生成ui文件,保存至项目路径
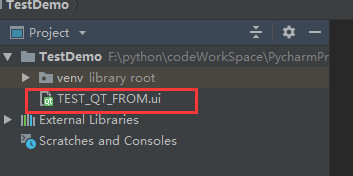
.ui文件(不用自己写)
<?xml version="1.0" encoding="UTF-8"?>
<ui version="4.0">
 <class>Dialog</class>
 <widget class="QDialog" name="Dialog">
  <property name="geometry">
   <rect>
    <x>0</x>
    <y>0</y>
    <width>400</width>
    <height>300</height>
   </rect>
  </property>
  <property name="windowTitle">
   <string>Dialog</string>
  </property>
  <widget class="QDialogButtonBox" name="buttonBox">
   <property name="geometry">
    <rect>
     <x>30</x>
     <y>240</y>
     <width>341</width>
     <height>32</height>
    </rect>
   </property>
   <property name="orientation">
    <enum>Qt::Horizontal</enum>
   </property>
   <property name="standardButtons">
    <set>QDialogButtonBox::Cancel|QDialogButtonBox::Ok</set>
   </property>
  </widget>
 </widget>
 <resources/>
 <connections>
  <connection>
   <sender>buttonBox</sender>
   <signal>accepted()</signal>
   <receiver>Dialog</receiver>
   <slot>accept()</slot>
   <hints>
    <hint type="sourcelabel">
     <x>248</x>
     <y>254</y>
    </hint>
    <hint type="destinationlabel">
     <x>157</x>
     <y>274</y>
    </hint>
   </hints>
  </connection>
  <connection>
   <sender>buttonBox</sender>
   <signal>rejected()</signal>
   <receiver>Dialog</receiver>
   <slot>reject()</slot>
   <hints>
    <hint type="sourcelabel">
     <x>316</x>
     <y>260</y>
    </hint>
    <hint type="destinationlabel">
     <x>286</x>
     <y>274</y>
    </hint>
   </hints>
  </connection>
 </connections>
</ui>
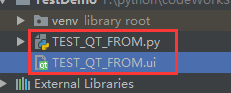
生成py文件

生成的.py文件(不用自己写)
# -*- coding: utf-8 -*-

# Form implementation generated from reading ui file 'TEST_QT_FROM.ui'
#
# Created by: PyQt5 UI code generator 5.11.3
#
# WARNING! All changes made in this file will be lost!

from PyQt5 import QtCore, QtGui, QtWidgets

class Ui_Dialog(object):
    def setupUi(self, Dialog):
        Dialog.setObjectName("Dialog")
        Dialog.resize(400, 300)
        self.buttonBox = QtWidgets.QDialogButtonBox(Dialog)
        self.buttonBox.setGeometry(QtCore.QRect(30, 240, 341, 32))
        self.buttonBox.setOrientation(QtCore.Qt.Horizontal)
        self.buttonBox.setStandardButtons(QtWidgets.QDialogButtonBox.Cancel|QtWidgets.QDialogButtonBox.Ok)
        self.buttonBox.setObjectName("buttonBox")

        self.retranslateUi(Dialog)
        self.buttonBox.accepted.connect(Dialog.accept)
        self.buttonBox.rejected.connect(Dialog.reject)
        QtCore.QMetaObject.connectSlotsByName(Dialog)

    def retranslateUi(self, Dialog):
        _translate = QtCore.QCoreApplication.translate
        Dialog.setWindowTitle(_translate("Dialog", "Dialog"))
最后调用使用
import sys
import TEST_QT_FROM
from PyQt5.QtWidgets import QApplication
from PyQt5.QtWidgets import QDialog
if __name__ == '__main__':
    app = QApplication(sys.argv)
    mUi_Dialog = QDialog()
    ui = TEST_QT_FROM.Ui_Dialog()
    ui.setupUi(mUi_Dialog)
    mUi_Dialog.show()
    sys.exit(app.exec_())
运行后结果:
