安装Mysql:
0、下载:(我的系统是 CentOS 64位,选择下载64位Mysql5.6)
wget https://dev.mysql.com/get/Downloads/MySQL-5.6/mysql-5.6.42-linux-glibc2.12-x86_64.tar.gz这里我没有采用先离线下载后上传到服务器的方式,而是直接服务器在线下载,不过速度还是很快的!(之前试图离线下载,没想到速度很慢,几次下载都中断了)

1、卸载老版本mysql:
这步主要是防止之前已经安装了,会影响现在安装
查找并删除mysql有关的文件
find / -name mysql
rm -rf     //上边查找到的路径,多个路径用空格隔开
//或者下边一条命令即可
find / -name mysql|xargs rm -rf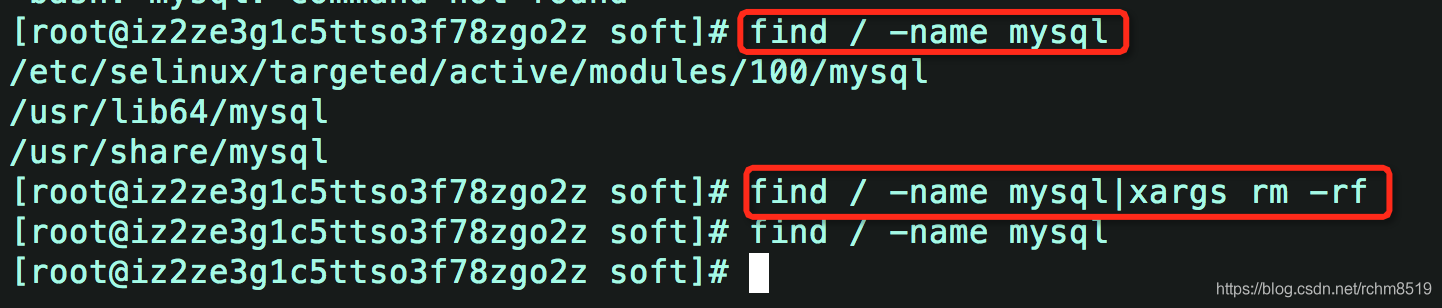
2、解压mysql:
tar -zxvf mysql-5.6.42-linux-glibc2.12-x86_64.tar.gz -C /usr/local为了方便,我们可以对加压后查mysql文件夹重命名
mv mysql-5.6.42-linux-glibc2.12-x86_64 mysql 3、添加mysql用户组和mysql用户:
先检查是否有mysql用户组和mysql用户:
groups mysql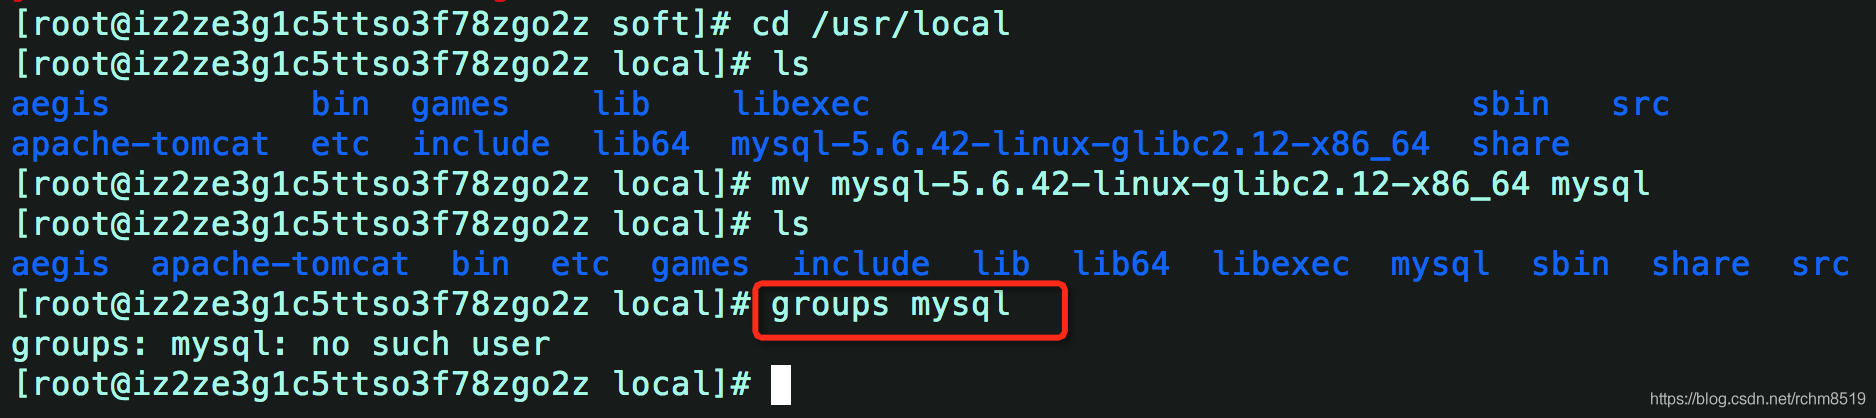
如果没有就添加:
groupadd mysql
useradd -r -g mysql mysql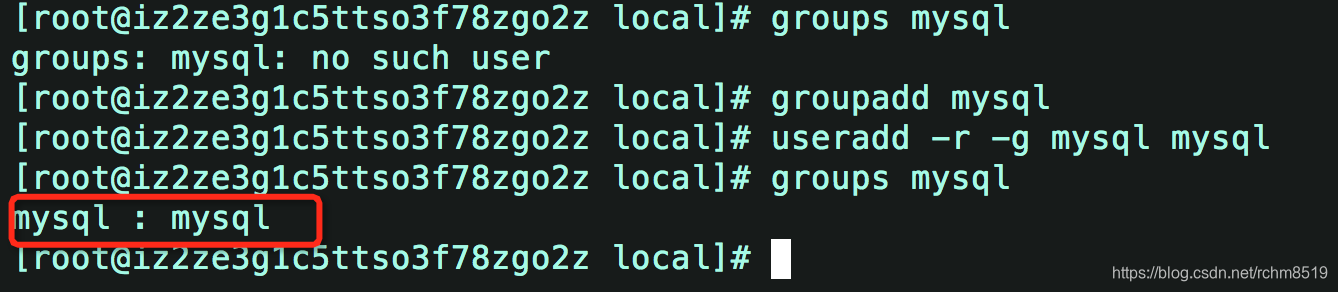
添加成功。
4、进入mysql目录更改权限(修改当前目录拥有者为mysql):
cd mysql/
chown -R mysql:mysql ./
5、执行安装脚本:
./scripts/mysql_install_db --user=mysql
此时会报以下错误:
[root@iz2ze3g1c5ttso3f78zgo2z mysql]# ./scripts/mysql_install_db --user=mysql
FATAL ERROR: please install the following Perl modules before executing ./scripts/mysql_install_db:
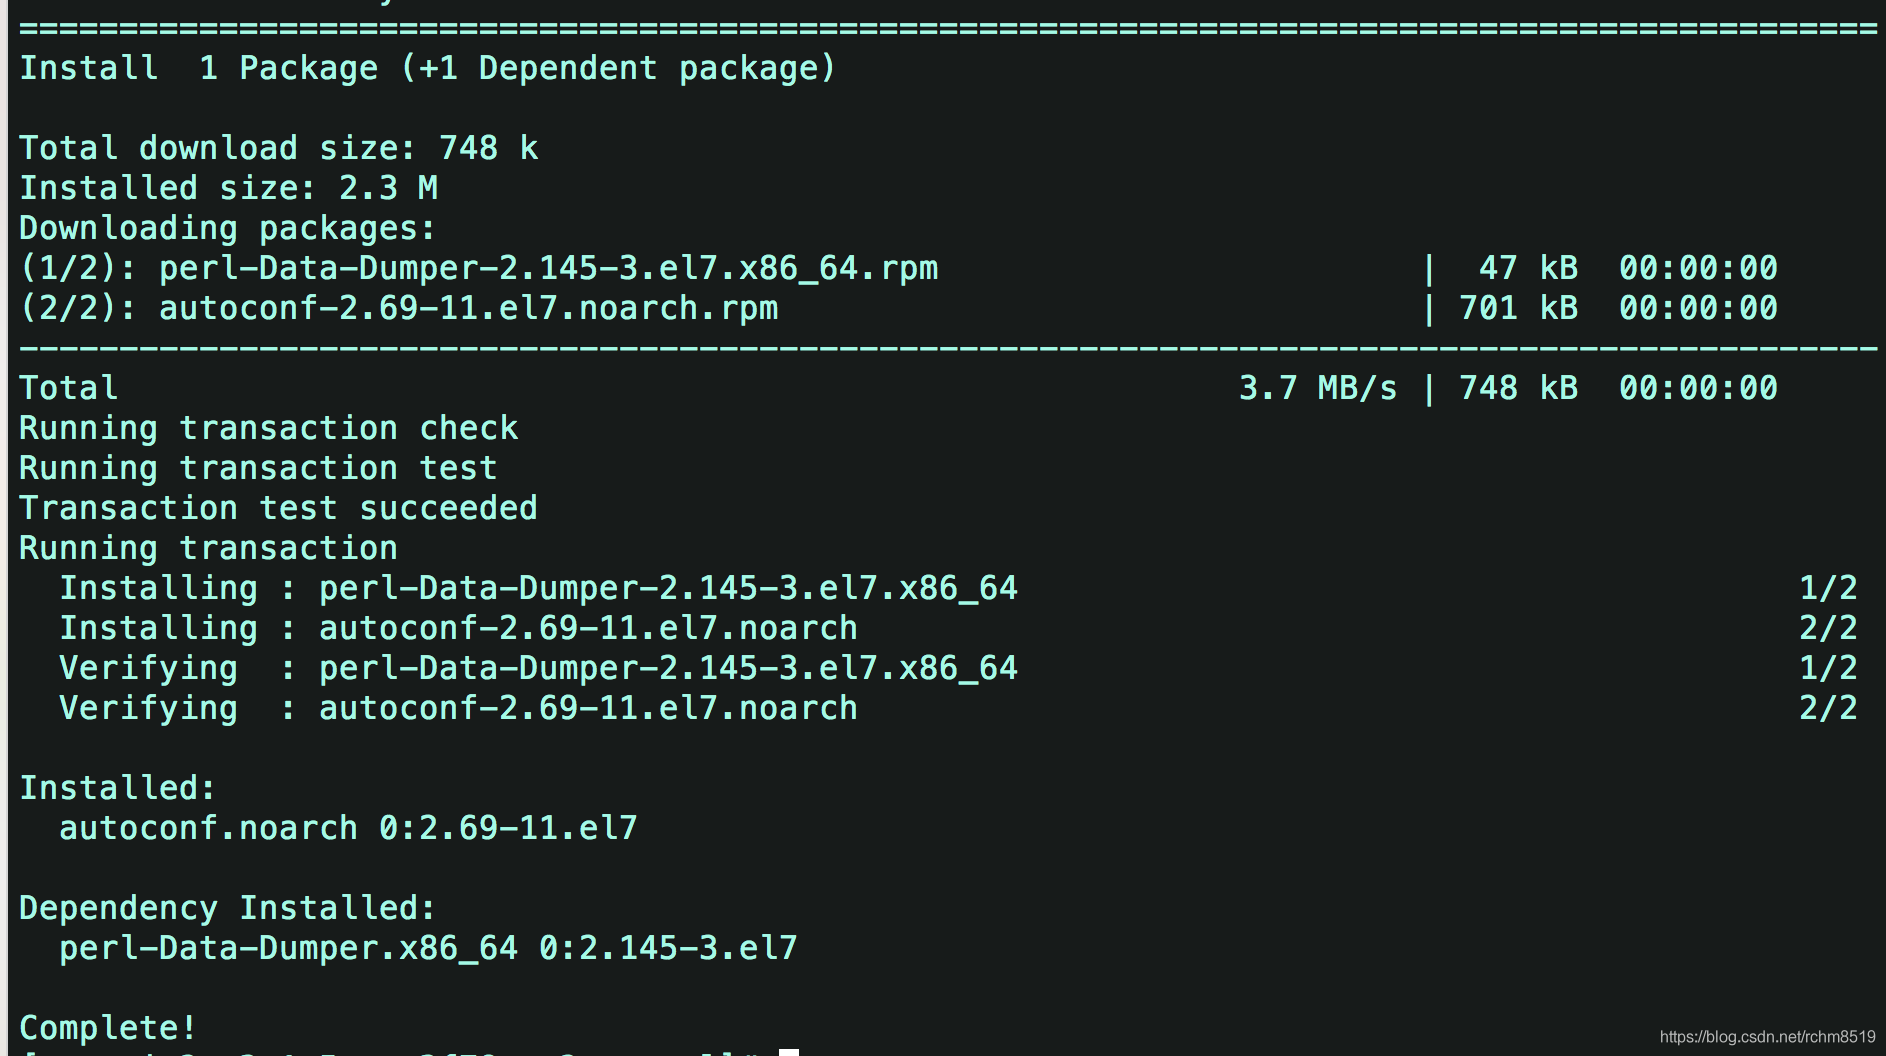
Data::Dumper解决方法 :安装autoconf库
命令:yum -y install autoconf //此包安装时会安装Data:Dumper模块
安装完autoconf库之后,再运行 ./scripts/mysql_install_db --user=mysql ,又可能出现下面的错误!

[root@iz2ze3g1c5ttso3f78zgo2z mysql]# ./scripts/mysql_install_db --user=mysql
Installing MySQL system tables..../bin/mysqld: error while loading shared libraries: libaio.so.1: cannot open shared object file: No such file or directory
出现该问题首先检查该链接库文件有没有安装,使用命令进行核查:
rpm -qa|grep libaio
运行该命令后发现系统中无该链接库文件
那么请使用以下命令安装:
yum -y install libaio-devel.x86_64

安装成功后,继续运行数据库的初始化命令,提示成功。
[root@iz2ze3g1c5ttso3f78zgo2z mysql]# ./scripts/mysql_install_db --user=mysql
Installing MySQL system tables...2018-11-18 00:13:52 0 [Warning] TIMESTAMP with implicit DEFAULT value is deprecated. Please use --explicit_defaults_for_timestamp server option (see documentation for more details).
2018-11-18 00:13:52 0 [Note] Ignoring --secure-file-priv value as server is running with --bootstrap.
2018-11-18 00:13:52 0 [Note] ./bin/mysqld (mysqld 5.6.42) starting as process 18662 ...
2018-11-18 00:13:52 18662 [Note] InnoDB: Using atomics to ref count buffer pool pages
2018-11-18 00:13:52 18662 [Note] InnoDB: The InnoDB memory heap is disabled
2018-11-18 00:13:52 18662 [Note] InnoDB: Mutexes and rw_locks use GCC atomic builtins
2018-11-18 00:13:52 18662 [Note] InnoDB: Memory barrier is not used
2018-11-18 00:13:52 18662 [Note] InnoDB: Compressed tables use zlib 1.2.11
2018-11-18 00:13:52 18662 [Note] InnoDB: Using Linux native AIO
2018-11-18 00:13:52 18662 [Note] InnoDB: Using CPU crc32 instructions
2018-11-18 00:13:52 18662 [Note] InnoDB: Initializing buffer pool, size = 128.0M
2018-11-18 00:13:52 18662 [Note] InnoDB: Completed initialization of buffer pool
2018-11-18 00:13:52 18662 [Note] InnoDB: The first specified data file ./ibdata1 did not exist: a new database to be created!
2018-11-18 00:13:52 18662 [Note] InnoDB: Setting file ./ibdata1 size to 12 MB
2018-11-18 00:13:52 18662 [Note] InnoDB: Database physically writes the file full: wait...
2018-11-18 00:13:52 18662 [Note] InnoDB: Setting log file ./ib_logfile101 size to 48 MB
2018-11-18 00:13:52 18662 [Note] InnoDB: Setting log file ./ib_logfile1 size to 48 MB
2018-11-18 00:13:53 18662 [Note] InnoDB: Renaming log file ./ib_logfile101 to ./ib_logfile0
2018-11-18 00:13:53 18662 [Warning] InnoDB: New log files created, LSN=45781
2018-11-18 00:13:53 18662 [Note] InnoDB: Doublewrite buffer not found: creating new
2018-11-18 00:13:53 18662 [Note] InnoDB: Doublewrite buffer created
2018-11-18 00:13:53 18662 [Note] InnoDB: 128 rollback segment(s) are active.
2018-11-18 00:13:53 18662 [Warning] InnoDB: Creating foreign key constraint system tables.
2018-11-18 00:13:53 18662 [Note] InnoDB: Foreign key constraint system tables created
2018-11-18 00:13:53 18662 [Note] InnoDB: Creating tablespace and datafile system tables.
2018-11-18 00:13:53 18662 [Note] InnoDB: Tablespace and datafile system tables created.
2018-11-18 00:13:53 18662 [Note] InnoDB: Waiting for purge to start
2018-11-18 00:13:53 18662 [Note] InnoDB: 5.6.42 started; log sequence number 0
2018-11-18 00:13:53 18662 [Note] Binlog end
2018-11-18 00:13:53 18662 [Note] InnoDB: FTS optimize thread exiting.
2018-11-18 00:13:53 18662 [Note] InnoDB: Starting shutdown...
2018-11-18 00:13:55 18662 [Note] InnoDB: Shutdown completed; log sequence number 1625977
OK

Filling help tables...2018-11-18 00:13:55 0 [Warning] TIMESTAMP with implicit DEFAULT value is deprecated. Please use --explicit_defaults_for_timestamp server option (see documentation for more details).
2018-11-18 00:13:55 0 [Note] Ignoring --secure-file-priv value as server is running with --bootstrap.
2018-11-18 00:13:55 0 [Note] ./bin/mysqld (mysqld 5.6.42) starting as process 18686 ...
2018-11-18 00:13:55 18686 [Note] InnoDB: Using atomics to ref count buffer pool pages
2018-11-18 00:13:55 18686 [Note] InnoDB: The InnoDB memory heap is disabled
2018-11-18 00:13:55 18686 [Note] InnoDB: Mutexes and rw_locks use GCC atomic builtins
2018-11-18 00:13:55 18686 [Note] InnoDB: Memory barrier is not used
2018-11-18 00:13:55 18686 [Note] InnoDB: Compressed tables use zlib 1.2.11
2018-11-18 00:13:55 18686 [Note] InnoDB: Using Linux native AIO
2018-11-18 00:13:55 18686 [Note] InnoDB: Using CPU crc32 instructions
2018-11-18 00:13:55 18686 [Note] InnoDB: Initializing buffer pool, size = 128.0M
2018-11-18 00:13:55 18686 [Note] InnoDB: Completed initialization of buffer pool
2018-11-18 00:13:55 18686 [Note] InnoDB: Highest supported file format is Barracuda.
2018-11-18 00:13:55 18686 [Note] InnoDB: 128 rollback segment(s) are active.
2018-11-18 00:13:55 18686 [Note] InnoDB: Waiting for purge to start
2018-11-18 00:13:55 18686 [Note] InnoDB: 5.6.42 started; log sequence number 1625977
2018-11-18 00:13:55 18686 [Note] Binlog end
2018-11-18 00:13:55 18686 [Note] InnoDB: FTS optimize thread exiting.
2018-11-18 00:13:55 18686 [Note] InnoDB: Starting shutdown...
2018-11-18 00:13:57 18686 [Note] InnoDB: Shutdown completed; log sequence number 1625987
OK

To start mysqld at boot time you have to copy
support-files/mysql.server to the right place for your system

PLEASE REMEMBER TO SET A PASSWORD FOR THE MySQL root USER !
To do so, start the server, then issue the following commands:

  ./bin/mysqladmin -u root password 'new-password'
  ./bin/mysqladmin -u root -h iz2ze3g1c5ttso3f78zgo2z password 'new-password'

Alternatively you can run:

  ./bin/mysql_secure_installation

which will also give you the option of removing the test
databases and anonymous user created by default.  This is
strongly recommended for production servers.

See the manual for more instructions.

You can start the MySQL daemon with:

  cd . ; ./bin/mysqld_safe &

You can test the MySQL daemon with mysql-test-run.pl

  cd mysql-test ; perl mysql-test-run.pl

Please report any problems at http://bugs.mysql.com/

The latest information about MySQL is available on the web at

  http://www.mysql.com

Support MySQL by buying support/licenses at http://shop.mysql.com

WARNING: Found existing config file ./my.cnf on the system.
Because this file might be in use, it was not replaced,
but was used in bootstrap (unless you used --defaults-file)
and when you later start the server.
The new default config file was created as ./my-new.cnf,
please compare it with your file and take the changes you need.

WARNING: Default config file /etc/my.cnf exists on the system
This file will be read by default by the MySQL server
If you do not want to use this, either remove it, or use the
--defaults-file argument to mysqld_safe when starting the server

[root@iz2ze3g1c5ttso3f78zgo2z mysql]#
安装完之后修改当前目录拥有者为root用户,修改data目录拥有者为mysql:
chown -R root:root ./
chown -R mysql:mysql data
6、启动mysql:
[root@iz2ze3g1c5ttso3f78zgo2z mysql]# ./support-files/mysql.server start
Starting MySQL.181118 00:23:52 mysqld_safe error: log-error set to '/var/log/mariadb/mariadb.log', however file don't exists. Create writable for user 'mysql'.
The server quit without updating PID file (/var/lib/mysql/i[FAILED]5ttso3f78zgo2z.pid).
上面启动报错,提示log文件无权限,我们可以通过更改配置修改log文件指向,并创建一个log文件来解决:
配置文件:/etc/my.cnf
[mysqld_safe]
log-error=/var/log/mariadb/mariadb.log
pid-file=/var/run/mariadb/mariadb.pid
修改后:
[mysqld_safe]
log-error=/usr/local/mysql/logs/mysqld.log
pid-file=/var/run/mysql/mysql.pid
创建log文件,并修改文件权限:
[root@iz2ze3g1c5ttso3f78zgo2z etc]# cd /usr/local/mysql/
[root@iz2ze3g1c5ttso3f78zgo2z mysql]# mkdir logs
[root@iz2ze3g1c5ttso3f78zgo2z mysql]# cd logs
[root@iz2ze3g1c5ttso3f78zgo2z logs]# echo "" > /usr/local/mysql/logs/mysqld.log
[root@iz2ze3g1c5ttso3f78zgo2z logs]# chown -R mysql:mysql /usr/local/mysql/logs/mysqld.log
重新运行启动mysql命令, 【OK】:

如果MySQL启动报错,则可能是已经存在MySQL进程,杀掉即可:
ps aux|grep mysql
kill -9 上边的进程号
#或者下边一条命令即可杀掉所有MySQL进程
ps aux|grep mysql|awk '{print $2}'|xargs kill -9
启动成功的mysql进程是这样的:

7、登录mysql
此时使用下面这条命令即可以登录到mysql了:
./bin/mysql -h127.0.0.1 -uroot -p
8、修改密码
无密码登录对数据库来说太危险,我们需要给mysql设置一个登录密码:
我是用下面这条命令进行设置的,把root用户的密码也设置为“root”
./bin/mysqladmin -u root password 'root'可以在登录后的通过mysql.user表查看用户设置密码情况,当然密码是加密过的
mysql> select user,host,password from mysql.user;
+------+-------------------------+-------------------------------------------+
| user | host                    | password                                  |
+------+-------------------------+-------------------------------------------+
| root | localhost               | *81F5E21E35407D884A6CD4A731AEBFB6AF209E1B |
| root | iz2ze3g1c5ttso3f78zgo2z |                                           |
| root | 127.0.0.1               |                                           |
| root | ::1                     |                                           |
|      | localhost               |                                           |
|      | iz2ze3g1c5ttso3f78zgo2z |                                           |
| root | %                       |                                           |
+------+-------------------------+-------------------------------------------+此时我们可以将root用户在其他host下的登录密码也设置一下:(通过这种方式修改密码后需要允许一下:flush privileges; )
mysql> update user set password=passworD("root") where user='root';
Query OK, 4 rows affected (0.00 sec)
Rows matched: 5  Changed: 4  Warnings: 0

mysql> select user,host,password from mysql.user;
+------+-------------------------+-------------------------------------------+
| user | host                    | password                                  |
+------+-------------------------+-------------------------------------------+
| root | localhost               | *81F5E21E35407D884A6CD4A731AEBFB6AF209E1B |
| root | iz2ze3g1c5ttso3f78zgo2z | *81F5E21E35407D884A6CD4A731AEBFB6AF209E1B |
| root | 127.0.0.1               | *81F5E21E35407D884A6CD4A731AEBFB6AF209E1B |
| root | ::1                     | *81F5E21E35407D884A6CD4A731AEBFB6AF209E1B |
|      | localhost               |                                           |
|      | iz2ze3g1c5ttso3f78zgo2z |                                           |
| root | %                       | *81F5E21E35407D884A6CD4A731AEBFB6AF209E1B |
+------+-------------------------+-------------------------------------------+
7 rows in set (0.00 sec)
9、增加远程登录权限
此时我们还只能通过本地机器登录mysql, 无法在别的机器上进行远程登录,想要远程登录还要权限开启:
mysql> grant all privileges on *.* to root@'%' identified by 'root';
Query OK, 0 rows affected (0.00 sec)

mysql> flush privileges;
Query OK, 0 rows affected (0.00 sec)
然后即可远程登录
注意:需要注意的是云服务器默认是没有开3306端口的,所以你要先开启3306端口
